Pitney Bowes SendPro C Lite Operator's Manual
Hide thumbs
Also See for SendPro C Lite:
- Operator's manual (222 pages) ,
- User manual (122 pages) ,
- Quick reference manual (34 pages)

Subscribe to Our Youtube Channel
Related Manuals for Pitney Bowes SendPro C Lite


Summary of Contents for Pitney Bowes SendPro C Lite
- Page 1 Shipping & Mailing Postage Meters SendPro® C Lite, SendPro® C, SendPro®+ PCN 8H00 Operator Guide US English Edition SV63317 Rev G March 2020...
- Page 2 Except as provided in writing, duly signed by an officer of Pitney Bowes, no license either express or implied, under any Pitney Bowes or third party’s patent, copyright or other intellectual property rights is...
- Page 3 Sending an international letter Funds Sending mail using a Certificate of Mailing Using USPS Informed Delivery Using USPS special services Installing your SendPro C Lite, SendPro C, Updating postal rates or software for printing SendPro+ on envelopes Installing a scale...
- Page 4 Adding a Trackable Labels or Shipping Labels Using the weighing platform when printing cost account postage on envelopes Modifying a Trackable Labels or Shipping Sealing the envelope only, bypass all printing 109 Labels cost account Pitney Bowes Operator Guide March 2020...
- Page 5 Printing a test pattern Setting up a mailer ID Checking the ink level Updating the ZIP code Installing the ink cartridge Multi-level Envelope Printing or Print on Changing the ink waste pad Envelopes accounts Pitney Bowes Operator Guide March 2020...
- Page 6 Sections of the meter impression Postal Security Device Parts of the device Connections on the back of the machine Specifications 12 - Technical Support Contacting Pitney Bowes 13 - Safety Lithium Ion Battery Agency Compliance Information Important Safety Notes Pitney Bowes...
- Page 7 1 - Quick start guide In this section Finding the Product Code Number (PCN) and serial number Navigating the Home screen Printing a shipping label or printing postage on an envelope Creating and printing a shipping label Using cost accounts to charge back shipping label postage costs Adding a Trackable Labels or Shipping Labels cost account...
- Page 8 Quick start guide Selecting a preset for printing postage Ordering supplies from your device Pitney Bowes Operator Guide March 2020...
- Page 9 Note that the serial number is blurred out here for security reasons. Navigating the Home screen The Home screen on the SendPro C Lite, SendPro C, SendPro+ machine provides the starting point for creating either a shipping label or printing postage on an envelope. Pitney Bowes...
- Page 10 Tap on SendPro Apps to access to a variety of applications to support and enhance your device. For example, you can check for rates and updates (Rates and Updates), get a history of shipping labels created (Shipping History), or check the status of your network connection (Network Connection). Pitney Bowes Operator Guide March 2020...
- Page 11 The toolbar The toolbar located at the top of the Home screen appears at the top of every screen within the Trackable Labels or Shipping Labels and Envelope Printing or Print on Envelopes applications. Pitney Bowes Operator Guide March 2020...
- Page 12 For the Trackable Labels or Shipping Labels this includes managing your carrier accounts and setting up your shipping label printer default values. (6) Profile - View your profile (name and email for shipping label account), log out, or lock your SendPro C device. Pitney Bowes Operator Guide March 2020...
- Page 13 USPS package services. You can also send via UPS® or FedEx®. The packaging options and benefits are almost identical. Use Trackable Labels or Shipping Labels for the following USPS flat rate envelopes Thick envelopes Poly mailers USPS non flat rate envelopes Boxes USPS flat rate boxes Pitney Bowes Operator Guide March 2020...
- Page 14 Use Trackable Labels or Shipping Labels to get the best pricing, free tracking, and detailed delivery history for USPS package services. You can also send via UPS® or FedEx®. The packaging options and benefits are almost identical. Pitney Bowes Operator Guide March 2020...
- Page 15 1. On the Home screen, tap Envelope Printing or Print on Envelopes. 2. Tap the carrier you wish to use. 3. Verify that the sender address is correct. If not, tap on the Sender field and select a new address. Pitney Bowes Operator Guide March 2020...
- Page 16 4. If cost accounts are enabled, you must select an account. If an account is already selected, verify that it is correct. To change or add the account, tap the Cost Account field and select an account. 5. Tap Continue. Pitney Bowes Operator Guide March 2020...
- Page 17 Quick start guide 6. Enter the recipient address manually, or tap the Address book icon to select one from the address book. 7. Tap Continue. 8. Tap a package type. Pitney Bowes Operator Guide March 2020...
- Page 18 Scale and the weight appears. Tap Apply. If you do not have a scale, tap on the Weight button and enter the weight, then tap Apply. 10. Tap Continue. 11. Tap the service you wish to use. Pitney Bowes Operator Guide March 2020...
- Page 19 12. To add additional services, tap Add additional services. If you are not adding any extra services, go to step 14. 13. Select the desired services and tap Apply. 14. To print the label, tap Print. Pitney Bowes Operator Guide March 2020...
- Page 20 Tap SendPro Apps on the Home screen, then tap Cost Accounts. 2. Tap the Cost Account settings icon in the upper right corner of the Cost Accounts screen. If cost accounts are not enabled, you will see this screen. Pitney Bowes Operator Guide March 2020...
- Page 21 Once you turn cost accounts on, you will need to have at least 1 cost account to print a shipping label Adding a Trackable Labels or Shipping Labels cost account Enter cost accounts individually in the Cost Accounts application. Pitney Bowes Operator Guide March 2020...
- Page 22 1. Tap Envelope Printing or Print on Envelopes 2. Tap Account. A list of all available accounts is displayed. 3. Tap the Preferences icon in the upper right corner of the screen. 4. Tap Manage Accounts. 5. Tap Create new account Pitney Bowes Operator Guide March 2020...
- Page 23 (Optional) To add a sub account to the account you just created, tap Add a Sub Account to this account. If you do not need to create any more accounts, tap Done. 10. Press the back arrow at the top of the screen to return to the account list. Pitney Bowes Operator Guide March 2020...
- Page 24 7. Tap Tape to begin printing postage on tape. To print more than one tape, tap on the number in the Tape button and enter the number of tapes. The Tape button is only present on SendPro C models equipped with an automatic feeder. Pitney Bowes Operator Guide March 2020...
- Page 25 Date and Time Stamp Date Correction Graphic Only Postage Correction Postage Printing - Printing postage on an envelope is the default mode. Seal Only- Bypass all printing. Test Print - Check the quality of postage imprint. Pitney Bowes Operator Guide March 2020...
- Page 26 Sending a First-Class letter envelope First class mail is an economical way to send mailpieces through the USPS. You can send standard postcards, letters and large envelopes and small packages up to 15.99 ounces. Pitney Bowes Operator Guide March 2020...
- Page 27 Advisor app. To open the Postal Advisor: Tap Postal Advisor in the application drawer at the bottom of the Home screen, or, Tap SendPro Apps on the Home screen, then tap USPS Postal Advisor. Pitney Bowes Operator Guide March 2020...
- Page 28 If the mailpiece is less than 3.5 oz, but has the dimensions of a flat: 1. Tap the Home icon in the toolbar. 2. Tap Envelope Printing or Print on Envelopes. 3. If you have the accounting feature enabled, tap Account and select an account. Pitney Bowes Operator Guide March 2020...
- Page 29 5. Tap a class that can be combined with Certified Mail (for example, First Class or Priority Mail). 6. Tap the mailpiece type (for example, letter or large envelope). 7. Select Certified and tap Apply. Pitney Bowes Operator Guide March 2020...
- Page 30 Tap the check mark. Sending mail using a Certificate of Mailing Purchase a Certificate of Mailing when you need to have proof that you sent a letter or package. Pitney Bowes Operator Guide March 2020...
- Page 31 Envelope Printing or Print on Envelopes. 5. Scroll down and tap Print Mode on the Envelope Printing or Print on Envelopes screen. 6. Tap Certificate of Mailing. Pitney Bowes Operator Guide March 2020...
- Page 32 7. For some classes, you are prompted to either scan or manually enter the Electronic Certified barcode from your label, and then to attach your label to your envelope or package. 8. Tap Apply. Pitney Bowes Operator Guide March 2020...
- Page 33 Manual postal rate updates 1. Select Rates and Updates: Tap Rates and Updates in the application drawer at the bottom of the Home screen, or Tap SendPro Apps, then Rates and Updates. Pitney Bowes Operator Guide March 2020...
- Page 34 Note: Prices and dates are used for reference only. These prices and dates may change with each postal change. Manual software updates 1. Select Rates and Updates: Tap Rates and Updates in the application drawer at the bottom of the Home screen, or, Tap SendPro Apps, then Rates and Updates. Pitney Bowes Operator Guide March 2020...
- Page 35 Your device uses two separate postage accounts, one for shipping labels and one for envelope printing. The funds for one cannot be used for the other. Before you begin Make sure that your device is connected to the internet. Pitney Bowes Operator Guide March 2020...
- Page 36 7. Tap Done. 8. Your updated postage balance is displayed on the Envelope Printing screen. Sealing envelopes You can seal envelopes whether you are printing postage on the envelopes or only sealing the envelopes (no postage). Pitney Bowes Operator Guide March 2020...
- Page 37 Note: If the moistener tank is full and your envelopes do not seal correctly, clean or replace the moistener brush and wick. Filling the moistener tank Your device will periodically need refills of E-Z Seal® in order to seal envelopes. Follow these steps to fill the moistener tank. Pitney Bowes Operator Guide March 2020...
- Page 38 Important: Only use genuine Pitney Bowes ink cartridges. Non-Pitney Bowes cartridges can damage your device. If you need ink, order a genuine Pitney Bowes replacement ink cartridge. When your device shows the low ink warning an ink cartridge will be ordered for you automatically, if you are enrolled in the AutoInk program.
- Page 39 Once the cleaning operation completes, you must print another test pattern. If this new pattern still has broken or missing lines, you may need to replace the ink cartridge or clean or replace the printhead. Good Test Print Bad Test Print Pitney Bowes Operator Guide March 2020...
- Page 40 1. On the Home screen, tap Envelope Printing or Print on Envelopes. 2. At the Envelope Printing screen, tap Class and select the class and any special services, messages or graphics. 3. Once you apply the settings, verify the settings on the Envelope Printing screen. Pitney Bowes Operator Guide March 2020...
- Page 41 A preset is a set of commonly-used settings saved as a template that you can use to more quickly select the same settings in the future. Presets can contain the postage class, postage value, extra services, and graphic. Select a preset when you wish to use it. Pitney Bowes Operator Guide March 2020...
- Page 42 Tap the "i" to open the online operator guide. This contains detailed information on using the Supplies app. b. View alerts and notifications Tap the Bell icon to view your order status or any notifications. Pitney Bowes Operator Guide March 2020...
- Page 43 If you are not enrolled in the AutoInk program, as soon as ink level for your device drops below 20%, an Order Now button appears next to Your Ink Level in the Supplies app. To order ink, tap Order Now. If you enrolled in AutoInk, the service automatically orders ink for you. Pitney Bowes Operator Guide March 2020...
- Page 44 This page intentionally left blank.
- Page 45 2 - Connectivity information In this section Setting up a wired network connection Setting up a wireless (Wi-Fi) network connection Connecting to a hidden Wi-Fi network Deleting a Wi-Fi network Checking your network connection Checking the MAC address for wired and wireless networks Setting up a proxy server...
- Page 46 9. Enter the IP Address, Netmask, Gateway, and DNS Address that you recorded in step 2. 10. Tap Connect. NOTE: If your device's model number is 8H00 or 9H00 it will remember the Static IP information Pitney Bowes Operator Guide March 2020...
- Page 47 Tap the > in the green circle. If you are unable to connect to the internet, if you get authentication errors, or you are unsure of the correct settings for your network, check with your IT department. Pitney Bowes Operator Guide March 2020...
- Page 48 4. Tap the down arrow next in the Security field and select the security method. 5. Tap Advanced Options to enter a static IP or set up a proxy. 6. Tap Connect when done. Pitney Bowes Operator Guide March 2020...
- Page 49 3. Tap on the network you wish to delete. Note that you can only delete a network to which you have previously connected. The network details display. 4. Tap the Forget button to delete the network connection. Pitney Bowes Operator Guide March 2020...
- Page 50 1. Tap the Settings icon in the toolbar. 2. Tap Wi-Fi. 3. The MAC address appears above the list of wireless networks. Wired: 1. Tap the Settings icon in the toolbar. 2. Tap Wired (Ethernet). Pitney Bowes Operator Guide March 2020...
- Page 51 5. Tap Close, then the back arrow to return to the Home screen. If the MAC address does not display, try these steps: 1. Tap the Settings icon in the toolbar. 2. Scroll down to the "Advanced Device Options" section and tap About This C-Series. Pitney Bowes Operator Guide March 2020...
- Page 52 Refer to the SendPro C Lite, SendPro C, SendPro+, SendPro C Auto Connectivity Guide for additional information. You can view or download the guide at the Pitney Bowes support site.
- Page 53 Adjusting time zone and location code Adjusting display brightness Adding favorite apps Setting up Energy Saver Managing your Pitney Bowes USPS Postage Funds Using USPS Informed Delivery Installing your SendPro C Lite, SendPro C, SendPro+ 58 Installing a scale Uploading system logs...
- Page 54 Manually lock your device 1. Tap the user profile icon in the upper right corner of the toolbar. 2. Tap Lock this device. The screen saver displays shortly after the "device is Locked" screen displays. Pitney Bowes Operator Guide March 2020...
- Page 55 Adding favorites to the app drawer makes them easy to find on the Home screen. 1. Tap SendPro Apps on the Home screen. All of the available apps display. 2. Tap Edit Favorites and a star appears next to each app. Pitney Bowes Operator Guide March 2020...
- Page 56 Your device uses two separate postage accounts, one for shipping labels and one for envelope printing. The funds for one cannot be used for the other.. Pitney Bowes offers two ways to fund postage for USPS mailing (Envelope Printing or Print on Envelopes) and USPS shipping (Trackable Labels or Shipping Labels) on your device: Purchase Power®...
- Page 57 2. Enter your USPS.com Username and password. If this is the first time you are using Informed Delivery on your device you will be requested to verify your USPS account. Follow the prompts to complete the verification process. Pitney Bowes Operator Guide March 2020...
- Page 58 Managing your machine Installing your SendPro C Lite, SendPro C, SendPro+ 1. What's in the box. Pitney Bowes Operator Guide March 2020...
- Page 59 Do not connect the SendPro C to a power source yet. b. Be sure to grab the entire feeder and not just the flap. 3. Unpack SendPro C a. Remove all the packing materials from your machine. Pitney Bowes Operator Guide March 2020...
- Page 60 4. Install the printhead and ink cartridge. a. Open the cover to access the ink carriage. b. Remove the packing tape from the ink carriage and open the guard. c. Unwrap the printhead and remove the protective strip. Pitney Bowes Operator Guide March 2020...
- Page 61 ! Performing this step correctly is critical in preventing damage to the system. f. Unwrap the ink cartridge and make sure you remove the silver foil strip from the ink cartirdge. g. Install the ink cartridge and close the guard. Pitney Bowes Operator Guide March 2020...
- Page 62 Managing your machine h. Close the cover. 5. Connect the SendPro C Lite, SendPro C, SendPro+ to a power source and continue the installation a. Connect your machine to a power source and turn on the power switch. b. Wait for the system startup..Then tap "Get Started" on the touchscreen and continue the installation steps.
- Page 63 Managing your machine SendPro C Lite, SendPro C, SendPro+ Quick Tour Paying for Postage Installing a scale If you did not install a scale when you installed your device you can do it at any time later. Your device contains step-by-step installation instructions for compatible scales 1.
- Page 64 5. Tap the Upload Selected Logs button. 6. The message "Sending Log Files" appears. Once the upload is complete, the message "Upload Complete" displays. 7. Tap Got It to return to the Home screen. Pitney Bowes Operator Guide March 2020...
- Page 65 4 - Creating Shipping Labels In this section Signing in to and out of Trackable Labels or Shipping Labels Creating and printing a shipping label Creating a shipping label from the address book Creating a new sender address for shipping labels Editing the sender address for shipping labels Creating an international shipping label Printing a USPS return shipping label...
- Page 66 Use Trackable Labels or Shipping Labels to get the best pricing, free tracking, and detailed delivery history for USPS package services. You can also send via UPS® or FedEx®. The packaging options and benefits are almost identical. Pitney Bowes Operator Guide March 2020...
- Page 67 1. On the Home screen, tap Envelope Printing or Print on Envelopes. 2. Tap the carrier you wish to use. 3. Verify that the sender address is correct. If not, tap on the Sender field and select a new address. Pitney Bowes Operator Guide March 2020...
- Page 68 4. If cost accounts are enabled, you must select an account. If an account is already selected, verify that it is correct. To change or add the account, tap the Cost Account field and select an account. 5. Tap Continue. Pitney Bowes Operator Guide March 2020...
- Page 69 Creating Shipping Labels 6. Enter the recipient address manually, or tap the Address book icon to select one from the address book. 7. Tap Continue. 8. Tap a package type. Pitney Bowes Operator Guide March 2020...
- Page 70 Scale and the weight appears. Tap Apply. If you do not have a scale, tap on the Weight button and enter the weight, then tap Apply. 10. Tap Continue. 11. Tap the service you wish to use. Pitney Bowes Operator Guide March 2020...
- Page 71 12. To add additional services, tap Add additional services. If you are not adding any extra services, go to step 14. 13. Select the desired services and tap Apply. 14. To print the label, tap Print. Pitney Bowes Operator Guide March 2020...
- Page 72 5. Follow the steps for creating and printing a shipping label. Creating a new sender address for shipping labels If you need to ship from more than one address, you can add additional sender addresses to the address book. Pitney Bowes Operator Guide March 2020...
- Page 73 Types of items in your shipment (documents, gifts or merchandise). Select either Abandon or Return to Sender if the item cannot be delivered. Description for each item, where the item was made, the quantity of the items. To enter the description, tap the Add an item button. Pitney Bowes Operator Guide March 2020...
- Page 74 SCAN Form 5630 can be scanned once, and every shipping label from that day will be uploaded to the USPS systems. You can enable USPS scan form printing on your device. 1. Tap the Settings icon on the toolbar. 2. Scroll down to Shipping Settings, then tap Label Options. Pitney Bowes Operator Guide March 2020...
- Page 75 4. Tap the shipment to open the details screen. 5. Tap Void Label. Select the box to confirm that you will not be using the label, then tap Continue. Pitney Bowes Operator Guide March 2020...
- Page 76 Note: Labels for First-Class Large Envelope do not bear a tracking barcode, and refunds cannot be requested for them via the SendPro C device. Sign in to sendpro.pitneybowes.com to request a refund for these transactions. Pitney Bowes Operator Guide March 2020...
- Page 77 5 - Managing Shipping Labels In this section Using SendPro Online to perform these tasks Using the shipping labels address book About cost accounts for shipping labels Changing the default refill amounts for shipping labels 80 Using cost accounts to charge back shipping label postage costs Turning on address autofill for Trackable Labels or Shipping Labels...
- Page 78 You must perform the following Trackable Labels or Shipping Labels tasks using SendPro® Online instead of your SendPro C Lite, SendPro C, SendPro+ device. Using a browser on your PC, go to https://login.pitneybowes.com/sendpro. You can use your SendPro C device user ID and password to sign in to SendPro Online, or you can sign in to your PB account and go to SendPro Online from there.
- Page 79 To view all of your cost accounts: Tap Cost Accounts in the application drawer at the bottom of the Home screen, or, Tap SendPro Apps on the Home screen, then tap Cost Accounts. Pitney Bowes Operator Guide March 2020...
- Page 80 Tap SendPro Apps on the Home screen, then tap Cost Accounts. 2. Tap the Cost Account settings icon in the upper right corner of the Cost Accounts screen. If cost accounts are not enabled, you will see this screen. Pitney Bowes Operator Guide March 2020...
- Page 81 Shipping Labels Autofill automatically fills in the address fields as you start to enter an address. This makes it easier and quicker to enter addresses when creating shipping labels. To turn on address autofill: Pitney Bowes Operator Guide March 2020...
- Page 82 Tap Address Book in the application drawer at the bottom of the Home screen, or, Tap SendPro Apps on the Home screen, then tap Address Book. 2. Add a new address by tapping the + icon and entering the contact information. 3. Tap Save when done. Pitney Bowes Operator Guide March 2020...
- Page 83 Labels address book 1. Open the Address Book screen: Tap Address Book in the application drawer at the bottom of the Home screen, or, Tap SendPro Apps on the Home screen, then tap Address Book. Pitney Bowes Operator Guide March 2020...
- Page 84 4. (Optional) Enter a description of the account, up to 200 characters. 5. Tap Enter (green check mark) when done. You can use the same types of characters as for the account name. Pitney Bowes Operator Guide March 2020...
- Page 85 Refilling postage for shipping labels Your device uses two separate postage accounts, one for shipping labels and one for envelope printing. The funds for one cannot be used for the other. Before you begin: Pitney Bowes Operator Guide March 2020...
- Page 86 8. Tap the Home icon in the upper right corner of the global toolbar to return to the Home screen. To view your shipping label postage refill history, sign into your SendPro Online account and export a postage history report. Pitney Bowes Operator Guide March 2020...
- Page 87 Tap on the Select Cost button and choose an account from the drop-down list. 7. Tap the Prompt me before auto postage refill is set to occur box. 8. Tap Save. 9. Tap the back arrow on the toolbar to return to the Home screen. Pitney Bowes Operator Guide March 2020...
- Page 88 4. Tap the Manage button next to FedEx on the right side of the screen. The Manage FedEx Account screen appears. 5. To use this as your default FedEx account, tap the Make this my default FedEx account box. Pitney Bowes Operator Guide March 2020...
- Page 89 Define the print options for your shipping labels. This includes the label size and whether to print the cost on the label. You can also choose to print a receipt or enable scan form and manifest printing. Pitney Bowes Operator Guide...
- Page 90 2. Scroll down to Shipping Settings. 3. Tap Automated Emails. 4. To enable tracking number and delivery confirmation emails to the sender or recipients, tap the appropriate check boxes in the Tracking Number Email and Shipment Delivery Email sections. Pitney Bowes Operator Guide March 2020...
- Page 91 You can see where you are spending your postage by viewing the Shipment Report. This report includes a list of all of the shipping labels you have created along with their carriers and the amounts of postage. Pitney Bowes Operator Guide...
- Page 92 Your device has a different accounts for the Envelope Printing or Print on Envelopes application and the Trackable Labels or Shipping Labels. Funds must be removed from each account separately. To remove funds from one or both of your accounts, call Pitney Bowes support at 1-877-822-0996. Pitney Bowes...
- Page 93 6 - Printing on envelopes In this section Printing postage on envelopes Checking the postage available for printing envelopes 97 Refilling postage for printing on envelopes Using accounts to charge back envelope printing costs 98 Sending a First-Class letter envelope Sending a large First-Class®...
- Page 94 Adding a custom text message to your envelope or tape Editing or deleting a custom text message Printing a graphic on your envelope without printing postage Adding an inscription to your envelope Printing only the date and time on your envelope Pitney Bowes Operator Guide March 2020...
- Page 95 7. Tap Tape to begin printing postage on tape. To print more than one tape, tap on the number in the Tape button and enter the number of tapes. The Tape button is only present on SendPro C models equipped with an automatic feeder. Pitney Bowes Operator Guide March 2020...
- Page 96 Date and Time Stamp Date Correction Graphic Only Postage Correction Postage Printing - Printing postage on an envelope is the default mode. Seal Only- Bypass all printing. Test Print - Check the quality of postage imprint. Pitney Bowes Operator Guide March 2020...
- Page 97 If you see a line through the connection icon, it means that you are not connected and will not be able to refill your postage until you establish a network connection. To refill your envelope printing postage: Pitney Bowes Operator Guide March 2020...
- Page 98 8H00 or 9H00 and if you have only a single account, once you select that account the device will remember that account the next time you start Envelope Printing or Print on Envelopes. 3. Tap Class. Pitney Bowes Operator Guide March 2020...
- Page 99 Tap Postal Advisor in the application drawer at the bottom of the Home screen, or, Tap SendPro Apps on the Home screen, then tap USPS Postal Advisor. The Postal Advisor also provides information for multiple types and classes of mailpieces, including postcards, letters, and parcels. Pitney Bowes Operator Guide March 2020...
- Page 100 3. If you have the accounting feature enabled, tap Account and select an account. 4. Tap Class. 5. Tap Start Over to display a list of all the available classes. 6. Tap First-Class Retail Metered for a First-Class mail envelope. Pitney Bowes Operator Guide March 2020...
- Page 101 8. Depending on the type class and type of mailpiece: Enter the destination ZIP Code and tap Apply If you're using E-Certified, enter the Mailer ID and tap Apply. 9. Enter the barcode from the label and tap Apply. Pitney Bowes Operator Guide March 2020...
- Page 102 Tap the check mark. Sending mail using a Certificate of Mailing Purchase a Certificate of Mailing when you need to have proof that you sent a letter or package. Pitney Bowes Operator Guide March 2020...
- Page 103 Envelope Printing or Print on Envelopes. 5. Scroll down and tap Print Mode on the Envelope Printing or Print on Envelopes screen. 6. Tap Certificate of Mailing. Pitney Bowes Operator Guide March 2020...
- Page 104 Important: The date on the postage should match the date when your mail goes to the post office. Your deviceautomatically advances the printed date on the device stamp (as well as its internally held date) when the system time reaches 5:00 PM. This time cannot be changed. Pitney Bowes Operator Guide March 2020...
- Page 105 1. On the Home screen, tap Envelope Printing or Print on Envelopes. 2. Scroll down and tap Print Mode. 3. Tap Postage Correction. 4. Tap Apply. Pitney Bowes Operator Guide March 2020...
- Page 106 You must print a future date on the back of the envelope before you can mail it. 1. On the Home screen, tap Envelope Printing or Print on Envelopes. 2. Scroll down and tap Print Mode. 3. Tap Date Correction. 4. Tap Apply. Pitney Bowes Operator Guide March 2020...
- Page 107 8. Tap Apply. Entering the weight manually when printing postage on envelopes You can enter the weight of a mailpiece when you know its weight and you are not using the integrated weighing platform. Pitney Bowes Operator Guide March 2020...
- Page 108 Start to feed the envelopes. Using the weighing platform when printing postage on envelopes Use your device to weigh your mailpiece and calculate the correct postage for you. Pitney Bowes Operator Guide March 2020...
- Page 109 4. Tap Apply. 5. Place your envelope face up, flap down into the feeder. Be sure to slide the envelope flap under the edge of the feed deck. Related topics Sealing envelopes on the next page Pitney Bowes Operator Guide March 2020...
- Page 110 Note: If the moistener tank is full and your envelopes do not seal correctly, clean or replace the moistener brush and wick. Zeroing the scale Zeroing the scale sets the weight with nothing on the scale to zero. Pitney Bowes Operator Guide March 2020...
- Page 111 4. To confirm, tap Apply. 5. Place the envelope or envelopes on the feed deck. Depending on the SendPro C model you have, feed the envelopes manually or tap Start to feed the envelopes. Pitney Bowes Operator Guide March 2020...
- Page 112 Mail Retail from the list of classes. 4. Tap Envelope or Package. 5. Enter the ZIP Code, then tap Apply. 6. Tap the Electronic Certified box. 7. Tap the Electronic Return Receipt box. 8. Tap Apply. Pitney Bowes Operator Guide March 2020...
- Page 113 You must submit your refund request within 60 days from the date shown on the indicia to your local Post Office. Pitney Bowes Operator Guide March 2020...
- Page 114 5. Tap + Graphic. 6. Tap Custom Text. 7. Tap + Add. 8. A message appears informing you that you must comply with Postal rules when creating a message. If you agree, tap Accept & Continue. Pitney Bowes Operator Guide March 2020...
- Page 115 11. When finished, tap Apply. The screen displays the message as it will appear on your envelope or tape. 12. Tap Apply again. The custom text message is now available when you print postage. 13. Tap the back arrow on the toolbar to return to the Home screen. Pitney Bowes Operator Guide March 2020...
- Page 116 Adding a custom text message to your envelope or tape Your SendPro C Lite, SendPro C, SendPro+, SendPro C Auto device allows you to add a custom text message to your mail. This can be a return address, for example. Your message can be up to five lines, with 20 characters per line.
- Page 117 Editing or deleting a custom text message Your SendPro C Lite, SendPro C, SendPro+, SendPro C Auto device allows you to add a custom text message to your mail. You can edit or delete messages that you no longer need.
- Page 118 Printing on envelopes 1. Tap + Graphic on the Envelope Printing or Print on Envelopes screen. 2. Tap Custom Text. Pitney Bowes Operator Guide March 2020...
- Page 119 Printing a graphic on your envelope without printing postage Use graphics to promote and strengthen your brand or convey a special message or greeting. 1. On the Home screen, tap Envelope Printing or Print on Envelopes. 2. Tap Print Mode. Pitney Bowes Operator Guide March 2020...
- Page 120 3. Select Date and Time Stamp. 4. Tap Apply. 5. Place the envelope or envelopes on the feed deck. Depending on the SendPro C model you have, feed the envelopes manually or tap Start to feed the envelopes. Pitney Bowes Operator Guide March 2020...
- Page 121 7 - Managing Printing on Envelopes In this section Confirming your meter update Changing the default refill amounts for printing postage Uploading printing postage transactions Clearing or resetting the number of mailpieces sent Performing USPS postal inspections for Envelope Printing or Print on Envelopes Updating postal rates or software for printing on envelopes Confirm the effective date for postal rates on your...
- Page 122 4. Tap the box under Default refill amount 5. Tap the back key to remove the existing amount. You may need to tap the key multiple times to clear the amount. 6. Enter the new amount. 7. Tap Apply. Pitney Bowes Operator Guide March 2020...
- Page 123 Make certain that you wish to delete the piece count information. Once you do so, you cannot restore the deleted data. 1. Tap Envelope Printing or Print on Envelopes on the Home screen. 2. Tap Pieces. 3. Tap Reset Counter to 0. Pitney Bowes Operator Guide March 2020...
- Page 124 Manual postal rate updates 1. Select Rates and Updates: Tap Rates and Updates in the application drawer at the bottom of the Home screen, or Tap SendPro Apps, then Rates and Updates. Pitney Bowes Operator Guide March 2020...
- Page 125 Note: Prices and dates are used for reference only. These prices and dates may change with each postal change. Manual software updates 1. Select Rates and Updates: Tap Rates and Updates in the application drawer at the bottom of the Home screen, or, Tap SendPro Apps, then Rates and Updates. Pitney Bowes Operator Guide March 2020...
- Page 126 You can check to see if you have downloaded the latest rates for each postal class on your device. 1. Tap Envelope Printing or Print on Envelopes. 2. Tap Class. 3. Tap Start Over to display a list of all the available classes. Pitney Bowes Operator Guide March 2020...
- Page 127 Your mailer ID is a 9-digit number that is required when using Electronic Return Receipt (ERR). To get your mailer ID, submit Form 5053, Bulk Proof of Delivery to the USPS. 1. Tap the Settings icon on the toolbar. 2. Scroll down to the Envelope Printer Settings section. Pitney Bowes Operator Guide March 2020...
- Page 128 If your machine prints an incorrect ZIP code, a new one must be downloaded. This issue must be resolved by a Pitney Bowes representative. Contact technical support for assistance. Multi-level Envelope Printing or Print on Envelopes accounts You can have up to 25 accounts.
- Page 129 Turning account passwords on or off for printing postage You can protect each account from unauthorized access by turning account passwords on. 1. Tap Envelope Printing or Print on Envelopes on the Home screen. 2. Tap Account. Pitney Bowes Operator Guide March 2020...
- Page 130 Tap Ok. 6. Tap the back arrow on the top left side of the screen to return to the list of accounts. 7. Tap Cancel to return to the Mail screen. Pitney Bowes Operator Guide March 2020...
- Page 131 Important: Once you charge postage to an account, you cannot change the account name or code, and you cannot delete the account. 1. Tap Envelope Printing or Print on Envelopes on the Home screen. 2. Tap Account. Pitney Bowes Operator Guide March 2020...
- Page 132 3. Tap the Preferences icon in the upper right corner of the screen. 4. Tap Manage Accounts. 5. Tap Delete account to display a list of available accounts. 6. Tap to select the account you wish to delete. 7. Tap OK. Pitney Bowes Operator Guide March 2020...
- Page 133 3. Once you apply the settings, verify the settings on the Envelope Printing screen. 4. Tap the star in the Preset box. Important: You must modify something in the Envelope Printing screen in order for the Preset star to appear. Pitney Bowes Operator Guide March 2020...
- Page 134 If you select a preset and do not use it within about one minute, the Envelope Printing screen restores the default preset values. The same is true when your device enters sleep mode or is turned off. Pitney Bowes Operator Guide...
- Page 135 You can set the length of time you wish before the preset values you select for sending an envelope revert to the default values. 1. Tap the Settings icon on the toolbar. 2. Scroll down to the Envelope Printer Settings section. 3. Tap Postage Refills. 4. Tap Default Preset Timer. Pitney Bowes Operator Guide March 2020...
- Page 136 Managing Printing on Envelopes 5. Use the slider to set the time between 1 and 9 minutes. 6. To save the value and exit the screen, tap the back arrow or Home icon in the toolbar. Pitney Bowes Operator Guide March 2020...
- Page 137 8 - View Print Reports In this section Viewing a receipt when refilling postage Viewing the total spent on printing postage Viewing the refill history for printing postage Printing a report for the number of mailpieces sent Printing a funds report for postage printing Running postage printing account reports Emailing a postage printing account report Setting the postage printing account report period...
- Page 138 Tap the History & Reports icon in the application drawer, then tap Refill History. 2. Tap on a postage refill to open a Refill Receipt. Note: At this time, you can only view the report. Pitney Bowes Operator Guide March 2020...
- Page 139 The date and time the report was printed. To print a funds report: 1. On the Home screen, tap Envelope Printing or Print on Envelopes. 2. Tap the piece count in the upper right. 3. Tap Print Report. Pitney Bowes Operator Guide March 2020...
- Page 140 Emailing a postage printing account report You can email the postage printing account report to any email address you choose. 1. On the Home screen, tap Envelope Printing or Print on Envelopes. 2. Tap Account. Pitney Bowes Operator Guide March 2020...
- Page 141 6. Tap View & print reports. 7. Tap the option button in front of the report to select it. 8. Tap Next. 9. Tap Actions or View Reports at the bottom of the screen. 10. Tap Email Report. Pitney Bowes Operator Guide March 2020...
- Page 142 1. On the Home screen, tap Envelope Printing or Print on Envelopes. 2. Tap Account. 3. Tap the menu icon. 4. Tap Manage Accounts. 5. Tap the Reports link in the Accounts section. 6. Tap Report period. Pitney Bowes Operator Guide March 2020...
- Page 143 7. Tap to select how accounts should be identified: by Name or by Code. 8. Tap to select the account level you wish to report on: Account, Sub account or Sub sub account. 9. Tap OK to return to the Reports screen. Pitney Bowes Operator Guide March 2020...
- Page 144 You can view and print all of the USPS shipping label refunds you've requested on your device. 1. Open the Shipping History screen: Tap History in the application drawer at the bottom of the Home screen, or, Tap SendPro Apps on the Home screen, then tap Shipping History. Pitney Bowes Operator Guide March 2020...
- Page 145 Tap Create Report. b. Enter the email address. Tap the green check mark to complete the entry. c. Tap Email Report. d. You will receive an email with an attached .csv transactions history file. Pitney Bowes Operator Guide March 2020...
- Page 146 This page intentionally left blank.
- Page 147 9 - Mail Machine Maintenance In this section Check the postage print quality Printing a test pattern Checking the ink level Installing the ink cartridge Changing the ink waste pad Cleaning the printhead Installing the printhead Cleaning the moistener brush and wick assembly Filling the moistener tank Avoiding envelope sealing issues Feeding envelopes...
- Page 148 Once the cleaning operation completes, you must print another test pattern. If this new pattern still has broken or missing lines, you may need to replace the ink cartridge or clean or replace the printhead. Pitney Bowes Operator Guide March 2020...
- Page 149 Checking the ink level Your device monitors its ink level. You can check the ink level at any time. If you are unsure of your SendPro C model number, refer to Related topics. Pitney Bowes Operator Guide March 2020...
- Page 150 Important: Only use genuine Pitney Bowes ink cartridges. Non-Pitney Bowes cartridges can damage your device. If you need ink, order a genuine Pitney Bowes replacement ink cartridge. When your device shows the low ink warning an ink cartridge will be ordered for you automatically, if you are enrolled in the AutoInk program.
- Page 151 The sheet contains the reset code you will need in order to complete the replacement process. 1. Tap Replace Pad. 2. The instructions for replacing the existing pad display on the screen. Pitney Bowes Operator Guide March 2020...
- Page 152 If that fails to clear the message, contact Pitney Bowes support. If the message no longer appears on the screen follow these steps: If you need a replacement waste pad, use the Supplies app to purchase the pad.
- Page 153 5. Flip the ink cartridge guard open. 6. Remove the ink cartridge as shown on the label to the right of the cartridge holder. 7. Squeeze the tabs on either side of the printhead. Pitney Bowes Operator Guide March 2020...
- Page 154 Mail Machine Maintenance 8. Lift and tilt the printhead gently to the right. 9. Pull the printhead up and out of the holder. Pitney Bowes Operator Guide March 2020...
- Page 155 10. Note the location of the plastic alignment tabs and the orientation of the printhead so that you can reinstall it properly after cleaning. 11. Clean off the printhead by wiping surface of the printhead shown here with a dry, lint-free cloth or foam swab. Pitney Bowes Operator Guide March 2020...
- Page 156 13. Reinsert the printhead by squeezing the tabs on either side of the printhead and sliding the plastic alignment pins into the lower slot of the printhead holder. 14. Gently push the printhead into place until it snaps into position. Pitney Bowes Operator Guide March 2020...
- Page 157 5. Flip the ink cartridge guard open. 6. Remove the ink cartridge as shown on the label to the right of the cartridge holder. 7. Squeeze the two gray tabs on either side of the printhead. Pitney Bowes Operator Guide March 2020...
- Page 158 Mail Machine Maintenance 8. Lift and tilt the printhead gently to the right. 9. Pull the old printhead up and out of the holder. Pitney Bowes Operator Guide March 2020...
- Page 159 Mail Machine Maintenance 10. Note the location of the plastic alignment tabs and the orientation of the printhead so that you can install the new printhead correctly. Pitney Bowes Operator Guide March 2020...
- Page 160 12. Insert the printhead by squeezing the tabs on either side of the printhead and sliding the plastic alignment pins into the lower slot of the printhead holder. 13. Gently push the printhead into place until it snaps into position. Pitney Bowes Operator Guide March 2020...
- Page 161 Cleaning the moistener brush and wick assembly If the moistener tank is full and your envelopes are not sealing properly, clean the moistener brush and wick. 1. Unscrew the plastic thumbscrew under the moistener base. Pitney Bowes Operator Guide March 2020...
- Page 162 Mail Machine Maintenance 2. Lift the moistener brush assembly off the top of the moistener base. 3. Turn the assembly over and slide the moistener brush out of the holder. Pitney Bowes Operator Guide March 2020...
- Page 163 7. Place the wick back in the metal grate, and replace the grate in the moistener base. 8. Slide the moistener brush back into the holder. 9. Replace the moistener brush assembly on top of the moistener base and secure with the plastic thumbscrew. Pitney Bowes Operator Guide March 2020...
- Page 164 Avoiding envelope sealing issues Sealing issues can be caused by inadequate sealant in the moistener tank, not placing the envelope correctly on the feed deck, or problems with the wick or brush in the moistener. Pitney Bowes Operator Guide March 2020...
- Page 165 If the moistener tank is full, and your envelopes are still not sealing correctly, clean or replace your moistener brush and wick. Refer to Cleaning the moistener brush and wick assembly. Feeding envelopes When feeding mail: Pitney Bowes Operator Guide March 2020...
- Page 166 Make sure and remove all the dust and debris. Managing product email notifications Your device can send you email notifications when: Its ink level is low Its funds are low It experiences an error To receive or stop receiving these emails: Pitney Bowes Operator Guide March 2020...
- Page 167 Mail Machine Maintenance 1. Sign in to your account on pitneybowes.com. If you do not have a Pitney Bowes Your Account login, see Signing up for a pitneybowes.com account. 2. Find the device in the Your Products section. If it is not listed, select (+) View more or (+) Add them now.
- Page 168 This page intentionally left blank.
- Page 169 10 - Supplies In this section Ordering supplies from your device Supplies, ink cartridges, and options...
- Page 170 Start Checkout to go to checkout. d. View product details for any item Tap anywhere on the product card for an item to view detailed information. This information is also displayed when you tap the Buy Now button. Pitney Bowes Operator Guide March 2020...
- Page 171 If you are not enrolled in the AutoInk program, as soon as ink level for your device drops below 20%, an Order Now button appears next to Your Ink Level in the Supplies app. To order ink, tap Order Now. If you enrolled in AutoInk, the service automatically orders ink for you. Pitney Bowes Operator Guide March 2020...
- Page 172 E-Z Seal ® Sealing Solution - 5 gallon Cubetainer 605-0 Moistener Brush, Wick and Grate for 621-8 SendPro C Lite, SendPro C, SendPro+, Models with PCN 2H00 and 8H00 Moistener Brush, Wick and Grate for 770-T SendPro C Auto 25 double sheets...
- Page 173 SendPro C red fluorescent ink cartridge 17 ml SL-798-0 SendPro C red fluorescent ink cartridge 35 ml 793-5 SendPro® C Auto red fluorescent ink cartridge 45 ml 765-9 SendPro C super blue ink cartridge 17 ml SL-798-0SB Pitney Bowes Operator Guide March 2020...
- Page 174 Backlit self-standing graphical tower display for MP82 scale MP00099 External USB platform scale (15/30 lb.) MT30 External USB platform scale (70 lb.) MT70 2.0 4-port USB Hub 552-3 I D barcode scanner 1E02 Report Printer 1E50 Envelope drop stacker HZ80001 Pitney Bowes Operator Guide March 2020...
- Page 175 11 - Machine Information In this section USPS requirements Key in Postage Sections of the meter impression Postal Security Device Parts of the device Connections on the back of the machine Specifications...
- Page 176 Due to USPS regulations, there is no Key in Postage available on any of the SendPro C devices. Sections of the meter impression The meter impression contains elements that identify the mailer and the type of mail. Pitney Bowes Operator Guide March 2020...
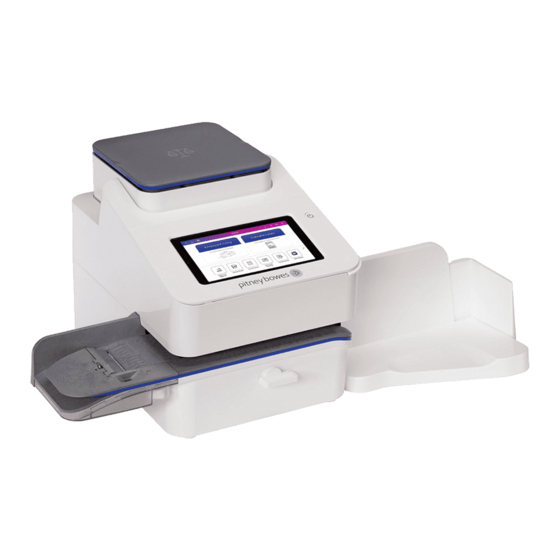
- Page 177 USPS to perform physical inspections, thereby making your mailing system easier and more convenient for you to use. Parts of the device Familiarize yourself with the parts of your SendPro C Lite, SendPro C, SendPro+. Pitney Bowes Operator Guide March 2020...
- Page 178 7. Paper jam lever - Normally engaged. If a stall occurs on the transport deck, turn this to disengage the rollers and clear the envelope, post card or tape strip. 8. Envelope stacker - This is where mail is deposited after the postage is applied to the piece of mail. Pitney Bowes Operator Guide March 2020...
- Page 179 Sound Level: Less than or equal to 70 dBA re 20 micro Pascal in accordance with ISO 7779, ISO 3744, or ISO 3741. Dimensions: 16.5 in L x 15.5 W x 11.25 in H Pitney Bowes Operator Guide March 2020...
- Page 180 Self-adhesive, dual tape strip for use on mailpieces that are too thick/large to run in the machine. Ideal for adding postage to oversized envelopes, priority mail and packages. Postal Inscriptions: Up to 60 inscriptions preloaded on the machine Graphics: Up to 60 graphic ads on the machine Pitney Bowes Operator Guide March 2020...
- Page 181 12 - Technical Support In this section Contacting Pitney Bowes...
- Page 182 Note that the serial number is blurred out here for security reasons. Be sure to have the following information available before contacting Pitney Bowes Technical Support:R Provide a description of the problem...
- Page 183 What steps have you already tried to fix the problem? If you tried, what happened? Contact Technical and Account Support Check the Pitney Bowes support site to make sure you have the latest information about your product. Visit us at: www.pitneybowes.com/support...
- Page 184 This page intentionally left blank.
- Page 185 13 - Safety In this section Lithium Ion Battery Agency Compliance Information Important Safety Notes Note for California Customers Only on all Models...
- Page 186 This product contains a lithium ion battery. The battery must be recycled or disposed of properly. If you are leasing this product, you must return it to Pitney Bowes. Alternatively, contact your local waste disposal or recycle facility for instructions on how to dispose of it properly.
- Page 187 The cabinet encloses hazardous parts. If you should drop or otherwise damage the unit, call Pitney Bowes. Use only Pitney Bowes approved ink, tape strips, and cleaners. To obtain Material Safety Data Sheets (MSDS) for OSHA requirements, please go to www.pb.com/msds. When prompted, enter the product name, manufacturer, the Pitney Bowes MSDS Number, or reorder number of the item you are interested in.
- Page 188 Servicing Please refer to the warranty information if problems occur. For reference purposes, the Pitney Bowes U.S. Service Center contact address is: Pitney Bowes Inc., 3001 Summer Street, Stamford, CT, 06926. All inquiries can be done by calling 1-800-522-0020 and following the telephone prompts. Customer Service Representatives are available Monday through Friday, 8:00 AM - 8:00 PM ET.
- Page 189 14 - Third party software In this section Third party software...
- Page 190 Third party software Third party software Third party software may have been incorporated into this product by Pitney Bowes Inc. (“PBI”) under permission from PBI’s licensors. Any special terms and conditions that apply to such software are provided below: This product contains the following software: Okhttp3 which is licensed under the Apache License, Version number 2.0.
- Page 191 Linux kernel under the terms of the GPL, without charge except for the cost of the media, shipping, and handling, upon written request to PBI. Such requests should be sent by e-mail to iptl@pb.com. Pitney Bowes Operator Guide March 2020...
- Page 192 Third party software Pitney Bowes Operator Guide March 2020...
Need help?
Do you have a question about the SendPro C Lite and is the answer not in the manual?
Questions and answers
what type of ink does this use
The Pitney Bowes SendPro C Lite uses genuine Pitney Bowes postal-approved ink cartridges. It supports a 17 ml cartridge that yields up to 1,500 impressions and a 35 ml cartridge that yields up to 3,000 impressions. Using non-Pitney Bowes or non-postal-approved cartridges can damage the device.
This answer is automatically generated