
Related Manuals for Inficon HAPSITE Smart


Summary of Contents for Inficon HAPSITE Smart
- Page 1 ® HAPSITE Smart Chemical Identification System IPN 074-397-P1G...
- Page 3 ® HAPSITE Smart Chemical Identification System IPN 074-397-P1G www.inficon.com re achus@inficon.com ©2006 INFICON...
- Page 4 All other brand and product names are trademarks or registered trademarks of their respective companies. The HAPSITE Smart runs a Linux® Operating System. The source code for the Operating System is available from INFICON by request for a nominal operating fee.
- Page 5 Operating Manual(s) for this product or product family. Equipment Description: HAPSITE Smart Portable GC/MS with or without wireless communications, including the HAPSITE Service Module, NEG Pump, Battery and AC to DC HAPSITE Adapter.
- Page 6 Duane H. Wright Operations Quality Manager, ISS INFICON Inc. ANY QUESTIONS RELATIVE TO THIS DECLARATION OR TO THE SAFETY OF INFICON'S PRODUCTS SHOULD BE DIRECTED, IN WRITING, TO THE VICE-PRESIDENT OF OPERATIONS AT THE ABOVE ADDRESS. Revised 11/04/08 (Rev C)
- Page 7 Operating Manual(s) for this product or product family. Equipment Description: SituProbe (when used with the HAPSITE Smart Portable GC/MS System) Applicable Directives: 2006/95/EC (LVD) 2004/108/EC (General EMC)
- Page 8 Duane H. Wright Operations Quality Manager, ISS INFICON Inc. ANY QUESTIONS RELATIVE TO THIS DECLARATION OR TO THE SAFETY OF INFICON'S PRODUCTS SHOULD BE DIRECTED, IN WRITING, TO THE VICE-PRESIDENT OF OPERATIONS AT THE ABOVE ADDRESS. Revised 11/04/08 (Rev C)
- Page 9 Operating Manual(s) for this product or product family. Equipment Description: Headspace (when used with the HAPSITE Smart Portable GC/MS System) Applicable Directives: 2006/95/EC (LVD) 2004/108/EC (General EMC)
- Page 10 Duane H. Wright Operations Quality Manager, ISS INFICON Inc. ANY QUESTIONS RELATIVE TO THIS DECLARATION OR TO THE SAFETY OF INFICON'S PRODUCTS SHOULD BE DIRECTED, IN WRITING, TO THE VICE-PRESIDENT OF OPERATIONS AT THE ABOVE ADDRESS. Revised 11/04/08 (Rev B)
- Page 11 Seller product was not designed nor against any defects due to plans or instructions supplied to Seller by or for Buyer. This manual is intended for private use by INFICON® Inc. and its customers. Contact INFICON before reproducing its contents.
- Page 13 HAPSITE Smart Operating Manual Definition of Note, Hint, Danger, Warning and Caution Paragraphs NOTE: This is a note paragraph. Notes provide additional information about the current topic. HINT: This is a hint paragraph. Hints provide insight into product usage DANGER This is a Danger paragraph.
-
Page 14: Operating Manual Style Conventions
HAPSITE Smart Operating Manual Operating Manual Style Conventions The following information describes the conventions used throughout this manual. When holding down a key and then pressing another key, this is expressed as (for example) Press Ctrl+C It is assumed that the floppy drive used is drive a. If using another drive, substitute the floppy drive letter being used for “a:”. -
Page 15: Table Of Contents
The HAPSITE Smart System ........ - Page 16 HAPSITE Smart Operating Manual HAPSITE Configurations ........2-12 Headspace Sampling System .
- Page 17 HAPSITE Smart Operating Manual Chapter 3 Operating HAPSITE in Portable Mode Starting the HAPSITE in Portable Mode......3-1 3.1.1...
- Page 18 HAPSITE Smart Operating Manual Chapter 4 Wireless and USB Introduction..........4-1 FCC Compliance Information .
- Page 19 HAPSITE Smart Operating Manual Chapter 6 Methods Introduction to Methods ........6-1 6.1.1...
- Page 20 Smart IQ Software......... 8-2 8.3.1 Updating the HAPSITE Smart Software......8-2 8.3.2 Installing and Updating the Smart IQ Software .
- Page 21 HAPSITE Smart Operating Manual RMB Menus within Data Review ....... . . 9-6 9.4.1...
- Page 22 HAPSITE Smart Operating Manual 10.2.3 Data Files ..........10-11 10.2.4...
- Page 23 HAPSITE Smart Operating Manual Chapter 12 Target Compound Methods 12.1 Introduction To Quantitative Analysis ......12-1 12.2...
- Page 24 HAPSITE Smart Operating Manual 13.3 Maintenance of HSS ........13-13 13.3.1...
- Page 25 HAPSITE Smart Operating Manual 14.9 Physically Removing the HAPSITE from the Service Module ..14-20 14.10 Storing the Service Module ........14-22 14.11...
- Page 26 HAPSITE Smart Spare Parts ........18-2...
- Page 27 HAPSITE Smart Operating Manual Appendix C Shipping the HAPSITE and Consumables Introduction..........C-1 Shipping the Canisters .
- Page 28 HAPSITE Smart Operating Manual This page is intentionally blank. TOC - 14...
-
Page 29: Introduction
(PC) for analysis. NOTE: This manual is specifically for the HAPSITE Smart. The terms "HAPSITE" and "HAPSITE Smart" are used throughout this manual to refer to the HAPSITE Smart. -
Page 30: Performance Specifications
HAPSITE Smart Operating Manual 1.2 Performance Specifications The performance specifications for the HAPSITE are shown below: Mass range ....1-300 AMU Scan Rate ....as much as 1000 AMU/sec @ 10 points per Ionization Mode . -
Page 31: Theory Of Operation
HAPSITE Smart Operating Manual 1.4 Theory of Operation The HAPSITE combines two analytical techniques, gas chromatography and mass spectrometry, to separate, identify, and measure the organic components in a gas phase sample. Using a flow of inert nitrogen carrier gas, the gas chromatograph (GC) performs a time separation (Retention Time) of the sample compounds. -
Page 32: Instrument Overview
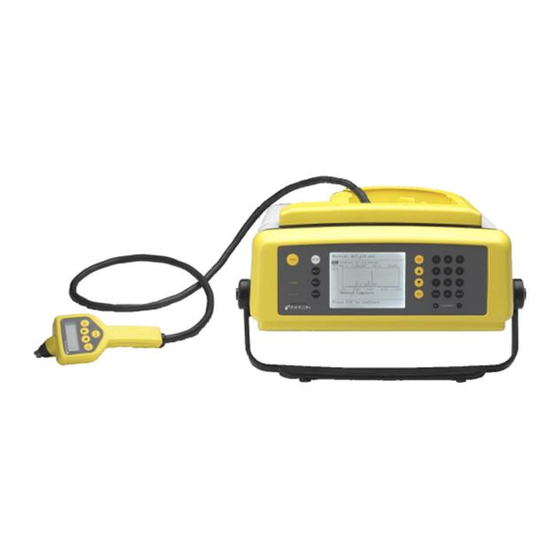
HAPSITE Smart Operating Manual 1.5 Instrument Overview The HAPSITE system is comprised of two modules: the HAPSITE, also known as the Analytical Module, and the Service Module. The HAPSITE is comprised of many systems and subsystems. Figure 1-1 shows a diagram of the major subsystems. - Page 33 HAPSITE Smart Operating Manual The inside of the column is coated with a thin layer of a material known as the stationary phase. The stationary phase is a chemical which can selectively attract components in a sample mixture. The mixture of sample compounds in the mobile phase interact with the chemicals of the stationary phase.
-
Page 34: Membrane Isolation Valve
HAPSITE Smart Operating Manual The performance of the column is affected by temperature, therefore, the column is housed in a temperature controlled oven. The gas chromatograph performs many operational functions, including injecting the sample, analyzing the sample, flushing the system, and tuning the system. - Page 35 HAPSITE Smart Operating Manual The inlet flow from the membrane isolation valve is brought directly to the ionizer. Within the ionizer, the component introduced from the inlet flow is subjected to a bombardment of electrons which are boiled off the hot filament. Collisions with the energetic electrons remove one electron from some of the gas molecules, leaving them with a net positive charge.
-
Page 36: Vacuum System
HAPSITE Smart Operating Manual Alternatively, the mass spectrometer can remain tuned to a specific mass or set of masses. The instrument measures the partial pressure of only those masses as a function of time. Operation in this mode, termed selected ion monitoring (SIM), permits very sensitive measurement of the presence of one or a few compounds which have already been identified. -
Page 37: Electronic Systems
HAPSITE Smart Operating Manual The diaphragm pump consists of four stages, in series. The diaphragm pump draws the gas from the exhaust of the compound pump and compresses the exhaust gas sufficiently to discharge the exhaust into the atmosphere. 1.6.4 Electronic Systems The electronic systems in the HAPSITE are considered in four groups: ... - Page 38 HAPSITE Smart Operating Manual data from the mass spectrometer, accesses the libraries as required, and displays the results of the analyses on the front panel. The control software allows a method to be started with minor modifications from the front panel. Design or substantive modifications of the method require the use of the HAPSITE Application software on an external PC.
-
Page 39: Hapsite Components And Assemblies
The HAPSITE instrument should be operated a minimum of every 3 weeks. Recommended storage is in extended standby mode. 2.2 Ship Kit Contents The following items are provided in a typical HAPSITE Smart Ship Kit. Figure 2-1. 2 - 1... - Page 40 HAPSITE Smart Operating Manual Figure 2-1 HAPSITE Ship Kit Box 1 . 036-0015 ..Shoulder Strap . 074-290 ..Instruction Sheet (Shoulder Strap) . 059-0329 ..Quick Disconnect Stem ...
- Page 41 HAPSITE Smart Operating Manual Figure 2-2 HAPSITE Ship Kit Box 2 Contents Box 2 Contents ..930-470-G1 Battery Charger Figure 2-3 HAPSITE Ship Kit Box 3 Contents Box 3 Contents ..24 V Power Supply (see table)
-
Page 42: Basic Assembly
HAPSITE Smart Operating Manual Figure 2-5 USA 24V Power Supply (AC To DC Power Converter) - Box 3 and Battery (2 Shipped) - Boxes 4 and 5 AC to DC Power Converter Batteries In addition, a laptop computer and accessories are shipped. The ship kits vary depending on the type of laptop ordered. -
Page 43: Attaching The Probe
HAPSITE Smart Operating Manual 2.3.1 Attaching the Probe To attach the probe line, plug the LEMO® connector into the port on the top of the HAPSITE as illustrated in Figure 2-7. Figure 2-7 Attaching the LEMO Connector on the Probe Line to the HAPSITE HINT: Save all of the caps to cover ports in the event the instrument needs to be washed or decontaminated. -
Page 44: Remove Exhaust (Vent) Cap
HAPSITE Smart Operating Manual 2.3.2 Remove Exhaust (Vent) Cap The red exhaust (vent) cap is located on the right side of the HAPSITE near the back. This exhaust (vent) cap must be removed for the HAPSITE to function properly. The HAPSITE is shipped with the cap removed. See Figure 2-9. -
Page 45: Installing The Gas Canisters
HAPSITE Smart Operating Manual 2.3.3 Installing the Gas Canisters Insert the gas canisters into the HAPSITE, making sure to place the purple banded canister in the top round opening and the yellow banded canister in the bottom. To insert the canisters, place them into the opening with the valve facing into the HAPSITE. -
Page 46: How To Change Or Remove A Gas Canister
HAPSITE Smart Operating Manual 2.3.3.1 How to Change or Remove a Gas Canister Push the lever located on the right of the canister. The canister will release. Remove the canister. Refer to Figure 2-12 on page 2-8. HINT: The nitrogen canister will need to be replaced after roughly 8 hours of use. -
Page 47: Install Battery
Connection To HAPSITE 2.3.6 Connect Laptop (if desired) The HAPSITE Smart has two possible configurations for connecting to a laptop computer. The standard connection is via a crossover ethernet cable. All instruments manufactured starting in December 2006 will have a wireless communication connection option. -
Page 48: Connect Laptop With Yellow Crossover Ethernet Cable
HAPSITE Smart Operating Manual 2.3.6.1 Connect Laptop with Yellow Crossover Ethernet Cable Unscrew the cap on the port next to the probe connection. Plug in the yellow crossover ethernet cable into this port. The opposite end plugs into the COM1 port on the laptop computer. -
Page 49: Helpful Guidelines
HAPSITE Smart Operating Manual 2.4 Helpful Guidelines A set of helpful guidelines to keep the HAPSITE safe and operational. DON’T… DO… Ship with a battery installed. Leave a battery installed when operating even when AC is connected. ... -
Page 50: Hapsite Configurations
headspace sampling needle assembly. heater block with four sample wells. compartment for loading an INFICON Nitrogen Carrier Gas canister. compartment for loading an INFICON rechargeable battery, INFICON part number 930-4061-G1. Swagelok® connection for use with an external supply of pressurized Nitrogen. - Page 51 Transfer Line — A directional heated line which connects the HSS to the HAPSITE, allowing sample transfer to the HAPSITE as well as communication between the two instruments. INFICON part number 931-401-P2. Each end is labeled to ensure proper orientation.
-
Page 52: Installing The Headspace Sampling System
HAPSITE Smart Operating Manual 2.6.2 Installing the Headspace Sampling System Required Parts The following items are needed to install the HSS: Headspace instrument Y-cable power splitter Transfer line Carrier Gas Charged Battery Procedure Install a fully charged battery into the HAPSITE. - Page 53 HAPSITE Smart Operating Manual Figure 2-18 Power Supply Y-cable and Back of HSS Y-Connector 24 V(dc) Supply Cable Plug into HAPSITE HSS Connection Properly align the labels on the foam insulation and transfer line and slide into place. The end of the insulation labeled in yellow THIS END TO HAPSITE should coincide with the end of the transfer line labeled in yellow THIS END TO HAPSITE.
- Page 54 HAPSITE Smart Operating Manual Figure 2-20 Accessory End of the Transfer Line Install the transfer line between the HAPSITE and Headspace Sampling System. First, disconnect the probe from the HAPSITE. Install the LEMO connector, labelled THIS END TO HAPSITE in the HAPSITE connector. The opposite end labelled THIS END TO ACCESSORY will connect to the rear of the Headspace Sampling System.
- Page 55 HAPSITE Smart Operating Manual Figure 2-22 Attaching the Transfer Line to the HAPSITE and the Back of the HSS This End To HAPSITE This End To Headspace Connect a pressurized nitrogen cylinder or install a nitrogen can into the Headspace instrument.
-
Page 56: Service Module
HAPSITE Smart Operating Manual Figure 2-23 Inserting the Battery into the HSS 2.7 Service Module The Service Module is used to create a vacuum in the HAPSITE. It cannot be used in a portable application. For additional information on the Service Module, refer to Chapter 14, Service Module. - Page 57 HAPSITE Smart Operating Manual Figure 2-24 Aluminum Storage Plug on Service Module Covering the aluminum plug is a yellow plastic cover, which aids in protecting the opening from foreign debris. See Figure 2-25. Remove the yellow cover before proceeding, and store it in a safe location.
- Page 58 HAPSITE Smart Operating Manual Figure 2-26 Power Cable Attached at Back Left of the Service Module The RS232 communication cable is shown in Figure 2-27. Figure 2-27 RS232 Communication Cable Attach the RS232 communications cable to the Service Module, as shown in Figure 2-28.
- Page 59 HAPSITE Smart Operating Manual Figure 2-28 RS232 Communication Cable Attached to Back Right Side of Service Module Now attach the RS232 cable to the laptop computer, as shown in Figure 2-29. Figure 2-29 RS232 Communication Cable Attached to PC Turn on the Power switch for the Service Module, located at the back right corner...
- Page 60 HAPSITE Smart Operating Manual Figure 2-30 System Setup Screen with Service Module NOTE: If the Service Module icon does not appear, the communications may need to be configured. See section 8.6.3, Establishing Communication with the Service Module, on page 8-26, for information on how to set up a COM port for communicating with the Service Module.
-
Page 61: Placing The Hapsite On The Service Module
HAPSITE Smart Operating Manual Figure 2-32 Cleaning the Service Module Rubber O-ring using a Lint-free Wipe After cleaning the rubber o-ring, make sure there are no cuts on it. Also look for any visible cracking of the o-ring. If the o-ring is damaged, the o-ring may need to be replaced. - Page 62 HAPSITE Smart Operating Manual Figure 2-33 Remove the Yellow Plastic Protective Cover on the Bottom of the HAPSITE Figure 2-34 shows the yellow protective cover removed from the bottom of the HAPSITE. Figure 2-34 Yellow Plastic Protective Cover Removed from the Bottom of the HAPSITE Carefully place the HAPSITE on top of the Service Module.
- Page 63 HAPSITE Smart Operating Manual NOTE: Black latches can be adjusted with the thumb screw to ensure proper tension. Figure 2-36 HAPSITE Attached to Service Module using Service Module Latches - Left Side View Continue by following the instructions in section 14.6, Starting Up HAPSITE on the Service Module, on page 14-11.
-
Page 64: Detaching The Hapsite From The Service Module
HAPSITE Smart Operating Manual 2.7.3 Detaching the HAPSITE from the Service Module Carefully follow the procedures starting with section 14.8, Detaching the HAPSITE, on page 14-17 to detach the HAPSITE from the Service Module. CAUTION Never physically remove the HAPSITE from the Service Module while the Turbo pump is spinning. - Page 65 HAPSITE Smart Operating Manual Procedure Refer to section 2.9.2, Removing the Sample Loop, on page 2-29 to remove the currently installed sample loop or to 2.9.5, Removing the Concentrator Tube, on page 2-36 to remove the concentrator tube. NOTE: There is not a specific orientation for the Sample Loop.
- Page 66 HAPSITE Smart Operating Manual Continue pressing on the top elbow, and tighten the top nut finger tight. See Figure 2-39. Figure 2-39 Tightening the Top Nut Using the 7/16" open end wrench supplied with the HAPSITE, tighten both the top and bottom nut approximately a quarter turn. See Figure 2-40.
-
Page 67: Removing The Sample Loop
The elbow fittings and nuts may be hot. If necessary, let the elbow fittings and nuts cool down before continuing. Using the 7/16" open end wrench suppled by INFICON, loosen the nuts on the top and bottom of the sample loop until it becomes free. - Page 68 HAPSITE Smart Operating Manual NOTE: The Tri-Bed Concentrator is directional. The Tri-Bed Concentrator must be installed with the smooth metal sleeve pointing down and the grooved metal sleeve pointing up. See Figure 2-42. Figure 2-42 Proper Tri-Bed Concentrator Orientation WARNING The elbow fittings and nuts may be hot.
-
Page 69: Installing The Tenax Or Carbopack Concentrator
HAPSITE Smart Operating Manual When pressure is released from the top fitting, the elbow should not move. When gentle upward pressure is applied to the top elbow, the elbow should not slip on the concentration tube. If the elbow moves, the tube is not properly... - Page 70 HAPSITE Smart Operating Manual While holding the bottom ferrule in place, put the bottom of the concentrator tube into the lower elbow fitting. See Figure 2-44. Figure 2-44 Placing Concentrator in Bottom Elbow Carefully lift up on the top elbow and insert the top of the concentrator tube. See Figure 2-45.
- Page 71 HAPSITE Smart Operating Manual With the Concentrator Tube in place, press down on the top of the elbow assembly with just enough force to seat the Concentrator Tube. See Figure 2-46. Figure 2-46 Pressing Down on Elbow Assembly Maintain the pressure on the top of the elbow and, tighten the bottom nut only until it begins to contact the ferrule.
- Page 72 HAPSITE Smart Operating Manual Fully tighten the top nut using your fingers being careful not to push, pull, shove or tilt the nut and fitting. Once the top nut is tightened, tighten the bottom nut again using your fingers. See Figure 2-48.
- Page 73 HAPSITE Smart Operating Manual Figure 2-49 Back of Concentrator Cover Install the concentrator cover. See Figure 2-50. Figure 2-50 Concentrator Cover 2 - 35...
-
Page 74: Removing The Concentrator Tube
The elbow fittings and nuts may be hot. If necessary, let the elbow fittings and nuts cool down before continuing. Using the 7/16" open end wrench suppled by INFICON, loosen the nuts on the top and bottom of the concentrator tube until the tube becomes free. -
Page 75: Probe Sampling Options And Attachments
HAPSITE Smart Operating Manual 2.10 Probe Sampling Options and Attachments To expand the sampling range of the HAPSITE sample collecting bags can be used and special VX Conversion Tubes can be attached. 2.10.1 Probe Nut Assembly The Probe Nut Ferrule orientation is critical for attaching a bag sample or VX Conversion Tube. -
Page 76: Attaching A Bag Sample
HAPSITE Smart Operating Manual 2.10.2 Attaching a Bag Sample When situations call for collecting samples to be run later, various sampling bags can be used. Before attaching a Tedlar® Bag to the Probe, refer to section 2.10.1, Probe Nut Assembly, on page 2-37 to ensure proper ferrule orientation in the probe nut. -
Page 77: Vx-G Conversion Tube Installation
HAPSITE Smart Operating Manual 2.10.3.1 VX-G Conversion Tube Installation The HAPSITE probe has a 3/16" Swagelok® nut installed at the end of the probe. Inside this nut is a two piece ferrule set consisting of a front and back ferrule. These must be in place and in the proper orientation to create a leak free seal. -
Page 78: Vx-G Conversion Tube Removal
HAPSITE Smart Operating Manual Insert the VX-G Conversion Tube into the Swagelok nut. Make sure the tube is firmly seated into the front ferrule. This positions the nut approximately 1/2 inch from the end of the tube. See Figure 2-54. -
Page 79: Batteries
HAPSITE Smart Operating Manual 2.11 Batteries The battery provides power to the HAPSITE to allow portability. Under optimum conditions, the battery has a 2 to 3 hour life. HINT: To test a battery, push on the TEST button on the end of the battery. In the elongated triangle, green lights will appear, the number indicates the percentage of remaining life in the battery in 20% increments. -
Page 80: Battery Charger
HAPSITE Smart Operating Manual 2.11.2 Battery Charger The auxiliary Battery Charger (part number 930-470-G1) is a simple, integrated unit which operates from AC power and charges one, two, or three HAPSITE batteries in 15 hours or less. CAUTION The Battery Charger is not sealed against moisture, debris, or contamination. -
Page 81: Battery Charger Connections And Startup
HAPSITE Smart Operating Manual 2.11.2.2 Battery Charger Connections and Startup Plug the power cord into the connector at the right rear of the Battery Charger, then into a grounded outlet. The ON light will illuminate. (The Battery Charger does not have a power switch). - Page 82 HAPSITE Smart Operating Manual Red ......The receptacle (or the battery, if one is installed) has a problem. A flashing red light indicates that communication with the battery is unsuccessful.
-
Page 83: Portable Accessories
HAPSITE Smart Operating Manual 2.12 Portable Accessories Portability is an important HAPSITE feature. The following accessories facilitate portability. 2.12.1 HAPSITE and Headspace Sampling System Strap Attach the HAPSITE and Headspace Sampling System straps as illustrated below Figure 2-59: Figure 2-59 Attaching the HAPSITE Strap... -
Page 84: Hapsite Backpack
HAPSITE Smart Operating Manual 2.12.2 HAPSITE Backpack The backpack is a light weight, high quality hiker’s backpack, modified to securely mount the HAPSITE. 2.12.2.1 Adjustment of the Backpack To adjust the backpack, proceed as follows. Put on the empty backpack. -
Page 85: Care Of The Backpack
HAPSITE Smart Operating Manual 2.12.2.2 Care of the Backpack Avoid exposing the backpack to solvents and other active chemicals. Avoid storing the backpack to direct sunlight. Wash the backpack as necessary with water and mild soap. CAUTION... - Page 86 HAPSITE Smart Operating Manual WARNING Risk of electrical shock. Be careful when using the Hot Swap Cable. Connect the Hot Swap Cable L connector to the battery first, then plug the power connector into the HAPSITE 24 V (dc) power port.
-
Page 87: Storing The Hot Swap Cable
HAPSITE Smart Operating Manual 2.13.2 Storing The Hot Swap Cable The Hot Swap Cable and battery have exposed electrical connections. Protect the connections from exposure to moisture or contaminated environments by wrapping the battery and cable connection in a protective plastic bag when not in use. See Figure 2-62. - Page 88 HAPSITE Smart Operating Manual This page is intentionally blank. 2 - 50...
-
Page 89: Operating Hapsite In Portable Mode
HAPSITE Smart Operating Manual Chapter 3 Operating HAPSITE in Portable Mode 3.1 Starting the HAPSITE in Portable Mode Starting the HAPSITE in Portable Mode refers to using the HAPSITE without the laptop computer. Required Materials HAPSITE (Analytical Module) ... - Page 90 HAPSITE Smart Operating Manual Figure 3-1 The Power Switch To warm up the system and perform a tune check, a method must be chosen to run, unless a startup method has been activated. Press 1, then SEL. See Figure 3-2.
- Page 91 HAPSITE Smart Operating Manual Figure 3-3 Choosing a Method Once a method is selected, the HAPSITE will automatically check the pressures in the gas canisters, and begin to heat up the system. When the heating sequence is completed the software will check the tune of the instrument and automatically make any necessary adjustments.
- Page 92 HAPSITE Smart Operating Manual Figure 3-4 Front Panel Display Checking Pressures, Heating and Tuning 3 - 4...
- Page 93 HAPSITE Smart Operating Manual Figure 3-5 Autotune Results When the warm-up is complete the start Method prompt will appear. Press RUN when ready to sample. See Figure 3-6. NOTE: Press ESC to not perform the method. Figure 3-6 Method Ready to Run Screen...
-
Page 94: Quick Reference Sop - Heat-Up And Tune
HAPSITE Smart Operating Manual 3.1.1 Quick Reference SOP - Heat-up and Tune Insert the Internal Standard and Carrier gas canisters. Insert a charged battery Connect the AC to DC power converter power supply. Press the power button on the inside of the front panel. -
Page 95: Run Method
HAPSITE Smart Operating Manual Figure 3-7 HAPSITE Front Panel LCD Main Menu 3.2.1 Run Method The method menu has three options, as shown in Figure 3-8. After selecting Run Method, the Method window appears. NOTE: The Method Menu is user configurable. The standard configuration is shown in this manual. -
Page 96: Service Module
HAPSITE Smart Operating Manual Recent Methods ....Provides access to recently collected files. Highlight a file and press SEL to review the data. GCMS ..... . . Provides access to data files collected in GC/MS mode. - Page 97 HAPSITE Smart Operating Manual Figure 3-10 Service Module Screen Attach SM ....Service Module menu selection number 1 will Attach HAPSITE, creating a vacuum in the HAPSITE mass spectrometer.
-
Page 98: System
Figure 3-13 System Window Selected from Main Menu System menu selection number 1 is Update Software. This selection requires the updated HAPSITE Smart software to have been previously copied to the HAPSITE Root Directory. NOTE: The Update Software function is best accomplished from the Laptop. - Page 99 HAPSITE Smart Operating Manual Figure 3-14 NEG Options Screen NEG Options menu selection 1, NEG Status, shows current NEG conditions. Figure 3-15 NEG Status Screen NEG Options menu selection 2, Use NEG, selects when the NEG pump will be used to provide vacuum.
- Page 100 HAPSITE Smart Operating Manual No Service Module ... . . Option 2 is selected to use the NEG pump only when there is not a Service Module providing the vacuum. This is the preferred selection for a HAPSITE with a NEG installed.
- Page 101 HAPSITE Smart Operating Manual Vent HAPSITE ....Used to vent the HAPSITE to atmosphere when attached to the Service Module. Activate NEG....Will start the NEG activation or reactivation process.
-
Page 102: Exit
Reboot System ....Reboots the system. Completes power down and restart cycle. Restart Program ....Restarts the HAPSITE Smart software. 3 - 14... - Page 103 HAPSITE Smart Operating Manual Standby Modes Extended ....Used as an alternative to shutting down the HAPSITE. In Extended Standby Mode, the NEG is heated and the ION pump remains on to maintain vacuum in the MS and a higher state of readiness.
-
Page 104: Stat
HAPSITE Smart Operating Manual 3.2.6 STAT The STAT button on the HAPSITE keypad will display other information about the system. Figure 3-22 will appear when the STAT button is pressed. Figure 3-22 STATUS Screen with SYS (System) Selected On the left side of the display, the status of 14 items may be monitored by pressing the Up and Down arrow button then pressing SEL. - Page 105 HAPSITE Smart Operating Manual HEAD ......Headspace Information: Headspace Supply Pressure; Headspace Temperatures. SITU ......SituProbe Information: SituProbe temperatures and pressure.
-
Page 106: Survey Mode
HAPSITE Smart Operating Manual 3.3 Survey Mode The Survey Mode is used for quick analysis and tentative results. The sampling period is approximately two minutes long. Refer to Chapter 6, Methods, for additional information. Sample the air away from the area of concern for one minute to serve as a background of VOC’s currently present in the area. - Page 107 HAPSITE Smart Operating Manual Figure 3-24 Selecting Survey Method using Recent Methods Menu 3 - 19...
- Page 108 HAPSITE Smart Operating Manual Figure 3-25 Selecting Survey Method using Method Menu After selecting 1. Survey, the software will make a quick check of the pressures and temperatures. NOTE: If the HAPSITE was not warmed up, then system will check the pressures, heat up (approximately twenty minutes) and run a Tune check (approximately 2 minutes).
- Page 109 HAPSITE Smart Operating Manual Figure 3-26 Survey Method in Progress HINT: The top line on the LCD displays the method being run, the second line displays the name of the data file, the third line displays the MAX TIC for the run and the TIC count at the cursor. The bottom line displays the run time.
-
Page 110: Quick Reference Sop - Survey Method
HAPSITE Smart Operating Manual To view the report, press SEL. Use the arrow keys to scroll through the pages. Figure 3-28. Figure 3-28 Search Results NOTE: Remember, all results are tentative. Run a GC/MS method for confirmation of the results. -
Page 111: Gc/Ms Mode With Loop
HAPSITE Smart Operating Manual 3.4 GC/MS Mode with Loop This method is used for analyzing samples with concentration levels in the low part per million (ppm) to high part per billion (ppb) range. This is commonly the second method used when trying to detect unknowns in the environment. Depending on circumstances, the Survey mode may be used to quickly and tentatively identify chemicals prior to the use of this GC/MS method. - Page 112 HAPSITE Smart Operating Manual From the Main Menu select Run Method by either pressing 1 then SEL or using the up and down arrow to highlight the selection and then press SEL. This will access the Method Menu. See Figure 3-30.
- Page 113 HAPSITE Smart Operating Manual Select the method Air 15 min Loop by highlighting it and pressing SEL. The software will check pressures and temperatures and when ready, the RUN prompt will appear. Press the RUN button to start the method. See Figure 3-32.
- Page 114 HAPSITE Smart Operating Manual The HAPSITE will now take 15 minutes for the sample to be processed through the HAPSITE. The chromatogram will appear on the Front Panel. See Figure 3-33 to see an example of a run in progress.
-
Page 115: Quick Reference Sop - Loop Method
HAPSITE Smart Operating Manual Figure 3-34 Front Panel Report 3.4.1 Quick Reference SOP — Loop Method From the main menu on the front panel highlight Run Method and press SEL. Highlight GCMS, and press SEL. Highlight Loop, and press SEL. -
Page 116: Gc/Ms Mode With Tri-Bed Concentrator
HAPSITE Smart Operating Manual 3.5 GC/MS Mode with Tri-Bed Concentrator This method is used for analyzing samples with concentration levels in the low part per billion to high part per trillion range. This method is used when the loop method fails to detect a chemical. - Page 117 HAPSITE Smart Operating Manual Highlight Concentrator in the GCMS menu and press SEL. See Figure 3-37. Figure 3-37 Selecting the Physical Configuration Select 3 min Carbon Conc Cleanout and press SEL. See Figure 3-38. Figure 3-38 Selecting the 3 min Carbon Conc Cleanout Method The system will raise the column temperature to 150 °C, which will take a few...
- Page 118 HAPSITE Smart Operating Manual Figure 3-40 Front Panel Run Prompt Press the RUN button on the Front Panel or on the Probe. This run will take approximately three minutes to complete. The progress of the run can be seen on the Front Panel. See Figure 3-41.
- Page 119 HAPSITE Smart Operating Manual Figure 3-42 Selecting the Air 15 min Carbon Conc method Highlight the Air 15 min Carbon Conc menu option by using the up or down arrows in the Concentrator Menu and then press SEL. The software will check the pressures and temperatures and prompt when ready to run a sample.
-
Page 120: Quick Reference Sop - Tri-Bed Concentrator Cleanout
HAPSITE Smart Operating Manual CAUTION The concentrator feature is designed to enhance HAPSITE sensitivity when analyzing low concentration samples. The accumulated sample VOCs are transferred from the concentrator adsorbent bed to the HAPSITE as a concentrated sample. Care should be taken to avoid overloading the HAPSITE and causing excessive carryover of VOCs in subsequent runs. -
Page 121: Gc/Ms Mode With Tenax Concentrator
HAPSITE Smart Operating Manual 3.6 GC/MS Mode with Tenax Concentrator This method is used for analyzing samples with concentration levels in the low part per billion to high part per trillion range. This method is used when the loop method fails to detect a chemical and is similar to the Tri-Bed concentrator method. - Page 122 HAPSITE Smart Operating Manual Highlight Concentrator in the GCMS menu and press SEL. See Figure 3-46. Figure 3-46 Selecting the Physical Configuration Select 3 min Tenax Conc Cleanout and press SEL. The system will raise the column temperature to 150 °C, which will take a few minutes.
-
Page 123: Quick Reference Sop - Tenax Cleanout
HAPSITE Smart Operating Manual CAUTION The concentrator feature is designed to enhance HAPSITE sensitivity when analyzing low concentration samples. The accumulated sample VOCs are transferred from the concentrator adsorbent bed to the HAPSITE as a concentrated sample. Care should be taken to avoid overloading the HAPSITE and causing excessive carryover of VOCs in subsequent runs. -
Page 124: Gc/Ms Mode With Headspace Sampling System And Sample Loop In Portable Mode
HAPSITE Smart Operating Manual 3.7 GC/MS Mode with Headspace Sampling System and Sample Loop in Portable Mode The Headspace Sampling System is used to test liquid and soil samples. See Chapter 13, Headspace Sampling System for more information on the Headspace System. - Page 125 HAPSITE Smart Operating Manual Select the Headspace folder from the GCMS menu. See Figure 3-49. Figure 3-49 Selecting The Headspace Folder Select HSS 15 Min Loop. See Figure 3-50. Figure 3-50 Selecting The Headspace Method 3 - 37...
- Page 126 HAPSITE Smart Operating Manual Wait for heaters to stabilize and the Run prompt window to open. Figure 3-51. Figure 3-51 Front Panel Heat-up And Run Prompt Place the headspace needle in the 40 mL vial that contains the sample. Gently depress into sample vial.
- Page 127 HAPSITE Smart Operating Manual Figure 3-52 Headspace Needle Press the Run button on the front panel of the HAPSITE. When prompted (chromatogram completed), place the headspace needle in the purge vial and press SEL. See Figure 3-53. Figure 3-53 Purging the Head Space Review data.
-
Page 128: Quick Reference Sop - Gc/Ms Mode With Hss And Sample Loop In Portable Mode
HAPSITE Smart Operating Manual 3.7.1 Quick Reference SOP — GC/MS Mode with HSS and Sample Loop in Portable Mode From the Front Panel highlight Run Method, then press SEL. Highlight GC/MS, then press SEL. Select the Headspace folder from the GC/MS menu. - Page 129 HAPSITE Smart Operating Manual NOTE: Concentrator Cleanout methods require the probe to be attached. Select Run Method from the main menu on the front panel of the HAPSITE. Figure 3-54. Figure 3-54 Selecting Run Method from the Front Panel Select GCMS from the Method menu on the front panel of the HAPSITE. See Figure 3-55.
- Page 130 HAPSITE Smart Operating Manual Figure 3-56 Selecting the Headspace Folder Select HSS 15 Min Carbon Conc or HSS 15 min Tenax Conc method, depending on which concentrator is installed. See Figure 3-57. Figure 3-57 Selecting the HSS 15 Min Carbon Conc Method Wait for temperatures to stabilize.
- Page 131 HAPSITE Smart Operating Manual WARNING The headspace needle assembly may be hot. Figure 3-59 Loading the Wells Press the Run button on the front panel of the HAPSITE. See Figure 3-60. Figure 3-60 Run Prompt Wait for the method to run to completion. See Figure 3-61.
- Page 132 HAPSITE Smart Operating Manual Figure 3-61 Sample Run in Process When prompted, place the headspace needle in the purge vial and press SEL. Figure 3-62 Figure 3-63. Figure 3-62 Purge Needle Request Figure 3-63 HSS Purging 3 - 44...
- Page 133 HAPSITE Smart Operating Manual Review results at end of run. See Figure 3-64. Figure 3-64 Completed Run View report. See Figure 3-65. Figure 3-65 Sample Run Results on Front Panel 3 - 45...
-
Page 134: Quick Reference Sop - Gc/Ms With Hss And Concentrator In Portable Mode
HAPSITE Smart Operating Manual 3.8.1 Quick Reference SOP — GC/MS with HSS and Concentrator in Portable Mode Follow the instructions in Section 2.9.3, Installing the Tri-Bed Concentrator, on page 2-29 Section 2.9.4, Installing the Tenax or Carbopack Concentrator, on page 2-31 to install the concentrator tube. - Page 135 HAPSITE Smart Operating Manual Figure 3-66 Exit Option on Main Menu Arrow down or press 4 and SEL to select Standby Modes. See Figure 3-67 Figure 3-67 Selecting Standby Options Arrow down or press 2 and SEL to select Extended Standby. See Figure 3-68.
-
Page 136: Cold Standby
HAPSITE Smart Operating Manual Figure 3-69 Column Cooling Message Remove gas cans when prompted. Refer to Section 2.3.3.1, How to Change or Remove a Gas Canister, on page 2-8 for instructions. See Figure 3-70. Figure 3-70 System is in Extended Standby 3.10.2 Cold Standby... - Page 137 HAPSITE Smart Operating Manual Figure 3-71 Selecting Exit Option from Main Menu Arrow down or press 4 and SEL to select Standby Modes. See Figure 3-72. Figure 3-72 Selecting Standby Modes Arrow down or press 1 and SEL to select Cold Standby. See Figure 3-73.
-
Page 138: Shutdown System
HAPSITE Smart Operating Manual Figure 3-74 HAPSITE in Cold Standby 3.10.3 Shutdown System Proceed as follows to shutdown the HAPSITE system. Press the ESC button on the front panel until reaching the Main Menu. Arrow down or press 5 and SEL to select the Exit Menu. - Page 139 HAPSITE Smart Operating Manual Figure 3-75 Shutting Down the HAPSITE 3 - 51...
-
Page 140: Rebooting The Hapsite
HAPSITE Smart Operating Manual 3.10.4 Rebooting the HAPSITE Rebooting the HAPSITE is the same as powering off and powering on, similar to Ctrl+Alt+DEL on the laptop. This option can be used to force the HAPSITE to autotune or if the HAPSITE has frozen similar to a PC. -
Page 141: Restart Program
Wait for the HAPSITE to shutdown and restart. 3.10.5 Restart Program The Restart Program restarts the HAPSITE Smart software. This option is most commonly used after saving a previous tune file to the current default.tun file to. Press the ESC button on the front panel until reaching the Main Menu. - Page 142 Figure 3-80 Selecting Restart Program Option Arrow down or press 1 and SEL to confirm restart. See Figure 3-81. Figure 3-81 Confirming Restart Program HAPSITE will shutdown the HAPSITE Smart software, then restart the HAPSITE Smart software. 3 - 54...
-
Page 143: Wireless And Usb
Wireless and USB 4.1 Introduction The HAPSITE Smart has wireless communication along with a USB drive. The wireless option is designed for use with Smart IQ software version 1.30 or greater. Wireless and USB is available as an upgrade for older HAPSITE Smart instruments. -
Page 144: Fcc Information - Information For U.s.a. Users
Hapsite instrument, ONLY use the antenna that was originally supplied with the Hapsite instrument. If you damage the original antenna please contact INFICON's service department for a replacement antenna (see Chapter 17 for contact information). -
Page 145: Ic Notice - Information For Canadian Users
4.3 Wireless Range The HAPSITE Smart is equipped with an 802.11b wireless adapter. The typical range for a signal is 300 ft. (100 meters) line of sight with no obstructions. The following may degrade the signal: ... -
Page 146: Turning The Radio On
HAPSITE Smart Operating Manual 4.4 Turning the Radio On If wireless communication is desired, the radio must be turned on. Table 4-1 gives instructions for turning the radio on NOTE: When the HAPSITE radio is on, even if wireless communication is not being used, a radio signal is being transmitted. -
Page 147: Establishing Communication
HAPSITE Smart Operating Manual 4.5 Establishing Communication Wireless communication for the HAPSITE Smart is set up at the factory. Table 4-3 Table 4-4 can be used to verify the set up or correct any communication issues. HINT: Setting up communications in Smart IQ requires the user to be in Advanced Mode. -
Page 148: Configuring The Hapsite For Wireless Communication
HAPSITE Smart Operating Manual 4.5.2 Configuring the HAPSITE for Wireless Communication To set up wireless communication between the HAPSITE and laptop computer, Smart IQ must be configured to communicate with the HAPSITE by setting up the IP address. See Table 4-3... - Page 149 HAPSITE Smart Operating Manual Table 4-3 Adding a Sensor Icon in Smart IQ Step Description Enter the letter “H”, followed by the last 3 or 4 significant digits of the Serial Number of the HAPSITE that requires communication setup. (The...
-
Page 150: Setting The Ip Address
HAPSITE Smart Operating Manual 4.5.2.2 Setting the IP Address The second step to setting up communications is to set the IP address of the laptop computer for direct communication with the HAPSITE. Instructions for this are found in Table 4-4. - Page 151 HAPSITE Smart Operating Manual Table 4-4 Setting the IP Address Step Description From the Wireless Network Connection Status Window, select Properties. In the General tab, highlight Internet Protocol (TCP/IP), select Properties. 4 - 9...
- Page 152 HAPSITE Smart Operating Manual Table 4-4 Setting the IP Address Step Description Select Use the following IP address. Before entering the IP address from the front panel of the HAPSITE there are two important differences to note. The second set of numbers (210) ...
-
Page 153: Configuring The Laptop For Wireless Communication
HAPSITE Smart Operating Manual 4.5.3 Configuring the Laptop for Wireless Communication In order for wireless communication between the laptop and HAPSITE Smart to be successful, the radio on the laptop computer must be turned on. The basic steps for configuring the laptop for wireless communication are: Enable the radio on the laptop computer. -
Page 154: Turning The Radio Off
HAPSITE Smart Operating Manual 4.7 Turning the Radio Off If wireless communication is not desired, the radio on the HAPSITE Smart can be turned off. See Table 4-5 for directions. NOTE: When the HAPSITE radio is on, even if wireless communication is not being used, a radio signal is being transmitted. -
Page 155: Saving Files To The Usb
Table 4-6 gives instructions for saving files to the USB drive. HINT: Data is always saved to the hard drive on the HAPSITE Smart and, if connected to the laptop, data will be saved there as well. Saving files to the... - Page 156 HAPSITE Smart Operating Manual Table 4-6 Saving Files to the USB Drive (continued) Step Description Highlight the method type to review. (Survey or GC/MS) and press SEL. If the method was a GC/MS file, highlight the correct configuration (Loop, Concentrator or Headspace) and press SEL.
-
Page 157: Retrieving Files From The Usb Drive
HAPSITE Smart Operating Manual Table 4-6 Saving Files to the USB Drive (continued) Step Description When finished transferring files, open the front panel and remove the USB drive. See section for details on transferring the files from the USB drive to the laptop computer. - Page 158 HAPSITE Smart Operating Manual Table 4-7 Retrieving Files from the USB Drive (continued) Step Description Right click and select Copy. Right click in the destination directory and select Paste NOTE: The files need to be placed in the correct directory for viewing. For this...
-
Page 159: Reviewing The Data Retrieved From The Usb
HAPSITE Smart Operating Manual 4.10 Reviewing the Data Retrieved from the USB Files that have been transferred to the laptop can be reviewed in the Smart IQ software. Table 4-8 gives details on how to access the data files. Table 4-8 Data Review from the Laptop... - Page 160 HAPSITE Smart Operating Manual This page is intentionally blank. 4 - 18...
-
Page 161: Operating Hapsite In Laptop Mode
HAPSITE Smart Operating Manual Chapter 5 Operating HAPSITE in Laptop Mode 5.1 Starting the HAPSITE in Laptop Mode Starting the HAPSITE in Laptop Mode refers to using the HAPSITE in conjunction with the laptop computer. Refer to Chapter 8, Smart IQ Software for additional information on the Smart IQ Software installed on the laptop computer. - Page 162 HAPSITE Smart Operating Manual Figure 5-1 Power Switch The laptop computer needs to be powered up. Locate the power cord and (optional) mouse, plug them into the appropriate places in the back of the computer. Open the laptop and press the power button.
- Page 163 HAPSITE Smart Operating Manual Click the Run Method icon. See Figure 5-4. NOTE: In order to heat up the system and run a tune check (which takes 20 minutes total), a method must be selected. Once the method is selected, the HAPSITE will automatically heat up and run Autotune.
- Page 164 HAPSITE Smart Operating Manual Double-click on the Run Method icon. A dialog is displayed to choose the type of method to run. This example is a GC/MS run, so double-click the GCMS folder. See Figure 5-5. NOTE: Use the buttons at the top of the dialog to choose the methods on the HAPSITE.
- Page 165 HAPSITE Smart Operating Manual Choose a folder that matches the physical configuration of the HAPSITE. In this example the Sample Loop is installed; double-click the Loop folder. See Figure 5-6. Figure 5-6 Selecting the Physical Configuration 5 - 5...
- Page 166 HAPSITE Smart Operating Manual Choose the desired method. Double-click the Air 15 min Loop or select another method and click OK. See Figure 5-7. Figure 5-7 Selecting the Air 15 Min Loop Method The software will check the pressure in the gas canisters, heat up all the zones, run an autotune (if required), and make tune adjustments as necessary.
-
Page 167: Quick Reference Sop - Starting The Hapsite
HAPSITE Smart Operating Manual 5.1.1 Quick Reference SOP — Starting the HAPSITE Refer to Section 2.3, Basic Assembly, on page 2-4 for assembly instructions. Turn on the HAPSITE. Plug in the power supply for the laptop computer. Connect the laptop to the HAPSITE with the crossover ethernet cable or enable... -
Page 168: Survey Mode
HAPSITE Smart Operating Manual 5.2 Survey Mode The Survey Mode is used for quick analysis and tentative results. The sampling period is two minutes long. Sample the air away from the area of concern for one minute to serve as a background to determine what, if anything, currently exists in the area. - Page 169 HAPSITE Smart Operating Manual Ensure the dialog is showing HAPSITE methods and double-click the Survey folder. Alternately, select the Survey folder and click OK. See Figure 5-10. Figure 5-10 Selecting the Survey Folder Double-click the Survey.mth method. Figure 5-11. Figure 5-11 Selecting Survey Method...
- Page 170 HAPSITE Smart Operating Manual The heaters window will pop-up to show the status of the heated zones. See Figure 5-12. Figure 5-12 Warming Heated Zones Click Run from the pop-up window. See Figure 5-13. Figure 5-13 Run Prompt Allow the sample probe to sample background for 1 minute, then hold the sample probe over the sample until a peak is seen or for one minute.
- Page 171 HAPSITE Smart Operating Manual Figure 5-15 Data Review Icon Select the Survey folder and then look for the data file that was just run. See Figure 5-16. Full instructions for data review are found in Chapter 9, Data Review. HINT: Remember that this is a tentative identification. For a more positive identification, run a GC/MS method for confirmation of the results.
-
Page 172: Quick Reference Sop - Running Survey Mode
HAPSITE Smart Operating Manual 5.2.1 Quick Reference SOP — Running Survey Mode Double-click the Smart IQ software icon. Double-click the Run Method icon. Double-click the Survey Folder. Double-click the Survey method. Wait for heaters to reach the set temperatures. Click the RUN button in the pop-up window, sample background for one minute. -
Page 173: Gc/Ms Mode With Loop
HAPSITE Smart Operating Manual 5.3 GC/MS Mode with Loop This method is used for analyzing samples with concentration levels in the low part per million (ppm) to high part per billion (ppb) range. This is commonly the second method used when trying to detect unknowns in the environment. Depending on circumstances, the Survey mode may be used to quickly and tentatively identify chemicals prior to the use of this GC/MS method. - Page 174 HAPSITE Smart Operating Manual Double-click the GCMS folder on the HAPSITE. See Figure 5-19. Figure 5-19 Choosing the Mode of Operation 5 - 14...
- Page 175 HAPSITE Smart Operating Manual Double-click the Loop folder. See Figure 5-20. Figure 5-20 Choosing Loop Folder Double-click the Air 15 min Loop method. Or, select the method and click OK. Figure 5-21. Figure 5-21 Selecting the Method 5 - 15...
- Page 176 HAPSITE Smart Operating Manual NOTE: At this point the HAPSITE will check pressures and temperatures. A prompt will appear when the HAPSITE is ready to run the method. Click the Run button in the pop-up window of the software. See Figure 5-22.
-
Page 177: Quick Reference Sop - Running Gcms Loop Method
HAPSITE Smart Operating Manual Figure 5-24 Complete Air 15 min Loop Review results at the end of the run. 5.3.1 Quick Reference SOP — Running GCMS Loop Method Double-click the Smart IQ icon to open the software. Double-click the Run Method icon. -
Page 178: Gc/Ms Mode With Tri-Bed Concentrator
HAPSITE Smart Operating Manual 5.4 GC/MS Mode with Tri-Bed Concentrator This method is used for analyzing samples with concentration levels in the low part per billion to high part per trillion range. This method is used when the loop method fails to detect a chemical. - Page 179 HAPSITE Smart Operating Manual Figure 5-27 Selecting GC/MS Folder using the Methods Menu Double-click the Concentrator folder. See Figure 5-28. Figure 5-28 Selecting the Physical Configuration 5 - 19...
- Page 180 HAPSITE Smart Operating Manual Select 3 min Carbon Conc Cleanout and press OK. See Figure 5-29. Figure 5-29 Selecting the 3 min Carbon Conc Cleanout Method The system will raise the column temperature to 150 °C, which will take a few minutes.
- Page 181 HAPSITE Smart Operating Manual NOTE: The TIC_Max number on the top left of the LCD must be less that 500,000 for the concentrator tube to be considered clean. See Figure 5-32. If the TIC_Max number is greater than 500,000, repeat the 3 min Carbon Conc Cleanout method until the TIC_Max number is less than 500,000.
- Page 182 HAPSITE Smart Operating Manual Double-click the GCMS folder. See Figure 5-35. Figure 5-35 Selecting GC/MS Folder using the Methods Menu Double-click the Concentrator folder. See Figure 5-36. Figure 5-36 Selecting the Physical Configuration 5 - 22...
- Page 183 HAPSITE Smart Operating Manual Highlight the Air 15 min Carbon Conc and then press OK. See Figure 5-37. Figure 5-37 Selecting the Air 15 min Carbon Conc method The software will check the pressures and temperatures and prompt when ready to run a sample. See Figure 5-38.
-
Page 184: Quick Reference Sop - Tri-Bed Concentrator Cleanout
HAPSITE Smart Operating Manual CAUTION The concentrator feature is designed to enhance HAPSITE sensitivity when analyzing low concentration samples. The accumulated sample VOCs are transferred from the concentrator adsorbent bed to the HAPSITE as a concentrated sample. Care should be taken to avoid overloading the HAPSITE and causing excessive carryover of VOCs in subsequent runs. -
Page 185: Gc/Ms Mode With Tenax Concentrator
HAPSITE Smart Operating Manual 5.5 GC/MS Mode with Tenax Concentrator This method is used for analyzing samples with concentration levels in the low part per billion to high part per trillion range. This method is used when the loop method fails to detect a chemical. - Page 186 HAPSITE Smart Operating Manual Double-click the GCMS folder. See Figure 5-41. Figure 5-41 Choosing the Mode of Operation 5 - 26...
- Page 187 HAPSITE Smart Operating Manual Double-click the Concentrator folder. See Figure 5-42. Figure 5-42 Selecting the Physical Configuration Double-click the 3 min Tenax Conc Cleanout.mth method. NOTE: The system will raise the column temperature to 150 °C, which will take a few minutes. When all the zones are heated, the Run Method prompt will be displayed.
- Page 188 HAPSITE Smart Operating Manual NOTE: The TIC_Max number must be less than 500,000 for the concentrator tube to be considered clean. If the TIC_Max number is greater than 500,000, repeat the 3 min Tenax Conc Cleanout.mth method until the TIC_Max number is less than 500,000.
- Page 189 HAPSITE Smart Operating Manual Double-click the GCMS folder. See Figure 5-45. Figure 5-45 Choosing the Mode of Operation Double-click the Concentrator folder. See Figure 5-46. 5 - 29...
- Page 190 HAPSITE Smart Operating Manual Figure 5-46 Selecting the Physical Configuration Select the Air 15 min Tenax Conc.mth method and click OK. Click Run on the pop-up window in the software. Once Run is selected, hold the probe over the sample the entire time the sample pump is running from the Linepurge until the Concfill event is completed.
-
Page 191: Quick Reference Sop - Tenax Cleanout
HAPSITE Smart Operating Manual 5.5.1 Quick Reference SOP — Tenax Cleanout Double-click the Smart IQ software icon. Double-click on the Run Method icon. Double-click the GCMS folder. Double-click the Concentrator folder. Double-click the 3 min Tenax Conc Cleanout method. Click the RUN button displayed in the pop-up window on the laptop. This run will take three minutes to complete. - Page 192 HAPSITE Smart Operating Manual 5.6 GC/MS Mode with Headspace Sampling System and Sample Loop Installed The Headspace Sampling System is used to test liquid and soil samples. Refer to Chapter 13, Headspace Sampling System for more information on the Headspace System.
- Page 193 HAPSITE Smart Operating Manual Double-click the Headspace folder. See Figure 5-48. Figure 5-48 Selecting the Physical Configuration Double-click the HSS 15 min Loop.mth method. See Figure 5-49. Figure 5-49 Selecting the Headspace Loop Method 5 - 33...
- Page 194 HAPSITE Smart Operating Manual Wait for the heaters to reach the set temperatures (see Figure 5-50). Figure 5-50 Heater Display Refer to Section 13.2.3, Loading the Wells, on page 13-10 for detailed instructions and information on loading the sample vials into the wells.
- Page 195 HAPSITE Smart Operating Manual Click the Run button. See Figure 5-52. Figure 5-52 Run Button When prompted at the end of the run, place the headspace needle in a clean, empty purge vial and press Select. See Figure 5-53. Figure 5-53 Purge Vial Prompt...
-
Page 196: Gc/Ms Mode With Headspace Sampling System And Concentrator
HAPSITE Smart Operating Manual 5.6.1 Quick Reference SOP — GC/MS Mode with HSS and Sample Loop Double-click the Smart IQ software icon. Double-click the Run Method icon. Double-click the GCMS folder. Double-click the Headspace folder. Double-click the HSS 15 Min Loop method. - Page 197 HAPSITE Smart Operating Manual Follow the instructions in Section 5.4.1, Quick Reference SOP — Tri-Bed Concentrator Cleanout, on page 5-24; or Section 5.5.1, Quick Reference SOP — Tenax Cleanout, on page 5-31; depending on the type of concentrator installed. NOTE: Concentrator Cleanout methods require the probe to be attached.
- Page 198 HAPSITE Smart Operating Manual Double-click the Headspace folder. See Figure 5-48. Figure 5-55 Selecting the Physical Configuration Select HSS 15 Min Carbon Conc or HSS 15 min Tenax Conc method depending on which concentrator is installed. See Figure 5-56. Figure 5-56 Selecting the HSS 15 Min Carbon Conc Method...
- Page 199 HAPSITE Smart Operating Manual Wait for temperatures to stabilize. See Figure 5-57. Figure 5-57 HSS Heater Display The sample must be heated for 20 minutes prior to sampling. Place the headspace needle in the 40 mL vial that contains the sample. Gently depress into sample vial.
- Page 200 HAPSITE Smart Operating Manual Figure 5-59 Sample Run in Process When prompted at end of run, place the headspace needle in a clean, empty purge vial and press Sel. See Figure 5-60. Figure 5-60 Purge Needle Request 5 - 40...
-
Page 201: Quick Reference Sop - Gc/Ms Mode With Hss And Concentrator
HAPSITE Smart Operating Manual Review results at the end of the run. See Figure 5-61. Figure 5-61 Completed Run 5.7.1 Quick Reference SOP - GC/MS Mode with HSS and Concentrator Refer to Chapter 13, Headspace Sampling System for more information on the Headspace System. -
Page 202: Situprobe Methods
HAPSITE Smart Operating Manual Wait for temperatures to stabilize. Following a 20 minute sample temperature equilibration in the HSS oven, gently depress the headspace needle into the 40 mL sample vial. Wait for the method to run. When prompted at end of run, place the headspace needle in the purge vial and press Sel. -
Page 203: Introduction To Methods
HAPSITE Smart Operating Manual Chapter 6 Methods 6.1 Introduction to Methods The versatility of the HAPSITE lies in the variety of methods available. The HAPSITE can be run in GC/MS mode, MS only mode ("Survey"), and uses various sampling accessories to extend its capabilities. The accessories include concentrator tubes, the Headspace Sampling System and the SituProbe. - Page 204 HAPSITE Smart Operating Manual CAUTION All unknown samples should first be collected with the Survey Method to estimate the total VOC response. The Survey Method allows the tester to gain knowledge of how far away to hold the probe from the sample and if a concentrator needs to be used.
-
Page 205: Building A Survey Method Library File
HAPSITE Smart Operating Manual 6.2.1 Building a Survey Method Library File Survey methods can be designed for data collection in three manners: without identification. qualitative analysis and identification based on match with the AMDIS library. Quantitative/Qualitative analysis, identification and quantification from a target library and unknown identification using the AMDIS library. - Page 206 HAPSITE Smart Operating Manual Figure 6-2 Data File Information Page During the Calibration run, enter the concentration level of the calibration standard and select the corresponding units. A description can be entered to help identify the sample. Open the Calibrate Function using the Toolbar Icon or the drop down menu. Select Survey as the file type and select OK.
- Page 207 HAPSITE Smart Operating Manual The spectrum of the analyte must be recorded to the target compound library. The spectrum is recorded by placing the scan cursor on the response curve (e.g., the TIC) at a location that represents the concentration of the calibration standard. See Figure 6-4.
-
Page 208: Gc/Ms Methods
HAPSITE Smart Operating Manual The spectrum must be recorded to the library. Highlight the spectrum window and click the right mouse button to bring up the spectrum menu. Highlight Grab Spectrum for Template to record the spectrum. Refer to Figure 6-5. - Page 209 HAPSITE Smart Operating Manual Monitoring (SIM) or Full Scan MS modes. The sensitivity of a GC/MS Loop method (full scan) will be in the approximate range of high ppb to low ppm. The sensitivity of a GC/MS concentrator method (full scan) will be in the range from high ppt to low ppb.
-
Page 210: Building A Gc/Ms Method And Target Compound Library File
HAPSITE Smart Operating Manual SituProbe ....Refer to section 3.9, SituProbe, on page 3-46 section 5.7.1, Quick Reference SOP - GC/MS Mode with HSS and Concentrator,... -
Page 211: Tune
HAPSITE Smart Operating Manual Chapter 7 Tune 7.1 Introduction to Autotune and Manual Tune Ensuring the mass spectrometer (MS) performance requires the MS functionality to be checked at startup and after 8 hours of continuous operation. The process of verifying the function of the Mass Spectrometer is called Tune. Tune can be accomplished by either the Autotune program, where the system sets and adjust all parameters, or by a Manual Tune where the user sets the parameters. -
Page 212: Autotune
HAPSITE Smart Operating Manual 7.2 Autotune There are two versions of the Autotune program: Short and Long. The Short Autotune program is the daily maintenance tune of the HAPSITE and is pre-configured to run automatically at startup, after the system has been powered OFF and ON and a method selected, or after an eight hour period of operation. - Page 213 Autotune is intended to be run when an ionizer has been replaced or the Short Autotune cannot maintain system performance. The Long Autotune must be invoked from the Manual Tune program. NOTE: INFICON recommends the use of Short Autotune as the primary technique for auto tuning from Manual Tune. 7 - 3...
-
Page 214: Starting Autotune From The Manual Tune Screen
HAPSITE Smart Operating Manual 7.2.1 Starting Autotune from the Manual Tune Screen Double-click on the Smart IQ icon. See Figure 7-5. Figure 7-5 Smart IQ Icon Double-click on the Tune Icon. See Figure 7-6. HINT: Only the Advanced Access level can run Manual Tune. -
Page 215: Viewing A Tune Report
HAPSITE Smart Operating Manual 7.3 Viewing a Tune Report The Tune Report can be viewed from the front panel display or from the laptop computer. See Figure 7-9. Tune Reports are stored on the hard drive of the HAPSITE. Therefore, to access Tune Reports from the laptop computer, the HAPSITE must be online. - Page 216 HAPSITE Smart Operating Manual To view the Tune Report from the front panel display select the STAT button and then Tune. See Figure 7-10. Pressing the SEL key will then display the last Tune Report. To scroll through the Tune Report, use the up or down arrows on the keypad.
-
Page 217: Autotune Failure
HAPSITE Smart Operating Manual 7.4 Autotune Failure Occasionally Autotune may fail. Follow the procedures outlined below before continuing. When Autotune fails, check IS canister pressure and expiration date. Replace if necessary. Check reservoir pressure to ensure the reservoir pressure is at least 400 kPa. - Page 218 HAPSITE Smart Operating Manual Select default.tun file and press OK. See Figure 7-13. Figure 7-13 Select "default.tun" File Highlight a "good" tune report. Select Export to Tune File. See Figure 7-14. Figure 7-14 Export Good Tune to Current Tune File...
-
Page 219: Manual Tune Settings And Controls
HAPSITE Smart Operating Manual Highlight default.tun. Click OK. See Figure 7-15. NOTE: This will overwrite the default.tun file. See section 10.3 on page 10-11 for information on transferring files to the PC if saving a copy of this file is desired prior to overwriting it. - Page 220 HAPSITE Smart Operating Manual Figure 7-16 Manual Tune Screen CAUTION Adjusting other parameters without proper training may damage the instrument. 7 - 10...
-
Page 221: Tool Bar
HAPSITE Smart Operating Manual 7.5.1 Tool Bar Figure 7-17 Manual Tune Tool Bar Filament On/Off..Turns the emission On or Off. Multiplier On/Off ..Turns the Electron Multiplier On or Off. -
Page 222: Tune Drop Down Menu
HAPSITE Smart Operating Manual Show Bounds ... Displays the peak centroid and the target peak width at 10% peak height. Save Tune ....Saves the Tune File. -
Page 223: Tune Properties Window
HAPSITE Smart Operating Manual Show Tune Status Panel ..Displays the Tune and Mass Calibration Status panel. Show Mass Calibration Status . . . Displays the Mass Calibration Status panel. View Tune Reports ... . . Displays the Tune Reports screen. -
Page 224: Tune Control Panel
HAPSITE Smart Operating Manual Show Target ....Displays the target bar for the mass peak center and peak width at 10% peak height. -
Page 225: Tune Parameters
HAPSITE Smart Operating Manual The Tune Control Panel (refer to Figure 7-20) provides access to display individual mass peak scans by selecting the check box next to the Mass. The measured intensity and resolution are displayed. The Target Resolution is also displayed and can be modified. - Page 226 HAPSITE Smart Operating Manual Running Tune Base Peak Gain ..Current measured Base Peak Gain. NOTE: The base peak gain will switch to Red when BPG is outside the target range. Auto Resolve ....Adjusts the resolution of all Mass Peaks to the target resolution.
-
Page 227: Peak Scan Window
HAPSITE Smart Operating Manual 7.5.4 Peak Scan Window The Peak Scan Window, see Figure 7-21, displays the mass peak and enables the user to manually control/tune the mass peak. Figure 7-21 The Peak Scan Window and Controls 7.5.4.1 Peak Scan Window Controls Mass Adjust . - Page 228 HAPSITE Smart Operating Manual Y Axis Scale ....Increase or decreases the Y axis scale. NOTE: For the following controls, The Left Mouse Button (LMB) is used to increment by 1, shift-LMB increments by 10, Ctrl-LMB increments by 100.
-
Page 229: Full Scan Window
HAPSITE Smart Operating Manual 7.5.5 Full Scan Window The Full scan window (see Figure 7-22) is used for display purposes to evaluate the performance of the MS. All tune adjustments should be made using the Peak Scan windows. Figure 7-22 Full Scan Window and Controls Zoom . -
Page 230: Tune And Mass Calibration Status
HAPSITE Smart Operating Manual Figure 7-23 Setting the Full Scan Range Default Scan ranges of 45 - 300 AMU or 1 - 45 AMU can be selected. NOTE: The EM voltage will automatically be decreased by 500 volts (default) anytime a range below mass 45 is scanned. Custom scan ranges can also be viewed by selecting the custom button and entering a start and end mass. - Page 231 HAPSITE Smart Operating Manual Figure 7-25 Tune and Mass Calibration Status Menu Mass ......The mass number of the peak. When a mass is selected to display, the mass immediately below and above are also displayed.
-
Page 232: Mass Calibration Status
HAPSITE Smart Operating Manual Max OK Target Percentage ..Displays the maximum percentage required for the mass peak to meet the OK High criteria. Base Peak ....Displays the base peak that the mass peak percentage is measured against. -
Page 233: Right Mouse Button (Rmb) Menus
HAPSITE Smart Operating Manual Diff(mmu) ....Adjustment to DAC value for mass peak alignment, since the last mass calibration check. 100 mmu = 0.1 AMU. -
Page 234: Rmb In Tune Status Window
HAPSITE Smart Operating Manual Mass Centered Width... Width in AMU that correctly aligns the calibration peak with the correct position on the mass axis. Lock Cursor to Peak ... Locks the cursor to the mass peak for adjustment of mass position. -
Page 235: Rmb On Y Axis
Remember when attempting a manual tune, if after a few cycles through the manual tune process the HAPSITE is still not tuning, call INFICON Support for additional guidance. Below are general guidelines for performing a manual tune. -
Page 236: Adjusting Base Peak Gain
HAPSITE Smart Operating Manual 7.6.1 Adjusting Base Peak Gain Double-click on the Smart IQ icon. See Figure 7-30. Figure 7-30 Smart IQ Icon Double-click on the Tune Icon. See Figure 7-31. HINT: Manual Tune can only be opened in Advanced User Mode. - Page 237 HAPSITE Smart Operating Manual Figure 7-33 Checking BPG and EM Voltage If yes, then the BPG does not need adjustment. Proceed to Step If no, the BPG will need to be adjusted. Proceed to Step 7 - 27...
- Page 238 HAPSITE Smart Operating Manual Figure 7-34 BPG Low To raise the BPG, increase the value of the EM Voltage by 25 volts. To lower the BPG, decrease the value of the EM Voltage by 25 volts. See Figure 7-34. Check the BPG value to see if the BPG is now in the range (0.8 to 2.0).
-
Page 239: Adjusting Resolution
HAPSITE Smart Operating Manual Figure 7-35 BPG Good with Mass 50 Low If all mass percentages are within limits, then the instrument is tuned. Proceed section 7.6.3, Adjusting the Ion Energy, on page 7-31. If any mass percentages are High or Low (red boxes), then proceed to section 7.6.2, Adjusting Resolution, on page... - Page 240 HAPSITE Smart Operating Manual Figure 7-36 Actual Resolution and Target Resolution If the red box is in the Min Target Percentage column, the Target Resolution will need to be increased. Use increments of 0.05 to change the Target Resolution. If the Target Resolution reaches 1.10, proceed to...
-
Page 241: Adjusting The Ion Energy
HAPSITE Smart Operating Manual If the Min or Max Target Percentage is red and the Target Resolution is within 0.85 and 1.10, repeat Step 3 Step 4 until the masses all no longer show red. If the Min or Max Target Percentage is red and the Target Resolution is at the end of the range, either 0.85 and still needs to be lowered to correct the... - Page 242 HAPSITE Smart Operating Manual Figure 7-38 Ion Energy Needs to be Increased NOTE: When adjusting ion energy, there are low and high limits for each mass. Make sure manual adjustments stay within the following limits: Table 7-1 Manual Adjustments Guidelines...
- Page 243 Proceed to section 7.6.1, Adjusting Base Peak Gain, on page 7-26. If this procedure is repeated more than 2 times, contact INFICON. Figure 7-39 Good Manual Tune Save the Tune file. Click Save Tune button on the upper Toolbar. See...
- Page 244 HAPSITE Smart Operating Manual Figure 7-41 Tune Saved Exit Manual Tune by closing the Tune window. The HAPSITE is ready for sampling. 7 - 34...
-
Page 245: Smart Iq Software
Chemical Identification System and its accessories. The software controls instrument operation and runs analyses. Smart IQ can also view and interpret data collected by HAPSITE Smart, managing files, and creating reports. The Smart IQ software operates on a Personal Computer (PC). -
Page 246: Computer System Requirements
Communications between the HAPSITE and Laptop Computer with a Crossover Ethernet Cable, on page 8-20 if communications need to be established. With Smart IQ running: Place the CD containing the HAPSITE Smart software into the CD drive of the laptop. 8 - 2... - Page 247 Click on My Computer to open the folder. Click on the D drive (or the CD drive for the laptop if different) to highlight. Press Open. See Figure 8-3. Figure 8-3 Open the CD Drive Select the HAPSITE Smart Software folder. Press Open. See Figure 8-4. 8 - 3...
- Page 248 HAPSITE Smart Operating Manual Figure 8-4 Selecting the HAPSITE Smart Software Folder Select the HAPSITE.upd file. Press Open. See Figure 8-5. Figure 8-5 Selecting the HAPSITE.upd File Click OK when the prompt "Update Complete" is displayed. See Figure 8-6. Figure 8-6 Update Complete Prompt Continue with Section 8.3.2, Installing and Updating the Smart IQ Software, on...
-
Page 249: Installing And Updating The Smart Iq Software
8.3.2 Installing and Updating the Smart IQ Software CAUTION Before performing this procedure, perform Section 8.3.1, Updating the HAPSITE Smart Software, on page 8-2. Click on My Computer. Click on the D drive (or the CD drive for the laptop if different) to highlight. Press Open. See Figure 8-3. - Page 250 HAPSITE Smart Operating Manual Figure 8-8 Selecting the Setup Icon The InstallShield Wizard will load. See Figure 8-9. Figure 8-9 InstallShield Wizard An installation wizard will automatically open to the Welcome Screen. Select Next. See Figure 8-10. 8 - 6...
- Page 251 HAPSITE Smart Operating Manual Figure 8-10 Welcome Screen When prompted to select the components and destination folder of the Smart IQ program. Select the components desired and press Next. See Figure 8-11. CAUTION Do not change the destination folder for the Smart IQ program.
- Page 252 HAPSITE Smart Operating Manual Figure 8-12 Copying Data Files Screen A WinZip window will appear asking to unzip the NIOSH Database. Select Unzip. See Figure 8-13. Figure 8-13 Unzip Prompt A window will appear indicating the unzip was successful, press OK. See Figure 8-14.
- Page 253 HAPSITE Smart Operating Manual NOTE: The Smart IQ Application window shown in Figure 8-16 may appear first, the Smart IQ Setup window shown in Figure 8-15, Step 10 needs to be addressed before proceeding to Step Figure 8-15 Installation Complete The Smart IQ Application window will appear containing the Smart IQ Application icon.
-
Page 254: Installing/Updating Nist And Amdis
HAPSITE Smart Operating Manual 8.4 Installing/Updating NIST and AMDIS The NIST and AMDIS mass spectral libraries are powerful tools for identifying VOCs contained in samples. Insert the NIST Installation CD into the CD Drive of the laptop. Select Start>> Run. See Figure 8-17. - Page 255 HAPSITE Smart Operating Manual Figure 8-19 NIST and AMDIS Installation Welcome Window On the Setup window, select Typical. See Figure 8-20. Figure 8-20 NIST and AMDIS Installation Setup Window Press Next. See Figure 8-20. When prompted to choose the software destination location, ensure the Install check boxes are checked for NIST and AMDIS and press Next.
- Page 256 HAPSITE Smart Operating Manual Figure 8-21 NIST and AMDIS Program Designation Window When prompted to find and connect to user libraries make the selections shown Figure 8-22 and press Next. Figure 8-22 NIST and ADMIS Libraries When prompted to select a program folder, use the default shown in...
- Page 257 HAPSITE Smart Operating Manual Press Next to start copying files. See Figure 8-24. Figure 8-24 NIST and AMDIS Installation Copying Files If a window appears asking to overwrite existing files, press Yes. See Figure 8-25. Figure 8-25 Overwrite Files Prompt The installation will proceed automatically, lasting a few minutes.
-
Page 258: Reloading Default Hapsite Methods
HAPSITE Smart Operating Manual Figure 8-27 NIST and AMDIS Installation Complete Window 8.5 Reloading Default HAPSITE Methods All of the default methods are saved on the laptop. These methods can be loaded and modified or used as they are. 8.5.1 Locating Default Methods Right click on the HAPSITE icon to access the menu. - Page 259 Figure 8-29 HAPSITE Default Methods The methods found in the Default Methods window are general purpose methods for each of the HAPSITE Smart configurations. 3 min Carbon Conc cleanout..Method to clean the Tri-Bed and Carbopack Concentrator tubes prior to analysis, 3 minutes.
- Page 260 HAPSITE Smart Operating Manual HSS 15 Min Tenax Conc..VOC and Chemical Warfare Agent Headspace Solid/Liquid analysis using Tenax Concentrator, 15 minute analysis time. SP 15 Min Carbon Conc..General purpose analysis for VOCs in a...
-
Page 261: Loading A Default Method To The Hapsite
HAPSITE Smart Operating Manual 8.5.2 Loading a Default Method to the HAPSITE From the Default Methods Menu, select the default method to load. See Figure 8-29. HINT: Refer to Section 8.5.1, Locating Default Methods, on page 8-14 to find the default methods. - Page 262 HAPSITE Smart Operating Manual Double-click the GCMS folder (or Survey folder for a Survey method). See Figure 8-31. HINT: Make sure HAPSITE is selected at the top of the Save Method File dialog. See Figure 8-31. Figure 8-31 Choosing the GCMS Folder...
- Page 263 HAPSITE Smart Operating Manual Double-click on the appropriate folder for the method to be saved. SeeFigure 8-32. HINT: If using a Survey Method, skip Step Figure 8-32 Choosing the Concentrator Folder The default name is automatically modified by Smart IQ, or it can be manually renamed.
-
Page 264: Establishing Communications Between The Hapsite And Laptop Computer With A Crossover Ethernet Cable
HAPSITE Smart Operating Manual 8.6 Establishing Communications between the HAPSITE and Laptop Computer with a Crossover Ethernet Cable Establishing communications between the HAPSITE, laptop and Service Module (if connected) is necessary to perform many advanced functions. The sections which follow explain the steps needed to establish communications. - Page 265 HAPSITE Smart Operating Manual Figure 8-35 Add HAPSITE to Port Settings List The newly added HAPSITE will appear in the HAPSITE List. Press OK. See Figure 8-36. Figure 8-36 New HAPSITE on Port Settings List Press OK on the System Properties Window. See Figure 8-34.
-
Page 266: Configuring The Hapsite For Communications
HAPSITE Smart Operating Manual Figure 8-38 HAPSITE Sensor Icon with Blue "X" Continue with Section 8.6.2, Configuring the HAPSITE for Communications, on page 8-22. 8.6.2 Configuring the HAPSITE for Communications If communication between the HAPSITE and the laptop could not be established using Section 8.6.1, Setting Up Communications, on page 8-20... - Page 267 HAPSITE Smart Operating Manual Figure 8-40 Network Connections Classic View Click on Connect to, drag the cursor over Show All Connections and click left mouse button. Click on Local Area Connection. See Figure 8-41. Figure 8-41 Network Connections Standard View The Local Area Connection Status Window will open, press Properties.
- Page 268 HAPSITE Smart Operating Manual Figure 8-42 Local Area Connection Status Window In the General tab, scroll down and highlight Internet Protocol (TCP/IP), press Properties. See Figure 8-43. Figure 8-43 Selecting Internet Protocol (TCP/IP) 8 - 24...
- Page 269 HAPSITE Smart Operating Manual Select Use the following IP address and enter the IP address of the HAPSITE, (refer to Step 3), with the number 128 added to the third number of the first line of the IP address. This is necessary in order for the system to configure communications properly.
-
Page 270: Establishing Communication With The Service Module
HAPSITE Smart Operating Manual 8.6.3 Establishing Communication with the Service Module Service Module communications will be established automatically if a COM port has been selected. Smart IQ has been set up with COM1 communications, so Smart IQ will automatically recognize and communicate when a Service Module is connected using a RS-232 cable. - Page 271 HAPSITE Smart Operating Manual After the COM port has been selected, the COM port will appear in the Port list in the System Properties window, as shown in Figure 8-48. Figure 8-48 Port List in Port Settings Tab of System Properties Press the OK button and the system will automatically establish communications with a Service Module (if powered on and connected) using a RS-232 cable.
-
Page 272: Establishing Communications Between The Hapsite And Laptop Computer Using The Wireless Connection
HAPSITE Smart Operating Manual 8.7 Establishing Communications between the HAPSITE and Laptop Computer Using the Wireless Connection Refer to Chapter 4, Wireless and USB for information on configuring the HAPSITE Smart to communicate via the wireless connection with the laptop computer. - Page 273 HAPSITE Smart Operating Manual Check the box for Use Startup Method. See Figure 8-51. Click on Browse to select a method. See Figure 8-51. Double-click on the desired method folder (Example:GCMS). See Figure 8-52. Figure 8-52 Selecting Startup Method 8 - 29...
- Page 274 HAPSITE Smart Operating Manual Double-click on the desired configuration (EXAMPLE: Loop). See Figure 8-53. Figure 8-53 Method Folders 8 - 30...
- Page 275 HAPSITE Smart Operating Manual Double-click on the desired method. (EXAMPLE: Air 15 min Loop) See Figure 8-54. Figure 8-54 Choose Method 8 - 31...
-
Page 276: Setting The Hapsite Time Zone
HAPSITE Smart Operating Manual Press OK. See Figure 8-54. The selected method should be entered on the line below Use Startup Method. Figure 8-55. Figure 8-55 Startup Method Selected Press OK to finish. Refer to Figure 8-55. This method will automatically run whenever the HAPSITE is turned on. - Page 277 HAPSITE Smart Operating Manual Figure 8-57 HAPSITE Sensor Icon Click on the HAPSITE Time Zone tab in the Properties Window. See Figure 8-58. Figure 8-58 HAPSITE Time Zone Tab Select the correct Time Zone from the drop-down list above the map.
-
Page 278: Access Levels
HAPSITE Smart Operating Manual 8.10 Access Levels There are two user Access Levels which can be set in Smart IQ: Normal and Advanced. Neither Access Level is installed with a password. Normal users can run samples, view results and reports, and perform basic operations with HAPSITE Smart. -
Page 279: Setting Or Changing The Access Level Password
HAPSITE Smart Operating Manual The current access level of the system is shown at the bottom right corner of the Smart IQ program, in the Status Bar, as shown in Figure 8-61 below. Figure 8-61 Current Access level, shown in Status Ba 8.10.2 Setting or Changing the Access Level Password... -
Page 280: Smart Iq Controls
HAPSITE Smart Operating Manual HINT: Smart IQ remembers the last access level when closed. When the program is re-opened, the system will default to the last access level used. If a password has been set, the user will be required to enter the correct password to open with Advanced access. -
Page 281: System Setup Main Menu
HAPSITE Smart Operating Manual 8.11.1 System Setup Main Menu The Main Menu in the System Setup view includes entries which can change, depending upon the item selected and the user Access Level selected. See Figure 8-65. Figure 8-65 System Setup Main Menu 8.11.1.1 File... -
Page 282: Tools Menu
The Help menu provides version information about Smart IQ. At this time, no online help is provided with the program. 8.12 Software Versions for the HAPSITE and Laptop Table 8-1 Smart IQ and HAPSITE Smart Compatibility Guide Smart IQ HAPSITE... -
Page 283: Hapsite Icons
HAPSITE Smart Operating Manual HAPSITEs use HAPSITE Smart software. Laptops use SMART IQ software. Even though the two programs usually are distributed on the same CD, the programs are not the same and require separate installations. Refer to Section 8.3, Installing and Updating the HAPSITE Smart and Smart IQ Software, on page 8-2. - Page 284 HAPSITE Smart Operating Manual Icon Description Accesses methods to initiate a run. Accesses the NIST software and Library. Accesses the NIOSH Database. Accesses the AMDIS software and library. Allows transfer of files between HAPSITE and Laptop. Allows editing and creating methods.
- Page 285 HAPSITE Smart Operating Manual Icon Description Accesses Data file information. Accesses Help. (Not available.) Returns the current screen to the System Setup screen. Accesses Smart IQ software information. Accesses the Calibrate function. Accesses the ID Unknowns function. Navigates through files in Data Review.
- Page 286 HAPSITE Smart Operating Manual This page is intentionally blank. 8 - 42...
-
Page 287: Data Review
Data Review 9.1 Introduction to Data Review The Data Review section of the HAPSITE SMART software allows access to previously acquired data for review and analysis, or to view data that is being acquired in real time. Data Review functionality includes: Search quickly for individual components using the NIST Library and the F7 ... -
Page 288: Accessing The Data Review Feature
HAPSITE Smart Operating Manual 9.2 Accessing the Data Review Feature The Data Review feature can be accessed as follows: Double click the Data Review icon, see Figure 9-1, or Figure 9-1 Data Review Icon Right click the HAPSITE icon. The menu shown in Figure 9-2 will appear. - Page 289 There are three data file extensions that are available: *.hps......HAPSITE Smart data file extension *.hpz......Compressed HAPSITE Smart data file extension *.acq.
- Page 290 HAPSITE Smart Operating Manual Figure 9-4 Sections of the Data Review Screen TIC/RIC Window Scan/Spectrum Control Window Panel Window TIC/RIC Window ....This window displays the Total Ion Chromatogram.
-
Page 291: Data Review Toolbar
HAPSITE Smart Operating Manual 9.3 Data Review Toolbar The Data Review toolbar is shown in Figure 9-5. Figure 9-5 Data Review Toolbar ......Aborts a running method. -
Page 292: Rmb Menus Within Data Review
HAPSITE Smart Operating Manual ......Open AMDIS Program......Opens the previous file in the current directory. - Page 293 HAPSITE Smart Operating Manual Figure 9-7 RMB Menu in TIC/RIC Window Common Scale ....When checked all RIC plots will be plotted to the same scale; when not checked all RIC plots will be individually scaled to 100%.
-
Page 294: Rmb In The Spectrum Display Window
HAPSITE Smart Operating Manual Label the Peaks ....Labels identified peaks with retention time and area. Change Search Parameters..Displays the peak search parameters, enables modification of the parameters. - Page 295 HAPSITE Smart Operating Manual Show Spectrum Cursor ..Shows the Spectrum Cursor in the Spectrum window. Show Description ....Will display the description of the Scan Cursor location and normalization mass.
-
Page 296: The Tic/Ric Display Functions
HAPSITE Smart Operating Manual 9.5 The TIC/RIC Display Functions There are tools available to assist in the Data Review process. 9.5.1 How to Access the Scan Cursor The specific scan displayed in the Spectrum window is accessed using the Scan Cursor in the TIC window. -
Page 297: Steps Required To Perform A One Point Background Subtraction
HAPSITE Smart Operating Manual 9.5.2.1 Steps Required to Perform a One Point Background Subtraction Figure 9-10 Original Chromatograph Using the Scan Cursor, select a peak of interest in the chromatograph. Refer to Figure 9-10. Perform a manual NIST search by pressing "F7" key or by checking the box in the Control Panel. - Page 298 HAPSITE Smart Operating Manual Figure 9-11 Using Background Subtract Select the background subtract blue triangle from the lower left side of the chromatogram and drag to an area on either side of the selected peak. Refer Figure 9-11. The identification is now chlorobenzene with three duplications. The first ID has an SI# of 706.
-
Page 299: Background Subtraction Using A Range Of Points
HAPSITE Smart Operating Manual 9.5.2.2 Background Subtraction Using a Range of Points Figure 9-12 Using Background Subtraction to Remove a Smaller Peak When multiple points in an area such as a smaller peak on the side of a larger peak complicate the chromatograph, the background can be widened to remove an area. -
Page 300: Additional Features Of The Background Tool
HAPSITE Smart Operating Manual 9.5.2.3 Additional Features of the Background Tool If the cursor is placed over B1 or B2, and the right mouse button is clicked, see Figure 9-13, a menu will pop-up that will give the analyst the option to: Figure 9-13 Background Subtract RMB Menu Remove . -
Page 301: Steps Required To Range Acquisition
HAPSITE Smart Operating Manual Figure 9-14 Using the Range Tool 9.5.3.1 Steps Required to Range Acquisition Place cursor on the triangle with Two Red Vertical Lines (R1). Click and hold the LMB, then drag R1 to the location where the scans should be averaged. -
Page 302: Additional Features Of The Range Tool
HAPSITE Smart Operating Manual 9.5.3.2 Additional Features of the Range Tool If the cursor is placed over R1, and the RMB is clicked, the following menu items are available. Refer to Figure 9-15 Range Tool RMB Menu Remove ..... . Remove the Range cursor Select Mass for Integration . - Page 303 HAPSITE Smart Operating Manual 9-16. Once the zoom range has been set, move the mouse cursor within the range, the cursor will turn into a magnifying glass. Click the LMB, and the display will zoom in on the area selected.
-
Page 304: Using The Zoom Spectrum Function
HAPSITE Smart Operating Manual Figure 9-17 Zoomed Spectrum To UNZOOM, either Click on the Magnifying Glass with the "-" inside or move the cursor below the x-axis of the TIC window, then click the LMB. 9.6.2 Using The Zoom Spectrum Function Zooming into a spectrum requires selection of the zoom buttons on the right side of the spectrum window. -
Page 305: Displaying Reconstructed Ion Chromatograms (Ric)
HAPSITE Smart Operating Manual Place cursor within desired zoom area, the cursor will turn into a magnifying glass. Click the LMB. See Figure 9-19. Figure 9-19 Placing Cursor in Area to Be Zoomed To unzoom, either one of the following actions will accomplish the task: Click on the magnifying glass on the right hand side of the window with the "-"... -
Page 306: Ric Plot To Locate Specific Compounds
HAPSITE Smart Operating Manual Figure 9-20 RIC Plot When the box in the Control Panel labeled -RIC is checked, the TIC/RIC window will display the TIC minus the RIC selected. 9.7.1 RIC Plot to Locate Specific Compounds NOTE: Before running NIST, position the scan cursor over the peak of interest in the TIC plot. - Page 307 HAPSITE Smart Operating Manual Enter the name of the compound, to be located, in the box on the top left of the screen. EXAMPLE: Benzene. See Figure 9-23. Figure 9-23 NIST Name Entry The spectrum and information about the compound will appear in the two boxes to the right of the names column.
- Page 308 HAPSITE Smart Operating Manual Figure 9-26 RIC Plot for Suspected Benzene One Mass Selected The compound may be present in the unknown sample if all three masses (peaks) align in the RIC plot. Use F7 NIST program to confirm identification of the suspected compound.
-
Page 309: Nist Library Searches
HAPSITE Smart Operating Manual 9.8 NIST Library Searches A TIC or sequential SIM peak qualitative identification can be accomplished using the Smart IQ software utilizing the integrated features of the NIST Mass Spectral Database. Figure 9-28 Searching a Library Figure 9-28 shows the TIC Window, the Spectrum Window and the Control Panel Window. - Page 310 Figure 9-29 Search Results Display Additional information may be obtained by checking the boxes in the Control Panel. These boxes, when checked, will provide information so that the NIST Match and the spectrum generated by HAPSITE Smart IQ can be compared. See Figure 9-30.
-
Page 311: Searching Peaks
If the Search Result Masses box is checked, the masses and relative intensities are displayed for the NIST reference spectrum. If the Scan Spectrum Masses box is checked, the HAPSITE Smart IQ masses and relative intensities are displayed for the unknown spectrum. - Page 312 HAPSITE Smart Operating Manual Figure 9-31 Peaks Menu Choices To view and adjust the search parameters, select Change Search Parameters from the submenu. Figure 9-32 displays the parameters that will determine what peaks are found. The Peak Search Parameters window is divided into sections of Peak Search, AMDIS, Libraries, and Elimination Rules.
- Page 313 HAPSITE Smart Operating Manual Figure 9-33 Post Analysis Display Figure 9-33, both the Search for Peaks function and the Label the Peaks function have been selected. Therefore, the retention time of each peak is displayed in the TIC/RIC window. At the top of the TIC/RIC window, the black triangles mark each peak that met the search parameters.
- Page 314 HAPSITE Smart Operating Manual Qualitative identification of each peak found by the Search function can be done by checking either Search in NIST, Search in AMDIS or both. After the search is selected and the Search button is clicked, the screen shown in Figure 9-35 displayed.
-
Page 315: Analyzing Data Using Amdis
9.8.2 Analyzing Data Using AMDIS AMDIS is an additional program provided by NIST and can be used to analyze data generated by the HAPSITE Smart IQ. AMDIS is the acronym for Automated Mass Spectrum Deconvolution and Identification System. AMDIS utilizes its own databases. The HAPSITE Smart IQ utilizes the HAPSITE.msl AMDIS library. - Page 316 HAPSITE Smart Operating Manual When the analyst invokes AMDIS, upon completion of the analysis, the program returns the Results Screen. See the inset in Figure 9-37. The results screen includes: Retention Time Window Identifications Window Component Window ...
-
Page 317: Accessing Nist From Amdis
HAPSITE Smart Operating Manual Figure 9-38 AMDIS Confirm Window This window shows the complete analysis, peak by peak. If there are any peaks that were not identified by AMDIS, use the NIST database to identify them. 9.8.3.1 Accessing NIST from AMDIS... -
Page 318: Analyzing Data Using Nist
HAPSITE Smart Operating Manual Figure 9-39 NIST Database Search 9.8.4 Analyzing Data Using NIST By right clicking on the Spectrum window, the NIST menu appears. See Figure 9-40. Figure 9-40 NIST Menu Grab Spectrum for NIST (F9)..This function will grab the spectrum selected and put the spectrum in the grab file for use within the NIST program. -
Page 319: How To Grab Spectra/Utilize The Full Nist Program
HAPSITE Smart Operating Manual Clear NIST Grab file ... . Clears the grab file of previous files. Switch to NIST Program (F8) ..Starts the full NIST program and will place any files that are in the grab file into the Spec List, then begin analysis of them. -
Page 320: Reporting And Printing Data
Notice the tabs at the bottom of the NIST window. These are multiple windows that make use of all the functions in the NIST software. The NIST program is a third-party software that comes with the HAPSITE Smart IQ software. Instructions on how to fully utilize the NIST and AMDIS software are included in the NIST Mass Spectral Database folder on the laptop and the HELP selection of either program from the Menu selection. - Page 321 HAPSITE Smart Operating Manual Figure 9-43 Search Reports Screen There are a total of three maximum reports available, depending upon the method used to generate the data was configured. They are: Summary ..... Generates a report based upon the Qualitative and Quantitative results.
-
Page 322: Reports Generated From Peaks Menu
HAPSITE Smart Operating Manual Figure 9-44 Qualitative Report in Excel 9.9.2 Reports Generated from Peaks Menu The function Show Current Search Results has the option to generate a qualitative search report, utilizing either the NIST database, the AMDIS database, or both. -
Page 323: Smart Iq Hot Keys
HAPSITE Smart Operating Manual Figure 9-45 Peak Found Search Report 9.10 Smart IQ Hot Keys Table 9-1 Smart IQ Hot Keys Keys Functions Crtl+o Open data file Datafile Info Search NIST (when a peak is selected) Alt+N Next NIST Hit (when NIST is showing) - Page 324 HAPSITE Smart Operating Manual This page is intentionally blank. 9 - 38...
-
Page 325: Saving And Managing Files
10.1.1 Method Files Method files are created using the HAPSITE Smart IQ software to direct the instrument how to collect and analyze samples. Once created and saved, a Method file can be selected to run samples. Method files are created and saved, using the Method Editor, either to a directory on the PC or to the HAPSITE hard drive. - Page 326 Figure 10-3. Figure 10-3 Entering a New Method File Name HINT: The HAPSITE Smart software is case sensitive. Folder names on the HAPSITE and laptop must be exactly the same. Example: Bakeout and Bakeout NOT bakeout or BAKEOUT. 10 - 2...
-
Page 327: Event Log Files
HAPSITE Smart Operating Manual 10.1.2 Event Log Files Event Log Files are created automatically by the system to record system state information (such as heating, valve changes, etc.) for future reference. These files are created daily when running the HAPSITE using the PC software. These files are saved on the PC. -
Page 328: Tune Files
HAPSITE Smart Operating Manual The system allows flexibility to add Date or Date and Time as a prefix or suffix, or use a different naming convention if Use Default Filename is not selected. 10.1.4 Tune Files If Tune is performed automatically (Autotune as part of normal operation), then the file name is specified as part of the Method file. - Page 329 HAPSITE Smart Operating Manual When an attempt is made to exit manual tune without saving, a window will appear asking "Do you want to save the changes to a tune file?". See Figure 10-6. To save the file, press Yes. If not saving the tune file, press No. Pressing Cancel will abort exiting tune without saving the tune file.
-
Page 330: Data Review
HAPSITE Smart Operating Manual Figure 10-8 Overwrite Existing Tune File Confirm Window To overwrite the file, select Yes, otherwise select No. If No is selected, the Save Tune File window will appear. 10.1.5 Data Review Data review is used to view and analyze data files. To open files, double click on... - Page 331 HAPSITE Smart Operating Manual be Data/Default. To select a file to open, open a folder then click on the desired data file to open, then click the OK button. See Figure 10-10, which shows a data file being selected. HINT: Smart IQ data files are saved with a .hps extension at the end of the filename.
-
Page 332: Saving Files To The Pc
HAPSITE Smart Operating Manual Figure 10-11 Viewing Results in the Data Review Window Data files stored on the PC may also be opened for review. To open files on the PC, select the PC button at the top of the Recall Data window, then select the appropriate file from the PC hard drive. -
Page 333: Method Files
HAPSITE Smart Operating Manual 10.2.1 Method Files Method files are created using the HAPSITE Smart IQ software to direct the instrument how to collect and analyze samples. Once created and saved, a Method file can be selected to run samples. Method files are created and saved using the Method Editor, either to a folder on the PC or to the HAPSITE hard drive. -
Page 334: Event Log Files
If a number of days is selected, each time HAPSITE Smart IQ is run the HAPSITE will erase files which are older than the number of days selected. -
Page 335: Data Files
10.3 Transferring Files Between the HAPSITE and PC Transfer of files between the HAPSITE and PC in the HAPSITE Smart IQ software can be performed using Manage Files. To open the Manage File dialog, either right click on a sensor icon then select Manage Files, or select a sensor then double click on the Manage Files icon in the System Setup view. - Page 336 HAPSITE Smart Operating Manual Figure 10-16 Manage Files Dialog Window In the Manage Files window, the left side displays PC files while the right side displays HAPSITE files. The current folder directory is listed for both the PC and HAPSITE at the top of the window. The PC drive can be changed by clicking on the Drive pull-down list and selecting another available drive.
-
Page 337: Saving, Retrieving And Reviewing Files Using The Usb Drive
HAPSITE Smart Operating Manual Figure 10-18 Manage Files - Delete Confirm Window Folders or individual files or groups of files within a folder may be moved between the PC and HAPSITE. To move a single file, make sure the desired destination directory is already opened, then click on the file and press the arrow button to move the file to the selected directory. - Page 338 HAPSITE Smart Operating Manual This page is intentionally blank. 10 - 14...
-
Page 339: Method Editor
HAPSITE Smart Operating Manual Chapter 11 Method Editor 11.1 The Method Editor The HAPSITE Method File provides for the total identification and qualitative analysis of volatile compounds in the sample. The main components covered in this section, which are used to build the HAPSITE Method File, are the Inlet... - Page 340 HAPSITE Smart Operating Manual The Search page sets the Calibration/Quantitation component, which designates which library file to access and search, the global GC/MS peak designation/integration parameters, and various reporting options. The Data page, which sets the Data File (file extension.hps) component, and ...
-
Page 341: Description Page
HAPSITE Smart Operating Manual Figure 11-3 Error Information Button The order of pages that appear in Wizard mode for different collection and analysis modes are listed in Table 11-1. Table 11-1 Method Editor Page Flow GC/MS Full GC/MS SIM Survey Full... - Page 342 HAPSITE Smart Operating Manual Figure 11-4 Method Editor Description Page Mode of Analysis GC/MS ..... . . This analysis uses both the Gas...
-
Page 343: Full Scan Method
HAPSITE Smart Operating Manual Collection Mode Full Scan ..... This mode scans all the masses across a given range. This is used for general analysis... -
Page 344: Sim Method
HAPSITE Smart Operating Manual if the instrument is to operate without the external computer, the appropriate files must be downloaded to the HAPSITE, the instrument must be tuned. (see Chapter 7, Tune), the instrument must be calibrated to the target compounds. (See... -
Page 345: Startup Page
HAPSITE Smart Operating Manual the instrument must be tuned, either with the Smart tune or manual tune program, (see Chapter 7, Tune), the instrument must be calibrated to the target compounds, as defined in the analyte library file. (See Chapter 12, Target Compound Methods.) - Page 346 HAPSITE Smart Operating Manual Figure 11-6 Method Editor Startup Page for Survey Methods The parameters on the Startup page are: Use Internal Standard ..This option is shown on the Startup Page for survey methods.
-
Page 347: Headspace
HAPSITE Smart Operating Manual Probe ......The target temperature the system will achieve in the Probe before starting data acquisition. -
Page 348: Situprobe
HAPSITE Smart Operating Manual 11.3.2 SituProbe To create a SituProbe method, choose the SituProbe Sample Input Device. This will bring up another temperature setting window for setting the SituProbe oven and transfer line temperatures. See Figure 11-9. Figure 11-9 SituProbe Parameters SituProbe Temperatures (C) Oven . - Page 349 HAPSITE Smart Operating Manual For example, in Figure 11-10, increasing the Run Time will increase the Duration of the Backflush Inlet State and will result in an increased Start time for the Standby event. The increase will also result in an increase to the Hold Time for the 180 degrees Temperature in the GC Temperature Profiles.
-
Page 350: Inlet States
HAPSITE Smart Operating Manual Figure 11-11 Inlet Page for GC/MS SIM 11.4.1 Inlet States Inlet States specify the valve settings for the HAPSITE and control the sampling, analysis and clean-out of the HAPSITE or HAPSITE with Headspace Sampling System. The Inlet component of the Method will contain multiple Inlet States, which are programmable for duration but not for valve settings. - Page 351 HAPSITE Smart Operating Manual Start ......This is the starting time of each Inlet State and is not programmable. The first state can start before "time zero";...
- Page 352 HAPSITE Smart Operating Manual Figure 11-13 Valve States for an Inlet State Event Figure 11-14 Customizing the Valve States for an Inlet State Any Inlet State can be selected from the pull-down within the Inlet State column as shown in Figure 11-15.
- Page 353 HAPSITE Smart Operating Manual Figure 11-15 Accessing the Inlet States The following choices are available in the Inlet States column: Loopfill..... . . This sets the GC valves so that the sample pump pulls the sample either through the sample loop.
- Page 354 HAPSITE Smart Operating Manual Survey ..... . . This Inlet State sets the GC valves and turns on the sampling pump so the sample will by-pass the GC and be directed to the inlet of the MS for real time analysis.
-
Page 355: Gc Temperature Profile
HAPSITE Smart Operating Manual The suggested HSSample duration is approximately 15 seconds. HSPurge ..... This state sets the valves for nitrogen to flow through the lines and needle assembly, then through the transfer line. -
Page 356: Use Internal Standard
HAPSITE Smart Operating Manual being edited. The Start time of each profile is automatically derived from the preceding profile. The Ramp Time is automatically calculated based on the Ramp Rate and Temp entries and cannot be edited directly. Figure 11-16 Method Editor Inlet Page: GC Temperature Profiles The Insert key does not work for this grid. -
Page 357: Concentrator Selection
HAPSITE Smart Operating Manual Figure 11-18 Scan Events The Filament Delay is a delay, after the start of analysis, which must pass before the filament is turned on. This delay should be set as a protection for the filament; enough delay should be set to allow the components of the air peak or solvents to pass through the Mass Spectrometer before turning the filament on. -
Page 358: Situprobe Flow Parameter
HAPSITE Smart Operating Manual 11.4.7 SituProbe Flow Parameter SituProbe Flow Pressure controls the flow rate of nitrogen through the SituProbe during the Sample and Purge states. This parameter is only available when the SituProbe is used. 11.5 Tune Page The Tune Page is divided into two pages - Report and Param - that each provide information about the Tune file. - Page 359 HAPSITE Smart Operating Manual Figure 11-19 Method Editor Tune Parameter Page 11 - 21...
- Page 360 HAPSITE Smart Operating Manual Figure 11-20 Method Editor Tune Parameter Page - Show Details 11 - 22...
-
Page 361: Full Scan Page
HAPSITE Smart Operating Manual Figure 11-21 Method Editor Tune Report Page 11.6 Full Scan Page The Full Scan page contains the mass range and other parameters of the Mass Spectrometer operation (see Figure 11-22). The full parameter set can be assigned a Scan Set Name for easy identification, if desired. - Page 362 HAPSITE Smart Operating Manual Figure 11-22 Method Editor Full Scan Page The following Mass Spectrometer parameters can be programmed: Start Mass ....The mass at which the Mass Spectrometer will start to scan.
-
Page 363: Sim Page
HAPSITE Smart Operating Manual End Mass..... The mass at which the Mass Spectrometer will end a scan. The end mass can be set from 1-300 AMU. -
Page 364: Sim For Gc/Ms
HAPSITE Smart Operating Manual 11.7.1 SIM for GC/MS Figure 11-23 Method Editor SIM Page for GC/MS Analysis SIM for the GC/MS mode allows for creation of multiple sets of masses. Each set has a Begin Time and an End Time which must be entered when programming the Set. - Page 365 HAPSITE Smart Operating Manual NOTE: One of the column entries listed above must be highlighted to enable editing of the Mass list for that specific Scan Set. Mass ......The masses for each set are entered here in a list.
-
Page 366: Sim For Survey
HAPSITE Smart Operating Manual 11.7.2 SIM for Survey Figure 11-24 SIM Page, Differences for Survey Analysis The SIM page for Survey mode provides the ability to create only one Scan Set of multiple masses. Refer to Figure 11-24. Scan set name ....A name should be created here to reference the specific set of ions being detected. - Page 367 HAPSITE Smart Operating Manual Trigger Mode ....When selected, programs this method to start stop based on the Run button. When the RUN button is pressed the sample pump will turn on, signaling the beginning of the run.
-
Page 368: Search Page
HAPSITE Smart Operating Manual 11.8 Search Page The Search Page provides all the criteria needed to qualify and quantify data. Calibrated libraries will need to be created in order to quantify results. The setting of parameters on this page mostly govern the actions that take place during front panel operation of the HAPSITE. -
Page 369: Setting Up A Qualitative Search
HAPSITE Smart Operating Manual There are four choices in the Search Mode drop down menu. No Search ....If this option is highlighted no library search... - Page 370 HAPSITE Smart Operating Manual Figure 11-27 lists the different analysis types available for the search. Figure 11-27 Type of Analysis Analysis Type Simple - Uses only the mass spectral data for the individual target compounds in the library to identify the compounds. The calculated match factor depends only on the quality of the match between the deconvoluted component spectra and the target library spectra.
- Page 371 HAPSITE Smart Operating Manual Low Mass ....The lowest mass in the range of masses being considered. For most cases involving the HAPSITE this value is 45.
- Page 372 HAPSITE Smart Operating Manual Figure 11-30 The Libraries To view other library choices, select the Browse button, refer to Figure 11-30. There are several small and specific libraries in addition to the HAPSITE.MSL See Figure 11-31. Many of the compounds found in these small libraries, that can be detected by the HAPSITE, are incorporated in the HAPSITE.MSL file.
- Page 373 Figure 11-31 Library Options Advanced Settings Figure 11-32 Advanced Settings NOTE: INFICON recommends leaving the Advance Settings at their default settings. Noise Thresholding Level ..Refers to the minimum signal recorded. Will filter out noise along the baseline.
-
Page 374: Setting Up A Quantitative Search
HAPSITE Smart Operating Manual Reject Bin ....Rejects peaks with less than set number of scans. Deconvolution Level ... High/Medium/Low, Default Medium: As the level of resolution goes up, the program separates peaks that are closer together. - Page 375 HAPSITE Smart Operating Manual Figure 11-34 Library Search Parameters Button Clicking the Library Search Parameters button opens the window shown in Figure 11-35. The center section refers to the AMDIS parameters and is exactly the same as described in Figure 11-26.
- Page 376 HAPSITE Smart Operating Manual Peak Resolution (dx) ... This number indicates the minimum number of scans between two peaks which is used to determine whether to split a peak into two or consider it as one peak.
- Page 377 HAPSITE Smart Operating Manual The Reset button allows for default values to be reset in the Peak Search window. Figure 11-36. Figure 11-36 Resetting Default Search Parameters The Elimination Rules section gives parameters for peaks to be reported. There are three options. See Figure 11-37.
- Page 378 HAPSITE Smart Operating Manual Display ..... . When enabled, a concentration can be entered which will determine the critical concentration level at which a peak will be displayed.
-
Page 379: Data Page
HAPSITE Smart Operating Manual 11.9 Data Page The Data Page provides the capability to customize the data filenames, and storage of data files, for the Method. Defaults are provided that assure automatic storage of data in a filename format that increments with each data file stored. - Page 380 HAPSITE Smart Operating Manual File increment digits ... This parameter sets the number of digits used in the index, starting at 000 and incrementing up to the maximum number provided by the index digits (in this case, 999).
- Page 381 HAPSITE Smart Operating Manual Data File Path ....The entry box for the data file path is used to specify where this method should save the data.
-
Page 382: Summary Page
HAPSITE Smart Operating Manual 11.10 Summary Page The Summary Page, see Figure 11-43, provides selections to show any component, or all components, of the Method in a text summary. These selections effect both the displayed and printed information. This page allows for a review of the Method settings before saving the Method to a file. -
Page 383: How To Create A Method
HAPSITE Smart Operating Manual 11.11 How to Create a Method CAUTION Read all of Chapter 11 before creating a method. HINT: For questions relating to specific settings, refer to the previous sections of this chapter. Creating a method is a very involved process. Creating a method from scratch is best left to experts, however, custom methods can be written by modifying a default method. - Page 384 HAPSITE Smart Operating Manual Figure 11-46 Choose Method Refer to section 11.2, Description Page, on page 11-3 through section 11.9, Data Page, on page 11-41 for details on changing options. To save a newly created method from the Method Editor, press the Save button...
- Page 385 HAPSITE Smart Operating Manual Figure 11-47 Save Method File Dialog Window - HAPSITE Option Selected On the File Name line type a NEW file name. Refer to Figure 11-48. Figure 11-48 Entering a New Method File Name The file location may be changed to save in the GCMS or Survey directory, or...
-
Page 386: How To Sequence Methods
HAPSITE Smart Operating Manual If creating a new folder, name the new folder and then open the new folder before saving the Method file. CAUTION Saving the new method file with the original name will overwrite (replace) the method that was used as the template. - Page 387 HAPSITE Smart Operating Manual Type a new name for the sequenced method. See Figure 11-52. NOTE: Method runs (i.e., sequence of methods) use the .xmth file extension. Click Add. See Figure 11-52. Figure 11-52 Method Run List 11 - 49...
- Page 388 HAPSITE Smart Operating Manual Chose a method file to add to the sequence. Click OK. See Figure 11-53. Figure 11-53 Chose Method 11 - 50...
- Page 389 HAPSITE Smart Operating Manual Repeat Step 5 until all desired methods are listed in the Method Run List. See Figure 11-54. Figure 11-54 Sequenced Method Options In the Start column chose either Run Button or Immediately for each method. This selection determines how each method in the run is started. Refer to Figure 11-54.
- Page 390 HAPSITE Smart Operating Manual Figure 11-55 Saving Sequenced Method 11 - 52...
-
Page 391: Target Compound Methods
HAPSITE Smart Operating Manual Chapter 12 Target Compound Methods 12.1 Introduction To Quantitative Analysis Quantitative analysis is the process of building a method calibration library of target compounds, analyzing samples and converting target compound responses to concentration results. The process of building a quantitative analysis method includes the following steps: Preparation of a standard or standards at multiple concentrations. -
Page 392: Definition Of Terms In The Calibrate Window
HAPSITE Smart Operating Manual 12.2 Definition of Terms in the Calibrate Window Figure 12-1 Calibrate Window 12.2.1 Method Browse ..... . Brings up the Method Selection window. -
Page 393: Peak Search
HAPSITE Smart Operating Manual Conc/Factor....Data file concentration of analytes if Global is selected, or Concentration Multiplier if Analyte is selected. Selection ....If checked, file will be processed when Start is pressed. -
Page 394: Analytes
HAPSITE Smart Operating Manual Build/Edit Template ... . Selects the mode in which a data file is searched to locate compounds, and loads/edits compounds into the library template. Calibrate Library....When selected, data files are processed to calibrate the library Search for Analytes . - Page 395 HAPSITE Smart Operating Manual NIST Search ....The initial search when building a template/library is performed using the AMDIS library. If peaks are detected and...
-
Page 396: Extracted Mass Peaks
HAPSITE Smart Operating Manual 12.2.6 Extracted Mass Peaks Displays the mass peaks and relative percentages for the selected analyte. See Figure 12-3. Figure 12-3 Extracted Mass Peaks 12.2.7 Calibration Displays the calibration curve and curve statistics for the selected analyte. -
Page 397: Data Files
HAPSITE Smart Operating Manual View Report....Displays a report of the last processed data files. Search Settings ....Displays the search parameter settings. -
Page 398: Analytes
HAPSITE Smart Operating Manual 12.3.4 Analytes Analytes in Library... . . Displays the analytes in the library. Analytes in File....Displays the analytes in the currently displayed or selected file. -
Page 399: Extracted Mass Peaks
HAPSITE Smart Operating Manual 12.3.6 Extracted Mass Peaks Displays the mass peaks and relative percentages for the selected analyte. See Figure 12-6. Figure 12-6 Extracted Mass Peaks 12.3.7 Calibration Displays the calibration curve and curve statistics for the selected analyte. -
Page 400: Display Function
HAPSITE Smart Operating Manual 12.4 Display Function The Display Function displays the selected data file for both Calibration and ID Unknowns. To review identifications, select chromatographic peaks and spectra (compounds), add to a library, and manually reintegrate peaks. See Figure 12-7 on... - Page 401 HAPSITE Smart Operating Manual template. After selecting the Spectrum for the compound to be added, place the cursor in the mass spectrum window and click the right mouse button to open up the spectrum pop-up menu. Select the Grab Spectrum for Template menu option.
-
Page 402: The Quantitation
HAPSITE Smart Operating Manual 12.5 The Quantitation When the ID Unknown function is used and a known compound is detected, the quantitation result will be displayed in the Quantitative Report. See Figure 12-9. Figure 12-9 Quantitative Report 12.6 Using the Calibrate Function A standard or series of standards must be prepared from the list of analytes to be quantified. - Page 403 HAPSITE Smart Operating Manual After the standard(s) have been prepared, a method must be developed to collect the data. The method can be a default method or a modified method using the Method Editor. All method development and chromatographic changes which can affect the retention time must be made prior to collecting the standard runs that are to be used for building and calibrating the library.
- Page 404 HAPSITE Smart Operating Manual Figure 12-11 Accessing the Calibrate Function Selecting the Calibrate function will display a dialog box used to select the type of quantitative method being developed — GC/MS or Survey. See Figure 12-12. NOTE: Methods can be built for Full Scan data or SIM (Selected Ion Monitoring) data.
- Page 405 HAPSITE Smart Operating Manual Use the Browse button under Data Files to select the data file to be used to create the library template. This should be a data file (or files) collected when running known samples. See Figure 12-13.
- Page 406 HAPSITE Smart Operating Manual Figure 12-14 Calibrate Display with Detected Peaks The template can now be edited to remove duplicate and unidentified entries from the analyte list. Place the mouse cursor over the compound name of an entry to be deleted or edited. Refer to...
- Page 407 HAPSITE Smart Operating Manual Clear All Empty Compound Entries ..Deletes all entries that do not have a compound name associated with them. NOTE: The down arrow next to the compound name can be used to select a different name if more than one possible match has been determined by the AMDIS search.
- Page 408 HAPSITE Smart Operating Manual To finish the template, the concentration of each analyte must be individually entered if not using the global concentration flag. In this example, the concentration of all analytes is the same so Global is being used and the concentration field is not a required entry.
- Page 409 HAPSITE Smart Operating Manual Figure 12-19 Library Ready for Calibration Prior to calibration, the curve fit should be selected. To change the curve fit from the default Linear, Forced through Origin, select the View/Edit button under the Method controls. Select the curve fit and save the method.
-
Page 410: Using The Id Unknown Function
HAPSITE Smart Operating Manual NOTE: To investigate problems use the View Reports function to examine the Calibration Report. If an outlying point is detected on the curve, delete the point by highlighting and clicking delete. When the curve is complete, save the Library and the Method. The Quant library is now part of the Method. - Page 411 HAPSITE Smart Operating Manual Select the method to be used to process or re-process the data. After a method is selected the ID Unknowns control panel will be displayed. Use browse to select the data file(s). Select Start to reprocess the data.
- Page 412 HAPSITE Smart Operating Manual This page is intentionally blank. 12 - 22...
-
Page 413: Headspace Sampling System
HAPSITE Smart Operating Manual Chapter 13 Headspace Sampling System 13.1 Introduction The Headspace Sampling System (HSS) is an accessory to the HAPSITE portable GC/MS, allowing testing for Volatile Compounds in various solid and liquid matrices, including soil and water. Used in combination with the HAPSITE, the Headspace Sampling System attachment provides the opportunity to perform soil and water analyses for quantitative and qualitative results in the field. -
Page 414: How The Hss Operates
HAPSITE Smart Operating Manual 13.1.1 How the HSS Operates The functions of the HSS are to provide consistent partition of analytes between the sample and the headspace, and to transfer a representative sample of the headspace to the HAPSITE for analysis. -
Page 415: Performance Specifications
HAPSITE Smart Operating Manual previous run. During the Purge cycle, the three-way valves change state, assuring that the bypass line is also purged. The sample pump continues to run during Purge. The temperature-controlled oven contains not only the sample wells, but the three-way valves and the entire sample line through the connection with the Heated Line. -
Page 416: Consumables Required
The mix is used to prepare standards for a calibration curve. The calibration curve is used for quantification. INFICON has created a 4 component mix used as Internal Standards for Headspace Sampling (HS) runs. This mix is added in conjunction with calibration mixes used to write calibration curves for quantification methods. -
Page 417: Connecting The Hss To The Hapsite
Line, which could lead to flow restriction or breakage. 13.1.6 Providing Power to the HSS The HSS may use AC power from an outlet, or may also use an INFICON rechargeable battery. A description of the connections for each power supply follows. -
Page 418: Powering On The Hss
HAPSITE Smart Operating Manual 13.2.1 Powering on the HSS Press the power button to turn on the HSS. See Figure 13-3. HINT: The power button is a toggle switch, just like on the HAPSITE. Once pressed and released the switch returns back to the original position. - Page 419 HAPSITE Smart Operating Manual Rinse a small clean vessel (such as a beaker) with VOC-free water and discard the water. Pour some VOC-free water in the rinsed vessel for rinsing of the sample syringe. Rinse the sample syringe with VOC-free water and discard the water. Repeat three times.
- Page 420 HAPSITE Smart Operating Manual Figure 13-5 Clearing the Air Bubble from the Sample Syringe Add Internal Standard and Surrogates into the sample. NOTE: The Internal Standards are a set of compounds which are injected at a consistent known concentration with each calibration standard, continuing calibration check, blank, quality control sample, as well as with each sample.
- Page 421 HAPSITE Smart Operating Manual Inject the desired amount of Internal Standard/Surrogate mixture into the sample through the small end of the sample syringe. See Figure 13-6. Figure 13-6 Injecting the Mix into the Sample Syringe For calibration standard preparation, injection of the proper amount of a calibration mixture is performed to achieve the desired compound concentrations.
-
Page 422: Loading The Wells
HAPSITE Smart Operating Manual The formula used to calculate the amount needed for injection (as above) is as follows (1 PPB = 1 ng/mL): X = C x 1000 L/mL x 1 g/1000 ng x 20 mL where: ... - Page 423 HAPSITE Smart Operating Manual WARNING Be careful to avoid injury when handling hot samples vials. WARNING Be careful to avoid injury when loading/unloading samples, as the metal sampling needle tip is sharp. WARNING Be careful to avoid injury from any broken glass.
-
Page 424: Cycling The Vials
HAPSITE Smart Operating Manual Figure 13-8 Inserting the Needle into a Vial Close the yellow cover to prevent heat loss and promote thorough heating of the needle assembly. Keep track of the time when each sample was inserted into the well to monitor equilibrium time. -
Page 425: Making The Measurement
HAPSITE Smart Operating Manual 13.2.5 Making the Measurement To make a measurement using the HSS, a method is required. To quantify the analytes detected, a calibrated method is required. Once the calibrated method is completed, samples may be analyzed and compared to the calibration for quantitative analysis. -
Page 426: Flush Procedure
HAPSITE Smart Operating Manual Once the HAPSITE has been tested, test the Transfer Line by reconnecting it to the HAPSITE and disconnecting it from the HSS. Perform an analysis of clean air with the Transfer Line connected. If the contamination is not present, then the contamination is in the HSS. -
Page 427: Cleaning The Hss Wells
HAPSITE Smart Operating Manual 13.3.3 Cleaning the HSS Wells The heating block is constructed of aluminum and is normally easy to keep clean. Routine cleaning of the wells is not usually necessary, but debris and liquids may be removed easily. -
Page 428: Washing The Hss
HAPSITE Smart Operating Manual 13.3.4 Washing the HSS The HSS is designed to be water resistant, but not water proof. The HSS can withstand rainfall, but should be removed to a dry area as soon as possible. The front door has a seal which prevents water from passing into the instrument when the door is closed. -
Page 429: Replacing The Hss Battery
HAPSITE Smart Operating Manual 13.3.5 Replacing The HSS Battery Replacement of the battery is performed on an as needed basis. The battery is used when a remote power source is not available. When the battery charge reads 20%, a battery change is needed. -
Page 430: Replacing The Hss Nitrogen Canister
HAPSITE Smart Operating Manual 13.3.6 Replacing The HSS Nitrogen Canister Replacement of the Nitrogen Canister is on an as needed basis. When the pressure is below approximately 140 kPa, the canister will need to be replaced with a new Nitrogen Canister. Replacement should be performed between sample runs, and in a dry and non-hazardous environment, since the front door must be opened. -
Page 431: Charging The Hapsite Battery Using The Hss
HAPSITE Smart Operating Manual 13.5 Charging the HAPSITE Battery using the HSS INFICON HAPSITE batteries may be charged using the HSS, one at a time. To charge a battery, connect the HSS to remote power using the AC-to-24 V(dc) adapter. Turn on the HSS by pressing the power toggle switch inside the front door. - Page 432 HAPSITE Smart Operating Manual This page is intentionally blank. 13 - 20...
-
Page 433: Service Module
HAPSITE Smart Operating Manual Chapter 14 Service Module 14.1 Introduction The Service Module (also called the SM) provides several support functions for the HAPSITE. The Service Module contains pumps that create a vacuum system for the HAPSITE manifold, both during GC/MS operation in the lab and NEG Pump activation. -
Page 434: Service Module Input Power
HAPSITE Smart Operating Manual 14.2 Service Module Input Power Service Modules are available in either 110/220 V(ac) (IPN 930-202-G1) or 24 V(dc) (IPN 930-202-G3) input power models. With the exception of input power, both models are identical. 14.2.1 Service Module 110 / 220 V(ac) Input The 110/220 V(ac) model operates from 110/220 V(ac) line voltage. -
Page 435: Components Of The Service Module
HAPSITE Smart Operating Manual 14.3 Components of the Service Module The following section describes the components of both models of Service Modules. 14.3.1 Backup Batteries The Service Module contains two 12 V(dc) (24 V(dc) total) lead-acid gel cells that will safely shut down the Service Module when power is lost. This includes closing the Vacuum Interconnect Valve if necessary, venting the Service Module manifold, and a controlled shutdown of the electronics. -
Page 436: Foreline Vent Valve
HAPSITE Smart Operating Manual 14.3.4 Foreline Vent Valve The Foreline Vent Valve is located in the middle of the MDP/Turbo Pump. This valve vents the foreline to atmosphere through a small orifice. This valve is either off, pulsed, or continuously open, depending on the situation. -
Page 437: Power Supply
HAPSITE Smart Operating Manual 14.3.8 Power Supply The Service Module Power Supply is a 24 V(dc) supply that provides power to the Service Module Components and is only available in the 110/ 220 V(ac) Service Module (IPN 930-202-G1) model. The Service Module Power Supply also supplies power to the Analytical Module when attached. -
Page 438: When To Use The Service Module
an alternative, or backup method, to using a NEG pump to provide vacuum for the HAPSITE is required (i.e.: the NEG is not installed). to perform troubleshooting operations with guidance from an INFICON service representative. 14 - 6... -
Page 439: Smart Iq Software For The Service Module
HAPSITE Smart Operating Manual 14.5 Smart IQ Software for the Service Module The Smart IQ for the Service Module can be accessed in three ways from the System Setup View: Double-click on the Service Module icon. See Figure 14-4. -
Page 440: The Service Module Tab In Properties Window
HAPSITE Smart Operating Manual 14.5.1 The Service Module Tab in Properties Window Figure 14-7 Service Module Tab in Properties Window The following options are available: Detach ..... . . Used to release the vacuum between the Service Module and the HAPSITE before the physical removal. - Page 441 HAPSITE Smart Operating Manual Configure ....Displays control information. See Figure 14-8. Figure 14-8 Configure Window Manual ..... . . Displays additional control information. See Figure 14-9.
- Page 442 HAPSITE Smart Operating Manual Turbo & R.P. Status ... . Displays the Turbo & R.P. Status. See Figure 14-11. Figure 14-11 Turbo & Roughing Pump Status Window Service ..... . Contains controls to Activate NEG, Vent HAPSITE and Bakeout NEG.
-
Page 443: Starting Up Hapsite On The Service Module
HAPSITE Smart Operating Manual Turbo Speed (Hz) ....Indicates the speed of the Turbo Pump in hertz (equivalent to rotational speed in revolutions per second). Turbo Current (A) ... . . Indicates the current draw of the Turbo Pump in amperes. -
Page 444: Attaching The Hapsite To The Service Module
HAPSITE Smart Operating Manual NOTE: If the HAPSITE is already powered on, the HAPSITE does not need to be turned off before placing on the Service Module. HINT: The HAPSITE will take approximately 60 seconds to completely power on, or "Boot Up". -
Page 445: Attaching The Hapsite To The Service Module Using The Smart Iq Pc Software
HAPSITE Smart Operating Manual 14.7.1 Attaching the HAPSITE to the Service Module using the Smart IQ PC Software Be sure to connect the HAPSITE to the PC using an ethernet cable before continuing. Refer to section 2.3.6, Connect Laptop (if desired), on page 2-9, if a connection is needed. - Page 446 HAPSITE Smart Operating Manual The Roughing Pump will start first, then the Turbo pump will begin to speed up, as shown on the Turbo Speed (Hz) line in Figure 14-15 above (initially listed as 0). NOTE: The attach procedure typically takes about 5 minutes to complete.
-
Page 447: Attaching The Hapsite To The Service Module Using The Hapsite Front Panel Controls
HAPSITE Smart Operating Manual 14.7.2 Attaching the HAPSITE to the Service Module using the HAPSITE Front Panel Controls On the HAPSITE Front Panel main menu, select option number 3. Service Module, as shown in Figure 14-19. HINT: If not already at the main menu, repeatedly press the ESC key until the HAPSITE Main Menu is displayed. - Page 448 HAPSITE Smart Operating Manual Figure 14-21 Service Module Attach - Confirm Screen The current status of the system will be displayed and updated, as shown in Figure 14-22. Figure 14-22 Attach HAPSITE Status Once the Attach SM operation has completed, the system will show the Attach...
-
Page 449: Detaching The Hapsite
HAPSITE Smart Operating Manual 14.8 Detaching the HAPSITE Detaching the HAPSITE allows the safe removal of the HAPSITE from the Service Module. The Detach procedure ensures that the interconnect plug in the HAPSITE is closed at the proper time, and the two pumps in the Service Module are properly shut down. -
Page 450: Using The Front Panel Display To Detach
HAPSITE Smart Operating Manual Figure 14-26 Detach HAPSITE Confirm Window Figure 14-27 Detach In Process The HAPSITE Vacuum Interconnect valve will close shortly after selecting Detach. NOTE: The detach procedure typically takes about 3 to 5 minutes to complete. NOTE: After pressing the Detach button and selecting Yes on the confirm window, the HAPSITE Properties window can be closed. - Page 451 HAPSITE Smart Operating Manual Figure 14-29 HAPSITE Front Panel - Main Menu Listing Menu Item 3. Service Module The resulting screen, shown in Figure 14-30, has two options: 1. Attach SM and 2. Detach SM. Figure 14-30 Service Module Screen on HAPSITE Front Panel Display Select number 2.
-
Page 452: Physically Removing The Hapsite From The Service Module
HAPSITE Smart Operating Manual Figure 14-32 Detach HAPSITE Status NOTE: The Detach SM procedure normally takes about 3-5 minutes to complete. Once the Detach SM operation has completed, the system will show the Service Module Detached screen shown in Figure 14-33. - Page 453 HAPSITE Smart Operating Manual CAUTION The HAPSITE should never be physically removed from the Service Module while the Turbo pump is operating. The Turbo Speed must be 0 Hz before removing the HAPSITE from the Service Module. Damage can result to...
-
Page 454: Storing The Service Module
HAPSITE Smart Operating Manual 14.10 Storing the Service Module When not attached to the HAPSITE, the Service Module should be stored with the aluminum storage plug in place. Storing the Service Module in this configuration includes a Pump Down procedure which turns on the Roughing pump for 60 seconds to create a partial vacuum. - Page 455 HAPSITE Smart Operating Manual To place the Service Module in storage, the aluminum storage plug is placed on the opening where the HAPSITE connects, as shown in Figure 14-36. Figure 14-36 Service Module Aluminum Storage Plug in Place on Service Module HINT: Confirm the RS-232 communication cable is connected to the Service Module and Laptop.
- Page 456 HAPSITE Smart Operating Manual Figure 14-38 Pump Down Service Module Confirm Window Select Yes to pump down the Service Module and place in storage. A window will appear counting down a sixty second delay while the pump down procedure completes, as shown in Figure 14-39.
-
Page 457: When Power To The Service Module Is Lost
HAPSITE Smart Operating Manual CAUTION The Service Module should be stored in a clean and dry area. Avoid storing the Service Module in areas which are outside the temperature range of 40 to 95 °F. 14.11 When Power to the Service Module is Lost... - Page 458 HAPSITE Smart Operating Manual This page is intentionally blank. 14 - 26...
-
Page 459: Introduction
15.1 Introduction The HAPSITE instrument is designed to require minimal service. Repairs will normally be carried out at the factory or other INFICON Service Facilities. Preventive maintenance includes the cleaning of the air filters and the replacement of certain consumables. -
Page 460: Safety Considerations
HAPSITE Smart Operating Manual 15.2 Safety Considerations WARNING The NEG pump becomes very hot when in operation. The software-controlled sequence to remove the NEG pump provides a cool-down period; this sequencing must not be bypassed. In addition to the danger of burns from... -
Page 461: Hapsite Symptom - Cause - Remedy Chart
HAPSITE Smart Operating Manual 15.3 HAPSITE Symptom - Cause - Remedy Chart Table 15-1 Diagnosing Problems - HAPSITE Symptom Cause Remedy 1. Filament will not turn on 1a. Remove ion source and check 1a. If opened, replace ion source (Unable to turn on to see if filament has opened. - Page 462 HAPSITE Smart Operating Manual Table 15-1 Diagnosing Problems - HAPSITE Symptom Cause Remedy 4c. Make sure that there is a full 4c. Replace canister with a full unexpired internal standard internal standard gas can. canister in the GC, and make sure...
- Page 463 HAPSITE Smart Operating Manual Table 15-1 Diagnosing Problems - HAPSITE Symptom Cause Remedy 9e. Check turbo speed in Service 9e. Contact INFICON. Module program, If less then 1480 Hz, Service Module pumps may need maintenance or the system may have an air leak.
- Page 464 HAPSITE Smart Operating Manual Table 15-1 Diagnosing Problems - HAPSITE Symptom Cause Remedy 16b. Loose connections at sample 16b. Check to see if fittings and loop, concentrator or ferrules. ferrules are properly installed. 17. Temperature zone fail to heat. 17a. Open heater, or bad controller 17a.
-
Page 465: Required Environment For General Maintenance
HAPSITE Smart Operating Manual 15.4 Required Environment for General Maintenance The HAPSITE is designed for use in the field, away from ideal laboratory conditions. However whenever the instrument is opened, appropriate care must be taken to assure the internal components remain uncontaminated. For example, removing and replacing batteries can generally be performed outdoors, while avoiding rain or foreign materials from entering the battery compartment. -
Page 466: Contamination Of The Mass Spectrometer
HAPSITE Smart Operating Manual 15.5.1 Contamination of the Mass Spectrometer Contamination of the Mass Spectrometer manifold can occur every time an internal component is changed, or vacuum is broken. This can consist of water and/or light hydrocarbons. These will be seen in the mass spectrum even when the isolation valve is closed. -
Page 467: Contamination Of The Probe And Probe Line
HAPSITE Smart Operating Manual is greater than the maximum temperature of the heated zones, or if a liquid sample has been pulled into the system, the GC and Transfer Line may need to be replaced. 15.5.3 Contamination of the Probe and Probe Line Contamination of the Probe and Probe Line can occur when the Probe Tip actually touches a sample or a compound "sticks"... - Page 468 HAPSITE Smart Operating Manual Figure 15-2 Moving Methanol Around in Probe and Probe Line Empty the methanol remaining in the probe line by tipping one end of the probe line downward until all of the methanol drains from the probe line. See Figure 15-3.
-
Page 469: Neg Troubleshooting
HAPSITE Smart Operating Manual Figure 15-4 Blow Out Probe Line and Probe with N2 Re-attach probe line to HAPSITE. 15.6 NEG Troubleshooting If an MS Pressure Warning message is received on the Front Panel of the HAPSITE or on the laptop (see... - Page 470 HAPSITE Smart Operating Manual Figure 15-6 Pres Option on the Stat Menu Figure 15-7 MS Pressure on the Service Module Tab A MS Vacuum Pressure reading of "Below Gauge Range" indicates the HAPSITE is ready to sample. If the MS Vacuum Pressure is 3E-3, order a new NEG Pump.
-
Page 471: Bakeout Procedure
HAPSITE Smart Operating Manual 15.6.1 Bakeout Procedure A bakeout can be performed with or without the use of the Service Module. A bakeout heats the NEG pump to 700 degrees Centigrade for a specified length of time (usually 2 hours). -
Page 472: Reactivating The Neg Pump
HAPSITE Smart Operating Manual 15.6.2 Reactivating the NEG Pump Reactivating the NEG Pump requires having the Service Module attached to the HAPSITE for at least 22 hours. The procedure is basically the same as activating a new NEG pump. Refer to section 2.7, Service Module, on page 2-18... -
Page 473: Neg Pump Removal, Installation And Activation
Part 5: Activation of the NEG Pump, section 15.7.6 on page 15-38 HINT: Read all instructions before starting the procedure making special note of all cautions and warnings. HINT: Contact INFICON prior to performing the following procedures. 15 - 15... -
Page 474: Required Tools And Equipment
HAPSITE Smart Operating Manual 15.7.1 Required Tools and Equipment A Service Module instrument laptop computer New NEG Pump. 1/4” Allen wrench. Torque wrench set for 70 inch/ pounds. gloves (cotton or latex) lint free wipes ... -
Page 475: Part 1: Neg Pump Removal
HAPSITE Smart Operating Manual 15.7.2 Part 1: NEG Pump Removal This procedure requires the use of a Service Module. The HAPSITE should be physically on the Service Module and attached. Refer to section 2.7, Service Module, on page 2-18 Chapter 14, Service Module for more information on setting up and using the Service Module. - Page 476 HAPSITE Smart Operating Manual Figure 15-13 Vent HAPSITE from Smart IQ Software 15 - 18...
- Page 477 HAPSITE Smart Operating Manual Figure 15-14 Vent HAPSITE from the Front Panel NOTE: If the HAPSITE is not attached to the Service Module, an error message will be displayed and the process will not proceed. See Figure 15-15. 15 - 19...
- Page 478 HAPSITE Smart Operating Manual Figure 15-15 Vent HAPSITE Error Message WARNING The NEG Pump becomes very hot when in operation. The software-controlled sequence to remove the pump provides a cool-down period. This sequencing must not be bypassed. In addition to the danger of burns from...
- Page 479 HAPSITE Smart Operating Manual To loosen the chain clamp, turn the nut counter-clockwise until loose. Figure 15-16 Figure 15-16 Loosening Chain Clamp Remove chain clamp. Pull the NEG Pump out. HINT: The aluminum gasket can not be reused. Bend the old gasket to avoid possible reuse.
-
Page 480: Part 2: Service Module Vacuum Interconnect (Vi) Valve Cleaning
HAPSITE Smart Operating Manual 15.7.3 Part 2: Service Module Vacuum Interconnect (VI) Valve Cleaning Remove the HAPSITE from the Service Module (see section 14.9, Physically Removing the HAPSITE from the Service Module, on page 14-20). On the underside of the Analytical Module remove the VI valve using the 1/4”... - Page 481 HAPSITE Smart Operating Manual Wearing safety glasses and gloves, clean the o-ring on the VI valve with methanol. See Figure 15-18. Figure 15-18 Cleaning VI Valve O-ring 15 - 23...
- Page 482 HAPSITE Smart Operating Manual Clean the bottom of manifold where the VI valve was removed with methanol. Figure 15-19. Figure 15-19 Cleaning Bottom of Manifold 15 - 24...
- Page 483 HAPSITE Smart Operating Manual Replace the VI valve into the bottom of manifold. Hand tighten. Figure 15-20. Figure 15-20 Replacing the VI Valve 15 - 25...
- Page 484 HAPSITE Smart Operating Manual Clean the o-ring on the Service Module using Methanol. See Figure 15-21. Figure 15-21 Cleaning O-ring on the Service Module Place the HAPSITE on the Service Module and lock down with the black side latches. Refer to section 2.7.2, Placing the HAPSITE on the Service Module,...
-
Page 485: Part 3: Install The New Neg Pump
HAPSITE Smart Operating Manual 15.7.4 Part 3: Install the New NEG Pump Wearing safety glasses and gloves, clean the manifold flange with methanol on a lint free wipe. See Figure 15-22. Figure 15-22 Cleaning Manifold Flange Remove the new NEG Pump and aluminum gasket from the shipping container. - Page 486 HAPSITE Smart Operating Manual Clean the aluminum gasket with methanol on a lint free wipe. Be careful to handle the aluminum gasket by the outer band. Do not let the knife-edges on the inner ring get nicked. See Figure 15-24.
- Page 487 HAPSITE Smart Operating Manual Figure 15-25 New NEG Pump O-ring and seat- ing ring assembly On the new NEG Pump, wipe inside the flange with methanol. See Figure 15-26. Figure 15-26 Cleaning Flange with Methanol Save the rubber “O” ring assembly and container to dispose of the old NEG Pump.
- Page 488 HAPSITE Smart Operating Manual Figure 15-27 Aluminum Gasket on NEG Pump Insert the new NEG Pump and aluminum gasket into the manifold. See Figure 15-28. Figure 15-28 Installing New NEG Pump 15 - 30...
- Page 489 HAPSITE Smart Operating Manual Replace the chain clamp insuring that the nut points to the left. Use the torque wrench and tighten to 70 inch/ pounds or 8 Nm. See Figure 15-29. Figure 15-29 Torquing Chain Clamp CAUTION DO NOT connect the black plug from the new NEG Pump to the black socket at this time.
-
Page 490: Part 4: Leak Check Of The Vacuum System
HAPSITE Smart Operating Manual Place the old NEG Pump into the protective container with the o-ring assembly and place back in the box. See Figure 15-30. Figure 15-30 Old NEG Pump Perform an Attach function by selecting the Attach button from the Service Window on the Service Module tab of the Properties section in the Smart IQ software. - Page 491 HAPSITE Smart Operating Manual Figure 15-31 Smart IQ Icon Click on the Tune Icon. See Figure 15-32. NOTE: Only the Advanced user access can open manual tune. Figure 15-32 Manual Tune Icon Select default.tun file. See Figure 15-33. Figure 15-33 Select "default.tun" File Wait for the automated process of opening tune to complete Click on View/Sensor Status Grid.
- Page 492 HAPSITE Smart Operating Manual Figure 15-34 Opening Sensor Status Grid Turn off the IS Supply and Tune Feed valves. See Figure 15-35. Figure 15-35 Sensor Status Grid Close the Tune Status Panel and the Mass Calibration Status by deselecting each. See Figure 15-36.
- Page 493 HAPSITE Smart Operating Manual Click on the Full Scan icon in the Tune window. See Figure 15-37. Figure 15-37 Full Scan Icon Click the RMB on the X-axis to access the Full Scan Range. See Figure 15-38. Figure 15-38 Setting Full Scan Range Select Custom.
- Page 494 HAPSITE Smart Operating Manual Figure 15-39 Checking For Leaks Spray the MicroDuster around the orifices listed below that could be the source of a possible leak, while checking the scan on the laptop in the tune program. If there is a leak, the response for the 69 and 83 masses will increase. See Figure 15-40.
- Page 495 HAPSITE Smart Operating Manual Figure 15-40 Spraying MicroDuster After the manifold has been leak tested and no leaks found, then the black cable on the front of the NEG Pump can be plugged into the black socket above the NEG Pump.
-
Page 496: Part 5: Activation Of The Neg Pump
HAPSITE Smart Operating Manual 15.7.6 Part 5: Activation of the NEG Pump Click on the Service Module tab of the Properties menu. Click on the Service button. See Figure 15-42. Figure 15-42 Service Button on the Service Module Tab Use the Activate NEG settings below as a guideline. - Page 497 HAPSITE Smart Operating Manual Figure 15-43 Service Window Select Activate Neg. When prompted on the Front Panel, enter the Serial Number of the New NEG Pump. The NEG Pump will take approximately 18 hours to activate. The process is totally automated and does not need any other interactions until the process is complete.
-
Page 498: Replacing The Ionizer Of The Mass Spectrometer
HAPSITE Smart Operating Manual 15.8 Replacing the Ionizer of the Mass Spectrometer The ionizer is located in the mass spectrometer vacuum manifold behind the NEG Pump, or a blank off plate if a NEG Pump is not installed. The NEG pump must be removed in this procedure. - Page 499 HAPSITE Smart Operating Manual Vent the HAPSITE by choosing Vent HAPSITE on the Service window of the Service Module tab in the Properties window or from the Front Panel by selecting System/Service HAPSITE/Vent HAPSITE. This starts a process which includes monitoring the cooling of the NEG Pump. See Figure 15-44.
- Page 500 HAPSITE Smart Operating Manual CAUTION The NEG Pump becomes very hot when in operation. The software-controlled sequence to remove the pump provides a cool down period time to cool. This sequencing must not be bypassed. In addition to the danger of burns from handling the hot flange, the reactive metal alloys within the pump can ignite if exposed to atmospheric pressure while hot.
- Page 501 HAPSITE Smart Operating Manual To loosen the chain clamp, turn the nut counter-clockwise until loose. Figure 15-16. Figure 15-45 Loosening Chain Clamp Remove chain clamp. Pull the NEG Pump out, remove the NEG Pump and place on a lint free cloth.
- Page 502 HAPSITE Smart Operating Manual CAUTION Insure all tools are clean, (wipe them with methanol), and wear powder free gloves for the rest of the procedure. Insert the forked end of the ionizer removal tool (see Figure 15-47) behind the collar on the stainless steel tube about 1/4 inch from the left side manifold wall.
- Page 503 HAPSITE Smart Operating Manual Figure 15-48 Extension Tube Slid into the Ion Volume Use the flat head screw driver to loosen the three screws which secure the ionizer to the quadrupole within the manifold. The screws are captive and will not fall out.
- Page 504 HAPSITE Smart Operating Manual Tighten the three securing screws with the screw driver. Tighten them alternately and gently to ensure that the ionizer is installed straight. NOTE: As you install and tighten the ionizer, make sure the extension tube remains positioned in the ion volume and is lined up with the membrane isolation valve.
-
Page 505: Replacing The Column In The Gas Chromatograph
3 mL/min flow of nitrogen through the system. Replacement columns should possess the same dimensions as the original column to ensure proper function of the HAPSITE. Before replacing the column with any other dimension, contact INFICON. Tools/Equipment Required ... - Page 506 HAPSITE Smart Operating Manual Figure 15-51 GC Cover Removal WARNING If not cooled sufficiently, the gas chromatograph and the isolation valve may be hot enough to cause burns. The lines to the column module must to be removed. Using a 1/4 wrench, unscrew both Swagelok®...
- Page 507 HAPSITE Smart Operating Manual Lift up on the column module and remove it. Unscrew the two fittings on the replacement module as shown in Figure 15-53. Figure 15-53 Column Module Replacement Insert the replacement column in the exact same manner as the old column was removed.
- Page 508 HAPSITE Smart Operating Manual CAUTION Do not tighten the bulkhead unions unless loose. The bulkhead unions only need to be snug against the wall of the column. CAUTION Be very careful to not cross-thread the steel fittings. Replace the GC cover back on retighten the screw. Ensure the column module is seated properly.
-
Page 509: Replacing The Hss Needle
HAPSITE Smart Operating Manual 15.10 Replacing the HSS Needle Replacement of the needle in the needle assembly should be performed on an as needed basis. Some situations where replacement will be necessary are when the needle becomes significantly deformed, broken, if the point becomes blunted, or if the holes become plugged with debris. - Page 510 HAPSITE Smart Operating Manual Figure 15-56 Removing the Nuts Once both the connection fittings have been completely loosened, pull straight up on the needle while holding the assembly in place. Set the used needle aside, as well as the nut and ferrules at the end of the needle.
- Page 511 HAPSITE Smart Operating Manual Figure 15-58 Holding Down the Needle while Tightening the Nuts (So Ferrules Seat Properly) Now that the needle is securely in place, replace the cover and two screws. Tighten both screws using the Phillips screwdriver. The HSS is now equipped with a new needle and is ready to operate.
-
Page 512: Cleaning The Air Filters In The Service Module
The frequency of cleaning is determined by the cleanliness of the surroundings, together with the intensity of use. INFICON recommends that the filters be cleaned approximately every four months. Adjust this schedule accordingly based on filter condition. -
Page 513: Opening The Service Module
HAPSITE Smart Operating Manual 15.11.1 Opening the Service Module If the Service Module has the SM Vacuum Seal in place and under vacuum, vent the SM using the proper venting procedure. Refer to section 2.7.1, Setting Up the Service Module, on page 2-18 Chapter 14, Service Module. -
Page 514: Cleaning The Air Filters
HAPSITE Smart Operating Manual 15.11.2 Cleaning The Air Filters The filters are in the fan guards, which are held in place by four plastic clips, Figure 15-60. Pry two adjacent clips free with finger-tips and slide the filter free. Wash the two filters in soapy water, and rinse them, shaking off the rinse water. -
Page 515: Battery Charger Maintenance And Troubleshooting
NOTE: If the battery charger’s connector protrudes from the back panel and requires pressing a clip to open the drawer, the battery charger will contain two fuses. Perhaps only one will be blown. If the problem persists, contact INFICON Customer Support. See Chapter 17, Customer Support. -
Page 516: If The Red Indicator Is Flashing
To be certain that the problem is not with the Battery Charger receptacle, try to charge the battery in an alternate receptacle. If the problem persists, replace the battery. If the battery should not be near the end of life, contact INFICON to discuss other possible steps. See Chapter 17, Customer Support. -
Page 517: Glossary
HAPSITE Smart Operating Manual Chapter 16 Glossary 16.1 Glossary Air peak ..... . A response by the mass spectrometer to components of air. - Page 518 HAPSITE Smart Operating Manual Column ..... . The active element of the Gas Chromatograph. The column is a long glass capillary which is lined with a material (called the “stationary phase”) with which the...
- Page 519 HAPSITE Smart Operating Manual Equilibrium Time ....The time allowed for a solid or liquid to heat and equilibrate volatile compounds between the sample and associated headspace within a sample vial.
- Page 520 HAPSITE Smart Operating Manual GC ......Gas Chromatograph. Global Search Parameters ..This specifies the various parameters which will be used to identify compounds which have been included in the Library.
- Page 521 HAPSITE Smart Operating Manual Internal Standard ....a mix of known concentrations of known compounds which are installed in the HAPSITE, mixed with calibration compounds during calibration and with samples during analysis to validate the response of the HAPSITE to the target analytes.
- Page 522 HAPSITE Smart Operating Manual LMB ......Left Mouse Button. Mass Calibration ....A function of the HAPSITE which uses...
- Page 523 HAPSITE Smart Operating Manual Noise Check ....An option in the Tune program and on the HAPSITE LCD which checks the system for background noise.
- Page 524 HAPSITE Smart Operating Manual Resolution....These settings in the Tune program affect the way the mass spectrometer resolves peaks. Increasing the resolution narrows the peaks in that mass range, while lowering the resolution will broaden the peaks.
- Page 525 SituProbe ....The SituProbe Purge and Trap System is a sampling accessory for the HAPSITE Smart portable GC/MS for in-situ testing of volatile organic compounds (VOCs) in water.
- Page 526 HAPSITE Smart Operating Manual Spectrum Grab ....This action is performed in the Run Method program to store information about a compound, including name, retention time, and relative mass intensities for the 10 largest mass peaks.
- Page 527 HAPSITE Smart Operating Manual Y-Cable ..... . A cable which connects to the power supply and enables powering of both the HAPSITE and Headspace Sampling System simultaneously from one converter.
- Page 528 HAPSITE Smart Operating Manual This page is intentionally blank. 16 - 12...
-
Page 529: Customer Support
Customer Support Representative. You must obtain a Return Material Authorization (RMA) number from the Customer Support Representative. If you deliver a package to INFICON without an RMA number, your package will be held and you will be contacted. This will result in delays in servicing your instrument. - Page 530 HAPSITE Smart Operating Manual This page is intentionally blank. 17 - 2...
-
Page 531: Part Numbers
Ship Kit 930-0241-G1 Standard 120V Inlet System None 930-206-G1 Hand Control Unit Laptop with NIST and Hapsite Smart IQ Software CDs 930-261-G3 Standard Laptop w/Windows XP 930-261-G4 Ruggedized Laptop w/Windows XP w/V erizon 930-261-G5 Ruggedized Laptop w/Windows XP Service Module... -
Page 532: Hapsite Smart Spare Parts
068-002 ..... . Battery Charger / Service Module Power Cord, U.S. 074-5004-G1 ....HAPSITE Smart User Guide CD Cables 600-1237-P1. -
Page 533: Hapsite Smart Consumables
HAPSITE Smart Operating Manual 930-4141-P1....VX Conversion Tubes, 10 each 930-4551-G1 ....Backpack, HAPSPACK Shipping Cases 930-464-P1. -
Page 534: Hapsite Upgrade (For 930-280-Gx Series Hapsite)
930-205-G1 ....Ionizer With Magnet 18.5 HAPSITE Upgrade (for 930-280-GX series HAPSITE) 930-718-G1 ....1 HAPSITE Smart IQ Factory Upgrade (Non-DOD) 930-719-G1 . -
Page 535: Syracuse Training Course
For customers who prefer two students per HAPSITE, charges for additional instruments will be incurred.Contact INFICON for details 930-831-P1....HAPSITE Shipping within the continental U.S. -
Page 536: Service Module Spare Parts
HAPSITE Smart Operating Manual 070-1207 ..... Replacement 10 µL Needle for Syringe (070-1206), each 931-402-P1 ....Sample Needle, Headspace 071-748 . -
Page 537: Hapsite Target Compounds
HAPSITE Smart Operating Manual Appendix A HAPSITE Target Compounds A.1 Compounds In Order Of Elution Name Formula Quantion I.S. CAS # Chloromethane CH3Cl 0.08 74-87-3 Vinyl Chloride CH2=CHCl 0.11 75-01-4 Bromomethane CH3Br 0.17 74-83-9 Chloroethane CH3CH2Cl 0.19 75-00-3 Acetone CH3COCH3 0.27... - Page 538 HAPSITE Smart Operating Manual This page is intentionally blank. A - 2...
-
Page 539: Calibrating Gas Mixtures
HAPSITE Smart Operating Manual Appendix B Calibrating Gas Mixtures B.1 Acquisition, Preparation, and Handling The HAPSITE (or any GCMS instrument) must be calibrated at one or more concentration levels of the organic compound(s) of interest for quantitative analysis of these target compounds. In the case of the HAPSITE, the target compounds... -
Page 540: Diluting The Gas On Site
HAPSITE Smart Operating Manual The concentrations for calibration of the various target compounds will probably be defined in the method being followed. The method may specify, for example, 0.1 ppm, 1 ppm, and 10 ppm of each compound. Calibrate the HAPSITE to bracket the concentrations at which the target compounds will occur in samples. -
Page 541: Correct Delivery Of The Mix To The Inlet Of The Hapsite
HAPSITE Smart Operating Manual The materials in the flow stream must be inert to the VOC compounds to be used, and heat-traced to prevent condensation and accumulation of any VOC's in the flow channels. A good gas mixing system minimizes future outlay in certified cylinder gas standard mixes. -
Page 542: Inert Sample Bag
HAPSITE Smart Operating Manual The smaller "leg" of the sampling tee is coupled to the HAPSITE. The total flow to the sampling tee should be approximately 1 liter/min. to allow sufficient excess over the HAPSITE sampling flow rate which is approximately 200 cc/min. and to prevent external air from being drawn back into the vent "leg"... -
Page 543: Gas Cylinder Safety, Contamination Checks, And Corrective Steps
HAPSITE Smart Operating Manual 3/16" to 1/8" Reducer ... (Swagelok part# SS-300-R-2) 3/16" Teflon Ferrule Set ..(Swagelok part# T-300-Set) 1/8" Nut ..... . (Swagelok part# S-S-202-1) 1/8"... - Page 544 HAPSITE Smart Operating Manual cleaning process above) while the bag is still filled with the VOC-free N, or VOC-free air, using the HAPSITE. The detection of any target compounds in the bag should necessitate recleaning or replacement with a bag known to be "clean".
- Page 545 (with the same cut-foam inserts) you received them in. These will probably not suffice for frequent shipping. A heavy-duty fitted shipping case for the HAPSITE is available from INFICON as part number 930-464-P1. The case for the Service Module is part number 930-465-P1. Protected by these cases, the instruments will survive handling by most airline, air freight, and trucking handlers.
- Page 546 HAPSITE Smart Operating Manual Federal Express, UPS, and the passenger airlines are forbidden to accept such cargo unless it is accompanied with the required "Shipper's Declaration for Dangerous Goods" in four copies. Both FedEx and UPS have their own version of this, and will be glad to instruct you in filling it out.
- Page 547 HAPSITE Smart Operating Manual In this case, simply discharge them outdoors by inserting any small point into the valve. Once they are empty, they can be disposed of as aluminum scrap. WARNING When discharging the canisters, point them away from people and stand upwind of the discharge.
- Page 549 HAPSITE Smart Operating Manual Index Symbols Begin Time 11-26 blend accuracy % RSD 16-8 AC to DC power converter Calibrate function 12-14 calibration leak 15-3 15-5 curve 16-1 samples 13-4 air filter calibration mix 13-4 cleaning 15-54 15-56 calibration report...
- Page 550 HAPSITE Smart Operating Manual Customer Support Customer Service 17-1 filament 16-3 Repair Service 17-1 delay 11-19 16-3 Return Material Authorization 17-1 file extension Sales 17-1 *.hps Service Center 17-1 file transfer 10-11 Technical Support 17-1 file types customize data filenames...
- Page 551 HAPSITE Smart Operating Manual 2-12 3-36 5-32 5-36 16-4 16-5 AC to CD Power 2-13 beam battery 2-17 energy 16-5 battery charging 13-19 pump 15-3 battery replace 13-17 source filament 15-8 calibration standard 13-9 target 16-10 carryover contamination 13-13 volume...
- Page 552 HAPSITE Smart Operating Manual MDP/turbo pump 14-3 14-4 Nitrogen 13-4 accl 14-4 Canister 13-18 norm 14-4 Carrier Gas speed 14-4 noble gases membrane 11-8 noise check 16-7 Membrane Interface Mass Spectrometry Noise Thresholding Level 11-35 membrane isolation valve 16-6 methanol...
- Page 553 HAPSITE Smart Operating Manual Report 10-11 2-18 14-1 calibration 12-4 air filter 15-54 15-56 printing 11-20 attach to HAPSITE 14-12 Qualitative 9-35 batteries 14-3 Quantitative 9-35 charger 14-4 Summary 9-35 charge indicator 14-4 reports 9-34 communications 2-22 8-26 14-5 resolution...
- Page 554 HAPSITE Smart Operating Manual Target vacuum interconnect valve 14-1 library 14-4 16-10 Tedlar bag vacuum pump oil 14-3 temperature Valve States 11-13 column 11-8 vent gas pressure 14-3 membrane 11-8 VI valve 15-22 probe 11-9 vials ramp 11-17 loading 13-6...
Need help?
Do you have a question about the HAPSITE Smart and is the answer not in the manual?
Questions and answers