Table of Contents
Advertisement
Quick Links
Download this manual
See also:
Reference Manual
Advertisement
Table of Contents

Subscribe to Our Youtube Channel
Related Manuals for Inficon 3000 Micro GC


Summary of Contents for Inficon 3000 Micro GC
- Page 1 Cover Page 3000 Micro GC Gas Analyzer PN 074-519-P1C...
- Page 3 Title Page 3000 Micro GC Gas Analyzer PN 074-519-P1C www.inficon.com re achus@inficon.com ©2013 INFICON...
- Page 4 The trademarks of the products mentioned in this manual are held by the companies that produce them. 3000 Micro GC™, Bring the Lab to the Sample™, EZ IQ™ and INFICON® are trademarks of INFICON GmbH Genie® (filter) is a registered trademark of A+ Corporation, LLC Luer-Lok®...
- Page 5 Business Line Manager, ISS Vice President, Operations INFICON Inc. INFICON Inc. ANY QUESTIONS RELATIVE TO THIS DECLARATION OR TO THE SAFETY OF INFICON'S PRODUCTS SHOULD BE DIRECTED, IN WRITING, TO THE QUALITY ASSURANCE DEPARTMENT AT THE ABOVE ADDRESS. Revised 2010/06/17 (Rev A)
- Page 7 Seller product was not designed nor against any defects due to plans or instructions supplied to Seller by or for Buyer. This manual is intended for private use by INFICON® Inc. and its customers. Contact INFICON before reproducing its contents.
-
Page 9: Table Of Contents
3000 Micro GC Specifications ........2-1... - Page 10 The 3000 Micro GC Module ........
- Page 11 (Portable 3000 Micro GC only) ........4-11...
- Page 12 User Supplied Parts ......... . 5-22 5.1.6.3.3 Prepare the 3000 Micro GC and Sample Introduction Accessory ..5-22 5.1.6.3.4 Installing the Transfer Line .
- Page 13 Introduction..........7-1 Connecting EZ IQ with 3000 Micro GC ......7-1 Configuring EZ IQ to Use a Valco (VICI) Valve .
- Page 14 3000 Micro GC Operating Manual 7.10.2 Common Integration Events........7-22 7.10.2.1...
- Page 15 (PN G2818A-X/G2845A/G2857A) ....... 8-37 Portable 3000 Micro GC Operation ......8-38 8.5.1...
- Page 16 3000 Micro GC Operating Manual 8.5.2 Battery Usage Information ........8-38 8.5.2.1...
- Page 17 How to Contact Customer Support....... 10-1 10.2 Returning 3000 Micro GC to INFICON ......10-1 10.3 Warranty Extension .
- Page 18 3000 Micro GC Operating Manual This page is intentionally blank. TOC - 10...
-
Page 19: Introduction
(TCD) also using MEMS technology. NOTE: When installed in a 3000 Micro GC chassis, a module is referred to as a channel. When standalone, it is referred to as a module. - Page 20 Install an appropriate sample filter or conditioner. An external 10 micron filter (PN G2801-60900) is shipped with every 3000 Micro GC. This filter must be used unless it is replaced by another filter or sample conditioner. Contact...
-
Page 21: Definition Of Notes, Warnings And Cautions
When using this manual, please pay attention to the Notes, Cautions, and Warnings found throughout. For the purposes of this manual they are defined as follows: NOTE: Pertinent information that is useful in achieving maximum 3000 Micro GC efficiency when followed. CAUTION Failure to heed these messages could result in damage to 3000 Micro GC. -
Page 22: Safety Overview
3000 Micro GC has been designed and tested in accordance with recognized safety standards and is designed for indoor use. WARNING If 3000 Micro GC is used in a manner not specified by the manufacturer, the protection provided by 3000 Micro GC may be impaired. WARNING... - Page 23 3000 Micro GC Operating Manual WARNING ° 3000 Micro GC has inlets which can be heated to 140 Touching the inlets once they are at operating temperatures can result in injury. Extreme care should be taken to avoid touching the inlets.
-
Page 24: Cleaning 3000 Micro Gc
Department of Transportation rated at a 12,405 kPa (1800 PSI) maximum with a five year Hydrostatic approval. 1.3.1 Cleaning 3000 Micro GC To clean the exterior of 3000 Micro GC, disconnect the power and wipe down with a slightly damp, lint-free cloth. 1 - 6... -
Page 25: Electromagnetic Compatibility
3000 Micro GC Operating Manual 1.4 Electromagnetic Compatibility 3000 Micro GC complies with the requirements of CISPR 11 and EN 61326. Operation is subject to the following conditions: This device may not cause harmful interference This device must accept any interference received, including interference that... - Page 26 3000 Micro GC Operating Manual This page is intentionally blank. 1 - 8...
-
Page 27: Specifications
3000 Micro GC Operating Manual Chapter 2 Specifications 2.1 3000 Micro GC Specifications Table 2-1 Specifications 1 or 2-channel 3 or 4-channel Portable Heated Heated 3000 Micro GC 3000 Micro GC 3000 Micro GC Vaporizer Regulator (PN G2819A-X (PN G2818A-X... -
Page 28: Environmental Conditions
3000 Micro GC Operating Manual 2.2 Environmental Conditions The following specifications are applicable to the 3000 Micro GC Heated Regulator and Heated Vaporizer sample conditioners. Operating temperature range..0 to 50°C Relative humidity ....5 to 95% (non-condensing) Altitude . -
Page 29: Repeatability
Backflush (fixed mode) ... <0.5% RSD 2.3.6 Carrier Gas Specifications Connection to 3000 Micro GC ..1/8 in. Swagelok fittings External source ....Helium... -
Page 30: Safety And Regulatory Standards
3000 Micro GC Operating Manual 2.3.10 Safety and Regulatory Standards Conforms to the following safety standards: CSA/National Recognized Test Laboratory (NRTL) UL61010-1 International Electrotechnical Commission (IEC) 61010-1 Canadian Standards Association (CSA) C22.2 No. 61010-1 EuroNorm (EN) 61010-1... -
Page 31: Overview
For many applications, hydrocarbons between the C boiling range can be detected at mid-to-high ppm concentrations. NOTE: When installed in a 3000 Micro GC chassis, a module is referred to as a channel. When standalone, it is referred to as a module. -
Page 32: 3000 Micro Gc Chassis
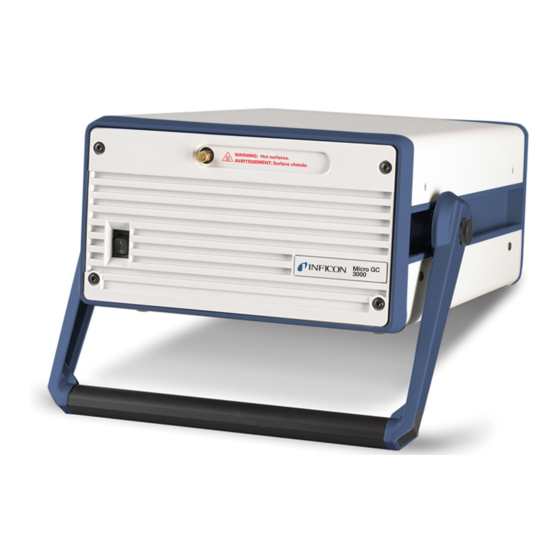
3000 Micro GC Operating Manual 3.2 3000 Micro GC Chassis There are three types of 3000 Micro GC chassis that house GC modules: 1,2-Channel Chassis, see section 3.2.1 on page 3-2 3,4-Channel Chassis, see section 3.2.2 on page 3-3 ... -
Page 33: 3,4-Channel Chassis
3,4-channel system must be supplied externally. See Figure 3-3 Figure 3-4. Figure 3-3 Front panel of the 3,4-channel 3000 Micro GC Sample Inlet Figure 3-4 Rear panel of the 3,4-channel 3000 Micro GC Vents RJ-45 LAN Port... -
Page 34: Portable Chassis
Figure 3-7 Onboard carrier gas cylinder (battery installed underneath) Portable 3000 Micro GC has an internal, refillable carrier gas tank. When full, it can support 35 to 40 hours of operation, application dependent. Portable 3000 Micro GC also contains an optional internal, rechargeable lead-acid battery pack that supports instrument operation without external power. -
Page 35: The 3000 Micro Gc Module
GC that performs sample injection, separation, and detection on a set of target components. When installed in a 3000 Micro GC chassis, a module is referred to as a channel. When standalone, it is referred to as a module. - Page 36 Detection: After column separation, the sample gas enters the Thermal Conductivity Detector (TCD). 3000 Micro GC employs a Microelectromechanical systems (MEMS) TCD which operates on a Wheatstone bridge circuit. The carrier gas enters the TCD via two pathways, the reference path and the analytical path.
-
Page 37: Injector Flow Assembly
3000 Micro GC Operating Manual 3.3.2 Injector Flow Assembly The injector flow assembly (see Figure 3-10) consists of: MEMS injector chip—micro-machined miniature chip that injects sample into the GC column Injector Pilot Solenoid Valve—on/off valve that directs carrier gas to drive diaphragm valves within the MEMS injector chip ... -
Page 38: Injectors
3000 Micro GC Operating Manual 3.3.3 Injectors Depending on application requirements, 3000 Micro GC supports four different types of injectors. These MEMS based injector “wafers” contain sample loops etched into the wafer and micro-diaphragm valves used to direct sample and carrier gas flow. -
Page 39: Fixed Injector
3000 Micro GC Operating Manual 3.3.3.3 Fixed Injector Fixed Injectors are unique to 3000 Micro GC. Fixed Injectors provide the best accuracy and precision for 0.2% levels and higher. Valid settings are between 0-50 ms. An inject time of 0 ms results in no injection. -
Page 40: Backflush Injector
3000 Micro GC Operating Manual 3.3.3.4 Backflush Injector The backflush assembly consists of: a backflush injector a precolumn an analytical capillary column The precolumn is a short section of column, whereas the analytical column is usually longer. The precolumn and analytical column are connected in series. -
Page 41: Columns
Typical lengths are 4 to 14 m, with an internal diameter of 0.15 mm. Stationary phase thicknesses of 1.2 or 2 µm are used ® for the OV-1. Other columns are also used in 3000 Micro GC, such as Stabilwax OV-1701, etc. Figure 3-11 PLOT and WCOT columns... -
Page 42: Detector
3000 Micro GC Operating Manual 3.3.5 Detector 3000 Micro GC uses a MEMS based TCD, which has a 240 nL internal cell volume. (See Figure 3-12.) The small volume provides for excellent sensitivity. For some components, a detection limit of 1 ppm can be achieved. -
Page 43: Module Cases
3000 Micro GC Operating Manual 3.3.7 Module Cases 3000 Micro GC supports two types of module cases, a standard module case and a Modbox module case. 3.3.7.1 Standard Module Case The standard module case is used for most column types. MolSieve modules are an exception. -
Page 44: 3000 Micro Gc Chassis Components
3000 Micro GC Operating Manual 3.4 3000 Micro GC Chassis Components 3000 Micro GC modules are installed into the 3000 Micro GC chassis. The components that are integrated into the chassis are: Inlet Tubing, see section 3.4.1 on page 3-14 ... -
Page 45: C-Board
3000 Micro GC Operating Manual 3.4.2 C-Board The Communications Board, also known as the C-board is internally mounted on the side of 3000 Micro GC. It controls the inlet zone heater and communicates with the D-boards and onboard computer. 3.4.3 OBC Board The onboard computer (OBC) is internally mounted on the back of 3000 Micro GC. -
Page 46: Sample Pump
3000 Micro GC Operating Manual 3.4.4 Sample Pump One or two sample pumps are installed internally in 3000 Micro GC. There is no flow through the sample path until the pump turns on. When the sample pump turns on, the sample is drawn through the sample inlet tubing and the sample injectors open for the time specified in the acquisition method. -
Page 47: Carrier Gas Weldment
Base plates align to each module. NOTE: See section 8.2, Remove and Replace a 3000 Micro GC Module, on page for more information about how to align a module. Figure 3-19 Carrier gas weldment... -
Page 48: Carrier Gas Inlet
3-21, and Figure 3-22. Figure 3-20 Carrier Gas inlet of a 1,2-Channel 3000 Micro GC Figure 3-21 Carrier Gas inlet of a 3,4-Channel 3000 Micro GC Figure 3-22 Carrier gas inlet of a Portable 3000 Micro GC 3 - 18... -
Page 49: Vents
TCD. Reference vents expel carrier gas from the reference side of the TCD. Sample vents expel sample gas when the sample pump is drawing sample gas into sample loop or the sample is backflushed from pre-column out of 3000 Micro GC. Figure... -
Page 50: Remote Control Module
3000 Micro GC Operating Manual 3.4.8 Remote Control Module The Remote Control Module allows an external control system to start 3000 Micro GC. The Remote Control Module port is located on the rear of 3000 Micro GC. See Figure 3-26. -
Page 51: Sample Conditioners
Extreme caution must be taken to ensure that liquid and solid particles are not introduced into 3000 Micro GC. A 10 micron sample inlet filter (PN G2801-60900) is provided in the 3000 Micro GC ship kit and must be connected to instrument sample inlet at installation. In addition, a variety of sample conditioners are available to ensure sample entering the instrument is in gas phase and that the sample gas pressure is below 25 PSI. -
Page 52: Ez Iq Chromatography Software
3000 Micro GC Operating Manual 3.6 EZ IQ Chromatography Software EZ IQ is a powerful chromatography software running under the Microsoft Windows ® operating system with an easy-to-use graphical user interface. EZ IQ supports three languages: English, Chinese, and Japanese. See Figure 3-27. -
Page 53: Product Identification
3000 Micro GC Operating Manual 3.7 Product Identification Each 3000 Micro GC carries a configuration specific part number (PN:), serial number (SN:) and identification number (ID:). When contacting INFICON regarding a 3000 Micro GC, please have all three product identification numbers available. -
Page 54: 1,2-Channel And Portable 3000 Micro Gc Part Numbering
3000 Micro GC Operating Manual 3.7.1 1,2-Channel and Portable 3000 Micro GC Part Numbering The 1,2-channel 3000 Micro GC chassis and the Portable 3000 Micro GC chassis can be equipped with one or two channels (modules). Figure 3-29 shows how an instrument part number is constructed for both types of chassis. -
Page 55: 3,4-Channel 3000 Micro Gc Part Numbering
3000 Micro GC Operating Manual 3.7.2 3,4-Channel 3000 Micro GC Part Numbering The 3,4-channel 3000 Micro GC chassis can be equipped with three or four channels (modules). Figure 3-30 shows how an instrument part number is constructed for a 3,4-channel chassis. -
Page 56: Identification Number
3.7.4 Identification Number Each instrument is uniquely identified by an identification number (ID:). Figure 3-31. Figure 3-31 3000 Micro GC identification number format CN Prefix: a fixed two digit prefix and is the same for every instrument Hardware Identification ... -
Page 57: Installation
Use pre-cleaned copper or stainless steel tubing, 1/8 in. OD, for carrier gas connections between the tank regulator and 3000 Micro GC. 3000 Micro GC has a 1/8 in. Swagelok male carrier gas connection. Pre-cleaned, GC grade copper tubing in 50 ft. lengths can be purchased from various chromatography vendors. -
Page 58: Site Requirements
Universal/Uninterruptable Power Supply (UPS) or surge protector is recommended. 4.1.3.2 Space and Venting Requirements For optimum 3000 Micro GC performance and lifetime, allow unrestricted airflow around 3000 Micro GC to dissipate heat. Safely vent sample streams—potentially toxic, noxious, or flammable gases—outside the instrument and away from the operating area. -
Page 59: Gas And Regulator Requirements
CAUTION To protect 3000 Micro GC and to enhance performance, carrier gas traps must be used to purify the carrier gas before the carrier gas is introduced into 3000 Micro GC. A hydrocarbon/moisture trap (PN G2870A-01) is usually sufficient. 4.1.5.2 Calibration Gas and Regulator Requirements Obtain an ample supply of a calibration gas, specific to the analysis needs, from a commercial vendor. -
Page 60: Instrument Hardware Setup
0100-2378 ..Female Luer x 1/6 in. ID Tube Barb Panel ..5 pc G2801-90200 . . . 3000 Micro GC Factory Info CD ....1 pc G2801-90118 . -
Page 61: Configuration Dependent Parts
3000 Micro GC Operating Manual 4.2.2.2 Configuration Dependent Parts 4.2.2.2.1 1,2-Channel and 3,4-Channel 3000 Micro GC Specific Parts Description Quantity G2801-60747 . . . 24 V (dc) AC/DC Power Supply ... 1 pc 4.2.2.2.2 Portable 3000 Micro GC Specific Parts... -
Page 62: Making Carrier Gas And Sample Inlet Connectors
3000 Micro GC Operating Manual 4.2.3 Making Carrier Gas and Sample Inlet Connectors 3000 Micro GC is equipped with a 1/8 in. carrier gas Swagelok connector on the back of the instrument. This section demonstrates how to assemble 1/8 in. carrier gas tubing with the instrument. - Page 63 Unscrew the nut. Connect the tubing with the swaged ferrules to the pencil marked location. Tighten the nut 1/4 turn past finger tight. 3000 Micro GC is equipped with a 1/16 in. sample inlet Swagelok connector on the faceplate. Connecting sample inlet tubing is the same procedure as described for carrier gas inlet tubing.
-
Page 64: Connecting The Carrier Gas
3000 Micro GC Operating Manual 4.2.4 Connecting the Carrier Gas 4.2.4.1 Gas Safety WARNING Gas cylinders present a hazard when not secured properly. Securely fasten all compressed gas cylinders to an immovable structure or permanent wall. Store and handle compressed gases in accordance with safety procedures. -
Page 65: Connecting The Carrier Gas Particulate Filter
Arrow points to 3000 Micro GC 15 cm (6 in.) Install the carrier gas filter within 15 cm (6 in.) of the 3000 Micro GC fitting to maximize its effectiveness. Use a cutoff valve (not provided) as shown in... -
Page 66: Setting The Gas Pressure
552 +/- 14 kPa (80 +/- 2 PSI) nitrogen * Required for checkout WARNING Never fill the Portable 3000 Micro GC internal gas cylinder with hydrogen. A hydrogen leak inside the instrument can present an explosion hazard. CAUTION Exceeding 82 PSI for the carrier gas pressure may result in damage to 3000 Micro GC. -
Page 67: Connecting The Carrier Gas To The 3000 Micro Gc
CAUTION Do not use leak detection fluids. 4.2.4.6 Using the Onboard Carrier Gas Cylinder (Portable 3000 Micro GC only) For information on refilling the internal carrier gas cylinder, see section 8.5.3.1, Refill Onboard Carrier Gas Cylinder, on page 8-43. -
Page 68: Installing The Sample Inlet Filter
CARRIER OUT port for onboard cylinder Carrier jumper tube CARRIER IN ports Set the carrier switch on the front of Portable 3000 Micro GC to ON. Connect sample gases. WARNING If a hazardous sample is used, the sample exhaust must be vented to a fume hood or other designated area for hazardous waste disposal. -
Page 69: Tools Required
Shut off any sample flow to 3000 Micro GC. Allow the sample inlet to cool. Disconnect the sample line to the 3000 Micro GC input fitting using the 5/16 in. wrench, while holding the sample inlet filter with a 7/16 in. wrench. -
Page 70: Power And Communication Cable Setup
3000 Micro GC Operating Manual 4.2.6 Power and Communication Cable Setup Connect the crossover cable (PN 5183-4649) between the computer and 3000 Micro GC. NOTE: If a LAN connection through a hub is required, consult an IT specialist to configure the setup. -
Page 71: Instrument Configuration Setup
4.3.1 Turn on 3000 Micro GC To turn on 3000 Micro GC, set the switch on the front of the instrument to the on position. The switch will illuminate green to indicate that 3000 Micro GC is on. -
Page 72: Ip Address Configuration
Click the General tab and click Properties. Highlight Internet Protocol (TCP/IP) and click Properties. NOTE: If 3000 Micro GC will be set up on a LAN, record all of the computer’s current IP address settings. It is recommended that an IT specialist be consulted when any IP addresses are configured on a LAN. -
Page 73: Ping The Instrument
Figure 4-12 Command prompt showing successful ping 4.3.4 Carrier Gas Configuration At the factory, 3000 Micro GC is configured to use helium carrier gas to verify instrument quality. If the checkout gas was ordered from INFICON and it will be used for the instrument checkout, do not change the carrier gas software setup at this point. -
Page 74: Chromatography Software Installation
3000 Micro GC Operating Manual 4.4 Chromatography Software Installation For an in-depth guide on installing and configuring EZ IQ, refer to the 074-537 EZ IQ Installation Guide. 4 - 18... -
Page 75: Accessory Installation
Chapter 5 Accessory Installation 5.1 Sample Conditioners 3000 Micro GC can be damaged by contaminants, especially particulates and condensing aerosols. Use an appropriate filter or sample conditioner at all times. Table 5-1 lists the typical usage and filtration capabilities of the standard filter and available accessories. - Page 76 3000 Micro GC Operating Manual Table 5-1 List of sample conditioners, inlet pressures, and IPNs Type Input Pressure Sample Sample Matrix Particle to Accessory Container/delivery filtration (microns) Heated Regulator 14 to 5516 kPa Transfer line or C6+ components G2818A-X, for Sampling high-pressure >0.5 mole%...
-
Page 77: Installing The 10 Micron Sample Inlet Filter
5.1.3 Installing the Genie Filter Assembly The Genie Filter Assembly Kit (PN G2817A) provides gas-liquid separation function through a Genie Membrane Separator. It is not compatible with other sample conditioners mounted on the 3000 Micro GC front panel. See Table 5-2 Figure 5-1 for G2817A kit contents. -
Page 78: User Supplied Parts
Loosely install a 5/16 in. nut, back ferrule, and front ferrule onto the 3000 Micro GC sample inlet fitting. Do not tighten. Tubing will be installed into this fitting later. Figure 5-2 Installing ferrules 1/4 in. male nut... - Page 79 Figure 5-4. The edge of the 3000 Micro GC front molding fits into the groove in the bracket. Figure 5-4 Installing the Genie filter assembly Sample inlet fitting...
- Page 80 Tighten the 1/4 in. nut on the top of the Genie Filter Assembly. Tighten the 5/16 in. nut on the 3000 Micro GC sample inlet fitting using the appropriate size wrenches. 5 - 6...
- Page 81 Uncoil the vent tubing. Run the exhaust to a fume hood or other designated area for hazardous waste disposal. Figure 5-7 shows the Genie Filter Assembly mounted on 3000 Micro GC. Figure 5-7 Genie filter assembly mounted on 3000 Micro GC G2817A on a 2-channel 3000 Micro GC shown...
-
Page 82: Installing The Pressure Reducer
3000 Micro GC Operating Manual 5.1.4 Installing the Pressure Reducer The Pressure Reducer (PN G2815A) provides a pressure reducing function. It is not compatible with other sample conditioners mounted on the 3000 Micro GC front panel. Table 5-3 Pressure reducer kit contents. -
Page 83: Installation Instructions For The Pressure Reducer
3000 Micro GC Operating Manual 5.1.4.3 Installation Instructions for the Pressure Reducer Turn off 3000 Micro GC and allow the sample inlet fitting to cool. WARNING 3000 Micro GC has inlets which can be heated to 140°C. Touching the inlets at operating temperatures can result in injury. - Page 84 Align the Pressure Reducer bracket horizontally on the face of the 3000 Micro GC so that the end of the outlet tubing is near the inlet fitting. Place the lower lip of the mounting bracket under the bottom front panel as...
- Page 85 Installation is now complete. Figure 5-14 shows the Pressure Reducer mounted on 3000 Micro GC. Figure 5-14 Pressure reducer mounted on a 3000 Micro GC PN G2815A on a 2-channel 3000 Micro GC 5 - 11...
-
Page 86: Installing The Pressure Reducer And Genie Filter Assembly
The Pressure Reducer and Genie Filter Assembly (G2816A) provides a pressure reducing function and a gas-liquid separation through a Genie filter. It is not compatible with other sample conditioners mounted on the 3000 Micro GC front panel. See Table 5-4 Figure 5-15 for G2816A kit content. - Page 87 3000 Micro GC Operating Manual 5.1.5.3 Installation Instructions for the Pressure Reducer and Genie Filter Assembly Turn off 3000 Micro GC and wait for the sample inlet fitting to cool. WARNING 3000 Micro GC has inlets which can be heated to 140°C.
- Page 88 Align the Pressure Reducer and Genie Filter Assembly bracket horizontally on the 3000 Micro GC face so that the end of the outlet tubing is near the inlet fitting. Then, place the lower lip of the mounting bracket under the bottom front...
- Page 89 When maintaining the alignment of the outlet tubing and the inlet fitting, tilt the bracket up and snap it onto the front of the 3000 Micro GC. When properly mounted, the bracket should be flat against the 3000 Micro GC frame. Insert the outlet tubing into the sample inlet fitting.
- Page 90 3000 Micro GC Operating Manual Remove the blue cap from the 1/8 in. NPT male input fitting and install a user-provided 1/8 in. female NPT fitting and sample line. See Figure 5-20. Figure 5-20 Installing the sample line Tighten Tighten...
-
Page 91: Installing Heated Sample Introduction Accessories
Figure 5-22 shows the Pressure Reducer and Genie Filter Assembly mounted on 3000 Micro GC. Figure 5-22 Pressure reducer and Genie filter assembly mounted on 3000 Micro GC G2816A on a 2-channel 3000 Micro GC 5.1.6 Installing Heated Sample Introduction Accessories Heated sample introduction accessories are separately powered sample conditioners for the 3000 Micro GC. -
Page 92: Heated Regulator
A 7 micron sintered stainless steel particle filter reduces the risk of damage to 3000 Micro GC by particulate matter. The entire sample pathway, from the quick connect fitting through the 3000 Micro GC sample transfer line, is heated to a minimum temperature of 60°C. -
Page 93: Target Analytes
3000 Micro GC Operating Manual 5.1.6.1.1 Target Analytes Natural gas typically consists of methane and a wide distribution of other hydrocarbons and fixed gases. The Heated Regulator is designed for the broadest range of sample compositions that are in the gas phase at ambient temperature and pressure. -
Page 94: Heated Vaporizer
NOTE: Samples with excessive water content will exhibit large water peaks. Several analytes detectable with the Heated Vaporizer and 3000 Micro GC are shown in Table 5-7. -
Page 95: Heated Vaporizer Accessory Contents
Power cable (varies by country) Power supply 5.1.6.3 Installation The heated sample introduction accessory can be installed on any 3000 Micro GC that has a heated injector. 5.1.6.3.1 Tools and Supplies Required A power source rated for 100 to 240 V (ac), 50/60 Hz, 2 A ... -
Page 96: User Supplied Parts
1/8 in. copper tubing for high pressure venting (rated for the maximum supply pressure) 5.1.6.3.3 Prepare the 3000 Micro GC and Sample Introduction Accessory Turn off 3000 Micro GC and allow the sample inlet fitting to cool. WARNING 3000 Micro GC has inlets which can be heated to 140°C. -
Page 97: Installing The Transfer Line
Quick disconnect fitting Sample outlet fitting Back view of heated sample conditioners (bracket for 2-channel 3000 Micro GC) Before mounting the heated sample introduction accessory, the transfer line must be inserted into the sample outlet fitting. Verify that the transfer line can slide into the nut and ferrule set. -
Page 98: Mounting The Heated Sample Conditioners
Figure 5-30 Accessory with copper coil and nut installed Copper coil and nut installed Hold the heated sample introduction accessory at an angle to the instrument and slide the right side screw slots under the loosened 3000 Micro GC cover screws. See Figure 5-31 Figure 5-32. - Page 99 Transfer line Tighten the 3000 Micro GC cover screws. Insert the transfer line into the 3000 Micro GC sample inlet fitting as far as possible, then back it out about 1 mm. Finger tighten the female nut, then tighten an additional 1/8 turn with the 5/16 in.
-
Page 100: Install The Vent Tubing And Connect To Power
5.1.6.3.6 Install the Vent Tubing and Connect to Power CAUTION Never connect low and high pressure vent lines together. 3000 Micro GC will be damaged by back pressure. Attach low pressure vent tubing to the low pressure vent on the heated sample introduction accessory. See Figure 5-34. -
Page 101: Installation For 3,4-Channel 3000 Micro Gcs
Turn 3000 Micro GC on. 5.1.6.4 Installation for 3,4-Channel 3000 Micro GCs Installation for the 3,4-channel 3000 Micro GC is essentially identical to that of a 1,2-channel 3000 Micro GC, except that the mounting bracket is longer. See Figure 5-36 Figure 5-37. -
Page 102: Heated Regulator/Vaporizer Part Numbers
3000 Micro GC Operating Manual 5.1.6.5 Heated Regulator/Vaporizer Part Numbers The Heated Regulator and Heated Vaporizer are supplied with country specific power cords. Part numbers reflect the power cord provided with the sample conditioner. See Table 5-9. Table 5-9 Heated regulator/vaporizer IPNs... - Page 103 3000 Micro GC Operating Manual Table 5-9 Heated regulator/vaporizer IPNs (continued) Power Cord Description G2846A-6 Australia/NZ Heated Vaporizer for gas sampling:3,4-ch G2846A-7 Korea Heated Vaporizer for gas sampling:3,4-ch G2857A-1 China Heated Regulator for gas sampling: portable G2857A-2 Europe Heated Regulator for gas sampling: portable...
-
Page 104: The Remote Connector
3000 Micro GC readiness. To have an external triggering device start or cancel a run, the Digital I/O module (PN G2847A) must be installed in 3000 Micro GC. If the Digital I/O module is not already installed, see Installing the Digital IO Module Quick Start Guide. - Page 105 3000 Micro GC Operating Manual Figure 5-39 shows the remote start cable. Figure 5-39 G2801-60618 remote start cable Figure 5-40 shows the remote start/cancel circuitry. Figure 5-40 Remote start/cancel circuitry 5 - 31...
-
Page 106: Ez Iq Operation To Activate Remote Start/Cancel Function
REMOTE_START circuit starts the 3000 Micro GC run and EZ IQ begins data acquisition. NOTE: When 3000 Micro GC is ready to begin a run but a REMOTE_START signal has not been received, the READY_OUT contacts (i.e., pins 8 and 15) are closed. -
Page 107: Multi-Position Valve Installation And Setup
3000 Micro GC Operating Manual 5.3 Multi-Position Valve Installation and Setup 3000 Micro GC can be equipped with a Valco (VICI) switching or sampling valve actuator to control the injection of multiple gas streams. EZ IQ software allows for control of this stream selection valve. See Figure 5-41. -
Page 108: Valve Hardware Connections
3000 Micro GC Operating Manual 5.3.2 Valve Hardware Connections Assemble the multiposition microelectric valve actuator and controller connections according to the Valco operating manual. Connect the Serial Port Cable (RS-232) to computer for valve control. 5.3.3 Valve Configuration The Valco valve driver is built into the EZ IQ software package. For valve configuration steps, see section 7.3, Configuring EZ IQ to Use a Valco (VICI) Valve,... -
Page 109: Instrument Setup Through
Embedded Web Page Operation 6.1 Overview 3000 Micro GC has an embedded web page for easy access to features such as viewing configuration information, IP Address modification, and carrier gas modification. The embedded web page is accessed via a web browser. - Page 110 The information listed on the home page will contain: 3000 Micro GC serial number Number of GC modules GC module information such as column, detector, and pump used Carrier gas type Figure 6-2 3000 Micro GC embedded web page home page 6 - 2...
-
Page 111: Determining 3000 Micro Gc Advanced Configuration
6.1.2 Determining 3000 Micro GC Advanced Configuration The embedded web page displays detailed configuration information in the Utilities tab. On 3000 Micro GC home page, click the Utilities tab. See Figure 6-3. Figure 6-3 Utilities tab on embedded web page Under Configuration, click Full System. - Page 112 3000 Micro GC Operating Manual The 3000 Micro GC configuration is displayed. See Table 6-1 Figure 6-5. Table 6-1 Advanced configuration item numbers and description Item # Description 3000 Micro GC Model 3000 Micro GC Serial Number GC Module Communication Address...
- Page 113 3000 Micro GC Operating Manual Codes for GC modules, sample pumps, and GC module layout are displayed in Figure 6-6. Figure 6-6 3000 Micro GC full system codes Pump m0, Pump0 m1, Pump1 GC Module GC Module Top of 1,2-Channel 3000 Micro GC...
-
Page 114: Status
NO—If the parameter values do not meet their set point, or if there are flags (= 00), reset the 3000 Micro GC by closing the browser and then turning 3000 Micro GC off and on. Recheck the Status tab. If the actual values still do not meet their set points, contact INFICON. -
Page 115: Utilities
NO—If the duty cycle is > 50%, check the carrier gas inlet pressure. Replace the carrier gas filter (PN 3150-0602). Recheck the Duty cycle. If it is still > 50%, contact INFICON. 6.3 Utilities The Utilities tab is on the 3000 Micro GC embedded web page. See Figure 6-8. Figure 6-8 Utilities tab 6.3.1 Set Date/Time... -
Page 116: Restart
Wait at least three minutes for the 3000 Micro GC to fully reboot. 6.3.3 Shutdown On the Utilities tab, click Shutdown to shut down 3000 Micro GC. A countdown screen will count down three minutes. After three minutes have passed, set the front panel power switch to the off position. -
Page 117: Change Carrier Gas Configuration
3000 Micro GC Operating Manual 6.4 Change Carrier Gas Configuration The type of carrier gas used for analysis can be changed through the embedded web page. NOTE: If a carrier gas type is changed without following this procedure, inverted peaks will appear in the chromatogram. - Page 118 3000 Micro GC Operating Manual Click Make Changes. See Figure 6-10. When prompted for a user name and password, type gasconfig for both. See Figure 6-11. Figure 6-11 Gas type username and password gasconfig gasconfig A window will then appear similar to Figure 6-12.
- Page 119 3000 Micro GC Operating Manual Select the new carrier gas type from the drop-down list. See Figure 6-13. Figure 6-13 Selecting a new carrier gas type Click Submit. This turns the column heaters off (to cool the columns and avoid thermal shock) and displays the Check Status view.
- Page 120 Figure 6-16 Restart screen for gas configuration Turn on 3000 Micro GC and wait three minutes for it to fully boot up. NOTE: To run samples using the reconfigured gas type, open EZ IQ Config and update the 3000 Micro GC configuration in EZ IQ. Refer to the 074-537 EZ IQ Installation Guide for details.
-
Page 121: Change Ip Address
3000 Micro GC Operating Manual 6.5 Change IP Address 6.5.1 IP Configuration The 3000 Micro GC IP address can be changed through the embedded web page. Open the web browser. In the address bar, type the current IP Address of the instrument. Press Enter. - Page 122 3000 Micro GC Operating Manual When prompted for a user name and password, type ipconfig for both. See Figure 6-19. Figure 6-19 IP configuration access Type the desired changes to the IP Address and click Submit. See Figure 6-20. NOTE: Consult an IT professional to assist with IP settings...
- Page 123 3000 Micro GC Operating Manual A window will prompt to restart 3000 Micro GC. Click Restart and wait at least three minutes before shutting down the 3000 Micro GC. See Figure 6-21. CAUTION Do not turn off the power without waiting at least three minutes.
-
Page 124: Access The Embedded Web Page Via A Fixed Ip Address
6.5.2 Access the Embedded Web Page Via a Fixed IP Address If the embedded web page cannot be accessed, and the IP address of the 3000 Micro GC cannot be determined, follow the instructions below to access the web page via a fixed IP address. - Page 125 3000 Micro GC Operating Manual On the Local Area Connection Status window, click Properties. See Figure 6-25. Figure 6-25 Local area connection status window On the Local Area Connection Properties window, select Internet Protocol (TCP/IP) from the list, then click Properties. See Figure 6-26.
- Page 126 3000 Micro GC Operating Manual In the Internet Protocol (TCP/IP) Properties window, click Use the following IP address. See Figure 6-27. Figure 6-27 Internet protocol (TCP/IP) properties window Type the IP address and Subnet mask as follows: IP address: 192.168.1.100 Subnet mask: 255.255.255.0...
- Page 127 Type 192.168.1.99 into the web browser address bar. Press Enter. The instrument embedded web page home page will display. Click IP Configuration. Review the IP Address. NOTE: If connection cannot be established, verify all LAN connections and IP addresses. If there is still no communication, contact INFICON. 6 - 19...
- Page 128 3000 Micro GC Operating Manual This page is intentionally blank. 6 - 20...
-
Page 129: Basic Ez Iq Operation
Operating Manual. The procedure and screen captures in this chapter are representative of operation using the 3000 Micro GC Enhanced Driver. For operation using the 3000 Micro GC Classic Driver, refer to the 074-538-P1(A) EZ IQ Operating Manual. 7.2 Connecting EZ IQ with 3000 Micro GC Before connecting EZ IQ with 3000 Micro GC, ensure: ... - Page 130 Configure. See Figure 7-2. Figure 7-2 Instrument configuration window The 3000 Micro GC Enhanced Driver window will display. Click the INFICON 3000 Micro GC icon. Click the arrow to move the INFICON 3000 Micro GC icon from Available modules to Configured modules. See Figure 7-3.
- Page 131 Figure 7-4 3000 Micro GC configuration window Click OK to exit the INFICON 3000 Micro GC Configuration window. Click OK to exit the INFICON 3000 Micro GC Enhanced Driver window. Click OK to exit the Instrument Configuration window. Click Close to exit the EZ IQ Configuration window.
-
Page 132: Configuring Ez Iq To Use A Valco (Vici) Valve
Configuration..See Figure 7-5. Figure 7-5 EZ IQ configuration window On the Instrument Configuration window, type the desired Instrument name:, select Instrument type: 3000 Micro GC Enhanced Driver, and click Configure. See Figure 7-6. Figure 7-6 Instrument configuration window For a Valco (VICI) Switching Valve, follow instructions in Configuring a Valco (VICI) Switching Valve, see section 7.3.1 on page... -
Page 133: Configuring A Valco (Vici) Switching Valve
3000 Micro GC Operating Manual 7.3.1 Configuring a Valco (VICI) Switching Valve The 3000 Micro GC Enhanced Driver window will display. Click the Valco Switching Valve icon. Click the arrow to move the Valco Switching Valve icon from Available modules to Configured modules. See Figure 7-7. - Page 134 3000 Micro GC Operating Manual Select the desired parameters. See Table 7-1 for a list of parameters. Table 7-1 Parameters Name Description Model Identifies the name of the valve model. Other configuration items will be unavailable until the Model is selected.
-
Page 135: Configuring A Valco (Vici) Sampling Valve
3000 Micro GC Operating Manual 7.3.2 Configuring a Valco (VICI) Sampling Valve The 3000 Micro GC Enhanced Driver window will display. Click the VICI Sampling Valve icon. Click the arrow to move the VICI Sampling Valve icon from Available modules to Configured modules. See Figure 7-11. - Page 136 3000 Micro GC Operating Manual Select the desired parameters. See Table 7-2 for a list of parameters. Table 7-2 Valco (VICI) sampling valve configuration parameters list Name Description Model Identifies the name of the valve model. Other configuration items will be unavailable until the Model is selected.
-
Page 137: Navigating Ez Iq
3000 Micro GC Operating Manual 7.4 Navigating EZ IQ When EZ IQ is opened, the Instrument Window will display. From this window, all instrumental functions are available, including: Method development Integration Calibration Instrument control and data acquisition ... - Page 138 3000 Micro GC Operating Manual By default, a Navigation pane is displayed at the left side of the instrument window. This view enables the user to quickly switch between the major functions of the instrument window. A function can be accessed by clicking on one of the function bars located at the bottom of the Navigation pane.
-
Page 139: Ez Iq Workflow
3000 Micro GC Operating Manual 7.5 EZ IQ Workflow The following steps outline the workflow for EZ IQ. Basic Method Development and Creating a New Method. See section 7.6 on page 7-12. Run a Sample. See section 7.7 on page 7-19. -
Page 140: Basic Method Development
3000 Micro GC Operating Manual 7.6 Basic Method Development A method is used whenever a data file is acquired and/or reprocessed. It contains instructions for: Data acquisition (run time, sampling rate, etc.) Integration Calibration Peak information ... -
Page 141: Creating A New Method
3000 Micro GC Operating Manual 7.6.1 Creating a New Method To create a new method: Open EZ IQ Click File >> Method >> New. Figure 7-15 Create a new method To edit method parameters, click Method >> Instrument Setup. See Figure 7-16. - Page 142 3000 Micro GC Operating Manual The Instrument Setup window will display parameters that can be changed. Figure 7-17. NOTE: The Instrument Setup window is configuration dependent. Figure 7-17 Instrument setup window Enter sample acquisition parameters as desired, such as Injector Temperature, Column Temperature, Sample Pump time, Column Pressure, etc.
- Page 143 3000 Micro GC Operating Manual Click the Trigger tab and select the trigger Type for the type of remote start installed in 3000 Micro GC. If there are no triggers on the system, select None. Figure 7-18. For instructions on how to use a trigger within EZ IQ, refer to section 7.14, EZ IQ Operation to Activate Remote Start/Cancel Function, on...
-
Page 144: Opening A Method
3000 Micro GC Operating Manual 7.6.2 Opening a Method To open a method, Click File >> Method >> Open. The Open Method File window displays to allow selection of the method file. Select a method file, then click Open. See Figure 7-19. -
Page 145: Downloading A Method
When a new method is created, or when a method is changed or opened, it must be downloaded to 3000 Micro GC. Click Control >> Download Method. See Figure 7-20. Figure 7-20 Downloading a method 3000 Micro GC status can now be viewed. See section 7.6.4, View Instrument Status, on page 7-18. 7 - 17... -
Page 146: View Instrument Status
3000 Micro GC Operating Manual 7.6.4 View Instrument Status Click Control >> Instrument Status to view 3000 Micro GC status. See Figure 7-21. Figure 7-21 Instrument status window - not ready NOTE: The status will read Not Ready (highlighted in yellow) if parameters have not reached their set points. -
Page 147: Run A Sample
3000 Micro GC Operating Manual 7.7 Run a Sample Once a method has been downloaded to 3000 Micro GC, a data acquisition run can be performed. To start the run, click Control >> Single Run. The Single Run Acquisition window will be displayed. See Figure 7-23. -
Page 148: Basic Sequencing
3000 Micro GC Operating Manual 7.8 Basic Sequencing A simple way to sequence data runs is to change the Number of reps in the Single Run Acquisition window. Refer to Figure 7-23. For more details on programming sequences in EZ IQ, refer to the corresponding chapter in the 074-538 EZ IQ Operation Manual. -
Page 149: Integrating The Chromatogram
3000 Micro GC Operating Manual 7.10 Integrating the Chromatogram EZ IQ provides integration of peaks for analysis of simple chromatograms. After a run is completed, the peaks will automatically be integrated. However, certain chromatography may require more elaborate treatment of the data, or special integration of specific peaks. -
Page 150: Common Integration Events
3000 Micro GC Operating Manual 7.10.2 Common Integration Events Frequently used event parameters are explained below. See the 074-538 EZ IQ Operating Manual for more detailed information. Figure 7-25 Integration events window 7.10.2.1 Width The Width event is used to calculate a value for bunching, or smoothing, the data points before the integration algorithm is applied. -
Page 151: Integration Off
3000 Micro GC Operating Manual 7.10.2.3 Integration Off The Integration Off event turns off the integration of the chromatogram from the Start Time to the Stop Time. This event is useful if there are regions of the chromatogram that are not of interest. - Page 152 3000 Micro GC Operating Manual Set the integration Start Time, Stop Time, and Value as desired. To save the method, click File >> Method >> Save. NOTE: To disable an event parameter for a particular analysis, yet keep the event in the table, select the check box next to the event.
-
Page 153: Graphically Programming Integration Events
3000 Micro GC Operating Manual 7.10.3.2 Graphically Programming Integration Events Right-click on the chromatogram and select the desired integration event under Graphical Programming. A blue window will display (see Figure 7-30). Using the pointer, select a position for the Start Time and the Stop Time on the chromatogram for the specific event. -
Page 154: Qualify Peaks
3000 Micro GC Operating Manual 7.11 Qualify Peaks Use the following steps to qualify, or identify peaks. 7.11.1 Annotate a Chromatogram To set annotations on a chromatogram, such as Retention Time and Name: Right-click on a chromatogram and select Annotations. See Figure 7-32. - Page 155 3000 Micro GC Operating Manual Click Available Annotation then select which features to annotate. For example, selecting Retention Time will display the retention times above the integrated peaks. When an annotation is highlighted, click the green arrow to move the annotation from Available Annotations to Show the following annotations.
-
Page 156: Adding Peak And Group Information
3000 Micro GC Operating Manual 7.11.2 Adding Peak and Group Information Peaks and groups can be identified in several ways. The information can be entered manually into the peak table, or the information can be gathered using graphical programming tools. -
Page 157: Define Peaks Graphically
3000 Micro GC Operating Manual 7.11.2.2 Define Peaks Graphically Click the Define Single Peak icon on the Int Event toolbar. See Figure 7-37. NOTE: Alternatively, integration events (also known as graphical programming tools) can be selected by right-clicking on the chromatogram and selecting the desired Graphical Programming option. - Page 158 3000 Micro GC Operating Manual Figure 7-38 Define single peak through graphical programming The Define Single Peak window will appear for the first detected peak in the chromatogram. See Figure 7-39. Figure 7-39 Define single peak window Verify the Retention time of the detected peak. If this peak is a component of interest, complete the boxes in the window.
- Page 159 3000 Micro GC Operating Manual Click Next >> to move to the next detected peak. Click << Back to move to the previously detected peak in the chromatogram. NOTE: The current peak and total peaks in the chromatogram are displayed on the right of the window.
- Page 160 3000 Micro GC Operating Manual Table 7-3 Parameters Parameters Description ISTD ID# If an internal standard calibration will be performed, enter the ID # for the internal standard peak for this compound. The ID # refers to the peak ISTD. ID # from the Peaks/Groups table.
-
Page 161: Adding Groups
3000 Micro GC Operating Manual 7.11.2.3 Adding Groups To add a group: Click Method >> Peaks/Groups from the toolbar. Click the Groups tab. See Figure 7-41. Figure 7-41 Groups tab Type the name of the group in a blank box. -
Page 162: Adjust Peak Windows
3000 Micro GC Operating Manual 7.11.3 Adjust Peak Windows Retention time windows will appear as red lines above peaks in the chromatogram. These can be adjusted manually by changing the Window value in the Peaks/Groups table. Alternatively, the windows can be adjusted graphically. - Page 163 3000 Micro GC Operating Manual A blue Adjust Retention Time Window window will display. Click on the desired retention time window. Figure 7-44 Retention time window select Move the window, or adjust the size as desired. See Figure 7-44. Press <Esc>. The Adjust Retention Time Window window will display. See Figure 7-45.
-
Page 164: Calibration
3000 Micro GC Operating Manual 7.12 Calibration A calibration must be performed to quantify a peak (i.e., determine the amount of a sample based on known standard gases). In this section, the procedure for setting up single level and multiple level calibration is described. -
Page 165: Perform A Single Level Calibration
3000 Micro GC Operating Manual 7.12.3 Perform A Single Level Calibration To quantify unknown samples, the method must contain the peak areas for each component in the standard calibration sample. To acquire the peak area information: Run the standard calibration sample and designate it as a calibration run... - Page 166 3000 Micro GC Operating Manual The Analysis/Single Level Calibration window will display. Figure 7-48 Analysis/single level calibration window - analysis information Type the sample identification in the Sample ID box, if not already present. See Figure 7-48. Select the name of the method to be calibrated, if not already present, by clicking the Open file icon adjacent to the box.
- Page 167 3000 Micro GC Operating Manual Select the Calibration check box and type 1 for Calibration level. See Figure 7-50. NOTE: For the initial calibration, clear any of the boxes involving calibrations or replicates. However, if the method was previously calibrated and the calibrated information needs to be replaced, select Clear all calibration before starting.
-
Page 168: Perform A Multiple Level Calibration
3000 Micro GC Operating Manual 7.12.4 Perform a Multiple Level Calibration If a multiple level calibration is required, sample calibration standards of different concentration levels should be run. NOTE: Update the Method >> Peaks/Groups table to include Level 2, Level 3, etc. -
Page 169: Review Calibration
3000 Micro GC Operating Manual 7.12.5 Review Calibration After completing a calibration, a calibration curve and associated data can be reviewed by clicking Method >> Review Calibration. Alternatively, click the Review Calibration icon. See Figure 7-53. Figure 7-53 Review calibration window From Review Calibration, ... -
Page 170: Generate Standard Reports
3000 Micro GC Operating Manual 7.13 Generate Standard Reports EZ IQ provides various standard report templates, such as an External Standard (ESTD) Report to generate the desired report. To customize report layout and content, use the EZ IQ Method >> Custom Report function. -
Page 171: Custom Method Report Features
3000 Micro GC Operating Manual 7.13.1.1.1 Custom Method Report Features A number of features in the Method Report window are outlined. See Figure 7-55. Figure 7-55 Custom method report Ruler and black arrow Command ribbons Right-click Import report Feature Description Ruler Shows the position relative to the page. -
Page 172: Importing A Template File
3000 Micro GC Operating Manual 7.13.1.1.2 Importing a Template File Right-click in the Method Report window. Select Import Report. The Open Report Template File window will prompt to open a template file. One example is the External Standard.srp file. See Figure 7-56. -
Page 173: Save A Custom Method Report
3000 Micro GC Operating Manual 7.13.1.2 Save a Custom Method Report Once all desired information has been modified or added, right-click in the Method Report and select Export Report. Figure 7-57. Figure 7-57 Report editor - export report In the Save Method Custom Report As window, type a method report name in the File name field. -
Page 174: View Or Print A Custom Method Report
3000 Micro GC Operating Manual 7.13.1.3 View or Print a Custom Method Report To view the custom method report, click Reports >> View >> Method Report. Figure 7-59. Figure 7-59 View a custom method report To print the custom Method Report, right-click over report area and select Print. -
Page 175: External Standard (Estd) Reports
3000 Micro GC Operating Manual 7.13.2 External Standard (ESTD) Reports An ESTD Report contains information on retention time, area, and mole percent concentration. It is not method specific. The same template will be applied to any method that is opened 7.13.2.1 Customize an ESTD Report... -
Page 176: View And Print An Estd Report
3000 Micro GC Operating Manual Click Save. Click Yes to overwrite the current file. See Figure 7-61. Figure 7-61 Save a customized ESTD report 7.13.2.3 View and Print an ESTD Report To view the ESTD report, click Reports >> View >> External Standard. See Figure 7-62. -
Page 177: Ez Iq Operation To Activate Remote Start/Cancel Function
3000 Micro GC Operating Manual 7.14 EZ IQ Operation to Activate Remote Start/Cancel Function To use the remote connector function in EZ IQ: Open EZ IQ. Click Method >> Instrument Setup to display the Instrument Setup window. On the Trigger tab, select Type: External. See Figure 7-63. - Page 178 3000 Micro GC Operating Manual Click Start to begin sample acquisition. The run queue will be pending until the REMOTE_START contact is closed. See Figure 7-65. Figure 7-65 Pending status shown in run queue window NOTE: Waiting For Trigger will be displayed at the bottom right corner of the EZ IQ Instrument Window.
- Page 179 3000 Micro GC Operating Manual To abort the remaining runs in the run queue during a run. Close the REMOTE_CANCEL contact, which may be triggered by an external system, until the current run is completed. Once the current run is completed, the remaining runs will be aborted.
-
Page 180: Apply The Valco Valve Program To Ez Iq Method
3000 Micro GC Operating Manual 7.15 Apply the Valco Valve Program to EZ IQ Method 7.15.1 Valco Valve Setup in EZ IQ In EZ IQ, click Method >> Instrument Setup. Click the Sampling tab. See Figure 7-68. Figure 7-68 Instrument setup window - switching Select the Valve purge position: from the drop-down list. -
Page 181: Running A Sample With A Valco Valve
3000 Micro GC Operating Manual 7.15.2 Running a Sample with a Valco Valve In EZ IQ, click Control >> Single Run to display the Single Run Acquisition window. See Figure 7-69. Figure 7-69 Single run acquisition window with valve control Type a Vial number. -
Page 182: Running A Sequence With A Valco Valve
3000 Micro GC Operating Manual 7.15.3 Running a Sequence with a Valco Valve A sequence of multiple runs with different valve positions can be scheduled by editing the sequence as below: Click Sequence >> Edit. The Sequence window will display. Vial number defines the port position for a single run. -
Page 183: Routine Operation
After the first installation After installing a replacement GC module After the 3000 Micro GC has been turned off or stored for an extended period of time After the 3000 Micro GC has been stored in a Shipping Case (PN G2801-81005) for an extended period of time ... - Page 184 3000 Micro GC Operating Manual Figure 8-1 Example bakeout method Click File >> Method >> Save to save the bakeout method. When prompted, type a unique name for the bakeout method. Verify that the carrier gas is on and flowing. This will protect the column and TCD.
-
Page 185: Shutdown/Restart
This may cause a system integrity issue. CAUTION If a 3000 Micro GC is powered off when the column is at a high temperature, column contamination and degradation may result. Proceed as follows to shutdown or restart a 3000 Micro GC. -
Page 186: Standby
If power is turned off too soon, the files could be corrupted, making 3000 Micro GC inoperable. 8.1.3 Standby Leave 3000 Micro GC power on with carrier gas flowing when 3000 Micro GC is not in use. This enhances instrument performance and lifetime. 8 - 4... -
Page 187: Remove And Replace A 3000 Micro Gc Module
3000 Micro GC Operating Manual 8.2 Remove and Replace a 3000 Micro GC Module The following procedure will outline the steps necessary to fully remove and replace a module. 8.2.1 Types of Replacement Modules In general, any type of GC module can be replaced with one of a different type. This includes modules with different columns, columns lengths, and injectors. -
Page 188: Update The Instrument Firmware
3000 Micro GC Operating Manual 8.2.3 Update the Instrument Firmware Before installing a new GC Module, the 3000 Micro GC firmware must be updated. New GC modules have the most recent firmware installed. The most recent 3000 Micro GC firmware is included in the GC module replacement kit. To update the instrument firmware: Insert the Firmware Update CD-ROM from the GC module replacement kit. -
Page 189: Decommission A Standard Gc Module
For a 1-2 channel or portable 3000 Micro GC, the module addresses are 1 and 2. For a 3-4 channel 3000 Micro GC, the module addresses are 1, 2, 3 and 4. Decommissioning a standard GC module will disable the GC module's address. - Page 190 3000 Micro GC Operating Manual Figure 8-4 Change module configuration Two caution messages appear. Read the caution, then click OK to continue. Click Remove. See Figure 8-5. Figure 8-5 Decommission a GC module - remove button NOTE: Once a Standard GC module is decommissioned, it can no longer be used until it is recommissioned.
- Page 191 3000 Micro GC must update configuration files before power is turned off. If power is turned off too soon, the files could be corrupted, making 3000 Micro GC inoperable. Wait at least three minutes before shutting down 3000 Micro GC. See Figure 8-8. 8 - 9...
- Page 192 3000 Micro GC Operating Manual Figure 8-8 Decommission a GC module - restart instrument countdown Set the 3000 Micro GC front panel power switch to the off position. 8 - 10...
-
Page 193: Remove A Gc Module
The old GC Module must be physically removed from 3000 Micro GC before the new GC Module is installed. The following procedure outlines how to remove the left, or Channel A, GC module in a 2-channel 3000 Micro GC. The process is similar for any channel. - Page 194 3000 Micro GC Operating Manual Figure 8-9 Thumbscrews on manifold cover plate Loosen thumbscrews Manifold cover plate Three screw design Loosen thumbscrews Manifold cover plate Two screw design Carefully remove the manifold insulation. Save it for reuse. See Figure 8-10.
- Page 195 3000 Micro GC Operating Manual NOTE: In Portable 3000 Micro GC, the DC-DC converter assembly blocks access to the GC modules. Remove the screws that secure the DC-DC converter assembly to the side of the chassis. Without disconnecting any wires, slide the assembly off of the standoffs and gently lift it away from the GC modules.
- Page 196 3000 Micro GC Operating Manual Disconnect the inlet manifold fitting from the GC module input fitting using a 1/4 in. open-ended wrench. See Figure 8-13. Figure 8-13 Disconnect inlet fitting Channel B Channel A module Disconnect inlet fitting Inlet manifold...
- Page 197 3000 Micro GC Operating Manual Figure 8-15 Remove the GC module Tilt GC module Mounting flange Mounting flange Tilt until mounting flange is free from aligning pins 2-channel 3000 Micro GC Others are similar Inspect the gang block fitting on the bottom of the chassis to ensure the mating surface is clean.
-
Page 198: Install A Gc Module
3000 Micro GC Operating Manual 8.2.6 Install a GC Module Once a module is removed, it can be replaced with another module. If the replacement module uses a different carrier gas, follow the procedure in section 6.4, Change Carrier Gas Configuration, on page 6-9. - Page 199 3000 Micro GC Operating Manual Remove the small metal plate covering the O-rings on the upper gang block. Figure 8-19. Figure 8-19 Protective plate on upper gang block Retaining screw Metal plate covering O-rings and upper gang block Inspect the GC module mounting flange fitting to verify all new O-rings on the replacement GC module are undamaged and seated properly.
- Page 200 Figure 8-22. Slide the GC module towards the front of the chassis, until the GC module is fully seated into the Swagelok fitting in the 3000 Micro GC inlet manifold. Figure 8-22 Install the new module Install GC module below...
- Page 201 3000 Micro GC Operating Manual Reconnect the communications cables. See Figure 8-23. NOTE: Do not connect more than two GC modules in series per communications board connection. NOTE: The GC modules and communications board use parallel communications; both connectors on each item function similarly.
-
Page 202: Commission A New Standard Gc Module
8-22. Turn 3000 Micro GC on Wait three minutes for the instrument to fully power up. In the web browser address bar, type the 3000 Micro GC IP address. Click the Utilities tab. Click Change Module Configuration. Figure 8-24 Change module configuration Click Set. - Page 203 Figure 8-26) to . Each module address corresponds to a channel number. Valid 3000 Micro GC module addresses are 1 through 4. Figure 8-26 Commission a standard GC module - select module After selecting the module address, click Restart to incorporate the changes.
-
Page 204: Enable The Instrument In Ez Iq
Update EZ IQ with updated 3000 Micro GC hardware configuration after: installing the replacement Standard or Performance Enhanced GC module updating the GC firmware For instruction on how to update 3000 Micro GC instrument configuration in EZ IQ, refer to section 7.2 on page 7-1. 8 - 22... -
Page 205: Sample Conditioners
8.3.1 Sample Conditioner Connections There are multiple types of optional sample conditioners. A sample conditioner connects directly to the 3000 Micro GC without a basic filter (G2801-60900). Make sure the proper fittings are available. 8.3.1.1 Connections for Sample Inlet Filter (PN G2801-60900), Pressure Reducer... -
Page 206: Running A Low Pressure, Clean Gas Sample
NOTE: If not installed, install the sample inlet filter assembly. Refer to section 4.2.5.3 on page 4-13. Connect the sample container or gas source to the 3000 Micro GC sample inlet. NOTE: For sample source pressures above 172 kPa (25 PSI), install a pressure regulator as shown in Figure 8-29. -
Page 207: Running A Low Pressure, Liquid/Particulate Containing Gas Sample
Check that the carrier gas supply is sufficient to run all of the samples. If using a sample vessel, prepare the sample. Connect the sample conditioner or gas source to 3000 Micro GC. CAUTION For sample source pressures above 172 kPa (25 PSI), install a pressure regulator between the sample source and Genie filter. -
Page 208: Running A High Pressure Gas Sample Without Liquids/Particulates
5.1.4, Installing the Pressure Reducer, on page 5-8. See Figure 8-31. NOTE: The Pressure Reducer can connect directly to the 3000 Micro GC or to the sample inlet filter (PN G2801-60900). Figure 8-31 Pressure reducer sample conditioner (PN G2815A) Adjustment knob... -
Page 209: Running A High Pressure Gas Sample With Liquids/Particulates
8-32. NOTE: The Pressure Reducer and Genie Filter Assembly can connect directly to 3000 Micro GC or to the sample inlet filter (PN G2801-60900). NOTE: There is no set range for the flow meter. Verify some flow is present. Figure 8-32 Pressure reducer and Genie filter assembly sample conditioner (PN G2816A) -
Page 210: Running A High Pressure Gas Sample Containing C6+ Components
G2845A-X Portable 3000 Micro GC G2857A-X NOTE: The accessories for all 3000 Micro GC types are the same except for their mounting brackets. 8.3.6.1 Using a Sample Vessel If the Heated Regulator accessory is not installed, install it as instructed in section 5.1.6, Installing Heated Sample Introduction Accessories, on page... - Page 211 3000 Micro GC Operating Manual Prepare the sample vessel. Connect the sample vessel to the quick disconnect fitting. Moderate pressure may be required for this connection. Open the stopcock on the sample vessel. Slowly turn the relief valve toward Vent until a small but steady flow is vented, and allow the sample to purge the line for approximately thirty seconds.
-
Page 212: Using A Transfer Line Or Other Continuous Sample Source
Vent the high and low pressure exhausts to a safe environment, such as a fume hood or dedicated exhaust. When 3000 Micro GC used in a vehicle, vent the high and low pressure exhausts outside of the vehicle and away from any sources of ignition. - Page 213 Figure 8-34 Typical setup using a transfer line (2-channel instrument shown) Heated transfer line (user provided) Quick disconnect fitting Low pressure vent tubing Relief valve High pressure vent tubing Start sample flow through the transfer line to 3000 Micro GC. 8 - 31...
-
Page 214: Running A High Pressure Liquid Petroleum Gas Sample
G2846A-X Portable 3000 Micro GC G2858A-X NOTE: The accessories for all 3000 Micro GC types are the same except for their mounting brackets. If the Heated Vaporizer for LPG sampling is not installed, install it as instructed section 5.1.6, Installing Heated Sample Introduction Accessories, on page 5-17. - Page 215 3000 Micro GC Operating Manual Turn 3000 Micro GC on. Wait three minutes until 3000 Micro GC has fully powered up. Use EZ IQ software to load the desired method. Power on the Heated Vaporizer. Wait approximately five minutes for the Heated Vaporizer Assembly to stabilize at operating temperature.
- Page 216 3000 Micro GC Operating Manual Turn the relief valve toward Vent to release the back pressure in the system, then close the valve. Remove the sample vessel from the filter disconnect assembly. Repeat steps 5 to 12 to run the next sample vessel.
-
Page 217: Consumable Replacement Procedures
8.4.1 Replacing the External 10 Micron Sample Inlet Filter Disk Shut off any sample flow to the GC. Wait for the 3000 Micro GC inlet to cool. Disconnect any sample line or conditioner to the sample inlet filter. Using a 5/16 in. wrench, remove Part B. See Figure 8-36. -
Page 218: Replacing The 2 Micron Filter In The Heated Vaporizer (Pn G2819A-X/G2846A-X/G2858A-X)
3000 Micro GC Operating Manual 8.4.2 Replacing the 2 Micron Filter in the Heated Vaporizer (PN G2819A-X/G2846A-X/G2858A-X) The 2 micron filter assembly uses a replaceable cartridge filter (PN 0100-2034). Figure 8-37. Figure 8-37 2 micron filter assembly If the sample vessel is installed on the sample line, remove it as follows: Close the stopcock on the sample vessel. -
Page 219: Replacing The 7 Micron Filter In The Heated Regulator (Pn G2818A-X/G2845A/G2857A)
Figure 8-38. Figure 8-38 7 Micron filter assembly Turn off any sample flow to 3000 Micro GC. Turn the relief valve to Vent on the Heated Regulator and purge all residual pressure remaining in the sample line. Unplug the heated sample conditioner and allow it to cool. -
Page 220: Portable 3000 Micro Gc Operation
Replace the 7 micron filter assembly. 8.5 Portable 3000 Micro GC Operation Due to its internal carrier gas cylinder and battery, Portable 3000 Micro GC requires special precautions and handling procedures. 8.5.1 General Information and Cautions of the Portable 3000 Micro GC... -
Page 221: To View The Battery Status
To charge the battery, plug the battery charger into an electrical outlet and then into the Portable 3000 Micro GC back panel at the location marked 15 V (dc). The battery will continue to charge while Portable 3000 Micro GC is operating. -
Page 222: Replace The Battery
Disconnect the power cord. Remove the screws from the Portable 3000 Micro GC top cover. Remove the top cover. Turn Portable 3000 Micro GC over and remove the screws from the bottom cover. Remove the bottom cover. Facing the front panel of Portable 3000 Micro GC, the battery compartment is located on the top left side. - Page 223 The positive battery terminals should be nearest the Portable 3000 Micro GC back panel when the battery is properly installed.
-
Page 224: Onboard Carrier Gas Supply
Figure 8-42 External jumper tube External jumper tube Internal pressure regulators and a check valve ensure a steady 550 kPa (80 PSI) carrier gas supply to Portable 3000 Micro GC when the CARRIER knob is turned ON. See Figure 8-43. -
Page 225: Refill Onboard Carrier Gas Cylinder
3000 Micro GC Operating Manual 8.5.3.1 Refill Onboard Carrier Gas Cylinder Portable 3000 Micro GC contains a refillable, high pressure carrier gas supply cylinder. The cylinder volume is 300 mL and will last 35 to 40 hours under normal operating pressure. This cylinder has been certified by the U.S. Department of Transportation (DOT) to a pressure of 1800 PSI (12,405 kPa). - Page 226 Carrier Gas Cylinder Recharge Kit transfer lines so that no air enters Portable 3000 Micro GC. After the transfer lines have been sufficiently purged (about fifteen seconds), tighten the 1/8 in. fitting on the back panel of Portable 3000 Micro GC. 8 - 44...
- Page 227 Tighten the Swagelok connection between the Carrier Jumper Tube (Figure 8-45) and the CARRIER IN port on the Portable 3000 Micro GC back panel. Observe the pressure gauge in the Carrier Gas Cylinder Recharge Kit. Partially open the needle valve on the Carrier Gas Cylinder Recharge Kit. When the pressure on the gauge reads 1500 to 1800 PSI, close the needle valve on the Carrier Gas Cylinder Recharge Kit.
-
Page 228: Before Turning Off The Carrier Gas
If it is necessary to turn off the carrier gas between analyses, refer to section 8.1.2 on page 8-3 for instructions on shutting down 3000 Micro GC. CAUTION Abruptly stopping the carrier gas flow to a hot column and filament may result in damage to Portable 3000 Micro GC. -
Page 229: Troubleshooting
Run a bakeout to clean the columns. Refer to section 9.2.2.1 on page 9-18. Instrument not sufficiently Allow at least 3 minutes for 3000 Micro GC to warmed up warm up. Conduct 10 runs and calibrate on the last run. - Page 230 Contact INFICON. Malfunctioning column or Check the flow out of the analytical and injector reference vents on the back of 3000 Micro GC. If there is no flow from either or both vents, contact INFICON. Malfunctioning TCD Contact INFICON. Flat line chromatogram Inject Time set to 0 ms.
- Page 231 Table 9-1 Common chromatographic problems (continued) Symptom Possible Cause Remedy Chromatograms not 3000 Micro GC requires Restart 3000 Micro GC as instructed in separating/no data is power cycle section 6.3.2, Restart, on page 6-8. showing View is set to Overlay...
- Page 232 Check the carrier gases and ensure that each large, broad humps in carrier gas is connected to the correct chromatogram 3000 Micro GC inlet. See the 3000 Micro GC webpage and verify proper gas setup. Refer to section 6.4, Change Carrier Gas Configuration, on page 6-9.
-
Page 233: Common Software Problems
Incorrect carrier gas Check the carrier gases and ensure each carrier gas is connected to the correct 3000 Micro GC inlet. See the 3000 Micro GC webpage to verify proper gas setup. Refer to section 6.4, Change Carrier Gas Configuration, on page 6-9. - Page 234 INFICON. Malfunctioning TCD Contact INFICON. Malfunctioning EPC valve Contact INFICON. Inlet/column temperature not Instrument requires power Restart 3000 Micro GC as instructed in stabilizing cycle section 6.3.2, Restart, on page 6-8. Hardware problem Contact INFICON. Unable to download...
- Page 235 TCD detector 'fault' Malfunctioning column or Check the flow coming out of the (continued) injector 3000 Micro GC analytical and reference vents. If there is no flow from either or both vents, contact INFICON. Malfunctioning TCD Contact INFICON. Method fields do not appear Instrument not properly...
-
Page 236: Common Connection Problems
Refer to section 6.5.1 on page 6-13. Conflicting 3000 Micro GC Verify there are no 3000 Micro GC with the IP address same IP address on the LAN network. Power supply voltage too low Check power supply voltage. 1-2 channel or 3-4 channel 3000 Micro GC... -
Page 237: Common Hardware Problems
3000 Micro GC Operating Manual 9.1.4 Common Hardware Problems Table 9-4 Common hardware problems Symptom Cause Remedy One carrier runs out faster External leak Check carrier gas lines using a leak detector. than another Tighten all fittings. Internal leak Remove the chassis cover and listen for a hissing noise. -
Page 238: Common Chromatographic And Method Problems
For communication and hardware problems, consult Table 9-3 on page 9-8 Table 9-4 on page 9-9. If problems still occur, contact INFICON. 9.2.1 Chromatographic Problems This section will overview unexpected chromatographic behavior and provide a possible cause and remedy. Problems may arise from: ... -
Page 239: Baseline Wander And Drift
3000 Micro GC Operating Manual 9.2.1.1.2 Baseline Wander and Drift Baseline wander or drift is to be expected when a flow or temperature setting is changed. With sufficient time, the problem should subside. The following cases assume that sufficient stabilization time has elapsed. -
Page 240: Baseline Noise
3000 Micro GC Operating Manual 9.2.1.1.3 Baseline Noise Noise is a continuous rapid baseline fluctuation, broadening the baseline and giving it a grasslike appearance. Noise is different than spiking. Spikes are isolated rather than continuous events. Some noise is inevitable with any detector. At low sensitivity it may not be noticeable, but noise may appear when the sensitivity is increased. -
Page 241: Retention Time Symptoms
3000 Micro GC Operating Manual 9.2.1.2 Retention Time Symptoms 9.2.1.2.1 Retention Time Drift Retention time drift is a steady increase or decrease of retention times in a series of successive runs. Erratic times (both directions) are discussed later as retention time wander. -
Page 242: Peak Symptoms
Possibilities include operator error, insufficient Sample Pump time, low Detector Sensitivity setting (peaks are present but not visible) or insufficient Inject Time. Check the 3000 Micro GC analytical and reference vent flow. No flow could indicate a broken column. The presence of flow could indicate an injector or TCD malfunction. -
Page 243: Extra Peaks
3000 Micro GC Operating Manual 9.2.1.3.3 Extra Peaks Extra (ghost) peaks are peaks that appear during a blank run, and peaks that appear during a sample run. Ghost peaks appear even when no sample is injected (and are also found among the genuine peaks during a sample run). -
Page 244: Deformed Peaks
3000 Micro GC Operating Manual 9.2.1.4 Deformed peaks The ideal chromatography peak is a pure Gaussian shape. In reality, some asymmetry is always present, particularly near the baseline. Some common types of deformed peaks are described. 9.2.1.4.1 Peak Fronting The peak rises normally, then drops sharply to baseline Figure 9-1 Fronting Fronting is usually caused by column overloading. -
Page 245: Deformed Peak Apex
3000 Micro GC Operating Manual 9.2.1.4.3 Deformed Peak Apex Top (apex) of the peak is deformed. Figure 9-3 Deformed apex A deformed peak apex is usually caused by column overloading. In severe cases, doubling the amount injected may cause little or no increase in peak size. -
Page 246: Method Problems
3000 Micro GC Operating Manual 9.2.2 Method Problems This section describes how to troubleshoot a method and solve problems that arise from incorrect instrument parameter settings, wrong peak identification windows, and inappropriate peak detection parameters. These conditions cause an erroneous calculation of the mole percent composition of samples. -
Page 247: Service And Technical Support
To contact Customer Support, see the Support page at www.inficon.com. 10.2 Returning 3000 Micro GC to INFICON Do not return a 3000 Micro GC or a GC module to INFICON without first speaking with a Customer Support Representative. A Return Material Authorization (RMA) number must be obtained from the Customer Support Representative. -
Page 248: Service Contract
10.4 Service Contract INFICON offers service contracts for an out-of-warranty 3000 Micro GC. INFICON will conduct an evaluation to verify the condition of an out-of-warranty 3000 Micro GC before agreeing to offer a service contract. Contact INFICON. 10 - 2... -
Page 249: Replacement Parts And Gases
3000 Micro GC Operating Manual Chapter 11 Replacement Parts and Gases This chapter lists the replacement part numbers (PN) for 3000 Micro GC. Before attempting to perform an on-site replacement, contact an INFICON service representative to discuss possible solutions. 11.1 Power Cables and Converters Each 3000 Micro GC requires one converter and one power cable. - Page 250 Korea 8121-1226 G2801-60747 24 V (dc) Power Converter, 160 VA, for 1 to 4-channel standard 3000 Micro GC G2801-60748 15 V (ac) AC Power Converter for Portable 3000 Micro GC G2751-60530 Vehicle Power Charger for Portable 3000 Micro GC...
-
Page 251: Gc Modules
11.2.1.2 New Module Part Number Use this part number when ordering a new module from INFICON. A new module may be stored as a spare, or swapped with an existing module in a 3000 Micro GC. 11.2.1.3 Refurbished Module Part Number INFICON offers fast service turn-around with an Exchange Module Program. -
Page 252: Standard Modules
3000 Micro GC Operating Manual 11.2.2 Standard Modules Standard modules have a two digit numerical ending based on column parameters. An example of a standard module is shown in Figure 11-2. Figure 11-2 GCMOD-23 standard module Label Remove cap NOTE: Modbox design is used for MolSieve columns. An example of a Modbox... -
Page 253: Standard Modules Table
3000 Micro GC Operating Manual 11.2.3 Standard Modules Table To order a replacement Standard GC module, contact INFICON with the New or Refurbished Module Part Number specified in Table 11-2. NOTE: If the reference number is not listed in the table, see section 11.2.6,... - Page 254 3000 Micro GC Operating Manual Table 11-2 Standard modules table (continued) Reference New Module Refurbished Injector Analytical Analytical Pre-Column Pre-Column Number on Top Part Number Module Part Type Column Column Length of GC Module Number Length G2801-60538 GCMOD-19 G2801-69015 Variable OV-1, Vol.
- Page 255 3000 Micro GC Operating Manual Table 11-2 Standard modules table (continued) Reference New Module Refurbished Injector Analytical Analytical Pre-Column Pre-Column Number on Top Part Number Module Part Type Column Column Length of GC Module Number Length G2801-60644 GCMOD-41 G2801-69644 Variable PLOT-Q Vol.
- Page 256 3000 Micro GC Operating Manual Table 11-2 Standard modules table (continued) Reference New Module Refurbished Injector Analytical Analytical Pre-Column Pre-Column Number on Top Part Number Module Part Type Column Column Length of GC Module Number Length G2801-60859 GCMOD-63 G2801-69859 1.0 µL...
-
Page 257: Performance Enhanced Modules
3000 Micro GC Operating Manual 11.2.4 Performance Enhanced Modules Performance Enhanced modules have a two digit alphabetic ending based on column parameters. An example of a performance enhanced module is shown in Figure 11-4. NOTE: The performance enhanced module contains a DIP switch for easy module commissioning. -
Page 258: Performance Enhanced Modules Table
3000 Micro GC Operating Manual 11.2.5 Performance Enhanced Modules Table To order a replacement GC module, contact INFICON with the New or Refurbished Part Number specified in Table 11-3. NOTE: If the reference number is not listed in the table, see section 11.2.6,... - Page 259 3000 Micro GC Operating Manual Table 11-3 Performance enhanced GC module PNs (continued) Reference New Module Refurbished Injector Type Analytical Analytical Pre-Column Pre-Column Number on Module Part Column Column Length Part Number Top of GC Number Length Module G2807-60541 GCMOD-FV G2807-69018 Variable Vol.
- Page 260 3000 Micro GC Operating Manual Table 11-3 Performance enhanced GC module PNs (continued) Reference New Module Refurbished Injector Type Analytical Analytical Pre-Column Pre-Column Number on Module Part Column Column Length Part Number Top of GC Number Length Module G2807-60694 GCMOD-GW G2807-69694 1.0 µL...
- Page 261 3000 Micro GC Operating Manual Table 11-3 Performance enhanced GC module PNs (continued) Reference New Module Refurbished Injector Type Analytical Analytical Pre-Column Pre-Column Number on Module Part Column Column Length Part Number Top of GC Number Length Module G2807-61109 GCMOD-HW G2807-69044 0.4 µL...
-
Page 262: Discontinued Module Replacement Ipns
3000 Micro GC Operating Manual 11.2.6 Discontinued Module Replacement IPNs Discontinued GC modules are listed for service support and are not for sale. Corresponding to each discontinued GC module, a New Module Replacement Part Number is specified as a replacement for the discontinued GC module. See Table 11-4. -
Page 263: Sample Accessories And Filters
3000 Micro GC Operating Manual 11.3 Sample Accessories and Filters 11.3.1 Sample Conditioners Table 11-5 Sample conditioners Description Part Number Genie Filter Assembly G2817A Pressure Reducer G2815A Pressure Reducer and Genie Filter Assembly G2816A *Heated Regulator for Gas Sampling ... -
Page 264: Filters
3000 Micro GC Operating Manual 11.3.2 Filters Table 11-6 Filters Description Part Number 7 Micron Particle Filter for G2818A-A/G2845A-X/G2857A-X 3150-0786 2 Micron Particle Filter Element for 0100-2034 G2819A-X/G2846A-X/G2858A-X (4/pk) Replacement Genie Membrane filters (5/pk) HDW-2170 External 10 Micron Particle Filter... -
Page 265: Checkout Gases
Regulator for Checkout Gas Cylinders 5184-3559 11.4.1 Universal Checkout Gas Universal Checkout Gas may be used during installation to verify the chemical performance of 3000 Micro GC or GC module. See Table 11-9 for the component concentrations. Table 11-9 The universal checkout gas... -
Page 266: Nga Checkout Gas
3000 Micro GC Operating Manual 11.5 NGA Checkout Gas The Natural Gas Analyzer (NGA) Checkout Gas may be used during installation of a 3000 Micro GC configured for natural gas composition/BTU analysis to verify chemical performance. Table 11-10 lists the component concentrations. -
Page 267: Rga Checkout Gas
3000 Micro GC Operating Manual 11.5.1 RGA Checkout Gas Refinery Gas Analyzer (RGA) Checkout Gas may be used during installation of a 3000 Micro GC configured for refinery gas composition analysis to verify chemical performance. Table 11-11 lists the component concentrations. - Page 268 3000 Micro GC Operating Manual This page is intentionally blank. 11 - 20...
Need help?
Do you have a question about the 3000 Micro GC and is the answer not in the manual?
Questions and answers
I have an inficon 3000 micro gc, but I have lost the relevant chromatography software. Could you please send me a copy or tell me where I can download it?