
Related Manuals for Cosco Fitness AC300


Summary of Contents for Cosco Fitness AC300
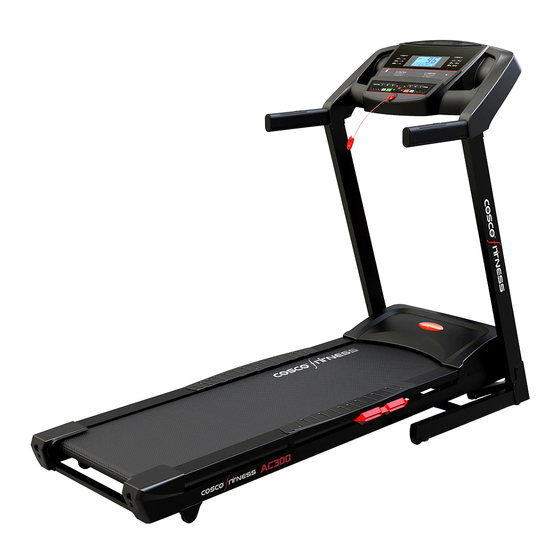
- Page 1 Owner Manual For Motorized treadmill AC300 Please read all precautions and instructions in this manual before in detail before using this equipment.
-
Page 2: Safety Cautions
SAFETY CAUTIONS When using this product, basic precautions should always be followed, including the following: Please read the instruction carefully before starting to use this product. Danger – To reduce the risk of electric shock: Always unplug this product from the electrical outlet immediately after using and before cleaning. Warning –... -
Page 3: Grounding Instructions
GROUNDING INSTRUCTIONS The products must be grounded first. If malfunction or breakdown occurs, grounding will provide a path of least resistance for electric current to reduce the risk of electric shock. The product is equipped with a cord having an equipment-grounding conductor and a grounding plug. The plug must be plugged into an appropriate outlet that is properly installed and grounded in accordance with all local codes and ordinances. - Page 4 GROUNDED PIN ASSEMBLY INSTRUCTIONS OPEN THE BOX YOU CAN FIND THE ALL PARTS AS BELOW.
- Page 5 SPEC Q’TY Name SPEC Q’TY NAME Base Console Hexagon bolt with Hexagon bolt with semicircular head M8*45 semicircular head M8*40 Hexagon bolt with Φ8 semicircular head M8*20 Internal serrated washer Lock nut Security lock Silicone oil bottle MP3 cable Allen wrench Allen wrench Cross open end wrench 13 14 15...
- Page 6 ASSEMBLY INSTRUCTIONS Note: Do not insert power until installation is complete. : Step 1 Take out the console (2) and then the treadmill base (1) from the carton and place on a level flat surface. Please always use the aid of a second person when removing the treadmill from the carton Step 2:...
- Page 7 Step 3: 2 persons cooperate to lift the console and connect the communication lines, and then use Allen Wrench (83) to pre-lock the semi-circular head hexagonal bolt (13), the washer (31) and the semi-circular head hexagonal bolt (15) to the uprights and console frames, but not locked temporarily.
- Page 8 See Left figure, Please raise base at the top of arrow (A),until hearing the sound from gas spring. Step 5: See Left figure, Please hold ‘B’, use your foot to kick the gas spring,and press down a moment, the machine will automatically drop down.
- Page 9 OPERATION GUIDE 1. Operation Guide FUNCTION KEY: START, STOP, PROGRAM, MODE, SPEED+/- quick key, INCLINE+/- quick key,volume +/- key. A “PROGRAM” key: Select program and FAT while the machine is in status of stop. B “MODE” key:Select TIME / DISTANCE / CALORIES mode. C “START”key: When machine is stopped or paused,press this key,it will be working.
- Page 10 D “STOP”key: When machine is running,press this key,it will be stopped. E “SPEED+/ -”key:When machine is running,press these keys to adjust speed and parameter. F “INCLINE+/-”key: When machine is running,press these keys to adjust incline and parameter. Quick speed key:When machine is running,press quick speed key“5”“10”“15”,it will be matched to corresponding values.
- Page 11 MODE TIME(MIN:SEC) 0:00 15:00 5:00~99:00 0:00~99:59 PRESET PROGRAM CHART: Each program divided running time into 20 intervals; the speed on each interval has been preset in the factory. Time set/20 intervals = running duration TIME PROG. SPEED INCLINE SPEED INCLINE SPEED INCLINE SPEED...
- Page 12 INCLINE SPEED INCLINE SPEED INCLINE SPEED INCLINE SPEED INCLINE SPEED INCLINE SPEED INCLINE SPEED INCLINE SPEED INCLINE SPEED INCLINE SPEED INCLINE SPEED INCLINE SPEED INCLINE SPEED INCLINE SPEED...
- Page 13 INCLINE SPEED INCLINE SPEED INCLINE SPEED INCLINE SPEED INCLINE SPEED INCLINE SPEED INCLINE SPEED INCLINE SPEED INCLINE SPEED INCLINE SPEED INCLINE SPEED INCLINE SPEED INCLINE SPEED INCLINE SPEED...
- Page 14 INCLINE SPEED INCLINE SPEED INCLINE SPEED INCLINE SPEED INCLINE SPEED INCLINE SPEED INCLINE SPEED INCLINE SPEED INCLINE SPEED INCLINE SPEED INCLINE SPEED INCLINE SPEED INCLINE 6. CUSTOMIZED PROGRAMS OPERATION The user can set programs according to their own needs. There are 5 user-setting programs: U1, U2, U3, U4, U5.
- Page 15 A. Customized program setting: Press “PROG” button in standby status to choose U1, U2, U3, U4, or U5, and the “TIME” window will flash to display the preset time. Press the SPEED+/- button to set the desired time, then press the “MODE” button to confirm and then you can set the program parameters, then set the first time interval, press the +/- button or Quick SPEED button to set the speed/incline.
-
Page 16: Maintenance
RESULT(F5) AS BELOW Special note: This data is only used as a workout reference and cannot be used as medical data. Using Asian standards as a reference, fat test results: FAT ≤19 Under weight 19<FAT ≤25 Normal weight 25<FAT ≤29 Over weight FAT≥30 Obesity... - Page 17 Warning: be sure to unplug the electric treadmill before cleaning or maintaining the product. Cleaning: comprehensive cleaning will extend the life of the electric treadmill. Remove dust regularly to keep parts clean. Be sure to clean the exposed areas on both sides of the running belt, which will reduce the accumulation of impurities under the running belt.
-
Page 18: Belt Adjustment
BELT ADJUSTMENT: 1. To better maintain your electric treadmill and extend the machine life, it is recommended that you continue to use it for 2 hours Turn off the power and let the machine rest for 10 minutes before using. 2. -
Page 19: Exploded Drawing
EXPLODED DRAWING... -
Page 21: Parts List
PARTS LIST Desc. Spec Remark Desc. Spec Remark Base frame Base frame Silicone cushion Main Frame Main Frame Multi-ribbed belt 185 J6 ¢20*27*M6 Uprights Uprights Cushion Transportation ¢51*24*¢8.5 Console frame Console frame wheel Power cord Incline rack Incline rack 6p-4 buckle Ring retaining ¢24*¢18*6... - Page 22 Upper line of Hexagon socket head M8*65 electronic watch bolt Hexagon socket head Electronic watch M8*20 lower line bolt Safety key Hex bolts M8*50 component Hexagon socket head Safety key sensor M8*25 bolt Hand pulse Hexagon socket head M6*20 component, right bolt Hand pulse Cross recessed flat...
- Page 23 Filter Bottom plate 574*337*43 optional MP3 module Console up-cover 720*438*114 Console USB module 710*200*90 back-cover Console panel 297*265*38 Speaker Audio spring line Running belt 2688*450*1.6 Allen wrench Running board 1175*596*15 Allen wrench Side rail 1164*76*32 Cross open end Left end cap 162*104*112 13 14 15 wrench...
Need help?
Do you have a question about the AC300 and is the answer not in the manual?
Questions and answers