Table of Contents
Advertisement
Quick Links
Advertisement
Table of Contents

Related Manuals for Cosco Fitness CMTM-4610A2


Summary of Contents for Cosco Fitness CMTM-4610A2
-
Page 2: Table Of Contents
CONTENTS Precautions…………………………………………..……….…..2 Hardware and tool………………………………………..…...…3 Exploded drawing……………………..………………..…….…4 Spare parts list…………………………..……………………..5 Assembly instruction…………..………………………...…..…6 Computer Instruction……………………………….…………..8 Adjustment…………………………………......….11 Operation instruction…………………………….……….……11 Folding, moving and unfolding instruction….………..….. 12 Maintenance and malfunction treatment………………..13 Warm up exercises……….…………………………..…..….14... -
Page 3: Precautions
Precautions 1) Thank you for making this treadmill part of your exercise program. For your safety and benefit please read this manual carefully before use. 2) Place the treadmill on the flat ground. The safety operation space is 200 cm behind the treadmill and 100 cm aside of it. -
Page 4: Hardware And Tool
16) The equipment is not suitable for therapeutic purpose. 17) This appliance is not intended for use by person (including children) with reduced physical sensory or mental capabilities, or lack of experience and knowledge, unless they have been given supervision or instruction concerning use of the appliance by a person responsible for their safety. -
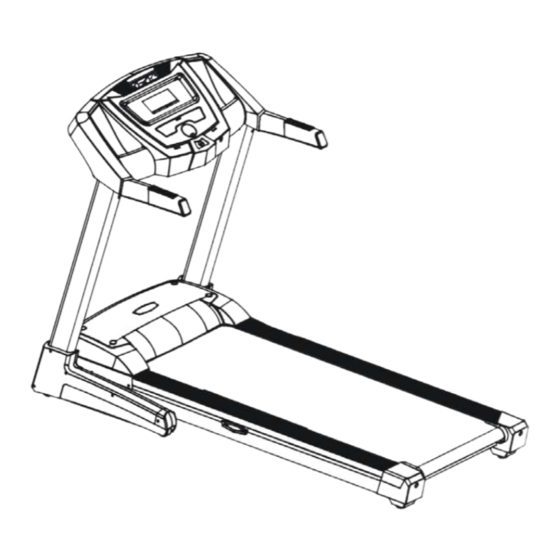
Page 6: Exploded Drawing
Explored drawing... -
Page 7: Spare Parts List
Spare Parts List Description Description Base frame Cymbiform switch Safety key Socket Running board support pad Foot wheel Left support tube Cushion Right support tube Square plug (60*30) Spring cover Square sensor φ15.5 Bushing Anit-shock spring Guide tube Side rail anchor point Square plug (40*20) Stator Computer/Handlebar... -
Page 8: Assembly Instruction
Driver Half round bolt M8*40 Emergency stop key Bolt M8*50 Description Description A12 Bolt M8*30 Nut M4 A13 Altitude bolt φ10X30 Flat washer Ф8 Flat washer Ф6 A14 Cross head bolt M6*30 Flat washer Ф4 A15 Half round bolt M8*30 Cross head half round bolt Flat washer Ф10 ST4.2*10... - Page 9 computer (10) and the Left & right support tube (4.5) along with the Computer connecting plate (51), insert the Computer connecting plate (51) and the tube of computer(10) to the Left & right support tube (4.5). (NOTE: Please don’t press against the wires.) (See figure 1-a-b) 2.
-
Page 10: Computer Instruction
Computer Instruction Calorie: 0-999.9 kcal Distance: 0-99.99 km Time: 0-99 minutes: 59 seconds Pulse: 60-200 times/minute Incline: 0%-15% A. Start the computer: connect the power, press the switch on machine, put the safety key in the groove on computer, the computer is ready. If the incline is not 0%, after pressing”... - Page 11 c. The time window shows program preset total time. Press -/+ to change program running time (The scale is 10-59 minutes.), press ENTER after setting. d. Press “START/STOP” to enter program status. The time starts to count down. When changing different programs, it will produce beep sound. When the time descends to zero, the speed slows down and the treadmill stop.
- Page 12 Press “CUSTOM” under ready status, the LCD will show Program 1. Press “CUSTOM” continuously, the LCD will show 2-5. If press “CUSTOM” again, it will go back to ready status. If the custom program is set, the LCD will show the data of the program. Press “START/STOP”...
-
Page 13: Adjustment
Malfunction: A. When the speed sensor has malfunctions, the computer will indicate it. The machine will stop after 5 seconds if there’s problem with speed sensor, the computer will return to ready status and LCD show “Er”. Users can continue the operation when it’s under ready status. -
Page 14: Folding, Moving And Unfolding Instruction
1. Turn on the electrical outlet switch, and put the emergency stop key onto the corresponding place on the computer. 2. Stand on the side extrusions; clip the safety key to your clothing at your waist. 3. Press the “ON/OFF” key, the treadmill runs at a lower speed, you can step on the belt and walk slowly. -
Page 15: Maintenance And Malfunction Treatment
Maintenance and Malfunction Treatment 1) The surface of the treadmill should be kept clean, pull out the power line before cleaning. You can clean the running belt and the surface of the treadmill with a soft and wet cloth. 2) The running belt is adjusted at factory; it may runs defectively after transportation and use. -
Page 16: Warm Up Exercises
Warning: 1) The safety level of the equipment can be maintained only if it is examined regularly for damage and wear, e.g. pins, connection points. 2) Please replace defective components immediately and/or keep the equipment out of use until repair. . - Page 17 2.Hamstring Stretch Sit with your right leg extended. Rest the sole of your left foot against your right inner thigh. Stretch toward your toe as far as possible. Hold for 15 counts. Relax and then repeat with left leg extended. 3.
- Page 18 6. Calf-Achilles Stretch Lean against a wall with your left leg in front of the right And your arms forward. Keep your right leg straight and the left foot on the floor; then bend the left leg and lean forward by moving your hips toward the wall. Hold, then repeat on the other side for 15 counts.
Need help?
Do you have a question about the CMTM-4610A2 and is the answer not in the manual?
Questions and answers