Table of Contents
Advertisement
Quick Links
Advertisement
Table of Contents

Related Manuals for Cosco Fitness SX-3366


Summary of Contents for Cosco Fitness SX-3366
- Page 1 TREADMILL MANUAL SX-3366...
- Page 2 Thanks for buying our Fitness equipment, Do some warm-up exercise before use, you’ll get twice the result with half the effort. Such as follows: extend the neck up and down twist the waist left and right level push forwards upright straighten one's back - 2 -...
-
Page 3: Safety Guidelines
left and right poise exercise up and down extend exercise thigh extend exercise calf extend exercise SAFETY GUIDELINES: Before beginning any exercise program, you should consult with your doctor. It is recommended that you undergo a complete physical examination. Please follow the instructions: 1. - Page 4 5. Make sure all parts are assembled, nuts and bolts are tightened 6. Do not use the treadmill if the unit is disassembled in any way 7. When connecting the power cord, plug the power cord into a grounded circuit. No other appliance should be on the same circuit.
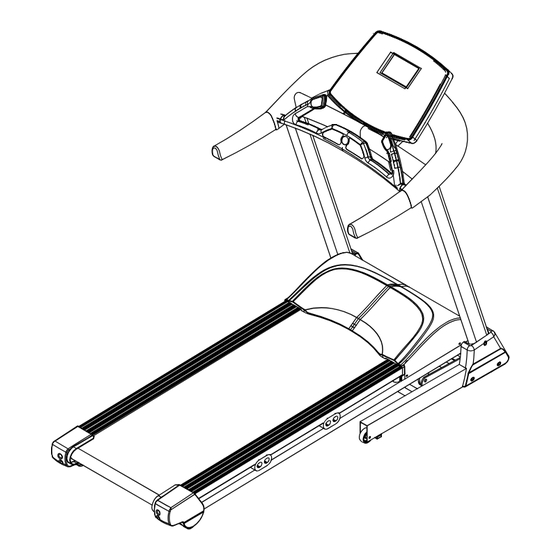
- Page 5 EXPLORE DRAWING - 5 -...
-
Page 6: Part List
PART LIST PART NO PART NAME Q'TY Front roller Running belt Rear roller Running deck Side rail Fix cushion of running deck Soft cushion Motor belt Motor Motor cover Speed sensor frame Speed sensor Motor frame Transformer Control board of motor Incline motor Power cord Motor adjustable plug... - Page 7 Protective cover of upright Right upright Left upright Foam Computer frame Pressing plate of handlebar Computer belly pan Fixed plate of computer frame Main body of computer Down cover of front handlebar Up cover of front handlebar Down cover of computer Computer cover Computer control board Safety key...
-
Page 8: Hardware Comparison Chart
M8*25 Bolt φ16 Plastic washer M8*60 Allen head bolt M8*45 Allen head bolt M8*45 Allen head bolt M8*50 Allen head bolt M8*20 Allen head bolt M8*30 Allen head bolt M10*20 Allen head bolt φ10 Washer M8*15 Allen head bolt ST4.2*25 Screw φ6 Washer ST2.0*6 Screw M5*15 Bolt... -
Page 9: Assembling Instructions
ASSEMBLING INSTRUCTIONS WARNING: Please put on all the screws, washers and bolts then tighten them. STEP1: Fix the uprights on the base frame with M10*20mm Allen head bolt 82, Ø10 washer83, M8*50mm Allen head bolt79 and Ø8 washer 52. - 9 -... - Page 10 STEP2: Fix the main body of computer on the upright with M8*15 Allen head bolt 84. STEP3: Fix the up cover of computer on the main body of computer with M5*15 bolt 88 and φ5Washer 89. - 10 -...
- Page 11 STEP4: Fix the Protection cover of upright onto the upright with ST4.2*15 Screw 72. Folding illustration: To unfold the treadmill: Folding illustration: To drop down treadmill: 1. Strike the damper. 2. Hold on to the top end covers and pull down the treadmill slowly on the ground.
-
Page 12: Computer Operation
To fold up the treadmill: To fold up treadmill: Both hands hold on the bottom end covers and lift up the treadmill. COMPUTER OPERATION Panel layout AUDIO - 12 -... -
Page 13: Waiting Mode
The Operation Power The required main power is 220 - 240 VAC Connect the power, all the windows will bright for two seconds,then enter the waiting mode. The speed is zero and the incline is zero. WAITING MODE Change the PROGRAM1-PROGRAM28, HRC65 and HRC85 at a fixed time. Press any key to enter the program choosing mode. - Page 14 BODY FAT Press the BODY FAT key to enter the BODY FAT mode. The HEIGHT display will flash. Use the “SPEED+/SPEED-” key to select your height value. Press ENTER key to confirm. The WEIGHT will flash. Use the “SPEED+/SPEED-”key to select your weight. Press ENTER key to confirm. The age will flash.
- Page 15 Press PLAY key to play or pause the music. Press TRACK-/VOLUME- or TRACK+/VOLUME+ to choose the music. Press TRACK-/VOLUME- or TRACK+/VOLUME+ for a long time to adjust the volume. NOTES: DO NOT play USB and AUDIO at same time. The shortcut key of PLAY, TRACK-/VOLUME-, TRACK+/VOLUME+ only can control the USB, it does not control the AUDIO.
- Page 16 SEG23 11.0 11.0 SEG24 11.0 SEG25 12.0 12.0 SEG26 12.0 SEG27 11.0 11.0 11.0 12.0 11.0 11.0 SEG28 12.0 11.0 12.0 12.0 12.0 12.0 11.0 SEG29 11.0 11.0 SEG30 SEG1 SEG2 11.0 SEG3 11.0 SEG4 11.0 SEG5 11.0 11.0 SEG6 11.0 11.0 11.0...
- Page 17 SEG7 11.0 SEG8 11.0 SEG9 SEG10 11.0 SEG11 SEG12 11.0 SEG13 11.0 SEG14 11.0 SEG15 11.0 SEG16 11.0 SEG17 SEG18 11.0 SEG19 SEG20 11.0 SEG21 SEG22 11.0 SEG23 11.0 SEG24 11.0 SEG25 11.0 SEG26 11.0 SEG27 SEG28 11.0 SEG29 SEG30 INCLINE SEG1 SEG2...
- Page 18 SEG23 SEG24 SEG25 SEG26 SEG27 SEG28 SEG29 SEG30 SEG1 SEG2 SEG3 SEG4 SEG5 SEG6 SEG7 SEG8 SEG9 SEG10 SEG11 SEG12 SEG13 SEG14 SEG15 SEG16 SEG17 SEG18 SEG19 SEG20 SEG21 SEG22 SEG23 SEG24 SEG25 SEG26 SEG27 SEG28 SEG29 SEG30 SEG1 SEG2 SEG3 - 18 -...
- Page 19 SEG4 SEG5 SEG6 SEG7 SEG8 SEG9 SEG10 SEG11 SEG12 SEG13 SEG14 SEG15 SEG16 SEG17 SEG18 SEG19 SEG20 SEG21 SEG22 SEG23 SEG24 SEG25 SEG26 SEG27 SEG28 SEG29 SEG30 Error Message Error Specification Treatment Connect error between panel and Check that the lines between panel and controller are controller connected or not.
-
Page 20: Maintenance
MAINTENANCE Proper maintenance is very important to ensure your treadmill is always in top working condition. Improper maintenance could cause damage or shorten the life of your treadmill and exceed the LIMITED WARRANTY coverage. 1. Important: Never use abrasives or solvents to clean the treadmill. To prevent damage to the computer, keep liquids away and keep it out of direct sunlight. -
Page 21: Deck Lubrication
First unplug the power cord from the surge protector. Using the hex key provided, turn both the left and right rear roller adjustment bolts the same distance, usually a 1/4 turn in the clockwise direction. Plug the power cord back into the surge protector and run the treadmill at 2.5 mph. You should now walk on the belt to determine if the belt is still slipping. - Page 22 REMARK: When the treadmill is over load by any case, for the using safety the fuse will be broken and the power will be cut off . Change a new fuse and start again. - 22 -...
Need help?
Do you have a question about the SX-3366 and is the answer not in the manual?
Questions and answers