Table of Contents
Advertisement
Quick Links
Advertisement
Table of Contents

Subscribe to Our Youtube Channel
Related Manuals for urmet domus 1099/212


Summary of Contents for urmet domus 1099/212
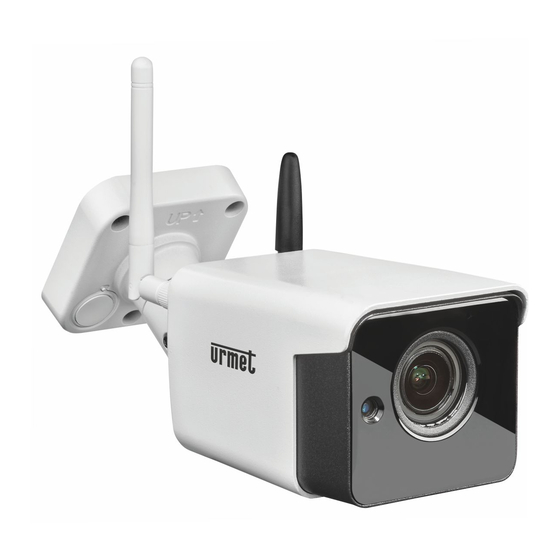
- Page 1 Mod. 1099 DS1099-077 WIFI 1080P IP PoE CAMERAS SERIES BULLET 1099/212 USER MANUAL...
-
Page 2: Table Of Contents
SIMPLIFIED EU DECLARATION OF CONFORMITY .................. 5 INSTALLATION ............................. 5 1099/212 → WiFi Bullet Varifocal camera ................... 5 HOW TO CONFIGURE THE CAMERA IN A NETWORK................6 How to add the camera to a WiFi network from the App ............. 6 Static IP address allocation ...................... -
Page 3: Introduction
Care if you encounter problems during operations. The manual will be regularly updated without prior notice. PRODUCT DESCRIPTION URMET devices Ref. 1099/212 is a wireless/LTE IP cameras which may be controlled entirely by connecting to the TCP/IP network. Technical specifications ➢... -
Page 4: Warnings
WARNINGS Power ➢ Make sure that the rating plate data corresponds to the power specifications before connecting the device to the mains. ➢ Arrange a suitable circuit breaker and fuse upstream of the devices. ➢ Disconnect power by means of the circuit breaker in the event of a failure and/or bad operation. ➢... -
Page 5: Simplified Eu Declaration Of Conformity
It leaves the IP camera configurations unchanged SIMPLIFIED EU DECLARATION OF CONFORMITY Hereby, URMET S.p.A. declares that the radio equipment types: camera 1099/212, is in compliance with Directive 2014/53/EU. The full text of the EU declaration of conformity is available at the following internet address: www.urmet.com INSTALLATION 1099/212 →... -
Page 6: How To Configure The Camera In A Network
To check the connection of the camera in 4G to the internet, connect a personal device such as a smartphone/tablet/PC to the Wi-Fi network of the camera (Wi-Fi SSID): “MIFI_...”, Wi-Fi password: 1234567890) or connect a PC via cable to the network connector of the camera. The integrated 4G/Wi-Fi router provides internet access to the camera and also to devices connected via Wi-Fi or cable to the camera. -
Page 7: Easytool
Press “Modify IP Address” to change the IP address of the device and wait for a few instants. Press the “Refresh List” button of “EasyTool” to refresh the list and view the camera with the changes made. IMPORTANT NOTE: to set/edit the network parameters of the camera (IP address, subnet mask, gateway) it is advisable to use EasyTool or the web page of the camera. -
Page 8: Activex Control Configuration
After having detected the IP camera, right-click and select “Open in IE” to open a Web page on IE. See the applicable section in the complete manual if installation of an ActiveX component is required. You can select user name (default: admin), password (d efault: admin), stream type (Main/Sub Stream) and language on the login page. - Page 9 Plug-in installation method: Enter the IP address of the IP camera on the IE address bar to inspect the IP camera. The controls will be loaded automatically on the IP camera. The plug-in installation window will appear. Click on "Install" to complete the installation automatically. DS1099-077...
-
Page 10: Connection From Other Web Browsers
CONNECTION FROM OTHER WEB BROWSERS The camera web page can be accessed using a browser other than Internet Explorer, simply by keying in the IP address of the camera on the navigation bar of the browser. In this case, no additional components need to be installed and the displayed stream live consists in MJPEG video stream for which selecting Main/Sub is not effective on the login home page. -
Page 11: Playback
: this is used to search and playback the video files recorded in the camera’s SD memory card (not included). : This is used to access the device setup menu to set the various customised parameters; : Snapshot, file type, saving path etc.; : Close and go back to the login page;... -
Page 12: Remote Settings
REMOTE SETTINGS 8.3.1 DISPLAY OSD CONFIG Click on (Remote settings) to access the Live interface OSD Config (default). ➢ Name: IP camera name. ➢ Channel Display: Enable/Disable. The display position can be customised. ➢ Time Display: Enable/Disable. The display position can be customised. ➢... - Page 13 Color Mode or Daytime: fixed setting as colors only, it never switches to B/W picture. Black & White Mode or Night: fixed setting as B/W only, it never switches to color picture. Video Mode or Active Mode: the camera switches from colors to black and white (turning on the IR LEDs) and vice versa based on the brightness level detected by the video sensor.
-
Page 14: Network
3. Point to the corner in the bottom right of each Privacy area and drag the mouse to change the size. Then position the Privacy area on the concerned area of the image. 4. Click on Save to activate the privacy area. 8.3.2 NETWORK Network configuration... - Page 15 ➢ Type: MainStream, SubStream. ➢ The user can set: Resolution, FPS, Audio (if the camera model has audio input), Bitrate control: CBR/VBR and the MainStream/SubStream Bitrate value. ➢ Resolution: MainStream 1080P(1920x1080), 960P(1280x960), 720P (1280×720), SubStream (704×576, 640×360, 352×288). ➢ FPS: max 20 for the Mainstream and 25 for the Substream ➢...
- Page 16 Description: • IP: to be replaced with the actual IP address of the device • The JPEG snapshot resolution can be modified in the following section: 【Advanced】→【Snapshot Settings 】 Click on 【Network】) →【Email】 to access the following interface. Server: it supports IP address or domain string Email Click on 【Network】) →【Email】...
- Page 17 Email service setting. By using this function in association with the Motion alarm function, the camera can sent the images acquired by email on the Internet by contacting the set email server (SMTP). SMTP Port: The default value is 25 (email service port). If Email: Disable/Enable.
- Page 18 Connection Status is used to check the settings of the DDNS account. DDNS: Disable/Enable. Server: Select the DDNS provider. Host Name: Enter the name of the host recorded User Name: Enter the name of your account recorded on on the DDNS provider website. the DDNS provider website.
- Page 19 RTSP Click on 【Network】) →【RTSP】 to access the following interface. ➢ RTSP Port: The default password is 554. The device will be restarted after the change. DS1099-077...
- Page 20 Description • rtsp://IP:Port/live/A/B • IP: IP address of the device. • Port: RTSP port of the device. Default: 554. • A: 0, 1, 2 ... channel ID number (for camera type devices use any ID, e.g. 0). • B: MAIN refers to “main stream”, SUB refers to “sub stream”. 8) P2P Click on 【Network】) →【P2P】...
-
Page 21: Alarm
8.3.3 ALARM MOTION Click on 【Alarm】→【Motion】 to access the following interface. Setting procedure DS1099-077... -
Page 22: Record
1. Motion detection can be activated/deactivated. 2. Holding the left button pressed, drag the mouse to select the motion detection area. Single cells can be enabled by clicking on them. 3. Set motion detection sensitivity, options: High, Middle, Low. 4. It is possible, when Motion is detected, to trigger the following actions: ➢... -
Page 23: System
Stream type: this parameter indicates the stream that the camera uses to video record files on the SD memory card. Default: Mainstream. Schedule: it is possible to set the type of video recording (Normal, Motion triggered, No record) and the time when the recording function is activated by the camera. - Page 24 DATE/TIME: this user interface can be used to set the date and time, including System Time, NTP, Date Format and Time Format. After having made the setting, click on Save. The device sets to the automatic time synchronisation function: ➢ NTP: Synchronise time with the NTP server on the Internet.
- Page 25 USERS Click on 【System】→【Users】 to access the following interface. New users can be created, activated and deactivated and the password can managed here. INFO Click on 【System】→【Info】 to access the following interface. DS1099-077...
- Page 26 When an SD memory card is plugged into the camera’s slot, it is possible: ➢ To read the information about total and available memory space ➢ To format the memory card by pushing the button ➢ To browse the memory card’s content by pushing the button .
- Page 27 Click on 【System】→【Log】 to access the following interface. ➢ Log Type: five types can be selected (system log, parameter log, registration log, user log, alarm log, events log, memory log, All logs. Specify start date/time and end date/time for the searched log. Click on “Search”...
-
Page 28: Advanced
8.3.6 ADVANCED The options 【Snapshot Setting】and 【Time Capture】are present as shown in the following figure: Snapshot Setting These image settings are applied to the following features: MJPEG stream, snapshot via HTTP command, snapshot saved on local micro SD memory and FTP server, snapshot attached to event emails. ➢... - Page 29 Click on 【Advanced】→【Firmware Update】 to access the following interface. In the “Firmware Update”, the user can click on "Scan" to select the update file; click on Upgrade to update the system automatically. If the update file does not correspond to the device, the update will not be performed. Note: The firmware update procedure will last approximately 5 minutes.
-
Page 30: Settings
Maintenance Click on 【Advanced】→【Maintain】 to access the following interface. ➢ Auto Reboot: enable/disable automatic restart of the device according to the indicated time programming. ➢ Auto Reboot: Select one of the three options Everyday, Everyweek, Once. ➢ Week plan: Select the days of the week on which to start automatic reboot. ➢... -
Page 31: Local Settings
And you are asked to open the contents in a new window. For details, refer to chapter 11 LOCAL SETTINGS Click on “Local Setting” to view the following dialogue window. The user can set Local Disk, Record Path, Snapshot path, file type and Interval for recording and manual snapshot capturing. IMPORTANT: to make the local settings effective, especially to create the Record and Snapshot Path folders and to save Record Files and Snapshots, IE has to be executed with Windows Andministrator privileges. -
Page 32: Viewing From App
VIEWING FROM APP With the camera already configured and connected in 4G, connect the smartphone to the Wi-Fi network of the camera (SSID Wi-Fi : “MIFI_...”, Wi-Fi password: 1234567890): Download the V-Stream app from the store and, if you do not have an Urmet Cloud or Yokis account, click on Sign Up to create a new account. -
Page 33: Configuration Of Other Devices
10 CONFIGURATION OF OTHER DEVICES With the 1099/212 camera already configured and connected in 4G, you can connect to the Wi-Fi network of the camera (Wi-Fi SSID: “MIFI_...”, Wi-Fi password: 1234567890) other Urmet Wi-Fi cameras (e.g. model: 1099/212 etc.). All cameras will be available via the Internet from the Urmet V-Stream app. -
Page 34: Device Status
On the home page you can view: the type of transmission and the 4G signal level (1), the status of the Internet connection (2), other details (3): 11.1.1 DEVICE STATUS Click on Device Status to access the following interface Device Status: this section contains the main info about the LTE device DS1099-077... -
Page 35: System Settings
System Status: this section shows the main parameters of the router's LAN network configuration Network Status: this section shows the main parameters of the status of the LTE network configuration assigned by the operator 11.1.2 SYSTEM SETTINGS Click on System settings to access the following interface Router: in this section it is possible to modify and set the LAN parameters of the LTE router. - Page 36 Firewall: in this section it is possible to insert rules for input and output data Port filtering: it allows you to filter (accept / reject) packets coming from / destined to a specific device Select “Apply” DS1099-077...
- Page 37 Port Mapping: Select “Enable” and “Apply” Port forwarding: DS1099-077...
- Page 38 Select “Enable” and “Apply” URL filtering: in this section you can selectively block URL UPnP: in this area it is possible to enable / disable the function to automatically open certain ports on the router. DMZ: this functionality of the router allows to divert, without checking its reliability, all traffic coming from the Internet to a specific network device, which will then manage and protect the traffic Update: In this section it is possible to update the FW of the camera LTE module DS1099-077...
- Page 39 DDNS: It refers to the Dynamic Domain Name Server, which allows you to reach the router through the internet in case of connection with a dynamic public IP address. Ping: in this section you can perform a ping test to a certain URL / IP address to check the reachability of a site / device Trace: in this section it is possible to make a trace route to an IP site / device DS1099-077...
- Page 40 Others: in this section it is possible to configure the NTP, SMTP, time zone, manage the PIN (Pin Management) and restore the camera to the factory parameters To manage the SIM PIN first disable the 4G connection and then press on PIN Management: We suggest that the PIN is always on Disable: DS1099-077...
-
Page 41: Quick Settings
To reset the 4G / Wi-Fi router to factory settings, press Reset Factory Settings: 11.1.3 QUICK SETTINGS Click on Quick Settings to access the following interface. Through this menu you can quickly change the basic settings of the 4G / Wi-Fi router (example: APN, Wi-Fi SSID, Wi-Fi password). -
Page 42: Statistics
11.1.5 STATISTICS Use of sim card data. 11.1.6 CONNECTED DEVICES In this section you can see all the devices connected to the camera, both wired and via Wi-Fi. DS1099-077... -
Page 43: Network Settings
11.1.7 NETWORK SETTINGS In this section it is possible to manage the WAN connection with the telephone operator Connection mode: in this section you can determine if you want to connect to the internet manually or automatically and if you want to allow the connection in case of roaming. Network selection: in this section you can choose whether to select the network operator automatically or manually DS1099-077... - Page 44 APN: in this section it is possible to create an APN profile, the username and password fields normally are empty LTE Band Lock in this section it is possible to disable the frequency bands to which you do not want to connect LTE PCI lock In this section it is possible to block the LTE modem by allowing the connection only with credentials DS1099-077...
-
Page 45: Wi-Fi Settings
11.1.8 WI-FI SETTINGS In this section it is possible to configure the parameters of the Wi-Fi network generated by the camera Wi-Fi SSID: in this section you can set the name of the selected network (SSID), the type of encryption, the password and the maximum number of users connected to the network. -
Page 46: Technical Specifications
12 TECHNICAL SPECIFICATIONS GENERAL DATA 1099/212 Max absorption Typ: 170mA(D), 450mA(N). Peak 470mA (when IR CUT moves D/N). Power supply 12 Vdc / PoE Dimensions (L x H x D) 189*76*68mm Weight (g) 650g Type of housing Bullet Housing color... - Page 47 WiFi 802.11 b/g/n WiFi frequency 2.4GHz~2.4835GHz band 1,2,3,5,7,8,20,34,38,39,40 e 41 gain 2dBi 64/128-bit WEP [non supportato], WPA/WPA2, WPA-PSK/WPA2- Security Multi browser (Internet Explorer, Chrome, Safari, Firefox, Opera) Web/Client/ Mobile Mobile Software (iOS, Android) FUNCTIONS Adjustment of: brightness, sharpness, contrast, saturation, via web Image setting page, smartphone App, HVR/NVR Motion detection (zone)
-
Page 48: Appendix
13 APPENDIX 13.1 FAQ ◆ IE does not load or install the plug-ins. Possible cause: The IE protection setting is too high. Solution: Set IE protection to minimum level. ◆ After updating, the user cannot inspect the IP camera using IE. Solution: Flush the IE cache.
Need help?
Do you have a question about the 1099/212 and is the answer not in the manual?
Questions and answers