Table of Contents
Advertisement
Quick Links
Advertisement
Table of Contents

Subscribe to Our Youtube Channel
Related Manuals for urmet domus 1099


Summary of Contents for urmet domus 1099
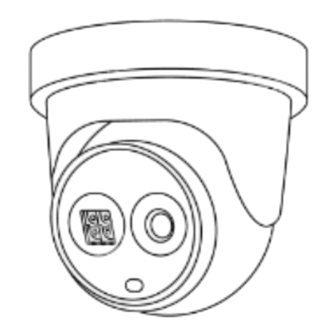
- Page 1 Mod. 1099 DS1099-188 BUILDING&RETAIL H.265 IP Cameras USER MANUAL...
-
Page 2: Table Of Contents
English CONTENTS Introduction ..............................4 Product Description ..........................5 Technical characteristics ......................5 Opening the Box ........................5 Warnings ...........................6 Overview ..............................8 Range of Application .........................8 Product description ........................8 Operating environment ......................8 IP Camera Connector Layout (Where Featured) ..............9 Operating instructions ........................... 10 Checking the Connection ....................... 10 Searching for the Device ...................... - Page 3 9.4.1.2 PD&VD: Pedestrian Detection & Vehicle Detection ................. 33 9.4.1.3 PID: Perimeter Intrusion Detection ......................34 9.4.1.4 LCD: Line Crossing Detection ........................35 9.4.1.5 SOD: Stationary Object Detection ......................36 9.4.1.6 CC: Line Crossing Counter ........................37 9.4.1.7 HM: Heat Map ............................38 9.4.1.8 CD (Crowd Density Detection) .........................
-
Page 4: Introduction
INTRODUCTION Thank you for purchasing our integrated and developed network camera products for network video monitoring. Our range includes the following products: Storage Network Bullet, Wireless Storage Network Bullet, IR Network Dome, IR Network Weather-Proof and High-Speed Network Ball cameras. Individual high-performance SOC chips are used in the media processor for audio/video capture, compression and transmission/transfer. -
Page 5: Product Description
PRODUCT DESCRIPTION URMET S.p.A. proposes different ranges of cameras according to installation requirements and the locations to be video-surveilled. It currently has a range of cameras, in both bullet and dome versions, which support the main intelligent analysis algorithms, and a range of cameras, in both bullet and dome versions, which, in addition to intelligent analysis, is also equipped with the deterrence function via red/blue light LEDs, white light LEDs and integrated siren. -
Page 6: Warnings
WARNINGS Power supply ➢ Before connecting the equipment to the electrical outlet, ensure that the nameplate specifications match those of the mains power supply. ➢ It is advisable to install a suitable disconnection and protection switch upstream from the equipment. ➢... - Page 7 Network configuration ➢ The camera default setting is DHCP mode. If the installation network does not support dynamic addressing (DHCP), the device will automatically switch to the factory-set IP address 192.168.1.168. The Urmet “Device Config Tool” software can be used to change the IP address and other network settings to prevent conflict with other devices on the network.
-
Page 8: Overview
OVERVIEW RANGE OF APPLICATION These network cameras with their powerful image processing capacity can be used in various public places, such as malls, supermarkets, schools, factories and workshops, as well as in environments requiring HD images, such as banks and traffic control systems, as illustrated in the figure below: Monitoring centre PRODUCT DESCRIPTION An IP camera is an online digital surveillance camera, equipped with a web server and capable of independent operation,... -
Page 9: Ip Camera Connector Layout (Where Featured)
Device Connection The IP camera can be connected in two ways: • Connection to a PC Connect the IP camera to the PC using a direct network cable, with the power input connected to a 12VDC adaptor, and enter the IP addresses of the PC and the camera in a network segment. The IP camera will communicate with the PC within one minute after being switched on if the network is working properly. -
Page 10: Operating Instructions
OPERATING INSTRUCTIONS CHECKING THE CONNECTION • The factory default IP address for the IP camera is 192.168.1.168 and the subnet mask is 255.255.255.0. Give your computer an IP address in the same network segment as the IP camera (e.g., 192.168.1.69) and the same subnet mask as that of the IP camera. -
Page 11: Installation Of Controls And Login To The System
Online device search procedure Run Device Config Tool by double-clicking on the icon. It will search for and display any online device and its IP address, port number, web port number, number of channels, configured name, device type and version, subnet mask, gateway, MAC address, connection pattern and status. - Page 12 Click OK to confirm. A window will then appear in which you can select and configure the password recovery modes in case the password is lost. ➢ Security Question Configuration: choose one of the suggested questions and enter the answer (if the function is enabled you must fill in all the security questions);...
-
Page 13: Preview
PREVIEW Open IE and enter the camera’s IP address (http://192.168.1.168) to bring up the login window shown below: Login Interface for H.265 IP camera. Figure 1 In the login window you can choose a language for the IE client. Enter your username (admin by default) and password (set previously) and then press Login. -
Page 14: Security Question Verification
5.3.1 SECURITY QUESTION VERIFICATION Give the correct answers to the previously selected questions, type the new password and confirm by clicking on the OK button. 5.3.2 CERTIFICATE OF AUTHORISATION Import the previously saved certificate (.txt file) and type the new password, then confirm by clicking on the OK button. -
Page 15: Live
LIVE Some of the buttons in the preview frame are described below. : (Colour) Button for setting the colour, brightness, contrast, saturation and sharpness of the frame. : (PTZ control) the PTZ interface appears when you click on the icon. : (IA Alarm) Button to open/close the window for alarms generated by intelligent video analysis. -
Page 16: Ptz Control (Only For Certain Models)
PTZ CONTROL (ONLY FOR CERTAIN MODELS) : (PTZ control) selecting this icon brings up the following window: • SPEED increases or decreases the PAN/TILT speed • ZOOM zooms in and out • FOCUS increases or decreases FOCUS • 3D Position: allows to move the camera on an area of interest •... -
Page 17: Playback
PLAYBACK Select Playback to access video search functions, choose the search type (General or AI), select the corresponding date, then click Search. GENERAL Select the General option to perform generic, NORMAL searches (24-HOUR recording), by type of EVENT (alarm input, sound detection, netbreak or motion events) or by type of Intelligent Video Analysis (IA) (PID, LCD, SOD, PD&VD, FD, CC, CD, QD, LPD, RSD) or ATTRIBUTE DETECTION, described in detail in the intelligence chapter. -
Page 18: Picture
PICTURE If you select the Picture option, it will be possible to search for saved pictures: If you select the Tag option, it will be possible to search for saved tags: PLAYBACK CONTROLS :from left to right, Play/Pause, Stop, Next frame, (select once to play a frame), Record, Capture, Download, Zoom, Play all, Stop all, Audio control. -
Page 19: Remote Setting
REMOTE SETTING DISPLAY CONFIGURATION 9.1.1 LIVE Select Remote Settings to open the following page (default preview settings page): Name: name of the IP camera. Date Format: choose the format type for the date. Time Format: Choose the format type for the time. Flicker control: Choose 50Hz or 60Hz. -
Page 20: Image Control
9.1.2 IMAGE CONTROL Select Image Control in the Channel Menu to open the following page (for Varifocal cameras): • IR-CUT Mode: Select the integrated IR-CUT filter mode to ensure that the camera functions properly in Day/Night: Automatic mode, Colour mode, Image mode, Day, Night, Schedule, where you have to indicate a time interval. -
Page 21: Privacy Zone
Image setting: Three modes can be chosen, full colour mode, day/night mode and schedule mode (hybrid full colour + day/night). Full colour mode: If set, images can be displayed in colour even in low light. Day/night mode: If set, this allows the camera to switch from colour to black and white according to ambient light conditions (colour during the day/black and white at night). -
Page 22: Roi
Enable Video Cover, and then use the left mouse button to trace rectangles around areas not to be displayed during recording, in screenshots and in Live viewing. Save when done to keep the settings. Press Save to save the desired setting 9.1.4 Select Channel →... -
Page 23: Record
RECORD 9.2.1 ENCODE Select Encode in the Record menu to access the page below. The following bit streams are available by default: • Main stream, Substream and Mobile Stream: The resolution, frame rate, video code, encryption level, bitrate control, bitrate modality, bitrate frequency, audio and frame interval can be set for the main stream, the substream and the stream for mobile devices respectively. -
Page 24: Record
9.2.2 RECORD This function allows you to enable recording to an SD card (if present): • Stream mode: recording mode (main stream or substream) • PreRecord: pre-recording • Netbreak: If you have no connectivity, use your SD as a backup recording until connectivity is restored 9.2.3 SCHEDULE Select Schedule in the menu Record to access the page below. -
Page 25: Capture Schedule
9.2.5 CAPTURE SCHEDULE This item allows you to configure the time slots and days of the week when the capture function is to be operational. Normal: When the time slot is marked in green, this indicates that the channel performs normal recording in that time slot. Motion: When the time slot is marked in yellow, this indicates that the channel only performs recording if motion is detected in that time slot. -
Page 26: Deterrence Only For Certain Models
9.3.1.2 Deterrence Only for certain models • Light: if enabled, it allows to turn on the white light for deterrence event. • Duration: it’s possible to setup the duration (in seconds) of the light after a deterrence event with a range from 5 to 180. -
Page 27: Sound Detection
• Siren: allows to enable the siren with a detected event. • Siren Type: choose between Alarm1, Alarm2 or User-defined1/2/3. • Siren Level: it’s possible to setup the volume of the sound of the siren with a range from 1 to 10. •... -
Page 28: Alarm Output Settings
9.3.2 ALARM OUTPUT SETTINGS 9.3.2.1 Motion detection • Latch Time: To set the alarm output time (5S,10S, 20S, 30S). [for models where featured] • Post Recording: When Enable Record is enabled, the recording delay can then be set (5S, 10S, 20S, 30S). •... -
Page 29: I/O (Input/Output) [Where Featured]
9.3.2.2 I/O (Input/Output) [where featured] • Alarm Type: Available values: OFF, Normally-Open, Normally-Closed. • Latch Time: Set the alarm output time (5S,10S, 20S or 30S). [for models where featured] • Post Recording: When Enable Record is selected, the recording delay can then be set (5S, 10S, 20S or 30S). -
Page 30: Sound Detection
9.3.2.3 Sound detection • Latch Time: To set the alarm output time (5S,10S, 20S, 30S). [for models where featured] • Post Recording: When Enable Record is selected, the recording delay can then be set (5S, 10S, 20S or 30S). • Send Mail: a function used with SMTP to enable the sending of e-mail. -
Page 31: Event Push
9.3.3 EVENT PUSH In this section, you can enter the server on which to receive Push notifications. • Enable: Enables the functionality of sending PUSH to an HTTP or UDP server. • Name: Enter the name of the server. • Push Way: Choose the server type between HTTP and UDP server. -
Page 32: Ia (Intelligent Alarm)
IA (INTELLIGENT ALARM) This section briefly describes the intelligent video analysis functions capable of generating specific events that can also be recorded on a remote NVR. IMPORTANT: 1) The video content analysis algorithms described in this section are based on an automatic analysis of the scene filmed by the camera device, which is capable of automatically processing the images. -
Page 33: Pd&Vd: Pedestrian Detection & Vehicle Detection
Face Enhance: enables the face enhancement function. By enhancing the effect of the face image, its capture during movement is improved. Activating this parameter requires more camera resources causing an inevitable loss of overall effect on the screen. Face Attribute: if activated, faces can be discriminated on the basis of desired attributes (glasses, hat, mask, etc.). Snap Mode: there are three recognition modes, optimal mode, real-time mode and interval mode. -
Page 34: Pid: Perimeter Intrusion Detection
- Realtime Mode: one image will be sent to the device when the person or vehicle enters the monitoring area and a second image will be sent to the NVR when the person or vehicle has left the monitoring area. - Interval Mode: the maximum number of times and the interval for sending each image to the device can be set. -
Page 35: Lcd: Line Crossing Detection
9.4.1.4 LCD: Line Crossing Detection This feature allows automatic detection of the crossing (in both directions) of a preset line by a moving object/person. The function is used to generate alarms when the algorithm traces the movement of an object that crosses a line previously defined by the user. -
Page 36: Sod: Stationary Object Detection
9.4.1.5 SOD: Stationary Object Detection This feature allows automatic detection of a change regarding the presence of an object within a preset area. The function is used to generate alarms in response to the “presence” or “removal” of an object in a previously defined area. -
Page 37: Cc: Line Crossing Counter
9.4.1.6 CC: Line Crossing Counter This feature allows automatic detection and counting of objects passing through the image if they cross a specific line in a given direction. The function also allows alarms to be generated if the count increases. Enable: enables or disables the detection and counting of objects passing through a line (CC). -
Page 38: Hm: Heat Map
9.4.1.7 HM: Heat Map The Heat Map function allows you to identify areas with the highest movement flows by colour overlay. Warmer colours (orange, red) indicate the areas with the most activity. Enable: enables or disables the Heat Map (HM) function. Rule Number: only one rule can be activated. -
Page 39: Qd (Queue Length Detection)
- Full Screen: the detection area coincides with the camera's coverage area. - Customise: if this mode is selected a region box will appear in the right window. Select the small red box next to the digital region ID box to change the region. Rule Number: only one rule can be activated. -
Page 40: Lpd (License Plate Detection)
9.4.1.10 LPD (License Plate Detection) This function allows the registration number of unknown vehicles or vehicles entered in the database to be recorded. Effective detection requires that the vehicle is not moving and that the positioning of the camera complies with certain requirements such as a certain distance from the number plate to be detected, a specific side angle and certain installation height. -
Page 41: Rsd (Rare Sound Detection)
9.4.1.11 RSD (Rare Sound Detection) This function allows the camera to detect specific background noises, dog barking, a child crying and/or gunshot. Enable: Enables or disables the Rare Sound (RSD) function. Sensitivity: The higher the value, the more sensitive the detection. The value can be set from 1 to 100. Detection Type: Three types of sounds can be chosen: baby crying, dog barking and gunshot. -
Page 42: Recognition: Face Recognition Only For Certain Models
9.4.2 RECOGNITION: FACE RECOGNITION ONLY FOR CERTAIN MODELS 9.4.2.1 Face Recognition (FR) This feature allows you to detect the human faces filmed in the scene, and then perform automatic comparisons to check the similarity between them. This specific feature can be configured and used from the Camera and from the NVR on which the camera has been set for recording. -
Page 43: License Plate Management Only For Certain Models
9.4.2.2 License Plate Management Only for certain models This menu provides a database of licence plate information. Enable: enables the desired LPD list. Group Name: allows you to set the database group name, Allow List , Block List and Stranger group . - Page 44 Press the Import/Modify button to add a group and edit the licence plate data. When more than 5000 data are added, the message Add data has reached the upper limit of the group is displayed. Press the Import from capture button to locally import licence plate data from the capture database. Select date, duration and channels and press on Search to search for plates saved by the device in that time period.
-
Page 45: Alarms
9.4.3 ALARMS In this section you can configure all the actions that can be implemented by the system in response to an Intelligent alarm. In the FD, FR, AD, PD&VD, PID, LCD, SOD, CC, FA, CD, QD, LPD e RSD function menus, you can also schedule the actions generated by these alarms, by accessing the schedule section of each menu. -
Page 46: Face Recognition Only For Certain Models
9.4.3.2 FR: Face Recognition Only for certain models Enable: enables or disables the relevant list. Similarity: if the similarity is greater than the set percentage the alarm will be generated. Latch Time: set the alarm time, a time period of 0-5s, 10s, 20s, 40s and 60s is allowed. Alarm Out: if enabled, allows the camera's alarm output to be switched after the alarm has been triggered. -
Page 47: Pd & Vd: Person And Vehicle Detection
Cloud Video: If enabled, this allows you to upload the alarm video to the cloud after the alarm has been triggered. Alarm Out: if enabled, allows the camera's alarm output to be switched after the alarm has been triggered. Enable Record: if enabled, allows you to enable recording in the event of an alarm. Warn Light*: If enabled, allows you to activate the warn light in the event of an alarm. -
Page 48: Lcd: Line Crossing Detection
Latch Time: set the alarm time, a time period of 5s, 10s, 20s and 30s is allowed. Post Recording: set the recording time after the alarm is triggered. OFF, 5s, 10s, 20s and 30s can be selected. Send Email: if enabled, allows an email notification to be sent after the alarm has been triggered. It is necessary to configure the e-mail data in the Remote Setup menu under E-mail Network. -
Page 49: Sod: Stationary Object Detection
9.4.3.7 SOD: Stationary object detection Latch Time: set the alarm time, a time period of 5s, 10s, 20s and 30s is allowed. Post Recording: set the recording time after the alarm is triggered. OFF, 5s, 10s, 20s and 30s can be selected. Send Email: if enabled, allows an email notification to be sent after the alarm has been triggered. -
Page 50: Fa: Face Attendance Only For Certain Models
Alarm Out: if enabled, allows the camera's alarm output to be switched after the alarm has been triggered. Enable Record: if enabled, allows you to enable recording in the event of an alarm. Warn Light*: If enabled, allows you to activate the warn light in the event of an alarm. Event Push: If enabled, enables push notifications in the event of an alarm. -
Page 51: Qd: Queue Length Detection
Latch Time: set the alarm time, a time period of 5s, 10s, 20s and 30s is allowed. Post Recording: set the recording time after the alarm is triggered. OFF, 5s, 10s, 20s and 30s can be selected. Send Email: if enabled, allows an email notification to be sent after the alarm has been triggered. It is necessary to configure the e-mail data in the Remote Setup menu under E-mail Network. -
Page 52: Lpd: License Plate Detection
9.4.3.12 LPD: License Plate Detection Post Recording: set the recording time after the licence plate reading alarm is activated. OFF, 5s, 10s, 20s and 30s can be selected. Send Email: if enabled, allows an email notification to be sent after the licence plate reading alarm has been triggered. Email data must be configured in the Remote Setup menu under E-mail Network. -
Page 53: Rsd: Rare Sound Detection
9.4.3.13 RSD: Rare Sound Detection Post Recording: Set the recording time after the noise detection alarm is activated. It is possible to select OFF, 5s, 10s, 20s and 30s. Send Email: If enabled, allows a notification email to be sent after the noise detection alarm has been triggered. It is necessary to configure the e-mail data in the Remote Setup menu under E-mail Network. -
Page 54: Statistics
9.4.4 STATISTICS From this section of the menu you can produce statistics for the Face Detection, Human& Vehicle Detection, Cross Counting and Heat Map functions. 9.4.4.1 Face Detection Only for certain models This section allows you to view and export statistics related to the face detection function. Date: select a specific date Report type: include daily/weekly/monthly/quarterly/yearly Group: select the specific list from All/Allow List/Block List/Stranger List... -
Page 55: Cross Counting Statistics
9.4.4.3 Cross Counting Statistics This section allows you to display in graphs the statistics for the type of crossing counting chosen Report Type: includes daily/weekly/monthly/yearly Detection Type: includes motion/person/vehicle Cross Type: include cross in/cross out Export: Press on Search and then on Export to export statistics in .CSV file format. System Time: select a specific time Select the Line Chart button, then press Search button and the results will be displayed in a line chart as shown below: Select the Column Chart button, then press Search button and the results will be displayed in a column chart as shown below:... - Page 56 Report Type: include daily/weekly/monthly/annual Date: select a specific date Start/End Hour: set the start and end time period for the search Select the Space Heat Map button, then press Search button and the search results will be displayed as images as shown below: Select the Time Heat Map button, then press Search button and the search results will be displayed as a column chart as shown below: Note: If the search were to be carried out in the current time frame, the value displayed in the columns would not correspond to...
-
Page 57: Network
NETWORK 9.5.1 GENERAL 9.5.1.1 General (Network) Click on General in the Network menu to open the following page: If you connect the camera to a router to use DHCP, enable the DHCP button. The router will automatically assign all network parameters for the camera. Unless the network is addressed manually, the parameters are as follows: •... -
Page 58: Snmp
Click Save; the camera will be restarted to activate the PPPoE setting. 9.5.1.3 SNMP (For future use) SNMP: Simple Network Management Protocol, an opensource protocol. SNMP can verify basic device parameters such as IP, hardware information and software information. 9.5.1.4 Port Configuration •... -
Page 59: E-Mail (E-Mail Configuration)
• P2P Switch: P2P address can be disabled (enable by default). 9.5.2 E-MAIL (E-MAIL CONFIGURATION) The e-mail menu allows you to access the configuration of the parameters for alarm notifications via e-mail. • Email: allows you to enable or disable the configuration of the email parameters. •... -
Page 60: Ftp
9.5.3 This menu allows you to enable the FTP function to view and load snapshots captured by the camera into the storage device on FTP. • FTP Enable: select the desired option to enable or disable operation. • IP Server: enter the address or name of the FTP server. •... -
Page 61: Ddns Configuration
9.5.5 DDNS CONFIGURATION Select DDNS in the Network menu to open the following page: DDNS (Dynamic DNS) is a service used to record a domain name and floating IP address with the DDNS server so that the domain name can be routed towards the IP address even if it is changed in a dynamic IP system. The user can access a remote camera using DDNS on the three previous types (Static, DHCP and PPPoE). -
Page 62: Https
9.5.6 HTTPS can set the security encryption protocol. In this menu you • Certificate Type: Default or Custom 9.5.7 IP FILTER Select IP Filter in the Network menu to open the following page: • Enable: if Enable is selected the Whitelist and Blacklist can be configured. •... -
Page 63: Device
Once the choice of address or address class has been confirmed, confirm with OK; the setting will be displayed in the menu below: You can edit the address list with the Edit button or delete the list with the Delete button. Press Save to save the desired setting. -
Page 64: Audio
Press Save to save the desired setting. 9.6.2 AUDIO Click on Audio in the Device menu to open the following page: Audio setup procedure: • Select the Enable Audio option to access the audio parameters. • set Output Volume and Input Volume (0~10) •... -
Page 65: Cloud
9.6.3 CLOUD In the event of an alarm, the IP camera is capable of sending images and video to a Cloud storage service via Dropbox, a free service that allows you to easily store and share snapshots and always have them on hand when needed. The configuration can be accessed under Cloud in the DEVICE menu. -
Page 66: System
SYSTEM System parameters include: General, Multi-User, Maintenance and Information. The various interfaces and functions are described below. 9.7.1 GENERAL 9.7.1.1 Date and Time Select General in the System menu to open the following page • Time setting mode: Select the time setting mode, whether Static or NTP Server Synchronisation •... -
Page 67: Multi User
Set by week: Select the month, day and time for the start and end time of daylight saving time. For example, 2: 00 a.m. on the first Sunday of a certain month. Set by date: select the start date (click the calendar icon), end date and time for activation of daylight saving time. -
Page 68: Maintenance
• Select Enable • Click the field next to Username to change the user name of the account. • Click the field next to Password to enter the desired password. • Click the field next to Confirm to re-enter the password. •... -
Page 69: Load Default
• Click Export to create a backup of the system log for the period searched, after naming the file, which will be saved in a system folder in .csv format 9.7.3.2 Load Default: Through this menu you can reset the camera’s factory settings You can choose to reset all settings at once or only specific menu settings. -
Page 70: Parameter Management
9.7.3.4 Parameter Management export/import the main camera settings. This menu allows you to • Click in the Import file window to open the dialogue where you can select the backup file to import, and confirm by clicking on the Import button. •... -
Page 71: Information
9.7.4 INFORMATION Click on Information in the System menu to open the following page: Some system information on the device is displayed in this section, including device type, MAC address and software version. The QR Code is the P2P ID that can be used via APP or UVS Pro Client for remote connection to the device. DS1099-188... -
Page 72: Maximum Recording Time With Sd Card
MAXIMUM RECORDING TIME WITH SD CARD The following resolution options can be selected for Main Stream recording: “8Mpx”, “5Mpx”, “4Mpx”, “3Mpx”, “1080P”, “960P” for IP camera with H.265/ H.265+/ H.264/H264+ codec ➢ IMPORTANT NOTES ➢ The following tables show the approximate time needed to fill the SD Card when the IP channel records with the selected Bitrate to an SD card with a 256GB capacity. -
Page 73: 11.2 Installing Activex
Taking a Cisco router as an example: The IP address of the IP camera is 192.168.1.168, the web port is 8000 and the client port is 9988. 11.2 INSTALLING ACTIVEX If you need to install an ActiveX component, you may do so as follows. Before connecting the PC, activate the IE protection settings, as shown below: Double click on the icon to open Internet Explorer. - Page 74 DS1099-188...
- Page 75 Select the “Trusted Sites” area. ➢ Click “Custom Level” and check that: ➢ • “Initialise and script ActiveX controls not marked as safe” is set to “Enable” or “Prompt”. • “Download signed ActiveX controls” is set to “Enable” or “Prompt”. Check that the Security Level is set to “Low”.
- Page 76 ➢ The following screen will be displayed: You will need to add the IP address of the device (example: in the “Add the website to the zone” field. http://192.168.36.40 Add the IP address of the device in the field and click “Add”. ➢...
-
Page 77: 11.3 Frequently Asked Questions
11.3 FREQUENTLY ASKED QUESTIONS ◆ Internet Explorer cannot load and install plug-ins. Possible cause: IE security level is set too high. Solution: Set IE security level to the minimum level. ◆ After updating, I cannot access the IP Camera through Internet Explorer. Solution: Clear the IE cache as follows: open IE Tools, select Internet Options, select the 2nd option under “Delete Files”... - Page 78 DS1099-188 Technical area URMET S.p.A. customer service 10154 TURIN (ITALY) +39 011.23.39.810 VIA BOLOGNA 188/C http://www.urmet.com Tel. +39 011.24.00.000 (AUTO) e-mail: info@urmet.com +39 011.24.00.300 - 323 MADE IN CHINA DS1099-188...
Need help?
Do you have a question about the 1099 and is the answer not in the manual?
Questions and answers