
Related Manuals for King Industrial KC-4900S


Summary of Contents for King Industrial KC-4900S
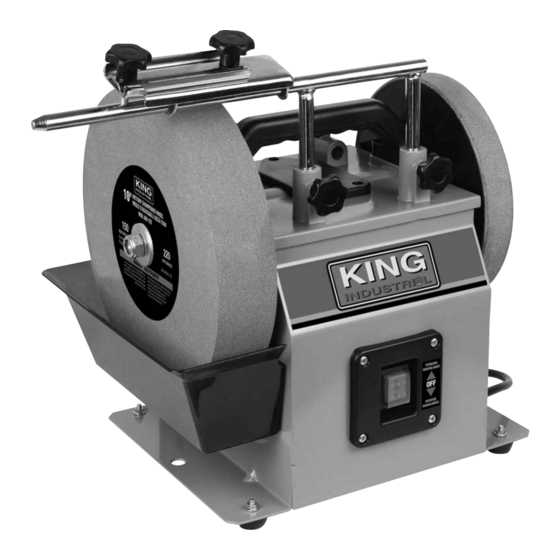
- Page 1 10” WET/DRY SHARPENER KIT INSTRUCTION MANUAL MODEL: KC-4900S COPYRIGHT © 2020 ALL RIGHTS RESERVED BY KING CANADA TOOLS INC.
-
Page 2: Warranty Information
WARRANTY INFORMATION 2-YEAR KINg CANADA TOOLS LIMITED WARRANTY OFFERS A 2-YEAR LIMITED WARRANTY FOR THIS 10” WET/DRY SHARPENER FOR COMMERCIAL USE. PROOF OF PURCHASE Please keep your dated proof of purchase for warranty and servicing purposes. REPLACEMENT PARTS Replacement parts for this product are available at our authorized King Canada service centres across Canada. Please use the 10 digit part numbers listed in this manual for all part orders where applicable. -
Page 3: General Safety Instructions
gENERAL SAFETY INSTRUCTIONS VOLTAgE WARNINg: Before connecting the machine to a power source (receptacle, outlet, etc.) be sure the voltage supplied is the same as that specified on the nameplate. A power source with voltage greater than specified can result in SERIOUS INJURY to the user - as well as damage the machine. -
Page 4: Electrical Information
ELECTRICAL INFORMATION WARNINg ALL ELECTRICAL CONNECTIONS MUST BE DONE BY A QUALIFIED ELECTRICIAN. FAILURE TO COMPLY MAY RESULT IN SERIOUS INJURY! ALL ADJUSTMENTS OR REPAIRS MUST BE DONE WITH THE MACHINE DISCONNECTED FROM THE POWER SOURCE. FAILURE TO COMPLY MAY RESULT IN SERIOUS INJURY! POWER SUPPLY To turn the machine “On”... -
Page 5: Specifications
5. 8” x 1-1/8” Leather stropping wheel- 12 mm arbor 11. Carry handle 6. Vertical position lock knobs 12. Horizontal position lock knobs SPECIFICATIONS MODEL KC-4900S Grinding/sharpening wheel size/arbor size 10” x 2” / 12mm Leather stopping wheel size/arbor size 8” x 1-1/8” / 12.5mm Speed (wheel/motor) - Page 6 ASSEMbLY UNPACKINg Open and remove loose contents from the box, carefully remove Wet/Dry Sharpener by the base or by the top mounted carry handle. Never transport the Wet/Dry Sharpener by its wheels or its accessories. Place the Wet/Dry Sharpener on a stable, flat work surface. INSTALLINg THE gRINDINg/SHARPENINg WHEEL This Wet/Dry Sharpener comes with a 10”...
-
Page 7: Assembly And Adjustments
ASSEMbLY & ADJUSTMENTS INSTALLINg THE UNIVERSAL SUPPORT- WHEEL ROTATION Against Wheel Rotation Grinding/Sharpening against the rotation removes larger amounts of material. The grinding/sharpening wheel rotates towards you. It is recommended to position the universal support in the vertical position for all against the wheel rotation operations. See Fig.6. Note: User may find that “Against”... -
Page 8: Operation
ASSEMbLY, ADJUSTMENTS & OPERATION FILLINg THE WATER TRAY 1. With the grinding/sharpening wheel and water tray installed, fill water tray (A) Fig.11 with clean, cold water up to the "max water level" (B) as shown on the inside of the water tray. 2. -
Page 9: Operation And Maintenance
OPERATION & MAINTENANCE POLISHINg/HONINg A bLADE After the sharpening blade/tool operation, the leather stropping wheel (A) Fig.14 can be used to remove burrs for a smooth, razor sharp edge. Follow these steps: NOTE: Do not attempt to hone scissors using the leather stropping wheel. Remove burrs if any from the scissor blades using a scrap piece of wood. -
Page 10: Maintenance
MAINTENANCE REPLACINg gRINDINg/SHARPENINg WHEEL ASSEMbLY WARNINg! Unplug power cord before changing grinding/sharpening wheel. Refer to the “Installing the Grinding/Sharpening Wheel” instruction in this manual. Follow instructions in reverse to remove the grinding/ sharpening wheel. A replacement 10” x 2” grinding/sharpening wheel (model KM-128) is available, contact your local distributor of King Canada products for more information.
Need help?
Do you have a question about the KC-4900S and is the answer not in the manual?
Questions and answers