
Related Manuals for King Industrial KC-15VS


Summary of Contents for King Industrial KC-15VS
-
Page 1: Instruction Manual
MINI MILLING/DRILLING MACHINE INSTRUCTION MANUAL MODEL: KC-15VS COPYRIGHT © 2018 ALL RIGHTS RESERVED BY KING CANADA TOOLS INC. -
Page 2: Warranty Information
WARRANTY INFORMATION 2-YEAR KING CANADA TOOLS LIMITED WARRANTY OFFERS A 2-YEAR LIMITED WARRANTY FOR THIS MINI MILLING/DRILLING MACHINE FOR COMMERCIAL USE. PROOF OF PURCHASE Please keep your dated proof of purchase for warranty and servicing purposes. REPLACEMENT PARTS Replacement parts for this product are available at our authorized King Canada service centres across Canada. Please use the 10 digit part numbers listed in this manual for all part orders where applicable. -
Page 3: Specific Safety Instructions
GENERAL & SPECIFIC SAFETY INSTRUCTIONS VOLTAGE WARNING: Before connecting the machine to a power source (receptacle, outlet, etc.) be sure the voltage supplied is the same as that specified on the nameplate. A power source with voltage greater than specified can result in SERIOUS INJURY to the user - as well as damage the machine. -
Page 4: Electrical Information
ELECTRICAL INFORMATION WARNING ALL ELECTRICAL CONNECTIONS MUST BE DONE BY A QUALIFIED ELECTRICIAN. FAILURE TO COMPLY MAY RESULT IN SERIOUS INJURY! ALL ADJUSTMENTS OR REPAIRS MUST BE DONE WITH THE MACHINE DISCONNECTED FROM THE POWER SOURCE. FAILURE TO COMPLY MAY RESULT IN SERIOUS INJURY! POWER SUPPLY Stop Button (C). -
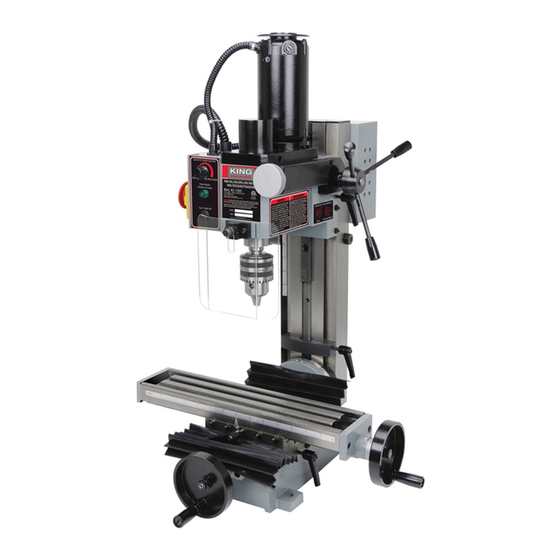
Page 5: Specifications
22. Fault indicator light 23. Emergency stop button 24. Low/High speed range selector lever 25. Spring return 26. Head/column fixing hex. nut SPECIFICATIONS MODEL KC-15VS Drilling capacity in cast-iron 1/2” Drilling capacity in steel 1/2” Max. distance spindle nose to table 11-1/4” Swing 12-3/4”... - Page 6 ASSEMbLY & TEST RUN UNPACKING, CLEANING AND MOUNTING TO WORKbENCH OR STAND Remove all contents from the packing. Lift the Mini Milling/Drilling Machine using handling equipment or get the help of an assistant and place it on level workbench or stand. Make sure the workbench or the stand is sturdy enough to support the weight of this Mini Milling/Drilling Machine (110 lbs).
- Page 7 ADJUSTMENTS & OPERATION FAST DOWNFEED & MICRO DOWNFEED CONTROLS This Mini Milling/Drilling Machine comes with two methods of downfeed, fast and micro. Fast feed method is normally used for drilling operations, and the micro feed method is normally used for milling operations. 1.
- Page 8 ADJUSTMENTS & OPERATION SPINDLE SPEED & CUTTING REFERENCE CHART This Mini Milling/Drilling Machine comes with two variable speed ranges (Low = 0-1100 RPM / High = 0-2500 RPM). It is very important to select the correct RPM cutting speed for the different materials to cut and for personal safety.
-
Page 9: Operation And Maintenance
OPERATION & MAINTENANCE USING THE DEPTH STOP This Mini Milling/Drilling Machine comes with a depth stop which limits the distance the head can travel while down feeding. The depth stop is mainly used when repeat drilling to specific depth is required. To adjust depth stop: 1. -
Page 10: Maintenance
MAINTENANCE REPLACING FUSE This Mini Milling/Drilling Machine comes with a 5A fuse installed to the front of the control panel of the machine. To replace fuse: 1. Unscrew fuse cover (A) Fig.19. 2. Remove fuse (B), replace with identical fuse and reinstall fuse cover. FIGURE 19...
Need help?
Do you have a question about the KC-15VS and is the answer not in the manual?
Questions and answers