Table of Contents
Advertisement
Advertisement
Table of Contents

Related Manuals for Hanil FLETA 40P


Summary of Contents for Hanil FLETA 40P
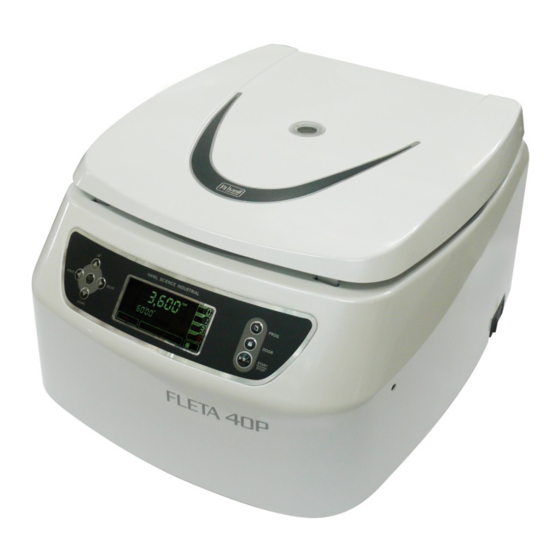
- Page 1 Operation Manual FLETA 40P Multipurpose Centrifuge...
-
Page 2: Table Of Contents
FLETA 40P USER MAUAL 1. General description 1-1. Components ---------------------------------- 1-2. Operation & keeping condition 2. Installation 2-1. Safety ------------------------------------------ 2-2. Location of Installation ------------------- 2-3. Check list ------------------------------------- 2-4. Power Supply ------------------------------- 3. Operation 3-1. Feature --------------------------------------- 3-2. Structure 3-3. -
Page 3: General Description
1. General Description FLETA 40P is Multipurpose Centrifuge, this manual is for a starter, which offers the information of trouble shooting, maintenance, precautionary measure and usage. Operator must read this manual for the successful handling of every function and this manual should be placed at the easy accessible location. -
Page 4: Installation
2. Installation 2-1. Safety Centrifuge containing the high speed rotating part is dangerous. Follow the instruction described in this manual to avoid breakage, trouble, injury. 1) Centrifuge must be placed the horizontally flat level, In the case of tilted shaft of rotating big vibration occurs. 2) Check the voltage before connecting power, the improper volt may cause the damage. - Page 5 2-2. Location of placement To be installed on the rigid and flat level; The rotation of heavy rotor in the long period on the inclined level may cause the deformation of rotating shaft. Smooth air ventilation; Centrifuge needs 30cm of vacant space of front & rear and right & left. An airway should not be covered by the another instrument or fabric, avoid the place of heavy dust.
-
Page 6: Check List
2-3. Check list Don’t open door manually during rotating rotor, don’t use emergency door open device except the emergent case. Rotating speed of rotor should not exceed the allowed max speed. The rotor is designed to endure only with the allowed influencing power. If RCF exceeds the allowed tensile strength, the rotor shall break or be deformed. - Page 7 2-4. Electrical requirements Ascertain the rated voltage on the label of Centrifuge. Unclear power supply of using should be checked again with the local electric power supplier or our A/S center. Warning ; Centrifuge must connect to ground. - Centrifuge contains plug with earth pin which can be inserted into the grounded receptacle.
-
Page 8: Feature
3. Checking Opeaon 3-1. Feature 3-2. Structure 1) Structure ① Door; to protect the internal chamber and erupting rotor ② Locking hook ③ Peeping hole; to check rpm by the digital speed meter ④ Chamber ⑤ Door packing; ⑥ Rotor ⑦... - Page 9 2) Internal structure of chamber ① Chamber; to protect erupting rotor ② Motor cover; intruding foreign substance into motor ③ Motor shaft Don’t grab the edge side of door to avoid any possible injury. Put hands on the door cover and press and check the complete closing to Operate...
-
Page 10: Rotor
3-3 Rotor - Wipe the motor shaft and hole of rotor with fabric before installation - As tighten rotor with motor shaft, temp. of rotor & motor should be 10~30℃ - Put rotor on the motor shaft tighten clockwise with hexagonal wrench In the case of release screw wrench to the counter direction 1) Weight loading on rotor - Put tubes symmetrically on rotor, only recommended tubes are workable. - Page 11 <1> Prepare the parts. (Rotor, Wrench) <2> Remove the buffer under the motor <3> Wipe the motor shaft and hole of rotor with fabric before installation. Attach the rotor to the shaft of the motor and turn the wrench clockwise to tighten it completely.
- Page 12 In the case of spin down lean tubes’ lids against the edge of rotor and Ascertain the sameness of tubes and close the rotor lid. This instruction must be applicable for using tubes provided by the kit manufacturer. Swing bucket rotor Check the internal cleanness of bucket and wipe out the foreign material with dry fabric.
- Page 13 Safety label Danger & alarm Danger of electric shock Warning! The dissymmetrical placement of rotor causes injury Check rotor connection, rotor closing Tubes location carefully before start -Place tubes of same type symmetrically -Use the adequate tubes with adapter -Use always homogeneous tube (same Weight, material property, density, Volume) 1.
-
Page 14: Function
3-4. Function check Test maximum speed of rotor. Check whether Centrifuge works at the door opened situation and door may open during operation. 3-5. Operation detail 1) Control panel description... - Page 15 2) Save and call program 3) Call/input program 4) Input RPM/RCF 5) Input Time 6) Short Run mode...
- Page 16 ※ Requested Operation At DEC 0, an unit decelerates the same as speed as DEC 3 by 500rpm. In less than 500rpm, it stops without brakes...
- Page 17 7) Simulation Set value of simulation; SL50-4(No.1), 4,000 RPM, 3 min is set in PROG No.3.
- Page 18 4. Wash & Maintenance Emergency open Activate the emergency door open device manually in the case of power failure. 1) Off power switch, await till rotor stops. 2) Insert 5mm T wrench into the hole on the right flank side and turn clockwise to open door.
- Page 19 2) Interior - Remove and clean periodically frost of rotor & chamber for the efficient cooling. - Off power switch and remove frost with dry cloth - Clean the chamber with soaked sponge or cloth and dry completely after removing frost. 3) Shaft - Shaft must be kept clean, the unstable rotation by contaminant of shaft causes imbalance.
-
Page 20: Maintenance
4-2. Maintenance 1) Check & clean rotor frequently 2) General check points Shaft & hub; Don’t separate hub and bent shaft, check abrasion. Motor bearing; Check noise and the smooth rotation Control board; Check bolt connection and functioning Power supply; Check whether connection is loosened. Rotor;... -
Page 21: Trouble Shooting
Speed •Error of controlling system. •Switch power off and re-start. System •Overload of motor, damage of IPM module •Contact Hanil A/S center. error •Re-set the preset value of the limit. •Over the pre set limit. Over Temp. (The value of L-Cal of the preset menu Door •Door not open in the stop status. -
Page 22: Rotor & Accessory
6. Rotor & Accessory 6-1. Rotor Specification Rotor Rotor Max. Max. Max. Capacity Name Radius(mm) Swing 85ml SL85-4 4,000 3,088 172.6 Rotor 50ml SL50-6 4,000 3,088 172.6 Angle 15ml AL15-12 4,000 2,547 142.4 Rotor 15ml AL15-24 4,000 2,790 155.9...
Need help?
Do you have a question about the FLETA 40P and is the answer not in the manual?
Questions and answers