
Related Manuals for Hanil Component R6


Summary of Contents for Hanil Component R6
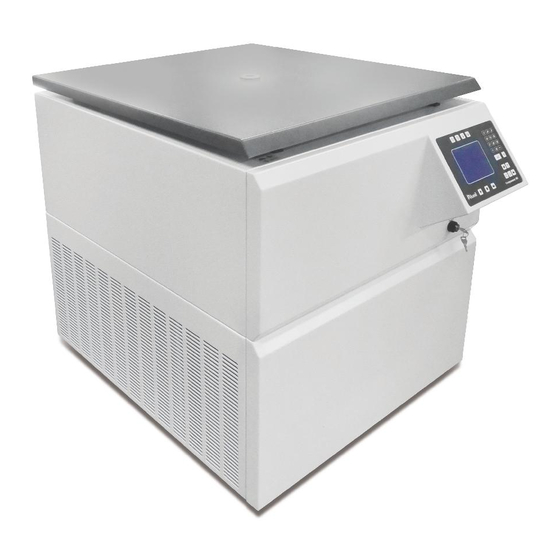
- Page 1 Operating Manual Component R6 Large capacity Centrifuge Date of Purchase Serial No. Place of purchase...
- Page 2 Copyright 2017 Hanil Scientific Inc. All rights reserved. Contact Us If you have and questions, contact Hanil Scientific Inc. or place of purchase. +82-2-3472-0727 Inquiry: info@ihanil.com Order: sales@ihanil.com Tech. support: techsupport@ihanil.com...
-
Page 3: Table Of Contents
CONTENTS General Considerations------------------------------------------------- Safety Transport & Storage Safety label Electric safety information Product description------------------------------------------------------- Structure -5 Delivery package -5 2.3 Technical specifications -6 Installation ---------------------------------------------------------------- Packing Inspection Installation -7 3.2.1 Selecting the location -7 3.2.2 Power connetion -8 Operation ---------------------------------------------------------------- Operation panel 4.2 Opening and closing the lid -10 4.3 Loading tubes -10... -
Page 4: General Considerations
2. Check the voltage to be used, before connecting the centrifuge to the power source. 3. Only use rotors, parts, and accessories provided by Hanil Scientific Inc. Hanil Scientific Inc. is not responsible for damages of the device and accidents caused by using parts and accessories not recommended. -
Page 5: Transport & Storage -4
1. General Considerations 1.2 Transport & Storage • Only lift and transport the • The device and the accessories device with sufficient number of may only be stored in dry rooms helpers. -Storage- -Transport- Ambient temperature 2℃~40℃ Ambient temperature -10℃~40℃ Maximum relative humidity 30%~85% Maximum relative humidity 10%~90% Air pressure 500~1060hpa... -
Page 6: Product Description
⑤ RPM measuring window: Visual inspection for rotor stop or for a speed check using a tachometer. ⑥ Circuit breaker: It prevents overvoltage or short circuit. 2.2 Delivery package ① Component R6(incl. a WS1000-6) ② Power Cable ③ Operating manual ④... -
Page 7: Technical Specifications -6
2. Product description 2.3 Technical Specifications Max. RPM 5,000 rpm Max. RCF 7,261 xg Max. Capacity 6 x 1,000 mL ACC/DEC ramps 10/10 steps /Two step Deceleration /Yes Temperature range -20℃ to 40℃ /Temperature offset /Yes Time control < 100 hr, continuous Program memory Noise level ≤... -
Page 8: Installation
3. Installation 3.1 Packing Inspection •Check packing conditions carefully, before unpacking. •Contact Hanil Scientific Inc. immediately if damages found. •Check the delivery for completeness. •You can get contact details on packing boxes and the back of the manual. 3.2 Installation 3.2.1 Selecting the location... -
Page 9: Installation -7
3. Installation 3.1 Packing Inspection 3.2.2 Power Connection • Connect the device to voltage sources which correspond to the electrical requirements on the label attached to the device. • Use sockets with a protective earth conductor and provided powercord. 1. Connect the power cable to the power socket on the right side of the product and plug the cord into the outlet. -
Page 10: Operation
4. Operation 4.1 Operation Panel Button Function Set RPM Set RCF Time Set centrifugation time Set the temperature: -20℃to 40 ℃ Temp Temp limit Keep the temperature when centrifugation with sensitive samples Start Start centrifugation Stop Stop centrifugation Open Open centrifuge lid Clear Erase the wrong number. -
Page 11: Opening And Closing The Lid -10
•Closing the lid Put the lid on and press the edge of the lid. 4.3 Loading tubes • Only use tubes provided or approved by Hanil Scientific Inc. • Always use the same type of tube. • Tubes should be loaded symmetrically. -
Page 12: Setting Rpm/Rcf -11
4. Operation 4.4 Setting RPM/RCF ① Press the RPM ( ) button or RCF ( ) button. ② Press the numeric key to set required RPM/RCF. ③ Press the Enter ( ) button to fix the value. 4.5 Setting run time ①... -
Page 13: Saving / Recall A Program -12
4. Operation 4.9 Saving / Recall programs Saving a program ① Set the centrifugation time/speed/Accel/Decel values. ② Press Save ( ) button. ▶You can store 100 programs on the device: 0~99 ③ Select the program slot by pressing the numeric keys. ④... -
Page 14: Maintenance
②Rotate the shaft with your hand to make sure it turns smoothly ③Use the stopwatch to check that the time setting is correct ④If you find any damages, do not use the device. Contact Hanil Scientific Inc. 5.2 Cleaning • Before cleaning the centrifuge, be sure to switch off the device and disconnect the power cord. -
Page 15: Troubleshooting
6. Troubleshooting 6.1 General errors Problem Recommended Action Check the power cord connection. Power failure Check the power fuse of the device. Device cannot be started Check the lid is closed completely. Lid cannot be opened Press the ‘Lid open button’. Remove the dirt at the door latch and close the lid. -
Page 16: Error Messages -15
6. Troubleshooting 6.2 Error messages Error Display Cause Solution - Check the power connection - No power connection No display None - Check the main fuse in - Blackout laboratory and device - Load a rotor - No rotor Unknow - Restrat the device - Errors in drive or rotor Rotor ID! - Page 17 6. Troubleshooting 6.3 Emergency lid open If the centrifug door cannot be opened, you can activted the emergency open manually. 1. Wait for rotor to stop before activating the emergency open. 2. Insert the provided T-wrench into the emergency release hole and turn it clockwise until the lid is released.
-
Page 18: Rotor
7. Rotor 7.1 Swing-out rotor 17 l www.ihanil.com... - Page 19 MEMO...
- Page 20 Hanil Scientific Inc. 16 Arayukro, Gimpo 10136, Rep. of KOREA T. 02-3452-8965 info@ihanil.com www.ihanil.com...
Need help?
Do you have a question about the Component R6 and is the answer not in the manual?
Questions and answers