Hanil Smart 15 Plus Operation Manual
Micro centifuge
Hide thumbs
Also See for Smart 15 Plus:
- Operating manual (23 pages) ,
- Quick manual (2 pages) ,
- Quick manual (2 pages)

Related Manuals for Hanil Smart 15 Plus


Summary of Contents for Hanil Smart 15 Plus
- Page 1 Operation Manual Smart 15 Plus Micro Centifuge Where Purchased : Date of Purchase :...
- Page 2 Smart 15 Plus Research Use Only © 2018 Hanil Scientific Inc. If you have any questions, contact our Technical Support Center. +82-2-3452-8966 / techsupport@ihanil.com www.ihanil.com The appearance or specifications of the device is subject to partial change for improvement. Doc.No. : OMM5PDEN1801...
-
Page 3: Table Of Contents
INDEX 1. General Considerations ----------------------------------------------------- 4 1.1 Safety -4 1.2 Transport & Storage - 5 1.3 Safety label on the Device - 5 1.4 Electric safety - 5 2. Product Description ---------------------------------------------------------- 6 2.1 Structure - 6 2.2 Delivery package - 6 2.3 Technical Specifications - 7 3. -
Page 4: General Considerations
2. Check the voltage to be used, before connecting the device to the power source. 3. Only use rotors, parts, and accessories provided by Hanil Scientific Inc. Hanil Scientific Inc. is not responsible for damages of the device and accidents caused by using parts and accessories not recommended. -
Page 5: Transport & Storage
1. General Considerations 1.2 Transport & Storage - The device and the accessories must only be stored in dry rooms. - Only lift and transport the device with sufficient number of helpers. -Storage- -Transport- Ambient temperature -10℃~40℃ Ambient temperature 2℃~40℃ Maximum relative humidity 10%~90% Maximum relative humidity 30%~85% Air pressure 500~1060hpa... -
Page 6: Product Description
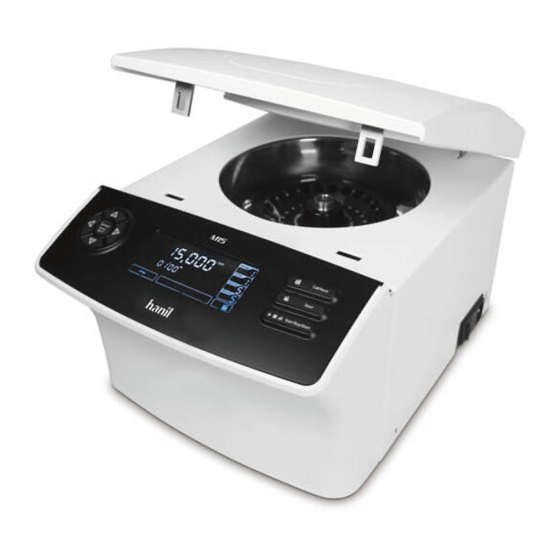
2. Product Description 2.1 Structure ① ② ③ ④ ⑤ ⑥ ① Door ② RPM measuring window ③ Chamber ④ Display & control panel ⑤ Power Soket ⑥ Power Swithch 2.2 Delivery package - Device - Power cable - Operating manual - T-wrench 6 / 21 www.ihanil.com... -
Page 7: Technical Specifications
2. Product Description 2.3 Technical Specifications Max. RPM 15,000 RPM Max. RCF 21,055 xg Time < 100 min, pulse, continuous Max. Capacity 24 x 1.5/2.0 mL, 4 PCR strips ACC/DEC steps 9/10 steps Acc. time to max. speed ≤15 sec Dec. -
Page 8: Installation
3. Installation 3.1 Packing Inspection • Check packing conditions carefully, before unpacking. • Contact Hanil Scientific Inc. immediately if damages found. • Check the delivery for completeness. ▶ You can get contact details on the packing box or manual. 3.2 Installation Installation on hard and flat ground. -
Page 9: Power Connection
3. Installation 3.3 Power Connection • Connect the device to voltage sources which correspond to the electrical requirements on the label attached to the device. • Use sockets with a protective earth conductor and provided power cord. 1. Connect the power cable to the power socket on the right side of the device and plug the cord into the outlet. -
Page 10: Installing/Removing The Rotor
3. Installation 3.5 Installing/Removing the Rotor • Only use rotors , parts , and accessories provided by Hanil Science Inc. • Do not use scatched or cracked rotor in use. 1. Before installing the rotor remove any foreign object or moisture. -
Page 11: Rotor Id
3. Installation 3.6 Rotor ID. • Input rotor Id. manually after installing the rotor. 1.Press the Setup/Enter button. 2. Press the Left or Right button to move the cursor for the Rotor ID. setting . ▶Rotor Id. Setting mode : Rotor flashes on the display. 3. -
Page 12: Loading Tubes
3. Installation 3.7 Loading Tubes • Only use tubes provided or approved by Hanil Scientific Inc. • Always use the same type of tube. • Tubes should be loaded symmetrically. • Do not exceed the maximum rated speed of the tube. -
Page 13: Operation
4. Operation 4.1 Control Panel ① ⑥ ⑦ ⑤ ⑧ ③ ④ ⑨ ② Button Description ① Up the values when setting parameters ② Down Down the values when setting parameters ③ Left Left button is used to select parameter ④... -
Page 14: Setting Rpm/Rcf
4. Operation 4.2 Setting RPM/RCF 1. Press the Setup/Enter button. 2. Press the Left or Right button until the RPM/RCF display(rpm) flashes. ▶ RPM setting mode: RPM(rpm) display flashes. ▶ RCF setting mode: RCF(xg) display flashes. 3. Press Up or Down button until the required RPM/RCF is displayed. 4. -
Page 15: Setting Acceleration/Deceleration
4. Operation 4.4 Setting Acceleration/Deceleration 1. Press the Setup/Enter button. 2. Press the Left or Right button until the Accel/Decel display(0) flashes. ▶ Accel rate setting mode: Accel display flashes(0). ▶ Decel rate setting mode: Decel display flashes(0). 3. Press the Setup/Enter button. 4.5 Start/Stop a centrifugation [Start] 1. -
Page 16: Saving/Calling Up A Program
4. Operation 4.6 Short Run This funcion is used for short run centrifugation. 1. Set the desired run speed. [ Refer to. 4.2 Setting RPM/RCF] 2. Press the Start/Stop/Pulse button more than 3sec. ▶ The rotor accelerates at maximum rate to the set speed and stops automatically. 4.7 Saving/Calling up a Program [Saving] 1. -
Page 17: Maintenance
5. Maintenance 5.1 Care Instructions 1. Regularly inspect the rotor chamber for check the motor shaft is normal. 2. Regularly check the rotor and accessories to be sure there is no damage. 3. Rotate the motor shaft with your hand to make sure it turns smoothly. 4. -
Page 18: Troubleshooting
6. Troubleshooting 6.1 Possible Problems Problems Recommended Action - Check the power cord connection. Power failure - Check the power fuse of the device. Centrifugation - Check the lid is closed completely. cannot be started Door cannot be - Press the ‘Door' button. opened - Check the power connection. -
Page 19: Error Codes
6. Troubleshooting 6.2 Error Codes Error Message Cause Recommended Action Imbalance •Asymmetrical arrangement of • Check the tightness of rotor loading. error tubes. • Check the proper loading of tubes. •Different volume of sample . • Check the stable ground or worktable. Over •2% over the set RPM. -
Page 20: Emergency Door Open
6. Troubleshooting 6.3 Emergency Door Open If the device door cannot be opened, you can activte the emergency open manually. 1. Wait for rotor to stop before activating the emergency open. 2. Insert the T-wrench into the emergency open hole and turn it clockwise until the door is opened. -
Page 21: Rotor
7. Rotor 7.1 Rotor Rotor Tube Required Bore Ø x L (mm) Max. RPM(rpm) Capacity Adaptor Radius (mm) Max. RCF (xg) Hole angle : ∠45° 0.2mL 6.5 x 17 12,500 Max. Capacity : 32 x 0.2 mL 0.2mL strips 55.5 9,695 Size (ø... - Page 24 RECYCLABLE 16 Arayukro, Gimpo 10136, Rep.of Korea Service Inquiries: +82-2-3452-8966 techsupport@ihanil.com www.ihanil.com...
Need help?
Do you have a question about the Smart 15 Plus and is the answer not in the manual?
Questions and answers