Table of Contents
Advertisement
Quick Links
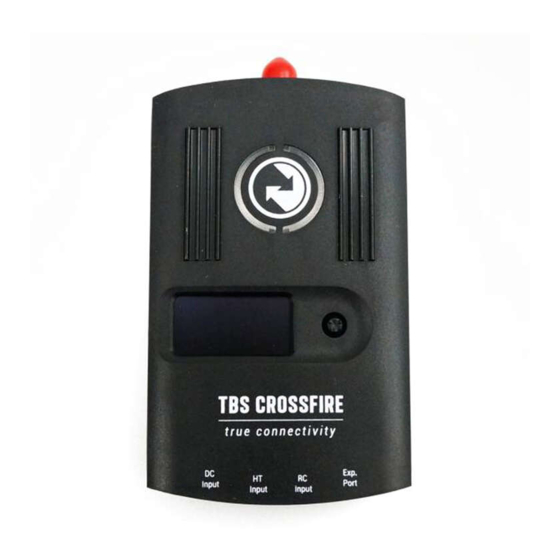
TBS CROSSFIRE R/C System
Adaptive Long Range Remote Control System
The TBS CROSSFIRE (XF) system is a R/C link system made for FPV enthusiasts. It features unheard of range
without sacrificing basic functionality such as being immune to interference from onboard equipment, low
latency control or two-way communications including telemetry functionality.
Key features
•
Long range, adaptive and robust remote control system for your aircraft
•
Immune to on-board noise
•
Two-way communication link with real-time link vitals and telemetry
•
Self-healing frequency hopping link
•
Receiver beacon mode to recover your downed aircraft
•
Super easy binding and configuration via built-in OLED display, OpenTX LUA or TBS TANGO remote
•
Low latency control for perfect immersive feeling
•
Free output mappable outputs diversity
•
Ability to fly with multiple friends at the same time (10 or more)
•
Dynamic self-selecting or selectable RF power (local restrictions apply)
•
Dedicated head-tracking input option for full FPV immersion (Standard/ Lite TX only)
•
Transmitter LED shows link health, OLED display for built in configuration (Standard/ Lite TX only)
1
Revision 2020-10-08
Advertisement
Table of Contents

Subscribe to Our Youtube Channel
Related Manuals for Team Blacksheep CROSSFIRE


Summary of Contents for Team Blacksheep CROSSFIRE
- Page 1 The TBS CROSSFIRE (XF) system is a R/C link system made for FPV enthusiasts. It features unheard of range without sacrificing basic functionality such as being immune to interference from onboard equipment, low latency control or two-way communications including telemetry functionality. ...
- Page 2 Table of content Attention Getting ready FAQ Note Updating Hardware overview Standard Tx pinout Radio connection JR-bay radios Other radios Antennas Antenna cover Adapter boards FrSky inverter mod Which transmitter is affected by this? How to install the inverter mod Software mod ...
- Page 3 Cut Failsafe position Transmission frequency Transmission power Operating modes Transmitter LED status indicator Receiver LED status indicator MyVTX RC over MAVLink Special functions - Standard/ Lite TX only External power Status display Up- and downlink status Oled Menu Find Mode ...
- Page 4 Menu Initiate the WiFi module Connection to a WiFi hotspot OTA update of the WiFi Module Opentx setup for crossfire LQ warning in OpenTX Model match in OpenTX (and FreedomTx on Tango 2) Vtx connection by CRSF Vtx connection by SmartAudio ...
- Page 5 WiFi WiFi telemetry with BetaFlight/ INav Wireless configuration with BetaFlight/ Inav by Bluetooth Signal strength in Betaflight - BF < 4.1 and DJI OSD Signal strength in Betaflight - BF 4.1 and later Signal strength in INav Link States LQ ...
- Page 6 TX: 3.2W, at 2000mW Diversity RX: 1.5W / Micro/Nano RX: 1W Ports: Diversity RX: 1x BST (the CROSSFIRE RX does not power the BST line), 8x Servo connectors Micro RX: V1: 1x Servo, 1x BST / V2: 4x Servo, 1x BST - ...
- Page 7 This manual is written based on C rossfire FW 4.00 . If some functions are not available for you, please update your Crossfire to this (Beta) or a later version. Updating In order to update and configure your Crossfire, you need the TBS Agent X, which you can download from the T BS shop...
- Page 8 Hardware overview The following diagram indicates the essential inputs and features of the transmitters and receivers. Standard/ Lite transmitter module: Diversity receiver unit: 8 ...
- Page 9 Micro transmitter module (V1 + V2): The Micro Tx V2 has the same features and layout as the V1 but with a USB-C connector Nano transmitter module : The Nano transmitter includes the same internals and functions as the Micro Tx V2. It is designed to fit into the mini-modul bay of newer FrSky radios, Tango 2 modul bay and any other radio with the mini-modul ...
- Page 10 Micro receiver: Nano receiver: 10 ...
- Page 11 Nano receiver pwm version: This Rx is the same as the Nano Rx but with 6 servo connectors installed. This Saves you the need for the PWM adapter board. Nano Diversity rx: Standard Tx pinout ...
- Page 12 When you have set up everything properly in OpenTX but your module still stays off, the radio pins did not slide into the Crossfire Tx. In this case you can bend all the pins in the JR bay just a little bit to the right or ...
- Page 13 RC In plug. Note: over this connection you can not use CRSF between your radio and the Crossfire Tx. If your radio supports CRSF, you need to feed the signal wire in the plug on the right. Check the Tx ...
- Page 14 Antennas You got a big variety of antennas for your transmitter and receiver. The antennas that come with your devices work fine and don’t need to be replaced in general. Depending on your environment, your drone and your purpose, you can change them anyway. Here are some of them: ...
- Page 15 Antenna cover If you order your Crossfire transmitter after mid 2020, you will notice a cover over the antenna. The antenne can be turned by 90° (both directions) to align it with your receiver antenne. If you want to ...
- Page 16 Crossfire Tx as some of them only have a slow transistor instead of an inverter chip included. This mod is not necessary for the Crossfire to operate properly with your radio but it helps with “Sensor lost” messages on certain radios as well as not properly working LUA scripts. ...
- Page 17 Which transmitter is affected by this? The older QX7 radio from FrSky with the S-Port pin at the bottom of the radio. Newer ACCESS radios and older radios than the QX7 (with bottom S-Port pin) don’t need this hardware mod. ...
- Page 18 General functions Binding Binding a receiver to your Crossfire is an easy task and does not require 3 hands or any special jumpering. General note/ model match You will notice that you can control any r/c model, even if you changed the model in your radio. This is ...
- Page 19 1. Power up the transmitter USB 2. Push the button of the Micro TX once 2. Open the Crossfire Transmitter ( M anage ) 3. Navigate to the C onfigure t ab 4. Under D evice , click on B ind ...
- Page 20 How to set it up Update your CROSSFIRE TX to F W 3.71 (or later) by Agent X. If you can’t see the required FW version, click on the 3 dots in the top right corner and ...
- Page 21 Connect your CROSSFIRE to the internet via the built-in WiFi module. You can provide access point information from your nearest wifi hotspot, or create a temporary one on your phone. Wait for it ...
- Page 22 Otherwise rebind the receiver by the button. Wrong ID/new ID It may occur that you need a “new” id. To get a new ID, simply connect your Crossfire to the Agent ● X with the new/correct user account and let it synchronice with the TBS Cloud. ...
- Page 23 Real world example The most common combination is that you already own a Crossfire transmitter to which all your receivers are bound and now you have a second transmitter like the Tango 2. Here is how you get them both ...
- Page 24 4. Click on S et fs. Mode and wait for the confirmation for the set position If your failsafe setting was set to cut and you entered the teaching mode, the crossfire will change the type to position if you accept the request. ...
- Page 25 Standard/ Lite Tx shortcut For these two transmitters you can run a shortcut to set the failsafe position: Set the sticks and switches in the position you want them Push the joystick down Push and hold it up for a few seconds Failsafe Set...
- Page 26 Transmission frequency C C Wikipedia The TBS CROSSFIRE supports two different frequency bands, depending on your local regulation.. Below is a general overview of the primary frequency segmentation. General area Frequency ITU Region 1 - Europe/Africa/Middle East (yellow) ...
- Page 27 Region settings: In the region settings, you can set your Crossfire according to your local laws. The region and the frequency setting will disappear after this, as well as not allowed setting for this region. The Crossfire then ...
- Page 28 II can only be used up to 500mW (Standard tx) or 1w (Micro Tx v2/ Nano Tx). To change RF power: 1. Enter the configuration menu/ LUA script select “General”/ “Crossfire TX” and “Max Power” 2. Pick the RF output power you require and exit the menu to confirm ...
- Page 29 Operation mode is where you can set the crossfire in an ultra-low update rate, high range mode. Normally the Crossfire switches from 150Hz to 50Hz, depending on the link quality. With F orced Telemetry e nabled, it will now only switch between 50Hz and 4Hz mode. Only enable it if you know what you are doing. ...
- Page 30 If you enable MyVtx, all other vtx settings will be overridden temporarily, till you disable it again. Connect your vtx to the Crossfire Rx by CRSF or Smart Audio, activate MyVtx and set the it up* ...
- Page 31 Depending on the MAVLink version used in your fc, you can send up to 12 channels by this (MAV V2) or 8 (MAV V1, used on Crossfire FW below 3.8). As there are some rumors around: The rc data will not stop being send, if the crossfire telemetry breaks up It’s as fast/ a bit faster than SBus ...
- Page 32 XT30 connector. You can use any 2(1) - 3S LiPo for this. To make sure the Crossfire uses the external battery, the ...
- Page 33 ● SNR - Signal-to-noise ratio, compares the level of a desired signal to the level of background noise Oled Menu When you scroll to the left/ right, you can see the other diagnostic screens, showing you informations of you link etc: ...
- Page 34 Testing find mode It is highly recommended to go through a crash scenario first so that you are fully aware of all the neat things we have packed into the Find Mode or Beacon Mode of the TBS Crossfire system. ...
- Page 35 35 ...
- Page 36 Preparations The find mode needs to be armed before it will take any action. Receiver only: ● ○ Power up receiver and transmitter and make sure they are connected to each other. ● Receiver with GPS: ○...
- Page 37 ○ The receiver will share the latest coordinates with the transmitter and display them on the OLED. For Droidplanner app select Bluetooth ( Crossfire App link mode needs to be set to ○ MAVLink emulator ) to locate your copter/plane ...
- Page 38 The Standard Tx (not the Lite version) got a built-in bluetooth module that you can use for real time telemetry or wireless configuration of your fc. Depending on the incoming data, the Crossfire selects the Mode for the bluetooth module for you. ...
- Page 39 destination selection. The selected channel under source will replace the channel selected under destination. This gives you the ability to map your headtracker channels from any channel of the Headtracker i nput to the RC link frame. XX Source: the channel number where the signal for this axis is incoming.
- Page 40 Receiver functions Output map On all receivers you can select what it should output on which pin. The available options for each differ for the receivers: Receiver pin Output type Diversity RX (standard) Default value 1 PWM Ch1 bis 12, PPM, RSSI, LQ, RSSI/LQ PWM Ch.
- Page 41 CRSf CRSF is a protocol designed by Team BlackSheep and championed through the TBS Crossfire remote control system. It has been integrated into most popular remote controls, is an incredibly high bandwidth (low latency) full duplex, serial data transmission protocol. It comes with native functionality such as OTA ...
- Page 42 12 channels, with V1 up to 8 channels. PWM (Ch X) If you select CH 1-12, the Crossfire will output a standard 50Hz PWM signal, that can be used for all servos and FC’s without digital rc input. ...
- Page 43 ● 150Hz : Locks the Crossfire in 150Hz mode. This is useful if you are on a race and want the low-latency during the whole flight. In this mode the range is limited so only use it on a race or a ...
- Page 44 Crossfire Tx will send with the maximum set up power level and switch to 50Hz mode. The LUA scripts are not affected by this. The Crossfire re-enables the telemetry for the time the datas are sent and then turns it back off. ...
- Page 45 TBS GPS / FC Hdg Magnetic orientation TBS GPS / FC RxBt Battery voltage TBS GPS / FC/ Crossfire Rx/ Core Curr Current draw TBS GPS / FC/ Crossfire Rx/ Core Capa Current consumption TBS GPS / FC/ Crossfire Rx/ Core ...
- Page 46 N ano Rx rev 43 and lower . If you experience issues with a other voltage sensor in your system, you can disable the Crossfire sensor in the settings under R eceiver/General - Voltage Sensor ...
- Page 47 If you own a Nano Rx, there is no longer the complete BST plug available on it. In this case, just connect SCL to SCL and SDA to SDA on all devices. The Pinout of the plug in general: ...
- Page 48 Additional informations TBS CLOUD All the TBS Crossfire transmitters* and the Fusion video receiver includes a built-in WiFi module which allows you a connection with all your gear through the TBS Cloud. This allows for features like VTx follow**, dynamic VTx power** and other upcoming features. ...
- Page 49 Do not shut down your radio during this ○ ● Now you can see the WiFI module in your Crossfire menu/ LUA script and Agent X Here you can find the whole process as video Connection to a WiFi hotspot ...
- Page 50 LUA script or the CRSF menu work as well: ● Connect the Crossfire Tx to your radio and power it up Navigate in the Crossfire menu to WiFI/ General ● Hit S can to search for available networks ...
- Page 51 Internal RF: off and E xternal RF: CRSF Note: those settings need to be done or all models where you use your Crossfire. Using CRSF will give you the lowest possible latency from your stick to the drone and full telemetry back to ...
- Page 52 L02 and L03 also got a small delay (0.5s) to avoid warnings when the signal is only bad for a short moment. Note: since Crossfire fw 2.93, the RFMD no longer needs to be compared as the LQ sensor will stay ...
- Page 53 Note: Model match and M ulti Bind d oes not work together if the model id is not the same in both radios. Note: At the moment, OpenTX does not support the model match function in their stable release. This means that you need to make sure that you selected the right model in your radio. ...
- Page 54 Model Id (Model Match) in FreedomTx (Tango 2) Model Id (Receiver No.) in OpenTX 54 ...
- Page 55 Vtx connection by CRSF All Unify32 and Evo line VTx’s from TBS are capable of using CRSf to communicate with the Crossfire ecosystem. ● Select a free output pin capable for CRSF (check the o utput map section...
- Page 56 Vtx connection by SmartAudio If you own any Unify or any other VTx with SmartAudio capability, you can connect it to your Crossfire receiver as well. ● Select a free output pin capable for SA (check the ...
- Page 57 When the Unify32 detects a signal on the SmartAudio Signal-in pad, it will disable the button. To change the VTx to CRSF or SA, you can unsolder the wire or force your crossfire rx to not output any signal. ●...
- Page 58 CRSF with BetaFlight and similar firmwares In the BetaFlight configurator, navigate to the C onfiguration t ab and select S erial-based receiver and C RSF In the Ports tab, enable Serial Rx for the UART where your receiver is connected ...
- Page 59 CRSF with KISS/ FETTEC Depending on the KISS Fc you are using, connect the Crossfire by CRSF to the Fc’s RC input port. In the configurator, enable CRSF as RC Type: Any other FC Depending on your FC, set the output map according to the protocol that it can use. ...
- Page 60 Mavlink with MAV FC’s If you use a FC with MAVLink like ArduPilot/ PX4, you can use the MAVLink capabilities of the Crossfire. Connect a MAVLink capable output to the Telemetry port of your FC. On PIX FC’s it’s mostly the TELEM1 ...
- Page 61 In M ission Planner , Q GroundControl or any other app, set the Baud Rate of your pc’s Bluetooth module to 57600baud. Make sure your Crossfire RF profile is set to dynamic or forced 150Hz! 61 ...
- Page 62 MAVLink t o o n . Make sure your Crossfire is in RF mode d ynamic o r f orced 150Hz. Note: in 1.17 there is a bug which turns the Mavlink option off everytime time you shut your transmitter ...
- Page 63 Depending on the FC firmware you use, you have to set your Bluetooth module to MAVEmu or Mavlink. Use MAVEmu if you use a non-MAVLink fc firmware. Otherwise the Crossfire will set the Bluetooth module to MAVLink by itself (if MAVLink datas are incoming to the receiver). ...
- Page 64 WiFi telemetry with BetaFlight/ INav For the WiFi telemetry, you need to wire up your FC with a extra MAVLink connection, as the MAVLink emulation is not (yet) supported by the WiFi firmware: Settings in BetaFlight/ INav On the port where you got your extra MAVLink connection installed, enable ...
- Page 65 BetaFlight/ Inav Fc without the for a USB connection. For this to work, you need to connect a second connection between the Crossfire Rx and the FC Note: This will only work while your Crossfire is in the 150hz mode. As soon as the link switches to 50Hz, the Bluetooth module stops sending serial data ...
- Page 66 Keep in mind, that the LQ will remain at 100% while the Crossfire is in 150Hz mode! In the Crossfire receiver channel mapping, assign LQ to an unused channel. If you set it up by LUA, you can assign it to channel 1, even when you use the 8 channel mode of the crossfire. ...
- Page 67 For the OSD tab, set it up like this: Signal strength in Betaflight - BF 4.1 and later Since version 4.1 BetaFlight can read the link information from the CRSf stream. This will give you the RSSI reading in dBm (0 - -130) and the LQ reading similar to the TBS OSD (300 - 0 %). ...
- Page 68 ● Rssi at 2m = -22dBm The Crossfire can go down to -130dBm before the link breaks up. If you use RSSI as sensor by the channel/ output map menu or as OpenTx telemetry sensor, it will be shown like this: ...
- Page 69 It shows you the ratio between the received noise and your Crossfire signal. To judge RSSI properly you need to know the SNR and compare it with your RSSI value. The Crossfire can receive signals in the noise down to -6dB. ...
- Page 70 Racing environment When using TBS CROSSFIRE control link, it is a requirement that all pilots use exactly the same power output. Use of CROSSFIRE has the same requirement as management of video transmission power output when it comes to racing. ...
- Page 71 TBS Agent X and update him straight away. Micro/ Nano/ Nano Diversity Rx Since FW 2.24 the Crossfire receivers stores a specific, “golden” firmware inside, which can be restored by the following steps: Hold the bind button ...
- Page 72 FLARM FLARM is a collision-avoidance system developed in the swiss and mainly used by sailing planes and helicopters. With the TBS Crossfire you are able to send and receive the FLARM track signal and make the airspace a bit safer. ...
- Page 73 When you receive your email with the code, you need to get the o ld TBS Agent (Agent X is in development for this). After the installation: Connect the Crossfire diversity rx via USB with your Pc ● ● Open the Agent ...
- Page 74 Pulse: Just send out your position ● ● Buddy: Send your position and show Crossfire pilots (only available with active license) Aviation : Send your position and show Crossfire pilots and airplanes and helicopters (only ● available with active license) Flarm Track ...
- Page 75 Arrow : Crossfire pilots Airplane : manned Airplane Helicopter : manned Helicopters Flarm in action We made a video showing you how the FLARM integration of the TBS Crossfire works: FLARM Showcase 75 ...
- Page 76 Go under Settings -> Advanced -> Connection Preferences and press forget default device ● TBS CROSSFIRE Seems not to work with Futaba T18SG It required you use an external battery to power the TBS Crossfire ○ ○ Go to Trainer port settings and select ACT, Student and 8 Ch. or 12 Ch. ...
Need help?
Do you have a question about the CROSSFIRE and is the answer not in the manual?
Questions and answers