Advertisement
Your new VHX-1019 kit includes:
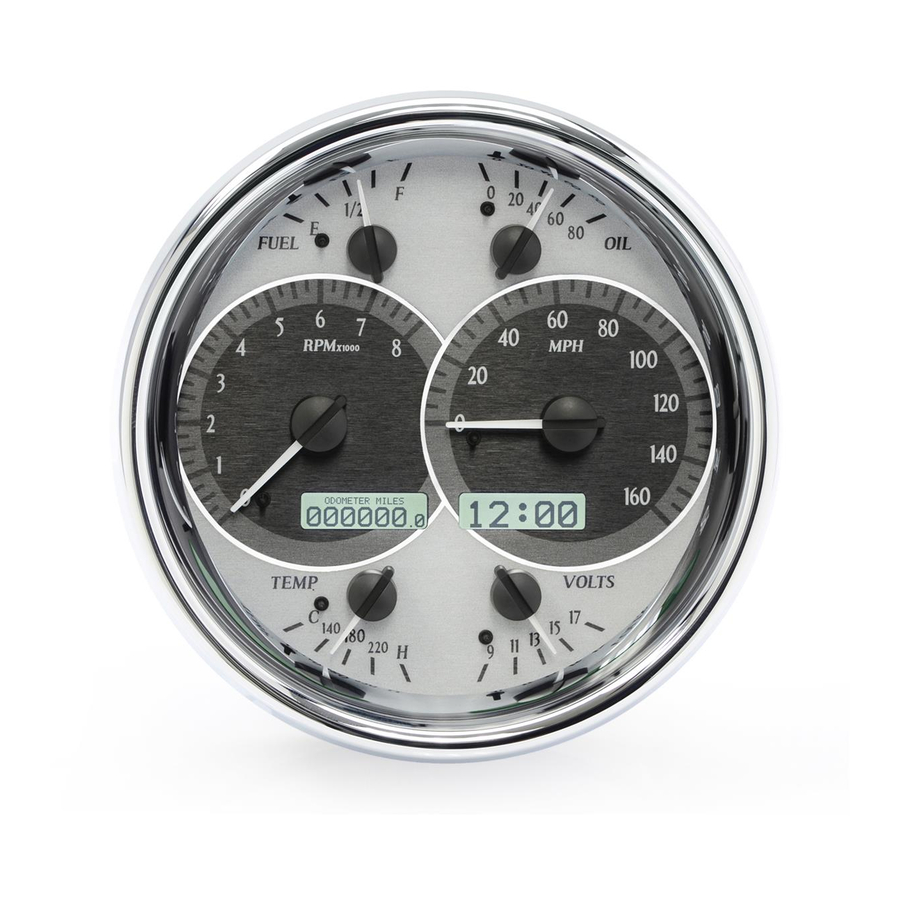
VHX Display
Universal Sender Pack
Switch Assembly
Installation
1. Use the provided template to mark out the 6 ¾" diameter opening needed to fit the VHX display.
Ensure adequate clearance behind desired mounting location; the display requires approximately 2"
of depth.
VHX-1019
Dakota Digital Universal VHX Instrument Installation
Installation Manuals
and Cutout Template
CAT5 Cable
(4x) L-Brackets
and Thumb Nuts
Control Box
Manual # 650418A
Advertisement
Table of Contents

Subscribe to Our Youtube Channel
Related Manuals for Dakota Digital VHX-1019


Summary of Contents for Dakota Digital VHX-1019
- Page 1 VHX-1019 Dakota Digital Universal VHX Instrument Installation Your new VHX-1019 kit includes: VHX Display (4x) L-Brackets and Thumb Nuts Universal Sender Pack Control Box Installation Manuals and Cutout Template Switch Assembly CAT5 Cable Installation 1. Use the provided template to mark out the 6 ¾” diameter opening needed to fit the VHX display.
- Page 2 2. With the appropriate opening cut, carefully place the VHX display from the front side and attach the four (4) L-brackets to the back of the display using the provided thumb nuts. 3. Remove the protective film, and then attach the provided CAT5 Cable to the back of the VHX display.
Need help?
Do you have a question about the VHX-1019 and is the answer not in the manual?
Questions and answers