Advertisement
Quick Links
®
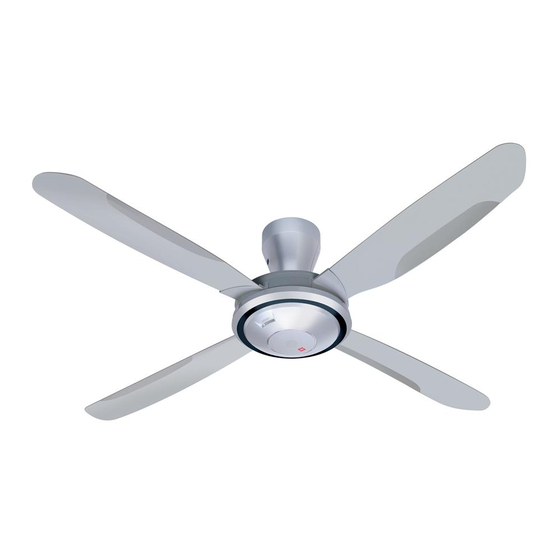
CEILING FAN
MIN
MAX
AUTO
SPEED
ON
SLEEP
h
MODE
TIMER
OFF/ON
AUTO
YURAGI
OFF/ON
OFF/ON
OFF TIMER
CANCEL
SET
SPEED
SLEEP MODE
OFF/ON
RESET
LAMP
Before operating this set, please read these instructions completely.
Antes de utilizar este aparato, por favor lea totalmente estas instrucciones.
Use only with rated voltage.
Utilícelo sólo con el voltaje especificado.
Switch off power supply and wait until the Blade is fully static, before cleaning or doing any
maintenance jobs.
Desconecte la alimentación eléctrica y espere hasta que el Aspa esté totalmente estática, antes
de realizar cualquier limpieza o mantenimiento.
ÆW Ëd*« W UO
This appliance is not intended for use by persons (including children) with reduced physical,
sensory or mental capabilities, or lack of experience and knowledge, unless they have been
given supervision or instruction concerning use of the appliance by a person responsible for their
safety. Children should be supervised to ensure that they do not play with the appliance.
Este aparato no está pensado para el uso por personas (incluyendo niños) con capacidades
mentales, sensoriales o físicas reducidas, o falta de experiencia y conocimiento, a menos que se
les haya dado control o formación en relación al uso apropiado por una persona responsable de
su seguridad. Los niños deberían estar controlados para asegurar que no juegan con el aparato.
r bM b u ô s cë Ë« ¨WOKIFë UÁU ô« ÍË– Ë« 5ÁUFÄ ©‰UH ô« vë W U{ôU ® 'U
Æ'U
To avoid the possibility of causing injury to users or damage to properties, please follow all the
explanation written in this manual. The manufacturer will not be responsible for any accidents and injuries
caused by defective, deficient installation or installation which does not follow to instruction manual.
Para evitar la posibilidad de causar lesiones a usuarios o daños a propiedades, por favor siga
todas las indicaciones que aparecen escritas en este manual. El fabricante no se
responsabilizará por ningún accidente o lesión causados por una instalación incorrecta,
insuficiente, o que no se realice de acuerdo con este manual de instrucciones.
s ‰u
Ä dO l UBë ÆVO Jë «c
Operating And Installation
Instructions
Instrucciones de Instalación y Uso
‰UL « sÄ qL Í« ¡«d « Ë« nOEM q Á ¨WKÄUÂ ...—uB W Ëd*« WA — nÁu
ô« ¡ôu
WÄö
s ‰u
Ä h
w »u J*« ÕdAë ŸU « v d ¨ UJK LLKà ˫ 5KLF
ÆVO Jë «c
ULOKF lÄ o «u
qOGA AÃ«Ë VOÂd ë ULOKF
qOGA AÃ«Ë VOÂd ë ULOKF
qOGA AÃ«Ë VOÂd ë ULOKF
qOGA AÃ«Ë VOÂd ë ULOKF
qOGA AÃ«Ë VOÂd ë ULOKF
ÆqÄU qJA ULOKF ë Ác
q Á sÄ W Ëd*« ...cN oKF
ULOKF Ë« œU —« r bM ÊUÂ «–« ô≈ ¨W dFÄ Ë« ...d
ô Ícë VOÂd ë Ë« hÁUMë VOÂd Ã«Ë ¨qDFë s W
Ceiling Fan
Ventilador
de techo
nI
nI
nI
nI
nI
Model Number
Número del Modelo
V56VK
...¡«dÁ v d ¨W Ëd*« Ác
Æ...—bI*« WODÃuHë vK jI W Ëd*« qLF
v
dE «Ë WOzU dNJë WÁUDë b Ëe qB «
« q Á sÄ ‰ULF
öÃ WBB Ä dO W Ëd*« Ác
*« 'U
öÃ U Ëd
‰uB
*« U Ëd'«Ë Àœ«u
W ËdÄ
W ËdÄ
W ËdÄ
W ËdÄ
W ËdÄ
q œu*« rÁ—
q œu*« rÁ—
q œu*« rÁ—
q œu*« rÁ—
q œu*« rÁ—
qOGA q Á
«
WO UJÄ« V
M
Ã
Ò
W «
Advertisement

Related Manuals for KDK V56VK


Summary of Contents for KDK V56VK
- Page 1 œu*« rÁ— q œu*« rÁ— q œu*« rÁ— LAMP V56VK Before operating this set, please read these instructions completely. Antes de utilizar este aparato, por favor lea totalmente estas instrucciones. ÆqÄU qJA ULOKF ë Ác …¡«dÁ v d ¨W Ëd*« Ác qOGA q Á...
- Page 2 SAFETY AND PRECAUTION ÊUÄô« U UO ÊUÄô« U UO ÊUÄô« U UO « « « ÊUÄô« U UO ÊUÄô« U UO « « PRECAUCIÓN Y SEGURIDAD To avoid the possibility of causing injury to users or damage to properties, please follow all the explanations written below. Para evitar la posibilidad de causar lesiones a usuarios o daños a propiedades, por favor siga todas las indicaciones que aparecen escritas abajo.
- Page 3 tO M tO M CAUTION PRECAUCIÓN tO M tO M tO M Do not install at places where there is Do not install at a wet and high Avoid installing at oily places. high vibration and impact. humidity area such as shower room. Evite instalarlo en lugares oleosos.
- Page 4 SUPPLIED PARTS WI d*« ¡«e ô« WI d*« ¡«e ô« WI d*« ¡«e ô« WI d*« ¡«e ô« WI d*« ¡«e ô« PARTES SUMINISTRADAS Parts / Partes / Pcs / Pzs. / ¡«e ô« œbFë 1. Motor Assembly „d;« W uL Ä Piezas de Montaje del Motor 2.
- Page 5 Arrange and tie the Safety Wire as shown. Ò Æs O Ä u ULÂ ÊUÄô« pK Ë V — Ò Ò Coloque y ate el Cable de Seguridad tal y como se indica. In case “J” Hook is being used. En caso de usar el Gancho “J”.
- Page 6 CONNECTING THE POWER SUPPLY WOzU dNJë WÁUDë —bBÄ qO WOzU dNJë WÁUDë —bBÄ qO WOzU dNJë WÁUDë —bBÄ qO WOzU dNJë WÁUDë —bBÄ qO WOzU dNJë WÁUDë —bBÄ qO CONEXIÓN DE LA ALIMENTACIÓN ELÉCTRICA i) Only direct connection to wall switch is allowed. Please refer to figure below. i) Sólo se permite la conexión directa a un interruptor de pared.
- Page 7 HOW TO INSTALL CANOPY Ò Ò Ò Ò Ò W W W W W Ië VOÂd WOHO Ië VOÂd WOHO Ië VOÂd WOHO Ië VOÂd WOHO Ië VOÂd WOHO CÓMO INSTALAR LA CAMPANA Separate the Canopy by loosen the 2 Screws provided. Separe la Campana aflojando los 2 Tornillos suministrados.
- Page 8 HOW TO INSTALL BLADE W Ëd*« «dH W Ëd*« «dH lOL& WOHOÂ lOL& WOHOÂ W Ëd*« «dH W Ëd*« «dH W Ëd*« «dH lOL& WOHOÂ lOL& WOHOÂ lOL& WOHOÂ CÓMO INSTALAR LAS ASPAS Figure A Hook the Blades as shown in Figure A. Take the Screw from the Part Set and tighten it firmly for fixing Blades (4 Blades). Screw: (M5 ×...
- Page 9 WM eë ¡UD VOÂd WOHO WM eë ¡UD VOÂd WOHO WM eë ¡UD VOÂd WOHO WM eë ¡UD VOÂd WOHO WM eë ¡UD VOÂd WOHO HOW TO INSTALL DECORATION CAP CÓMO INSTALAR LA TAPA DE DECORACIÓN Figure B Imagen B qJAë...
- Page 10 bF s rJ ë …b Ë bF s rJ ë …b Ë bF s rJ ë …b Ë bF s rJ ë …b Ë bF s rJ ë …b Ë REMOTE CONTROL UNIT MANDO A DISTANCIA • Insert 2 pieces AAA, R03, LR03 size Batteries and make sure the polarise direction is as shown in Figure C. •...
- Page 11 qÄU VOÂd WOHO qÄU VOÂd WOHO qÄU VOÂd WOHO qÄU VOÂd WOHO qÄU VOÂd WOHO HOW TO INSTALL REMOTE CONTROL HOLDER bF s rJ ë …b Ë bF s rJ ë …b Ë bF s rJ ë …b Ë bF s rJ ë …b Ë bF s rJ ë...
- Page 12 bF s rJ ë …b Ë ‰ULF « WOHO bF s rJ ë …b Ë ‰ULF « WOHO bF s rJ ë …b Ë ‰ULF « WOHO bF s rJ ë …b Ë ‰ULF « WOHO bF s rJ ë …b Ë ‰ULF « WOHO HOW TO USE REMOTE CONTROL UNIT CÓMO UTILIZAR EL MANDO A DISTANCIA OFF/ON Button...
- Page 13 LCD DISPLAY ÷d W U ÷d W U ÷d W U ÷d W U ÷d W U PANTALLA LCD LCD full display LCD display is OFF Pantalla completa LCD La pantalla LCD se encuentra en OFF WKÄUÂ ÷d W U WHÁu Ä...
- Page 14 ·UI ô« XÁRÄ ·UI ô« XÁRÄ ·UI ô« XÁRÄ ·UI ô« XÁRÄ ·UI ô« XÁRÄ OFF TIMER / TEMPORIZADOR DE APAGADO / For off timer function, the timer will gradually count down from hour to hour until OFF. During this timer count down, speed will remain the same till the ceiling fan is OFF. Para la función de temporizador de Apagado, el temporizador realizará...
- Page 15 1/f YURAGI YURAGI f/1 ø u UÄ What is 1/f YURAGI? YURAGI f/1 iF V W UNMë w Êu F ”UMë Ê« X W «—œ „UM ■ It is studied that people eventually get tired of some ■ ÆW U ë «eH;« constant stimulations.
- Page 16 AUTO MODE What is Auto Mode? Sensor position Auto Mode function is to control suitable air velocity to human. ■ Posición del sensor *« l{Ë It will function based on changing of room temperature. ■ Air velocity will increase when room in high temperature and reduce ■...
- Page 17 Speed will change for Auto Mode function according to the below table: La velocidad en Modo Automático cambiará tal y como se indica en la tabla inferior: ∫qH ô« w ‰Ëb'« V wzUIK ë l{uë WHOÿË l{Ë vK W d ë d OG ·u Ò...
- Page 18 qB ô« W UOBë q « sÄ qOÃbë qB ô« W UOBë q « sÄ qOÃbë qB ô« W UOBë q « sÄ qOÃbë qB ô« W UOBë q « sÄ qOÃbë qB ô« W UOBë q « sÄ qOÃbë GUIDE TO BETTER MAINTENANCE GUÍA PARA UN MEJOR MANTENIMIENTO 1.
- Page 19 UH «u*« UH «u*« SPECIFICATIONS UH «u*« UH «u*« UH «u*« CARACTERÍSTICAS TÉCNICAS Èd _« ‰ËbKà For others / Para otros / WATTAGE VELOCITY DELIVERY WEIGHT VOLTAGE FREQUENCY ROTATION (RPM) POTENCIA VELOCIDAD REPARTO PESO VOLTAJE FRECUENCIA ROTACI N (RPM) EL CTRICA DEL AIRE DEL AIRE NETO...
- Page 20 KDK Company, Division of PES 8001 Head Office: 4017, Takaki-cho, Kasugai, Aichi, Japan. V56VK...
Need help?
Do you have a question about the V56VK and is the answer not in the manual?
Questions and answers