
Subscribe to Our Youtube Channel
Related Manuals for Prolon VC2000


Summary of Contents for Prolon VC2000
- Page 1 INSTALLATION AND STARTUP GUIDE REV 7.0.0 www.proloncontrols.com PL-TRA-STARTUP-EN 1-877-977-6566 info@proloncontrols.com 17510 Rue Charles, Suite 100, Mirabel, QC, J7J 1X9...
-
Page 2: Table Of Contents
Part 4 - Start Up .................................8 Powering up the zones ................................... 8 Powering up the Unit Controller ................................8 Quick verification (without the Prolon Focus software and computer) .................. 8 Part 5 - Prolon Focus (Computer Access and Control) ....................9 Computer and software ..................................9 Opening a session on Prolon Focus .............................. -
Page 3: Prolon Installation And Start Up Guide
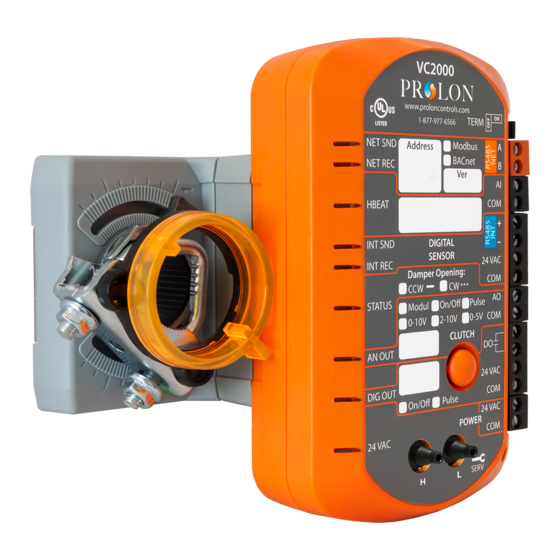
Prolon Installation and Start Up Guide PROLON INSTALLATION AND START UP GUIDE Communication 4 wire cable (#22/4 shielded cable room sensors recommended) Supply/Outputs #18/2 or #18/3 wire, LVT standard #24/2 wire, twisted and shielded, low capacitance Network (“LOW-CAP”) grounded at control cabinet,... -
Page 4: Part 2 - Installing The Components
Part 2 : In Part 2 - Installing the Components VAV Zone Controller • Verify / validate the rotation direction of each zone damper. • Close the damper and rotate the actuator clamp to the closed posi- tion using the clutch button. •... -
Page 5: Part 3 - Electrical Installation / Connections
Part 3 - Electrical Installation / Connections VAV Zone Controller Inputs Supply • Wall Sensor (PL-T200/T500/T1000): 4 wire cable (#22/4 • 5VA per zone / max 100VA per circuit. shielded cable recommended) connected to terminals • Link the #1 & #2 terminals in a daisy chain. #9 to #12. -
Page 6: Network Cabling
Inputs Input/Outpout wiring for a o Wall sensor (PL-T200/T500/T1000) : VC-2000 #18/2 + #24/2 (supply & communication) –or- LVT 4-conductor cable* connected to terminals #9 to #12 *Small gauge, shielded cable preferable. o Changeover sensor (if required): directly to terminals #13 & #14 Network Cabling Supply •... -
Page 7: Unit Controller
Network cabling (continued) o Check for continuous daisy-chain to all zone controllers. Do not link in a star pattern. o Check the A / B network polarity on all zones and unit controller; must all be in phase. o Join all shields at each controller’s junction and connect one end only to the ground lug in the central Unit Controller panel only (unit controller). -
Page 8: Part 4 - Start Up
• Approximately 5 minutes following power up, the heat or the air conditioning of the unit can come on (initial power up off-delay protection). Quick verification (without the Prolon Focus software and computer) • Temporarily disconnect the supply air sensor from the unit controller (do not forget to reconnect!) -
Page 9: Part 5 - Prolon Focus (Computer Access And Control)
• In order to avoid problems and delays, make sure to follow these guidelines. • Use a laptop computer (with Windows 7 or later software) as well as the most recent version of Prolon Focus. Visit the website www.proloncontrols.com to download the latest version. -
Page 10: Adjusting The Bypass Damper
• At the bottom of this page check the “Enable Absolute Overrides” and click “OK” to confirm your acceptance. • Then click “Apply”. Adjusting the bypass damper • Click on the “Home” button in the upper right to return to the unit controller’s home page, click on “Network” then “Other”... -
Page 11: Rename Zones And Units
No part of this document may be photocopied or reproduced by any means, or translated to another language without prior written consent of Prolon. All specifications are nominal and may change as design improvements are introduced. Prolon shall not be liable for damages resulting from misapplication or misuse of its products.
Need help?
Do you have a question about the VC2000 and is the answer not in the manual?
Questions and answers