Table of Contents
Advertisement
Advertisement
Table of Contents

Related Manuals for 3M Clean-Trace NGi Luminometer


Summary of Contents for 3M Clean-Trace NGi Luminometer
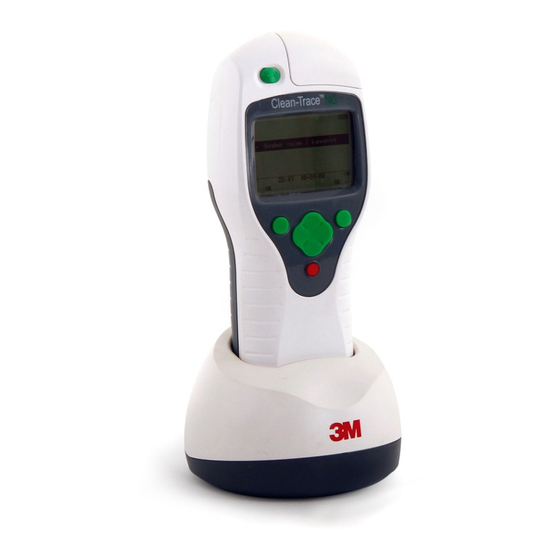
- Page 1 User Manual 3M™ Clean-Trace™ NGi Luminometer Docking Station...
- Page 2 User Manual 3M™ Clean Trace™ NGi Luminometer and Docking Station INDEX 1.0 PRODUCT DESCRIPTION 1.01 How the 3M™ Clean-Trace™ NGi Luminometer works to Measure Contamination 1.02 ATP and Surface Hygiene Testing. 1.03 ATP and Water Testing. 2.0 INSTRUMENT OVERVIEW 2.01 Parts of the 3M™ Clean-Trace™ NGi Luminometer 2.02 General Features 2.03 Charging the Battery 2.04 Switching the Instrument ON 2.05 Measurement Modes 2.06 Inserting a Test 2.07 Swab Sensor...
- Page 3 1.02 ATP and Surface Hygiene Testing. The 3M™ Clean-Trace™ NGi Luminometer, together with the appropriate test kit, is an effective method for monitoring the hygiene status of surfaces. ATP from both micro-organisms and product residues are detected. Measurement of “total ATP” provides an important insight to the overall cleanliness.
- Page 4 Luminometer and needs to be charged prior to use. It is necessary to attach the battery pack to the instrument. Locate the battery pack into the aperture in the rear of the 3M™ Clean-Trace™ NGi Luminometer by inserting the bottom of the battery pack first and pushing the battery into place. Secure the battery pack by turning the fixing screw clockwise using a small screwdriver.
- Page 5 Setup Menu Wed 04 Jan 2012 10:09 Select When switched on, the 3M™ Clean-Trace™ NGi Luminometer will display a continuous indication of battery status at the top right of the display screen. The removable battery pack is held in place by a single screw.
- Page 6 PROGRAM MODE allows data to be saved on the 3M™ Clean-Trace™ NGi Luminometer and then transferred to the 3M™ Clean-Trace™ Online Software. To use the Program Mode, sample plans will need to have been created and downloaded to the 3M™ Clean-Trace™ NGi Luminometer. (See section 5 for further details).
- Page 7 Chamber” error message on the screen and provide an audible beep to remind the user to remove the test following the measurement. Similarly, if a measurement is attempted in Program Mode without a 3M™ Clean-Trace™ ATP test in the chamber of the instrument, the test sensor will notify the user that the chamber is empty with a “No Swab Detected”...
- Page 8 Power from Connector to Clean‑Trace™ NG To use, simply locate the 3M™ Clean-Trace™ NGi Luminometer into the aperture and apply light downward pressure. The connectors to the printer, PC and charger can be left permanently in place if required. RS232 is not functional on NGi Luminometer.
- Page 9 Turn the 3M™ Clean-Trace™ NGi Luminometer on. When initialized the screen will display MAIN MENU the MAIN MENU: Measure Sample The cursor will be pointing at MEASURE SAMPLE. Insert a 3M test device into the Program Mode Review Results 3M™ Clean-Trace™ NGi Luminometer (see section 2.06)
- Page 10 The PROGRAM MODE of the 3M™ Clean-Trace™ NGi Luminometer is used to carry out testing and save results against specific test points within a saved sample plan. Refer to the 3M™ Clean-Trace™ Online Software User Guide to download the service driver to allow communication between 3M™ Clean-Trace™...
- Page 11 At this point it is possible to use the 3M™ Clean-Trace™ NGi Luminometer to perform a new series of tests for the selected sample plan, or to perform retests on existing stored results which are shown in date order on the screen.
- Page 12 The result is now stored. The cursor will move to the next test point automatically, or use the Ward 1 navigation (▲/▼) buttons to highlight the next test point required. New Results ► ATP-S Pressing the Back key will exit the testing. Centre of overbed Ta Test 1: 52,847 RLU X...
- Page 13 The list of sample plans stored on the 3M™ Clean-Trace™ NGi Luminometer will be REVIEW RESULTS displayed. Use the navigation (▲/▼) buttons to highlight the plan to be reviewed and Result Sets ↴ press Select. Ward1 Ward2 Ward3 Ward4 Wed 04 Jan 2012 10:09...
- Page 14 6.0 SETUP MENU 6.01 What the SETUP MENU allows 6.02 How to find the SETUP MENU 6.03 Setting Date Format 6.04 Setting the Date 6.05 Setting the Time 6.06 Setting the Language 6.07 Performing a Self Check 6.08 Setting the Backlight Timeout 6.01 What the SETUP MENU allows The SETUP MENU allows: • Format the date as shown below and format the time to 12/24 hour clock • Set the current time and date • Change the displayed language • Check to see if the instrument performs within calibration limits...
- Page 15 6.04 Setting the Date While in the SETUP Menu, use the navigation (▲/▼) buttons to select DATE & TIME and DATE & TIME press the Select button. The DATE & TIME menu can now be seen. Set Date 04-Jan-12 While in the DATE & TIME menu, use the navigation (▲/▼) buttons to select SET DATE. Set Time 14:28:56 Date Format...
- Page 16 If the instrument is not performing within calibration limits, one of the three screens below will be displayed. If this is the case the instrument should not be used as performance may be compromised. Contact 3M or local 3M Distributor for service and calibration.
- Page 17 6.08 Setting the Backlight Timeout The display on the 3M™ Clean-Trace™ NGi Luminometer is fitted with a backlight to improve visibility in dark or dim lighting conditions. The backlight may be set permanently off, permanently on; or may be set to remain on for a preset time interval after which the backlight extinguishes.
- Page 18 Online Software via the USB cable or Docking Station. 7.02 How to SYNCHRONISE NGi To start the synchronisation process you need to right-click on the 3M Synchronisation Manager icon on the System Tray of your PC and select Open 3M Synchronisation Manager If you cannot find the icon in the system tray then start it by going to Start\All Programs\3M CleanTrace Hygiene Management Solution\ 3M NGi Sync.
- Page 19 At the end of a successful synchronisation, a synchronisation completed message will be displayed on the NGi. Stored results will have been uploaded to 3M™ Clean-Trace™ Online Software and will have been removed* from the 3M™ Clean-Trace™ NGi Luminometer. Any adjustments to Sample Plans will be updated on the 3M™ Clean-Trace™ NGi Luminometer.
- Page 20 If the Scheduled Sampling system is set up on the website then, when you synchronise, Scheduled Sampling data will be loaded onto your NGi. See 3M™ Clean-Trace™ Online Software Help File for further Information about configuring the system for Scheduled Sampling.
- Page 21 A list of schedules will be displayed as follows: • If the website administrator has decided not to download user-names to the NGi then all schedules on the NGi will be displayed. • If a user was selected then schedules for that user will be displayed together with unassigned schedules. • If <No User Name>...
- Page 22 Wed 04 Jan 2012 10:09 NOTE: if a measurement is attempted without a 3M™ Clean-Trace™ ATP Test in the chamber of the 3M™ Clean-Trace™ NGi Luminometer, an error message stating No Swab Detected will be displayed and an audible beep will sound to notify the user that there is not a test in the chamber.
- Page 23 9.03 Partial Result Sets A Partial Result Set is a result set that does not have Measurements against all of its INCOMPLETE RESULTS Test Points. Ward1 If you are collecting Measurements or Retests and you decide to leave the Result Set (by Wed 04 Jan 2012 10:04 pressing Back ) then the INCOMPLETE RESULTS screen will be displayed if there are no Test Points: 3 Measurements against all of the Test Points (i.e.
- Page 24 WARNING: Do not use the 3M™ Clean-Trace™ NGi Luminometer or power supply if the enclosure is broken. WARNING: do not use a power supply other than the one specified by 3M. 1. The 3M™ Clean-Trace™ NGi Luminometer is designed to be robust and easy to use but it is a sensitive instrument which should be handled with care.
- Page 25 3M™ Clean-Trace™ NGi Luminometers. • In normal usage, the 3M NGLBP1 rechargeable Li-ion battery provides up to eight hours of charge capacity. When the battery needs to be charged, the battery status indicator displays no bars, identified below as Flat-10%. The battery does not need to be discharged to no bars before recharging it.
- Page 26 13.04 Self Check Error Screen 13.05 Other Error Screens 13.06 Inadvertent changing of language setting 13.01 General This section is to help overcome any problems that might be encountered when using the 3M™ Clean-Trace™ NGi Luminometer. For further detailed advice contact 3M or local 3M distributor. Problem Probable Cause Remedy Turn instrument OFF.
- Page 27 There is no available memory within the instrument to store further results. Press OK, upload all stored results to the PC and try again. There is an internal fault with the chamber or connections to the chamber. Contact 3M or local 3M distributor.
- Page 28 Date/time stamp for every individual result Every result including retests appears in this file Pass/Caution/Fail status for each result Username Product batch number or user test reference if entered Other fields defined in 3M™ Clean-Trace™ Online Software • Non volatile data memory • Battery backed SRAM • Greater than 3500 results storage capability Security • Every Instrument with unique software encoded ID number...
- Page 29 RS232 A method of connecting to the PC. A specific cable connector is required. Sample plan A sample plan is a list of test points with pass and fail levels previously generated using 3M™ Clean-Trace™ Online Software. Self check A means of checking that the instrument is operating within set performance limits.
- Page 30 3M Health Care 2510 Conway Ave. St. Paul, MN 55144 U.S.A. 3M Deutschland GmbH Health Care Business Carl-Schurz-Str. 1 41453 Neuss, Germany 3M and Clean-Trace are trademarks of 3M. Used under license in Canada. © 2015, 3M. All rights reserved. Issue Date: 2015-03 34-8716-7698-6...
Need help?
Do you have a question about the Clean-Trace NGi Luminometer and is the answer not in the manual?
Questions and answers