Table of Contents
Advertisement
Advertisement
Table of Contents

Related Manuals for 3M LM1


Summary of Contents for 3M LM1
- Page 1 User Manual Clean-Trace Luminometer ™...
-
Page 2: Table Of Contents
Performing an Unplanned Visual Inspection Test ..13 Using the Base ..............6 SYNCHRONIZING THE 3M CLEAN‑TRACE Logging in on the 3M Clean-Trace Luminometer ..6 LUMINOMETER WITH THE COMPUTER Logging in on the 3M Clean-Trace Luminometer DATABASE ................. 14 with a PIN ..............7... -
Page 3: Intended Use
Hygiene Management Software for use with other manufacturers’ products, use with other manufacturers’ designs, or use in any other application that has not been evaluated or documented by 3M and may lead to an unsafe condition. The 3M Clean-Trace Luminometer is not intended to be used in potentially flammable or explosive environments. Although the 3M Clean-Trace Hygiene Monitoring and Management System is very sensitive, surfaces or solutions should not be considered sterile based on results. -
Page 4: Limited Warranty
TRADE. 3M DOES NOT WARRANT THAT THE SOFTWARE WILL FUNCTION ERROR FREE. If within one year after shipment, the Hardware does not conform to the express warranty set forth above, 3M’s sole obligation and User’s sole remedy shall be, at 3M’s option: 1) to repair or replace the non-conforming component; or, 2) -
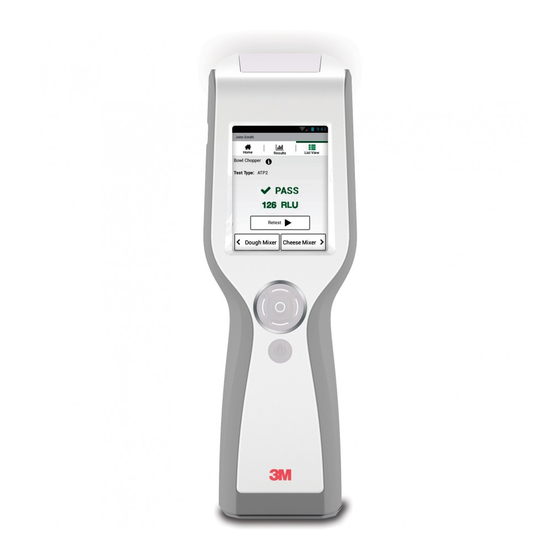
Page 5: Product Description
INVESTMENTS, OR OPPORTUNITIES EVEN IF 3M HAS BEEN ADVISED OF THE POSSIBILITY OF SUCH DAMAGES. The parties agree that 3M’s total cumulative liability to User for direct damages for all causes shall not exceed One Hundred Dollars, or the price paid for the Hardware, whichever is higher. Some states or countries may have laws which require liability rights different from those stated above. -
Page 6: Operating The 3M Clean-Trace Luminometer
• The battery does not need to be fully discharged before recharging. • When storing a 3M Clean-Trace Luminometer for more than a month, the battery level should be at 50% charge. Do not store a 3M Clean-Trace Luminometer with a fully discharged battery because the battery may lose the ability to be recharged. -
Page 7: Switching The Power Off
6. Or, tap [Cancel] to cancel the power off process. Controlling the Software To control the 3M Clean-Trace Luminometer software, use either the touch screen or the cursor control pad. • To use the touch screen, use common gestures such as tap and swipe. -
Page 8: Using The Base
1. The Default User is automatically logged in. Tap [Login]. • Or, if you set up Users using 3M Clean-Trace Hygiene Management Software, to select your User name, tap select and tap your User name. Tap [Login]. -
Page 9: Logging In On The 3M Clean-Trace Luminometer With A Pin
Logging out from the 3M Clean‑Trace Luminometer 1. Tap Settings 2. Tap [Log Out]. The Login screen appears. Refer to the Logging in on the 3M Clean‑Trace Luminometer section in this User Manual for more information. -
Page 10: Performing Tests On Test Points Within Sample Plans
Test Point name. Tap Back to return to the previous screen. 3. Follow the Instructions for Use for the 3M Clean-Trace Tests. Collect a sample, activate the test and shake it for at least 5 seconds. a. Open the 3M Clean-Trace Luminometer by pressing the rocker cap. Then insert the activated test into the chamber. -
Page 11: Performing A Retest On An Atp Test Point With A Caution Or A Fail Test Status After Moving To A Different Test Point
Scroll up then tap the Test Point you want to retest. 1. Follow the Instructions for Use for the 3M Clean-Trace Test to collect a sample, activate the test and shake it for at least 5 seconds. 2. Open the 3M Clean-Trace Luminometer by pressing the rocker cap. Then insert the activated test into the chamber. -
Page 12: Recording Temperature Or Ph For A Test Point Within A Sample Plan
3. Tap the field. Use the number pad to enter the Temperature test result or pH test result. 4. The test result appears and is stored in the memory so it can be synchronized with the 3M Clean-Trace Hygiene Management Software. The result is also interpreted using your established pass/fail limits and is displayed on the... -
Page 13: Changing Temperature Or Ph Recording For A Test Point Within A Sample Plan
4. Use the number pad to enter the Temperature test result or pH test result. • The test result appears and is stored in the memory so it can be synchronized with the 3M Clean-Trace Hygiene Management Software. The result is also interpreted using your established pass/fail limits and is displayed on the... -
Page 14: Setting Up A Custom Test Type On A Test Point Within A Sample Plan
, then enter the correct number. Tap [Done]. 3. The test result appears on the screen and is stored in the memory so it can later be synchronized with the 3M Clean-Trace Hygiene Management Software. The test result is also interpreted using the pass/fail limits and the test... -
Page 15: Performing Testing On Unplanned Test Points
• AQT200(water total) 3. Tap [OK]. 4. Follow the Instructions for Use for the 3M Clean-Trace Test to collect a sample, activate the test and shake it for at least 5 seconds. 5. Open the 3M Clean-Trace Luminometer by pressing the rocker cap. Then insert the activated test into the chamber. -
Page 16: Synchronizing The 3M Clean-Trace Luminometer With The Computer Database
Setting Up Synchronization with a USB Connection To use a USB cable connection: connect one end of the 3M provided USB cable to the USB/Power port and connect the other end of the USB cable to a USB port on your computer. - Page 17 • To change the Connection Type to WiFi, refer to the Changing the Connection Type section in this User Manual. • The 3M Clean-Trace Luminometer WiFi software uses the following ports by default on your computer: 9002, 9003, 9004, 9005. Ensure that these ports are enabled by your antivirus software or firewall.
-
Page 18: Changing The Connection Type
1. Tap Settings 2. Tap [Diagnostic Check] to do the same diagnostic check the 3M Clean-Trace Luminometer does automatically when the power is switched on. For more information, refer to the Switching the Power on section in this User Manual Changing the Screen Brightness 1. -
Page 19: Displaying Software Versions
3. Swipe the list of software versions up to display the complete list. 4. Tap [Continue]. Troubleshooting This section is intended to help you solve problems that you might encounter when using the 3M Clean-Trace Luminometer. Contact 3M or your local 3M distributor for more information. Problem... - Page 20 Error: 7 Firmware upgrade problem 1. Turn off the 3M Clean-Trace Luminometer, and turn it on again. 2. Repeat the firmware upgrade. 3. If the problem persists, contact 3M or your local distributor.
-
Page 21: Appendix
The 3M Clean-Trace Luminometer display screen is laminated, bonded and shatter-resistant. It is designed to hold together in the event of breakage. The 3M Clean-Trace Luminometer allows for gloved operation. Gloves need to be 4 mil thick or less and cannot be woven with metallic substances. - Page 22 3M Health Care © 2016, 3M. All rights reserved. 2510 Conway Ave 3M and Clean-Trace are trademarks of 3M. Used under license in Canada. St. Paul, MN 55144 USA All other trademarks are the property of their respective companies. www.3M.com/foodsafety...
Need help?
Do you have a question about the LM1 and is the answer not in the manual?
Questions and answers