
Related Manuals for 3M Clean-Trace NGi Luminometer


Summary of Contents for 3M Clean-Trace NGi Luminometer
- Page 1 Important Safety Information And User Manual 3M™ Clean-Trace™ NGi Luminometer Docking Station...
-
Page 2: Product Description And Intended Use
System is very sensitive, surfaces should not be considered sterile based on results from the 3M™ Clean-Trace™ System. The 3M™ Clean-Trace™ System is not intended to be used in the diagnosis of conditions in humans or animals. The user is responsible to know and follow applicable workplace regulations. -
Page 3: Safety Information
WARNING To reduce the risks associated with hazardous voltage: • do not service the 3M™ Clean-Trace™ Luminometer, docking station or power supply. Use only 3M authorized service personnel. • do not use the 3M™ Clean-Trace™ Luminometer or power supply if the enclosure is broken. - Page 4 To reduce the risks associated with illness or infection: • do not use the 3M™ Clean-Trace™ System in the diagnosis of conditions in humans or animals. • do not use the 3M™ Clean-Trace™ System as an indication of sterility of surfaces or solutions...
-
Page 5: Regulatory Compliance
• do not store or use the 3M™ Clean-Trace™ Luminometer, Power Supply, or Docking Station in a location exposed to steam high humidity, dust or strong vibration. • Ensure that the battery charger power supply connector is in the right orientation before inserting into luminometer. -
Page 6: Package Contents
LIMITED WARRANTY AND DISCLAIMER. 3M warrants that for one year from the date of shipment that the 3M™ Clean-Trace™ NG Luminometer or Docking Station will substantially perform in accordance with the User Documentation. The terms of this Agreement do not affect or prejudice the statutory rights of a consumer acquiring the 3M™... -
Page 7: Limitation Of Liability
3M Health Care - Product and Service Information 3M Product Information: www.3M.com To obtain warranty service, call 3M Health Care Helpline (USA) 1 800 228 3957 or for outside the USA contact your local 3M Subsidary or a 3M Health Care Representative. - Page 8 User Manual Clean Trace NGi Luminometer and Docking Station Index 1 Product Description 1.01 How the 3M™ Clean-Trace™ NGi Luminometer works to Measure Contamination 1.02 ATP and Surface Hygiene Testing 1.03 ATP and Water Testing 2 Instrument overview 2.01 Parts of the 3M™ Clean-Trace™ NGi Luminometer 2.02...
-
Page 9: Product Description
1.01 How the 3M™ Clean-Trace™ NGi Luminometer works to Measure Contamination The 3M™ Clean-Trace™ NGi Luminometer is a luminometer used in conjunction with 3M reagent kits to measure levels of contamination on surfaces and in water samples. The technology used is Adenosine Triphosphate (ATP) bioluminescence. -
Page 10: Instrument Overview
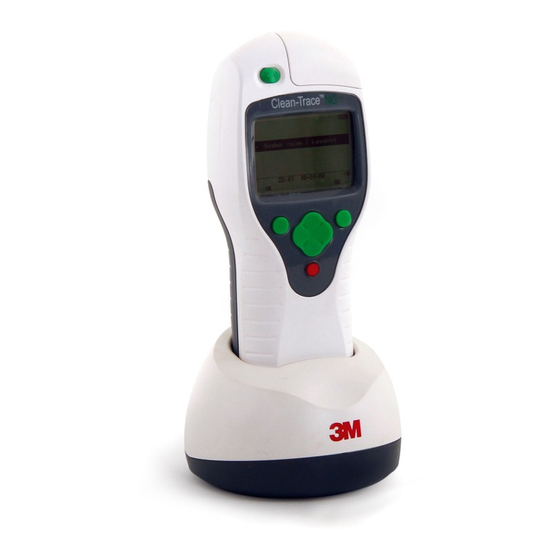
Power from Charger 2.02 General Features The 3M™ Clean-Trace™ NGi Luminometer is a light-weight, fully portable instrument with alphanumeric LCD display. The instrument is for use in production areas, healthcare settings and laboratories and can be supplied with a carrying pouch. A separate internal Lithium Battery is used to retain information in the instruments memory,... -
Page 11: Charging The Battery
3M™ Clean-Trace™ NGi Luminometer as shown in Figure 2, then connect the charger to an AC power outlet and switch on. Alternatively, the optional docking station is used, insert the 3M™ Clean- Trace™ NGi Luminometer into the docking station, plug the connector from the charger into the docking station then connect the charger to an AC power outlet. -
Page 12: Switching The Instrument On
Ensure that no samples have been left in the chamber from previous tests before switching the instrument on. The power switch is the red button on the instrument. Pressing and holding the on/off button will switch the 3M™ Clean-Trace™ NGi Luminometer on. Pressing and holding the on/off button again will switch the 3M™ Clean- Trace™... -
Page 13: Measurement Modes
The 3M™ Clean-Trace™ NGi Luminometer instrument offers three ways to measure a sample. MEASURE SAMPLE allows as many readings as required, but does not store the data for later use. If the 3M™ Clean-Trace™ Luminometer Printer is used, results may be printed as they are produced as long as the 3M™... - Page 14 The 3M™ Clean-Trace™ NGi Luminometer has a sensor to determine if a 3M™ Clean-Trace™ ATP test device has been left in the chamber for more than 30 seconds following the completion of a measurement. If this situation is detected, the instrument will display a "Swab Left In Chamber"...
-
Page 15: Low Power Mode
In order to communicate between the 3M™ Clean-Trace™ NGi Luminometer and 3M™ Clean-Trace™ Online Software ensure that the luminometer is connected to the PC via the USB cable or through the 3M™ Clean- Trace™ Docking Station, which in turn is connected to the PC via the USB cable. - Page 16 3M™ Clean-Trace™ NG Luminometer Soft Carry Case 3.01 3M™ Clean-Trace™ NG Luminometer Docking Station Available as an optional accessory, the 3M™ Clean-Trace™ NG Luminometer Docking Station is an instrument holder which provides instant connection to the charger and PC communications. It offers the following useful facilities: •...
- Page 17 3.02 3M™ Clean-Trace™ NG Luminometer Printer It is possible to connect the 3M™ Clean-Trace™ NGi Luminometer to an external 3M™ Clean-Trace™ NG Luminometer Printer via the 3M™ Clean-Trace™ Docking Station. Both the Docking Station and 3M™ Clean- Trace™ NG Luminometer Printer are available as optional accessories. It is possible to print either individual tests or a series of tests from one result set in a given sample plan.
- Page 18 Samples may be inserted after folding back the flap at the top of the carry pouch. To prevent the 3M™ Clean-Trace™ NGi Luminometer being dropped there is a lanyard attached to the pouch which fixes onto the instrument.
-
Page 19: Measuring Samples
4.01 What is MEASURE SAMPLE MEASURE SAMPLE allows as many readings as required but does not store the data for later use. If a 3M Clean-Trace Luminometer printer is used, results may be printed as they are produced as long as the printer is turned on and connected while the measurement is performed. - Page 20 To measure another sample, remove the previous test, insert the next one and press the Measure key. When all measurements are completed press the Back key to return to MAIN MENU. If the light in the chamber exceeds the range of the instrument, an Overload message will be displayed.
-
Page 21: Program Mode
Select At this point it is possible to use the 3M™ Clean-Trace™ NGi Luminometer to perform a new series of tests for the selected sample plan, or to perform retests on existing stored results which are shown in date order on the screen. - Page 22 OK before further measures can be taken. NOTE: if a measurement is attempted without a 3M Clean- Trace ATP Test in the chamber of the 3M™ Clean-Trace™ NGi Luminometer, an error message stating "No Swab Detected" will be displayed and an audible beep will sound to notify the user that there is not a test in the chamber.
-
Page 23: Reviewing Results
5.04 Reviewing results It is possible to review and inspect previous results and to print to an external 3M printer either individual tests or a series of tests from one result set in a given sample plan. Before attempting to print, ensure the printer is connected directly to the 3M™... -
Page 24: Printing Results
All results for the selected plan can be printed by using the navigation buttons ( ) to change the function button from ◄ ► Select to Print. Use the navigation ( ) buttons to highlight the required result ▲ ▼ set to review or print and press Select. -
Page 25: Setup Menu
6.0 SETUP MENU 6.01 What the SETUP MENU allows 6.02 How to find the SETUP MENU 6.03 Setting Date Format 6.04 Setting the Time Format 6.05 Setting the Date 6.06 Setting the Time 6.07 Setting the Language 6.08 Performing a Self Check 6.09 Setting the Backlight Timeout 6.01 What the SETUP MENU allows... -
Page 26: Setting Date Format
6.03 Setting Date Format While in the SETUP Menu, use the navigation ( ) buttons to ▲ ▼ select DATE & TIME and press the Select button. The DATE & TIME menu can now be seen. The choice of date formats are: DD MM YY e.g. -
Page 27: Setting The Time
6.06 Setting the Time While in the DATE & TIME menu, use the navigation ( ▲ ▼ buttons to select SET TIME, press Select and ‘Hours’ is highlighted on the display. Use the navigation ( ) buttons to ▲ ▼ change the ‘Hour’... - Page 28 If the instrument is not performing within calibration limits, one of the three screens below will be displayed. If this is the case the instrument should not be used as performance may be compromised. Contact 3M or local 3M Distributor for service and calibration. Calibration check failed...
- Page 29 6.09 Setting the Backlight Timeout The display on the 3M™ Clean-Trace™ NGi Luminometer is fitted with a backlight to improve visibility in dark or dim lighting conditions. The backlight may be set permanently off, permanently on; or may be set to remain on for a preset time interval after which the backlight extinguishes.
-
Page 30: Upload Results
Clean-Trace™ NGi Luminometer and 3M™ Clean-Trace™ Online Software. Refer to the 3M™ Clean-Trace™ Online Software User Guide for more information. Note: A USB symbol will only appear on the 3M™ Clean-Trace™ NGi Luminometer screen when it is connected to the 3M™ Clean-Trace™ Online Software via the USB cable or Docking Station. - Page 31 • Upper case letters • Lower case letters • Digits • Special characters Refer to the Troubleshooting Section of this Instruction Manual or the 3M™ Clean-Trace™ Online Software User Guide, if there are difficulties at the login and password stages.
- Page 32 If the 3M™ Clean-Trace™ NGi Luminometer has not been connected to the USB lead directly or via the 3M™ Clean-Trace™ Docking Station, a notification message will be displayed. Once the USB lead is connected, the 3M™ Clean-Trace™ NGi Luminometer will continue to communicate with 3M™...
- Page 33 WARNING: Do not use the 3M™ Clean-Trace™ NGi Luminometer or power supply if the enclosure is broken. The 3M™ Clean-Trace™ NGi Luminometer is designed to be robust and easy to use but it is a sensitive instrument which should be handled with care.
- Page 34 9.0 CARE OF THE 3M™ Clean-Trace™ NGi Luminometer 9.01 Cleaning 9.02 Temperature 9.01 Cleaning The external surfaces of the instrument should be wiped clean with a damp cloth and then wiped dry. 9.02 Temperature Avoid storing the instrument at temperatures below 4°C or above 40°C. If subjected to low temperatures, condensation may occur.
-
Page 35: Troubleshooting
10.07 Inadvertent changing of language setting 10.01 General This section is to help overcome any problems that might be encountered when using the 3M™ Clean-Trace™ NGi Luminometer. For further detailed advice contact 3M or local 3M distributor. Problem Probable Cause... - Page 36 Charge Battery or operate from AC power. 10.03 Communication Error Screens If there is a communication error between the 3M™ Clean-Trace™ NGi Luminometer and 3M™ Clean-Trace™ Online Software, follow the instructions as displayed on the instrument screen.
- Page 37 10.05 Login and Password Error Screens If one of the following Error Screens is observed, select OK to return to the previous Login screen to take the action indicated. When Change Password is selected, the new password created much meet the password criteria set. The password must be at least 8 characters and must contain a combination of characters, including a minimum of 3 out of the following 4 character types: Upper Case Letters / Lower Case Letters / Digits / Special...
- Page 38 There is no available memory within the instrument to store further results. Press ‘OK’, upload all stored results to the PC and try again. There is an internal fault with the chamber or connections to the chamber. Contact 3M or local 3M distributor. Error Message...
- Page 39 If this occurs, follow the following sequence of key presses to return to the original language: 1. Switch the 3M™ Clean-Trace™ NGi Luminometer off, then switch on and wait for main menu to appear. 2. Press the "up" navigation button once 3.
-
Page 40: Technical Specifications
11.0 Appendices 11.01 Technical Specifications 11.02 Terms and Conventions 11.01 Technical Specifications User interface • Simple structured menu system • Buttons & menu driven LCD user interface • 7 button user interface - UP, DOWN, LEFT, RIGHT, POWER and 2 software defined keys •... - Page 41 • Pass/Caution/Fail status for each result • Username • Product batch number or user test reference if entered • Other fields defined in 3M™ Clean-Trace™ Online Software • Non volatile data memory • Battery backed SRAM • Greater than 5000 results storage capability Security •...
-
Page 42: Terms And Conventions
RS232 A method of connecting to the PC. A specific cable connector is required. Sample plan A sample plan is a list of test points with pass and fail levels previously generated using 3M Clean-Trace Online Software. Self check A means of checking that the instrument is operating within set performance limits.
Need help?
Do you have a question about the Clean-Trace NGi Luminometer and is the answer not in the manual?
Questions and answers