Table of Contents
Advertisement
Advertisement
Table of Contents

Subscribe to Our Youtube Channel
Related Manuals for Microtek Medi-2200 Plus


Summary of Contents for Microtek Medi-2200 Plus
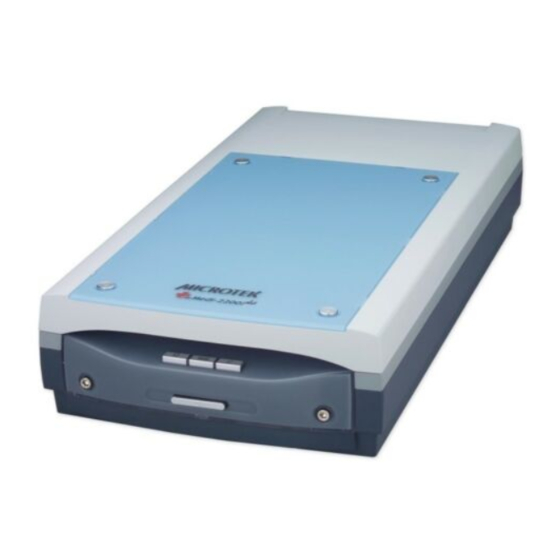
- Page 1 Dental Film Digitizer User's Manual www.microtek.com...
-
Page 2: Preface
The contents of this manual have been checked carefully for accuracy, and every effort has been made to ensure that there are no errors. However, Microtek makes no guarantee as to the accuracy of the contents of this document and reserves the right to make changes to the contents without prior warning. -
Page 3: Safety Regulations
This device complies with Part 15 of the FCC Rules. Operation is subject to the following two conditions: (1) This device may not cause harmful interference, and (2) this device must accept any interference received, including interference that may cause undesired operation. Medi-2200 Plus User's Manual... -
Page 4: Regulations
EN 55024:1998+A1:2001+A2:2003 WEEE Compliance Statement Microtek International, Inc. operates under full compliance with the WEEE Directive. Among the requirements of the Directive are the marking of any applicable equipment placed in the EU market with the WEEE symbol, a crossed out wheeled bin as shown at left;... -
Page 5: Safety Precautions
• Do not place the digitizer on any slippery, slanted, or unstable surface. The product may slide or fall, causing serious injury to people as well as serious damage to the product. Medi-2200 Plus User's Manual... - Page 6 • For safety reasons, ensure to inspect the device before using it. In addition, carrying out a regular inspection at least once a year. Medi-2200 Plus User's Manual...
-
Page 7: Table Of Contents
FCC Compliance Statement ..............3 Regulations ..................4 Safety Precautions ................5 Knowing about Your Film Digitizer .............9 Features of the Medi-2200 Plus ............9 System Requirements ..............10 Unpacking Your Film Digitizer ............11 Looking for Damage ................ 11 Unpacking Package Contents ............ - Page 8 Care and Cleaning ................35 Cleaning the Glass Surfaces ............. 35 Maintenance ..................36 Appendix ...................37 Troubleshooting ................37 Specifications ................. 39 Medi-2200 Plus User's Manual...
-
Page 9: Knowing About Your Film Digitizer
The Medi-2200 Plus can capture details in bright and dark areas of dental X-ray films and provide the medical professionals a convenient method to digitize the dental X-ray films for the electric data storage. -
Page 10: System Requirements
Easy to operate, clean and maintain — The Medi-2200 Plus requires virtually no routine maintenance and no daily cleaning, which is ideal for busy radiology departments. System Requirements In order to use your Medi-2200 Plus, your computer must satisfy the following system requirements: • CD-ROM drive (for installing software) •... -
Page 11: Unpacking Your Film Digitizer
1. Ensure that you put your shipping carton toward the right direction. Then, open the top cover. 2. Take out the bags containing the film templates and accessory components from the sides of the carton. Medi-2200 Plus User's Manual... - Page 12 Before putting down the package on a steady surface, do not go off either of hands from holding the foam supports. 4. Turn over the foam supports and make them stand vertically. 5. Lift up the upper foam support. Medi-2200 Plus User's Manual...
- Page 13 Once the digitizer has been placed in a suitable location and is ready to be connected to the computer, you are ready to step forward to the installation of the necessary software and hardware for the digitizer. Medi-2200 Plus User's Manual...
-
Page 14: Package Contents
After you have unpacked your digitizer package, please check for the major components listed below. Size 3 Size 4 Size 0 Size 1 Size 2 Intraoral X-Ray Film Holder Medi-2200 Plus film digitizer Power cord Power adapter Panoramic X-Ray Film Holder Software CD Hi-Speed USB cable Cephalometric Cephalometric... -
Page 15: How To Repack Your Film Digitizer For Shipping
Shipping To ship back your Medi-2200 Plus for repairing, maintenance services, or other reasons, in order to not damage your Medi-2200 Plus, it is strongly recommended that using the original carton and other packing materials. Follow the steps below to repack your Medi-2200 Plus correctly. - Page 16 4. Put the bags containing the film templates and accessory components into the sides of the carton. 5. Close the top cover of the shipping carton and seal it with tape. Medi-2200 Plus User's Manual...
-
Page 17: Taking A Closer Look
Presses to perform the Smart-Scan function. They function same as the Smart-Scan button on the software control panel. These buttons are Intraoral, Panoramic and Cephalometric. Horizontal Ruler Used to measure the width of the images. Black Mat Used when scanning of reflective materials. Medi-2200 Plus User's Manual... -
Page 18: Rear View
Names of Parts Functions of Parts Hi-Speed USB Port Connects the Hi-Speed USB (USB 2.0) cable to the computer. 15-pin Accessory port Connects the TMA to the digitizer. Power Connector Connects the digitizer to the power adapter. Medi-2200 Plus User's Manual... -
Page 19: Installing Your Digitizer
After you finish the installation of software, if you found that the installed drivers and software cannot run your product or your computer system properly later, please go to the Microtek Download Service site at www.microtek.com/service.php to download and install any updates you may require. -
Page 20: Unlocking The Digitizer
NOTE: To lock the digitizer and the TMA (for shipping and other purposes), turn the locking switch to the “Locked” position. When locking the digitizer, do not turn the digitizer upside down when locking the digitizer back. Medi-2200 Plus User's Manual... -
Page 21: Connecting The Digitizer
1. Connect the power adapter to the back of the digitizer. 2. Plug one end of the power cord into the power adapter, and plug the other end of the power cord into a wall outlet or other power source. Medi-2200 Plus User's Manual... -
Page 22: To The Hi-Speed Usb (Usb 2.0) Cable
5. Press the Power button on the front panel of the digitizer to turn the digitizer on; the LED of the button panel will light up . The system will detect your digitizer automatically. Power Button Medi-2200 Plus User's Manual... -
Page 23: Digitizing Dental Films
Used to hold five basic intraoral dental film sizes, Size 0, 1, 2, 3, and 4. Size 4 Size 3 Size 0 Size 1 Size 2 Cephalometric Cephalometric X-Ray Film Holder X-Ray Film Holder For intraoral films For panoramic films For cephalometric films Medi-2200 Plus User's Manual... -
Page 24: Removing The Black Mat
Removing the Black Mat The Medi-2200 Plus is come with a Black Mat put on the digitizer lid when shipping. This Black Mat is designed to work with scanning of reflective materials such as photographs, documents or prints as well. It is not designed to work with scanning of X-ray films. -
Page 25: Positioning Dental Films
1. Make sure that the Black Mat is removed from the digitizer lid. 2. Place the Panoramic X-Ray Film Holder on the digitizer glass surface. Make sure to orient the film holder with the “Microtek” logo facing up. U-shaped edge... -
Page 26: Using The Cephalometric X-Ray Film Holder
1. Make sure that the Black Mat is removed from the digitizer lid. 2. Place the Cephalometric X-Ray Film Holder on the digitizer glass surface. Make sure to orient the film holder with the “Microtek” logo facing up. U-shaped edge... - Page 27 1. Make sure that the Black Mat is removed from the digitizer lid. 2. Place the Intraoral X-Ray Film Holder on the digitizer glass surface. Make sure to orient the film holder with the “Microtek” logo facing up. U-shaped edge...
-
Page 28: Scanning Dental Films
Scanning Dental Films ScanWizard Medi is a scanning software designed by Microtek for X-ray films or reflectives scanning used for a medical purpose. Its user-friendly interface enables you to easily start the scanning process and finish all the scan jobs. Refer to the ScanWizard Medi software manual for more details. - Page 29 • If ScanWizard Medi is launched as a Plug-In from an image-editing program, the scanned image is delivered after the scan to your application, where the image can be saved, viewed, or printed further. Medi-2200 Plus User's Manual...
- Page 30 After Scan Untitled1 Untitled2 Untitled3 Untitled4 Medi-2200 Plus User's Manual...
-
Page 31: Digitizing Dental Films Without Film Holder
Digitizing Dental Films without Film Holder If the supplied film holder is not going to be used, Medi-2200 Plus also allows you to scan the dental films without any film holder on the scan bed. Follow the steps below to perform your scan. - Page 32 If ScanWizard Medi is launched as a Plug-In from an image-editing program, the scanned image is delivered after the scan to your application, where the image can be saved, viewed, or printed further. Scan Frame tool Medi-2200 Plus User's Manual...
-
Page 33: Digitizing Reflective Originals
Digitizing Reflective Originals To scan reflective originals, such as photographs, documents or prints, you can still use the Medi-2200 Plus with built-in transparency adapter. 1. Raise the digitizer lid, and place the reflective original to be scanned facing down on the digitizer glass surface. - Page 34 • If ScanWizard Medi is launched as a plug-In from an image-editing program, the scanned image is delivered after the scan to your application, where the image can be saved, printed, or modified further. Medi-2200 Plus User's Manual...
-
Page 35: Care And Cleaning
Care and Cleaning To ensure optimal performance for the Medi-2200 Plus, it is important to clean the glass surface of the digitizer on a regular basis. Cleaning the Glass Surfaces 1. Lift up the digitizer lid. 2. Use the cleaning cloth come with your package or a soft, non-abrasive and lint-free cloth to gently wipe the glass surface area on the digitizer's scan bed. -
Page 36: Maintenance
NOTE: Your digitizer need a professional to perform the required service or maintenance. Do not attend to fix or perform the maintenance by yourself, or it may cause dangers to you or the digitizer. Medi-2200 Plus User's Manual... -
Page 37: Appendix
15-pin accessory port. Make sure you place the film holder and film properly on the scan bed. Do not block the calibration window (as indicated in the “Positioning Dental Films” section). Medi-2200 Plus User's Manual... - Page 38 Make sure you are in the “Reflective” scanning mode. If not, click the “Scan Material” icon in the Preview window; then, select “Reflective” as your scanning mode. Uninstall and reinstall the ScanWizard Medi software. Medi-2200 Plus User's Manual...
-
Page 39: Specifications
100V to 240V HAIDER HDAD38W101 Environment Operating Temperature: 50°F to 104°F (10°C to 40°C) Relative Humidity: 20% to 85% Important Specifications, software bundles, and accessories are subject to change without notice. Not responsible for typographic errors. Medi-2200 Plus User's Manual...
Need help?
Do you have a question about the Medi-2200 Plus and is the answer not in the manual?
Questions and answers