Table of Contents
Advertisement
Quick Links
Advertisement
Table of Contents

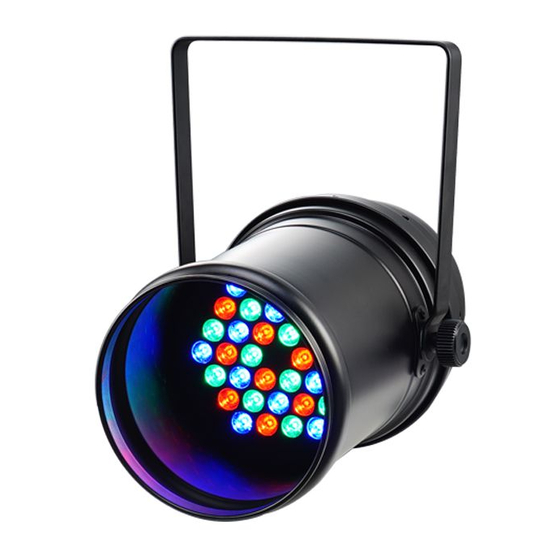
Summary of Contents for ACME Color Par 36
- Page 1 CP-36S User Manual Please read the instruc on carefully before use...
-
Page 2: Table Of Contents
Contents 1. Safety Instructions ................. 2 2. Technical Specifications ................. 3 3. How To Set The Unit................4 3.1 Control Panel ................... 4 3.2 Main Function .................. 5 4. How To Control The Unit ..............11 4.1 Master/Slave Built In Preprogrammed Function ......11 4.2 DMX Controller ................ -
Page 3: Safety Instructions
1. Safety Instructions Please read the instruction carefully which includes important information about the installation, usage and maintenance. WARNING Please keep this User Manual for future consultation. If you sell the unit to another user, be sure that they also receive this instruction booklet. ... -
Page 4: Technical Specifications
moisture. The housing and lenses must be replaced if they are visibly damaged. Caution: There are no user serviceable parts inside the unit. Do not open the housing or attempt any repairs yourself. In the unlikely event your unit may require service, please contact your nearest dealer. -
Page 5: How To Set The Unit
Weight: 2.6kgs Dimension: 477 x 224 x 268mm 3. How To Set The Unit 3.1 Control Panel Display: Shows the various menus and the selected functions. Button: 6. MENU To select the programming functions DOWN To go backward in the selected functions To go forward in the selected functions 9. -
Page 6: Main Function
DMX input: DMX512 link, use 3-pin XLR cable to link the unit and DMX controller. 3.2 Main Function To select any of the given functions, press the MENU button up to when the required selection as shown on the display. Select the function by the ENTER button and the display will blink. Use the DOWN/UP button to change the mode. - Page 8 (DMX 512 Address) To select the , press the ENTER button to show the DMX ADDRESS on the display. Use the DOWN/UP button to adjust the address from 1 to 512. Once the address has been selected, press the ENTER button to setup, to go back to the functions without any changes press the MENU button again.
- Page 9 Once the mode has been selected, press the ENTER button to setup, to go back to the functions without any changes press the MENU button again. Hold and press the MENU button for one second or wait for one minute to exit the menu mode. (...
- Page 10 DOWN/UP button to select the (master slave mode) or (blackout mode). Once the mode has been selected, press the ENTER button to setup, to go back to the functions without any changes press the MENU button again. Hold and press the MENU button for one second or wait for one minute to exit the menu mode.
- Page 11 ( ) Manual Setting To select the , press the ENTER button to show the DIMMER SPEED on the display. Use the DOWN/UP button to select the (blue) (dimmer) or (red), (green) (strobe) mode. Once the mode has been selected, press the ENTER button to setup, use UP/DOWN button to adjust the value 0-255, to go back to the functions without any changes press the MENU button again.
-
Page 12: How To Control The Unit
4. How To Control The Unit You can operate the unit in three ways: 1. Master/slave built-in preprogram function 2. Universal DMX controller You do not need to turn the unit off when you change the DMX address, the new DMX address setting will take effect immediately. -
Page 13: Dmx512 Configuration
Press the MENU button up to when the is showing on the display. Press the ENTER button and the display will blink. Use the DOWN and UP button to change the DMX512 address. Once the address has been selected, press and keep the ENTER button pressed up to when the display stops blinking or storing automatically 7 seconds later. - Page 14 Strobe:Slow → Fast 016 – 131 132 – 139 Open 140 – 181 Slow Open Fast Close 182 – 189 Open 190 – 231 Slow Close Fast Open 232 – 239 Open 240 – 247 Random Strobe 248 - 255 Open 000 –...
-
Page 15: Dmx Connection
163 – 170 Color 21 171 - 178 Color 22 179 – 185 Color 23 186 - 193 Color 24 194 – 201 Color 25 202 – 209 Color 26 210 – 216 Color 27 217 - 224 Color 28 225 –... -
Page 16: Troubleshooting
1. At last unit, the DMX cable has to be terminated with a terminator. Solder a 120 ohm 1/4W resistor between pin 2(DMX-) and pin 3(DMX+) into a 3-pin XLR-plug and plug it in the DMX-output of the last unit. 2. -
Page 17: Fixture Cleaning
B. Not responding to DMX controller 1. DMX LED should be on. If not, check DMX connectors, cables to see if link properly. 2. If the DMX LED is on and no response to the channel, check the address settings and DMX polarity. - Page 19 Declaration of Conformity We declare that our products (lighting equipments) comply with the following specification and bears CE mark in accordance with the provision of the Electromagnetic Compatibility (EMC) Directive 89/336/EEC. EN55103-1: 2009+A1:2012; EN55103-2: 2009; EN61000-3-2: 2014; EN61000-3-3: 2013. & Harmonized Standard EN 60598-1:2015;...
- Page 20 Innovation, Quality, Performance...


Need help?
Do you have a question about the Color Par 36 and is the answer not in the manual?
Questions and answers