Table of Contents
Advertisement
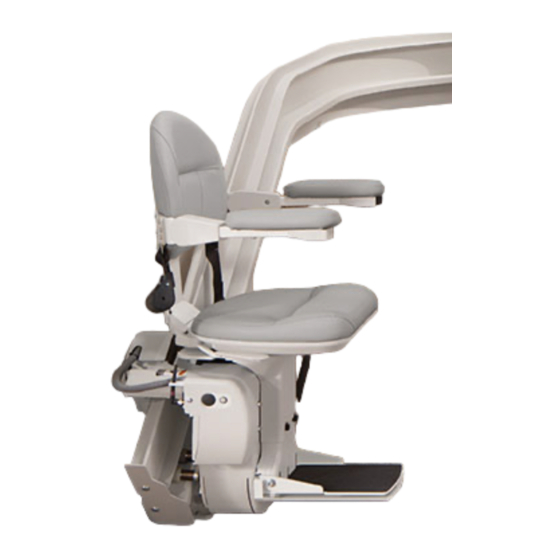
CRE-2100
ELECTRA-RIDE™ III
STAIRWAY ELEVATOR
www.bruno.com
1780 EXECUTIVE DR., P.O., BOX 84, OCONOMOWOC, WI 53066 USA
TEL.: (262) 567-4990
FAX: (262) 953-5501
Toll free number valid throughout the U.S. and Canada
Bruno invites your calls at:
1-800-882-8183
Technical Service email: service@bruno.com
Technical Service fax: 262-953-5503
INSTALLATION MANUAL
DEALER
MAN-2100-1 UL
REVISED 08-16-2004
Advertisement
Table of Contents

Related Manuals for Bruno ELECTRA-RIDE III

Summary of Contents for Bruno ELECTRA-RIDE III
- Page 1 1780 EXECUTIVE DR., P.O., BOX 84, OCONOMOWOC, WI 53066 USA TEL.: (262) 567-4990 FAX: (262) 953-5501 Toll free number valid throughout the U.S. and Canada Bruno invites your calls at: 1-800-882-8183 Technical Service email: service@bruno.com Technical Service fax: 262-953-5503 INSTALLATION MANUAL...
- Page 2 35°F (2°C). Electra-Ride™ is a trademark of Bruno Independent Living Aids, Inc.® The Electra-Ride® III, #5,967,265, is covered by one or more U.S. Patents and/or has U.S. Patents Pending Velcro® is a registered trademark of Velcro Industries B.V.
-
Page 3: Table Of Contents
Yearly Maintenance Operations................39 Sample Plan and Elevation Views .................. 40 Wiring Diagram ......................Exploded Views/Bills of Material ..................42-66 Warranty ......................... 67 Sample Rail Position and Clamp Location Worksheet ........... 68 CRE-2100 NRUL 08-16-2004 ©2004,1998 Bruno Independent Living Aids, Inc.®... -
Page 4: Regulatory Information
This lift is intended to be installed in accordance with the current editions of the U.S. National Electric Code NFPA-70 and the Standard for Platform Lifts and Stairway Chairlifts, ANSI/ ASME A18.1-1999. ©2004,1998 Bruno Independent Living Aids, Inc.® CRE-2100 NRUL 08-16-2004... -
Page 5: Specifications
45 degrees Rail: steel channel with integral drive gear rack Seat Swivel: 0, 30 and 60 degrees at top and bottom Power Supply: 24 VDC battery charger powered by 120 V wall CRE-2100 NRUL 08-16-2004 ©2004,1998 Bruno Independent Living Aids, Inc.®... -
Page 6: Introduction
INTRODUCTION Thank you for purchasing a CRE-2100 Electra-Ride III Stairway Elevator. Be sure to check carton contents for shipping damage as soon as they are received. Also, check the carton contents against the packing list before leaving the shop to install the unit on site. -
Page 7: Packing List
PACKING LIST The ELECTRA-RIDE III is shipped in two (2) main cartons plus Check carton contents separately-wrapped rail sections. Before beginning an installation, for shipping damage check the carton contents against the packing list to be sure you immediately upon have all the components. -
Page 8: Tools For Installation
[ ] 3/8” magnetic socket (recommend use with 18” extension) [ ] razor knife [ ] #27 Torx driver to remove armrest (Service) [ ] Vise grips and c-clamp Vise grips [ ] 3/16” drill (pilot holes for shims) ©2004,1998 Bruno Independent Living Aids, Inc.® CRE-2100 NRUL 08-16-2004... -
Page 9: Installation
See photos below. Do NOT attach the upper end plate or charge bracket at this time. bottom rail end plate upper rail end plate (do not attach at this time) CRE-2100 NRUL 08-16-2004 ©2004,1998 Bruno Independent Living Aids, Inc.®... -
Page 10: Clamp Placement And Rail Installation
Note: Before attaching the clamp to the rail, make sure the threaded end of the bolt is pointing to the inside of the installation (away from the stairs), and that the longer-footed clamps point toward the outside of the installation (chair side of the rail). ©2004,1998 Bruno Independent Living Aids, Inc.® CRE-2100 NRUL 08-16-2004... - Page 11 NOTE: It may be necessary to install a screw into one of the rear holes on the clamp assembly to prevent the rail from sliding. CRE-2100 NRUL 08-16-2004 ©2004,1998 Bruno Independent Living Aids, Inc.®...
- Page 12 The correct angle should be observed within 1/2 degree, every (2) feet of linear rail travel. Be sure to check the rail angle every (2) feet of linear travel. ©2004,1998 Bruno Independent Living Aids, Inc.® CRE-2100 NRUL 08-16-2004...
-
Page 13: Clamp Space Installation
DOWN ZERO-DEGREE SLOPE 1. To accomodate the stairways which include a portion with zero-degree slope, Bruno has included a horizontal adjustment screw on the lower carriage. NOTE: The horizontal adjustment screw is factory set and should not be readjusted at the installation site. -
Page 14: Carriage Installation
Temporarily tape the lower carriage on an angle to match the slope of the rail (see photo to left). (1) center wheel (2) tape (3) front guide plastic (4) cog ©2004,1998 Bruno Independent Living Aids, Inc.® CRE-2100 NRUL 08-16-2004... - Page 15 (see illustration to left) Using the jumper/switch (see illustration to left), jog the carriage 2-3” down the rail. use jumper/switch to jog carriage onto rail rack center flange wheel gear rack CRE-2100 NRUL 08-16-2004 ©2004,1998 Bruno Independent Living Aids, Inc.®...
- Page 16 (see illustration below). Use the jumper/switch to perform one final jog of approximately (1) foot down the rail. guide strip guide wheels ©2004,1998 Bruno Independent Living Aids, Inc.® CRE-2100 NRUL 08-16-2004...
- Page 17 12”. Using a level, check that the top of the carriage is level side-to-side and front-to-back. NOTE: If the unit is not level, call the Bruno Service Department before proceeding (1-800-882-8768). Turn the circuit breaker OFF.
-
Page 18: Seat Swivel Assembly
Plug in the seat harness. Reinstall the shroud and footrest handle. upper charge bracket Install the upper rail end plate and the upper rail charge bracket. end plate ©2004,1998 Bruno Independent Living Aids, Inc.® CRE-2100 NRUL 08-16-2004... -
Page 19: Final Limit Ramp And Switch
If the overspeed switch trips, you must reset (2) levers (overspeed lever and cam lever). See photos at left. CAM LEVER overspeed switch overspeed lever cam lever (in set tripped position) CRE-2100 NRUL 08-16-2004 ©2004,1998 Bruno Independent Living Aids, Inc.®... - Page 20 NOTE: If the lever is rotated too far, the unit will not be reset. Rotate the cam lever until you just feel the switch engage. ©2004,1998 Bruno Independent Living Aids, Inc.® CRE-2100 NRUL 08-16-2004...
-
Page 21: Mounting Lead In Cable Channel
Bundle any excess power cord length to avoid creating a tripping hazard. Secure the battery charger in its permanent location with the Phillips pan head sheet metal screws provided (8 x .75” lg). CRE-2100 NRUL 08-16-2004 ©2004,1998 Bruno Independent Living Aids, Inc.®... -
Page 22: Important Charging Notes
Keep the charger plugged into a household outlet at all times. If the charger plug and lead are located in a vulnerable location, Bruno recommends the use of a plug lock to prevent accidental unplugging of the battery charger. -
Page 23: First-Time Rail Lubrication
Approximately once per year, regrease the gear rack teeth ONLY with white lithium grease. Pledge® is a registered trademark of the S.C. Johnson & Son, Inc. CRE-2100 NRUL 08-16-2004 ©2004,1998 Bruno Independent Living Aids, Inc.®... -
Page 24: Installing The Antenna
This action ensures that the necessary contact is made for proper operation of the Stairway Elevator. antenna installed ©2004,1998 Bruno Independent Living Aids, Inc.® CRE-2100 NRUL 08-16-2004... -
Page 25: Mounting The Standard Call/Send Transmitter
Position the bracket/transmitter unit on the wall so that the top/bottom standard transmitter bracket holes align with the anchors. mounted with bracket Secure the bracket/transmitter to the wall using the screws provided. CRE-2100 NRUL 08-16-2004 ©2004,1998 Bruno Independent Living Aids, Inc.®... -
Page 26: Mounting The Commercial Call/Send Transmitter
NOTE: Codes may vary from one municipality to another. Check pertinent local codes in force before beginning installation of the call/send transmitter. commercial call/send transmitter ©2004,1998 Bruno Independent Living Aids, Inc.® CRE-2100 NRUL 08-16-2004... -
Page 27: Testing The Call/Send Transmitter
NOTE: This unit includes equipment covered by FCC regulations. Any changes or modifications to the call/send transmitter or receiver, unless expressly approved by Bruno Independent Living Aids, Inc.® (the party responsible for ensuring its equipment complies with FCC regulations), could void the user’s authority to operate the equipment. -
Page 28: Learning The Call/Send Transmitter
LED Hold down the Learn/Erase button and switch (S4) until the Learn/Erase LED goes out (approx. 12 seconds). circuit board Learn the new transmitter(s) as instructed above. ©2004,1998 Bruno Independent Living Aids, Inc.® CRE-2100 NRUL 08-16-2004... -
Page 29: Replacing The Batteries: Call/Send Transmitter
Reposition and close the access door. Be sure to recycle the batteries in accordance with local regulations. front (3) AAA batteries required (open access door) rear CRE-2100 NRUL 08-16-2004 ©2004,1998 Bruno Independent Living Aids, Inc.®... -
Page 30: Footrest Lever
(on either the right or left side) to release the lock. Swivel to the desired angle and release the latch to lock the seat in place. push up to swivel ©2004,1998 Bruno Independent Living Aids, Inc.® CRE-2100 NRUL 08-16-2004... -
Page 31: Electrical
Repeats once every 4 minutes until Seat Safety Switch is disengaged or battery voltage increases. * Battery Voltage Critical: 5 Beeps (2 short and 3 long) Repeats once a minute until voltage is above 16 V. CRE-2100 NRUL 08-16-2004 ©2004,1998 Bruno Independent Living Aids, Inc.®... - Page 32 The normal setting is 600 mS of coast. Should the unit lose the remote call/send signal, this can be increased to 900mS by moving Switch # 2 on S1 to the `ON' position. ©2004,1998 Bruno Independent Living Aids, Inc.® CRE-2100 NRUL 08-16-2004...
-
Page 33: Discharged Batteries
NOTE: Partially charged batteries will run the car- riage down but not up. Confirm that the charger is plugged into a live outlet and wait for the batteries to recharge. CRE-2100 NRUL 08-16-2004 ©2004,1998 Bruno Independent Living Aids, Inc.®... -
Page 34: Circuit Breaker
Replacing a blown fuse Set the ON/OFF switch (see above) to OFF. Disconnect the battery charger from the rail charge lead. Remove the carriage cover. (con’t. next page) ©2004,1998 Bruno Independent Living Aids, Inc.® CRE-2100 NRUL 08-16-2004... -
Page 35: Battery Charger
Remove the power cord from the wall outlet and the charger inlet. Pull out the fuse access panel. Remove the fuse. Replace with the same size and type: (BUSS # GMC 4) 5 x 20 mm-4amp/125V-TIME LAG CRE-2100 NRUL 08-16-2004 ©2004,1998 Bruno Independent Living Aids, Inc.®... -
Page 36: Adjustment, Speed Control
Tighten the collet nut. Make a final test run to double check the speed. counter- clockwise clockwise faster slower ©2004,1998 Bruno Independent Living Aids, Inc.® CRE-2100 NRUL 08-16-2004... -
Page 37: Maintenance
Apply a thin layer of white lithium grease to the gear rack teeth only. Approximately once per year, regrease the gear rack teeth ONLY (more often if the stairway elevator is operated in harsh environments). CRE-2100 NRUL 08-16-2004 ©2004,1998 Bruno Independent Living Aids, Inc.®... -
Page 38: Vacation/Long-Term Storage
NOTE: The batteries may require recharging if the unit remained OFF for an extended period of time. Simply reconnect the charger to the wall outlet (circuit breaker ON) and allow the battery to fully recharge. ©2004,1998 Bruno Independent Living Aids, Inc.® CRE-2100 NRUL 08-16-2004... -
Page 39: Yearly Maintenance Operations
Examine exposed wiring. Are there any cuts or abrasions? Verify operation of seat swivel mechanism. Does it moves easily and lock in place correctly? Check that all hardware is properly tightened. CRE-2100 NRUL 08-16-2004 ©2004,1998 Bruno Independent Living Aids, Inc.®... -
Page 40: Sample Plan And Elevation Views
SAMPLE VIEWS PLAN VIEW ELEVATION VIEW ©2004,1998 Bruno Independent Living Aids, Inc.® CRE-2100 NRUL 08-16-2004... -
Page 41: Wiring Diagram
WIRING DIAGRAM CRE-2100 NRUL 08-16-2004 ©2004,1998 Bruno Independent Living Aids, Inc.®... -
Page 42: Exploded Views/Bills Of Material
EXPLODED VIEW/BILL OF MATERIALS ©2004,1998 Bruno Independent Living Aids, Inc.® CRE-2100 NRUL 08-16-2004... - Page 43 EXPLODED VIEW/BILL OF MATERIALS CRE-2100 NRUL 08-16-2004 ©2004,1998 Bruno Independent Living Aids, Inc.®...
- Page 44 EXPLODED VIEW/BILL OF MATERIALS ©2004,1998 Bruno Independent Living Aids, Inc.® CRE-2100 NRUL 08-16-2004...
- Page 45 EXPLODED VIEW/BILL OF MATERIALS CRE-2100 NRUL 08-16-2004 ©2004,1998 Bruno Independent Living Aids, Inc.®...
- Page 46 EXPLODED VIEW/BILL OF MATERIALS ©2004,1998 Bruno Independent Living Aids, Inc.® CRE-2100 NRUL 08-16-2004...
- Page 47 EXPLODED VIEW/BILL OF MATERIALS CRE-2100 NRUL 08-16-2004 ©2004,1998 Bruno Independent Living Aids, Inc.®...
- Page 48 EXPLODED VIEW/BILL OF MATERIALS ©2004,1998 Bruno Independent Living Aids, Inc.® CRE-2100 NRUL 08-16-2004...
- Page 49 EXPLODED VIEW/BILL OF MATERIALS CRE-2100 NRUL 08-16-2004 ©2004,1998 Bruno Independent Living Aids, Inc.®...
- Page 50 EXPLODED VIEW/BILL OF MATERIALS ©2004,1998 Bruno Independent Living Aids, Inc.® CRE-2100 NRUL 08-16-2004...
- Page 51 EXPLODED VIEW/BILL OF MATERIALS CRE-2100 NRUL 08-16-2004 ©2004,1998 Bruno Independent Living Aids, Inc.®...
- Page 52 EXPLODED VIEW/BILL OF MATERIALS ©2004,1998 Bruno Independent Living Aids, Inc.® CRE-2100 NRUL 08-16-2004...
- Page 53 EXPLODED VIEW/BILL OF MATERIALS CRE-2100 NRUL 08-16-2004 ©2004,1998 Bruno Independent Living Aids, Inc.®...
- Page 54 EXPLODED VIEW/BILL OF MATERIALS ©2004,1998 Bruno Independent Living Aids, Inc.® CRE-2100 NRUL 08-16-2004...
- Page 55 EXPLODED VIEW/BILL OF MATERIALS CRE-2100 NRUL 08-16-2004 ©2004,1998 Bruno Independent Living Aids, Inc.®...
- Page 56 EXPLODED VIEW/BILL OF MATERIALS ©2004,1998 Bruno Independent Living Aids, Inc.® CRE-2100 NRUL 08-16-2004...
- Page 57 EXPLODED VIEW/BILL OF MATERIALS CRE-2100 NRUL 08-16-2004 ©2004,1998 Bruno Independent Living Aids, Inc.®...
- Page 58 EXPLODED VIEW/BILL OF MATERIALS ©2004,1998 Bruno Independent Living Aids, Inc.® CRE-2100 NRUL 08-16-2004...
- Page 59 EXPLODED VIEW/BILL OF MATERIALS CRE-2100 NRUL 08-16-2004 ©2004,1998 Bruno Independent Living Aids, Inc.®...
- Page 60 EXPLODED VIEW/BILL OF MATERIALS ©2004,1998 Bruno Independent Living Aids, Inc.® CRE-2100 NRUL 08-16-2004...
- Page 61 EXPLODED VIEW/BILL OF MATERIALS CRE-2100 NRUL 08-16-2004 ©2004,1998 Bruno Independent Living Aids, Inc.®...
- Page 62 EXPLODED VIEW/BILL OF MATERIALS ©2004,1998 Bruno Independent Living Aids, Inc.® CRE-2100 NRUL 08-16-2004...
- Page 63 EXPLODED VIEW/BILL OF MATERIALS CRE-2100 NRUL 08-16-2004 ©2004,1998 Bruno Independent Living Aids, Inc.®...
- Page 64 EXPLODED VIEW/BILL OF MATERIALS ©2004,1998 Bruno Independent Living Aids, Inc.® CRE-2100 NRUL 08-16-2004...
- Page 65 EXPLODED VIEW/BILL OF MATERIALS CRE-2100 NRUL 08-16-2004 ©2004,1998 Bruno Independent Living Aids, Inc.®...
- Page 66 EXPLODED VIEW/BILL OF MATERIALS ©2004,1998 Bruno Independent Living Aids, Inc.® CRE-2100 NRUL 08-16-2004...
-
Page 67: Warranty
Bruno, damage in shipment, or repairs undertaken by anyone other than Bruno factory employees or authorized distributors. The “original pur- chaser” of a Bruno Stairlift that is leased or rented shall be the person or entity acting as the lessee or rental provider. -
Page 68: Sample Rail Position And Clamp Location Worksheet
SAMPLE ©2004,1998 Bruno Independent Living Aids, Inc.® CRE-2100 NRUL 08-16-2004...
Need help?
Do you have a question about the ELECTRA-RIDE III and is the answer not in the manual?
Questions and answers