Table of Contents
Advertisement
Advertisement
Table of Contents
Troubleshooting

Related Manuals for Magnum Energy MMS Series


Summary of Contents for Magnum Energy MMS Series
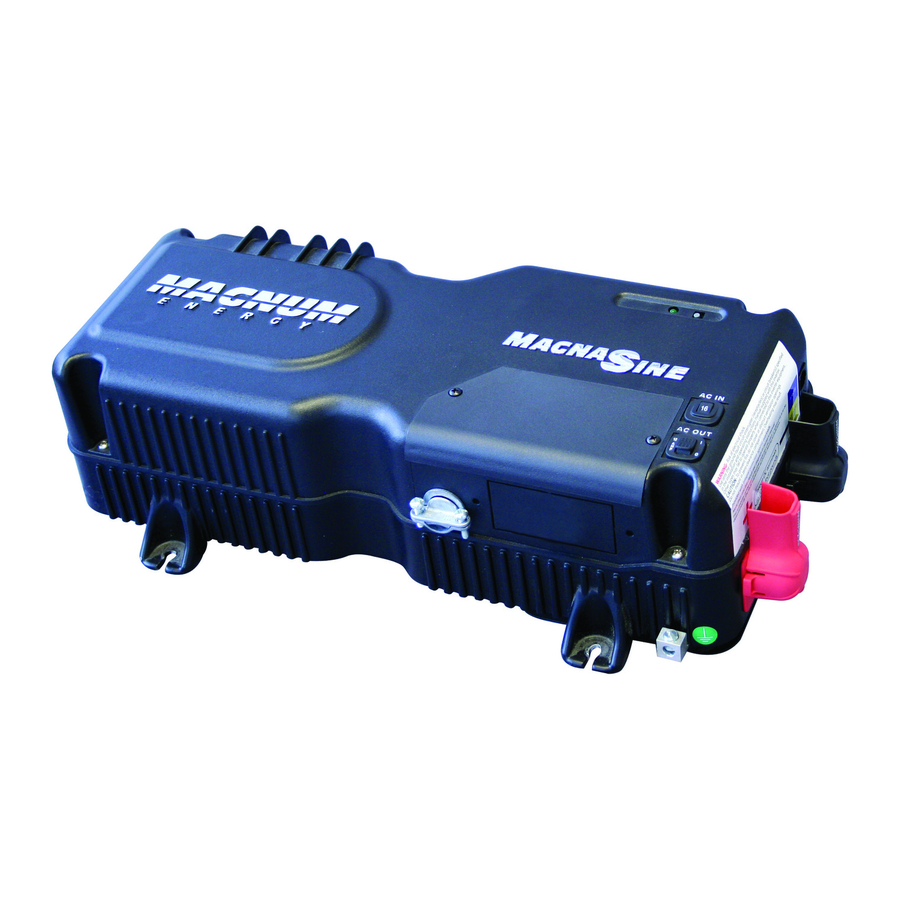
- Page 1 MMS Series Inverters/Chargers Owner’s Manual...
- Page 2 Failure of this inverter can reasonably be expected to cause the failure of that life support device or system, or to affect the safety or effectiveness of that device or system. If the MMS Series inverter fails, it is reasonable to assume that the health of the user or other persons may be endangered.
- Page 3 Safety Instructions Conventions Used in this Manual (terminology) Shorepower or External AC power – refers to alternating current (AC) provided by the utility electric power grid or from a generator. Mobile application – refers to inverters used in a recreational vehicle (RV), boat, or a truck installation.
- Page 4 Safety Instructions • Ensure all conductor insulation is of a type that is approved for the voltage, operation, temperature, and location of use. • No AC or DC disconnects are provided as an integral part of this inverter. Both AC and DC disconnects must be provided as part of the system installation.
- Page 5 Safety Instructions Symboles de sécurité Afi n de réduire les risques de choc électrique, d’incendie ou d’autres risques pour la sécurité, les symboles de sécurité suivants ont été placés tout au long de ce manuel pour indiquer les consignes de sécurité...
- Page 6 Safety Instructions • Assurez-vous que tous les isolateurs de conducteurs sont approuvés pour la tension, le fonctionnement, la température et le lieu d’utilisation. • Aucune déconnexion AC ou DC n’est fournie en tant que partie intégrante de cet onduleur. Les deux disjoncteurs AC et DC doivent être fournis dans le cadre de l’installation du système.
- Page 7 Safety Instructions • En cas d’exposition accidentelle à l’acide de la batterie, laver à fond avec de l’eau et du savon. En cas d’exposition aux yeux, les inonder pendant au moins 15 minutes avec de l’eau courante et consulter un médecin. •...
-
Page 8: Table Of Contents
Table of Contents Table of Contents Introduction ..............1 MMS Series Models ........... 1 How an Inverter/Charger Works ......... 2 Pure Sine Wave vs Modifi ed Sine Wave ......2 Appliances and Run Time .......... 2 Standard Features and Benefi ts ......... 3 1.5.1... - Page 9 Table 2-3, Wire Color to AC Wire Connection ......22 Table 3-1, Inverter Battery Turn On/Off Levels ......36 Table 3-2, Inverter/Charger Default Settings ......38 Table 4-1, Troubleshooting Guide ..........40 Table 5-1, MMS Series Specifi cations ........42 viii © 2017 Sensata Technologies...
-
Page 10: Introduction
Introduction Introduction Congratulations on your purchase of an MMS Series inverter/charger from Sensata Technologies. This product is designed especially for your small home or mobile application. Powerful, yet simple to use, this product will provide you with years of trouble-free use. -
Page 11: How An Inverter/Charger Works
Appliances and Run Time The MMS Series inverter/charger can power a wide range of household appliances. As with any appliance using batteries for power, there is a certain length of time that it can run—this is called “run time”. -
Page 12: Standard Features And Benefi Ts
Series inverter/charger has a built-in safeguard that automatically protects your batteries from being over-discharged. Standard Features and Benefi ts The MMS Series inverter/charger converts 12 volts of direct current (VDC) power from your battery to 120 volts alternating current (VAC) power. -
Page 13: Figure 1-3, Top And Left Side Features
Introduction Figure 1-3, Top and Left Side Features 1. Inverter Status Indicator – a green LED that illuminates to provide information on the inverter’s operation. 2. Power Switch – a momentary pushbutton switch that turns the inverter on or off. 3. -
Page 14: Figure 1-4, Front And Back Side Features
18. Model/Serial Number Label – includes model/serial number and provides specifi cations and information on the inverter and charger. See the MMS Series Specifi cations (Table 5-1) for more information and the different models available. © 2017 Sensata Technologies... -
Page 15: Battery Temperature Sensor
Introduction 1.5.1 Battery Temperature Sensor A plug-in external Battery Temperature Sensor (BTS) is provided for units with the battery charger feature. When installed, the BTS automatically adjusts the battery charger’s BULK, ABSORB, and FLOAT voltage set-points (based on temperature) for better charging performance and longer battery life. -
Page 16: Installation
Warning Label If items appear to be missing or damaged, contact your authorized Magnum Energy dealer or Sensata Technologies. If at all possible, keep your shipping box. It will help protect your inverter from damage if it ever needs to be returned for service. Save your proof-of-purchase as a record of your ownership (needed for any in-warranty service). -
Page 17: Figure 2-1, Mms1012 Model Basic Installation Diagram
Installation Generator Power Shorepower 120VAC Output 120VAC Output ME-AGS-N Auto Gen Start Controller MM-RC Transfer Switch INVERT BULK AC IN ABSO RB ON/OFF FAULT FLOAT ME-RC50 Main Panel 120VAC power to inverter FAULT CH G SELECT O N/O FF MMS1012 CH ARG ER O N/ O FF... -
Page 18: Figure 2-2, Mms1012-G Model Basic Installation Diagram
Installation MM-RC INVERT BULK AC IN ABSO RB ON/OFF FAULT FLOAT Tools ME-RC50 FAULT CH G SELECT O N/O FF CH ARG ER O N/ O FF I NVE RTE SH OR E AG S METER SETU P TECH Remote Controls AC OUT MMS1012 -G Inverter/Charger... - Page 19 Installation The inverter should only be installed in a location that meets the following requirements: Clean and Dry – The inverter should not be installed in an area that allows dust, fumes, insects, or rodents to enter or block the inverter’s ventilation openings.
-
Page 20: Figure 2-3, Approved Mms1012 (-G) Mounting Orientations
DC wiring connections, as they will need to be checked and tightened periodically. Refer to Figures 2-4 and 2-5 for the specifi c dimensions of the two MMS Series models. Mounting Orientation – To meet regulatory requirements, the MMS Series inverter/charger can only be mounted... -
Page 21: Wiring Guidelines
Installation Mounting holes x4 ~ 4 " [¼” (0.25") diameter] (4.625") 10.0" ~ 16 " (16.59") ~ 6 " (6.71") ~ 7 " (7.51") ~ 8 " (8.41") Figure 2-4, MMS1012 Model Dimensions 2.1.3 Wiring Guidelines • Before connecting any wires, determine all wire routes to and from the inverter throughout the home/offi... -
Page 22: Figure 2-5, Mms1012-G Model Dimensions
Installation Mounting holes x4 ~ 4 " [¼” (0.25") diameter] (4.625") 10" 16 " (16.59") ~ 5" ~ 6 " (6.71") ~ 5 " ~ 7 " (7.51") (5.125") ~ 8 " (8.41") Figure 2-5, MMS1012-G Model Dimensions • If installing in a recreational vehicle, do not attempt to use the vehicle’s metal frame in place of the negative connection or DC ground. -
Page 23: Dc Wiring
Installation DC Wiring This section describes the MMS Series inverter’s required DC wire sizes, the recommended disconnect/overcurrent protection, and how to make the DC connections to the inverter and the battery bank. 2.2.1 DC Wire Sizing It is important to use the correct DC wire to achieve maximum effi... -
Page 24: Dc Grounding
Installation Electrical systems in mobile installations typically do not require using a DC disconnect, although an overcurrent protection device is still required. Because the DC disconnect is not required, a fuse is usually used as the disconnect device in these installations. These installations also do not normally use conduit, so the fuse must be installed in the ungrounded conductor (usually the positive DC cable line) within 18 inches (45.7 cm) of the battery—to protect the DC... -
Page 25: Table 2-1, Wire/Overcurrent Device
Installation Table 2-1, Wire/Overcurrent Device Inverter Model MMS1012 MMS1012-G Maximum Continuous 133 amps 133 amps Current DC Grounding Electrode #6 AWG #6 AWG Wire Size (13.3 mm²) (13.3 mm²) #2 AWG #2 AWG Minimum DC Wire Size (33.6 mm²) (33.6 mm² (75˚C rating in free air) [170 amps] [170 amps]... -
Page 26: Dc Cable Connections
Installation 2.2.4 DC Cable Connections When connecting the DC cable to the battery or to the inverter’s DC terminals, the hardware should be installed in the correct order to prevent high resistance connections from heating up and possibly causing the connections to melt. Stack the hardware per Figures 2-6 &... -
Page 27: Battery Bank Wiring
Installation DC cable with ring lug terminal cover (snaps on) Inverter’s DC terminal 5/16" (Kep nut with star-washer) or Flange nut Figure 2-7, DC Cable to Inverter’s DC Terminals Battery Bank Wiring WARNING: Lethal currents will be present if the positive and negative cables attached to the battery bank touch each other. -
Page 28: Inverter To Battery Bank Wiring
Installation Info: To ensure the best performance from your inverter system, do not use old or untested batteries. Batteries should be of the same size, type, rating, and age. CAUTION: Install batteries in a well ventilated area. Batteries can produce explosive gasses. For compartment or enclosure installations, always vent batteries to the outside. -
Page 29: Figure 2-8, Battery String Connections
Installation DC Positive Wire Mount the DC fuse block and disconnect (or circuit breaker assembly) as near as practical to the batteries, and then open the disconnect (or circuit breaker). WARNING: DO NOT close the DC fuse/DC disconnect (or close the DC circuit breaker) to enable battery power to the inverter at this time. -
Page 30: Ac Wiring (Mms1012 Model Only)
Installation AC Wiring (MMS1012 model only) This section describes the MMS1012’s required AC wire size and overcurrent protection, and provides info on making AC connections. Info: This AC Wiring section does not apply to the MMS1012-G model. The MMS1012-G model comes wired from the factory with a power cord for the AC input and dual outlets on top of the inverter for the AC output. -
Page 31: Ground-Fault Circuit Interruption (Gfci) Breakers
Installation or circuit-breakers, and must be properly sized and rated for the wire they are protecting and the appliances being powered. Most inverter’s that are hardwired use a service/distribution panel wired to the inverter’s input (main panel), and a dedicated panel between the inverter’s output wiring and the AC loads (sub-panel). -
Page 32: Ac Wiring Connections
Installation 2.4.4 AC Wiring Connections For the MMS1012 model, the AC input and output wiring is performed in the AC wiring compartment. This compartment is accessed via the top panel (Figure 1-3, Item 8). If the panel cover is installed, remove the two Phillips screws on the cover to access the AC wiring compartment and locate the inverter’s AC wiring. -
Page 33: Ac Output Wiring
AC power source. This will cause severe damage to the inverter and is not covered under warranty. Info: When using the MMS Series inverter in an RV application—under certain conditions and provided that the wire is properly sized for the protecting breaker—... -
Page 34: Grounding Inverters
AC access cover, review all AC wiring to ensure all connections are correct and secure. Grounding Inverters The MMS Series inverter/chargers should always be connected to a permanent, grounded wiring system—which limits the risk of electrical shock, reduces radio frequency noise from the inverter, and minimizes excessive surge voltages induced by lightning. -
Page 35: Figure 2-10, Neutral-To-Ground Connection (Inverter Mode)
The MMS Series has automatic neutral-to-ground switching to specifi cally work in multiple source or mobile (i.e., truck/RV/boat) applications. The MMS inverter/charger uses an internal relay that automatically connects the AC neutral output terminal to the vehicle/ boat’s ground while inverting (Inverter mode) to provide the neutral-... -
Page 36: Disabling The Neutral-To-Ground Connection
Installation 2.5.2 Disabling the Neutral-to-Ground Connection The MMS1012 has an automatic neutral-to-ground switching feature. In installations that already have the neutral bonded to ground in the electrical panel (i.e., home/offi ce installation), this feature must be disabled by disconnecting the neutral-to-ground connection. If you are not sure whether you must disable this feature, check your local code requirements. -
Page 37: Inverter Warning Label
Installation Inverter Warning Label The warning label (Figure 2-13) is provided to inform all personnel that an inverter is installed in your electrical system. Affi x this label in a clearly visible location at the electrical panel that is being powered by the inverter. - Page 38 Installation 4. Connect a 10-25 watt light bulb to the inverter output and verify it comes on and shines normally. DO NOT connect anything larger than a 25-watt light bulb until all wiring and voltages are confi rmed to be correct. Info: The inverter’s AC output voltage will not be correct until a load greater than 5 watts (default setting) is connected to the inverter;...
-
Page 39: Operation
Inverting – When a load greater than 5 watts is connected to the inverter output, the MMS Series “inverts” the DC power from the battery and supplies 120 VAC power to your sub-panel. The inverter’s green LED fl ashes once every 2 seconds to indicate it is inverting. -
Page 40: Standby Mode
Operation 3.1.2 Standby Mode The MMS Series features an automatic transfer relay and an internal battery charger when operating in Standby mode. Standby mode begins whenever AC power (shorepower or generator) is connected to the inverter’s AC input. Once the AC voltage and frequency of the incoming AC power is within the AC input limits, an automatic AC transfer relay is activated. - Page 41 BTS is below 77°F (25°C), and decrease if the temperature around the BTS is higher than 77°F (25°C). ** The MMS Series uses changeable settings (see Table 3-2, Inverter Default Settings) that are adequate for most installations. However,...
-
Page 42: Figure 3-1, Automatic 4-Stage Charging Graph
The transfer from Standby mode to Inverter mode averages approximately 16 milliseconds. While the MMS Series is not designed as a computer UPS system, this transfer time is usually fast enough to hold them up. However, the VAC dropout setting has an effect on the ability of the loads to transfer without resetting. -
Page 43: Battery Temperature Sensor Operation
Operation Battery Temperature Sensor Operation The plug-in Battery Temperature Sensor (BTS) is used to determine the battery temperature around the batteries. This information allows the multi-stage battery charger to automatically adjust the battery charge voltages for optimum charging performance and longer battery life. -
Page 44: Protection Circuitry Operation
Operation Protection Circuitry Operation The inverter is protected against fault conditions, and in normal usage it will be rare to see any. However, if a condition occurs that is outside the inverter’s normal operating parameters, then it will shut down and attempt to protect itself, the battery bank, and your AC loads. -
Page 45: Inverter Startup
(immediate) Inverter Startup ON/OFF Switch – The MMS Series can be turned on and off by lightly pressing and releasing the Power ON/OFF switch on the front of the inverter. When the inverter is fi rst connected to the batteries, or when its automatic protection circuit has turned the inverter off, the ON/OFF switch will need to be pressed to start the unit. -
Page 46: Factory Default Settings
AC loads connected to the inverter’s output. Factory Default Settings The MMS Series inverter/charger uses default settings that are adequate for most installations (see Table 3-2). However, you can adjust these parameters using Sensata’s optional ME-RC50 remote. -
Page 47: Table 3-2, Inverter/Charger Default Settings
Operation 04 Battery Type: This setting identifi es the type of batteries being used in the system. This provides information to the charger to determine what voltage level to use to charge the batteries. 05 Charge Rate: This setting can be used to turn off the charger, or limit the amount of current that the charger can use (leaving more current available to power loads);... -
Page 48: Maintenance And Troubleshooting
Maintenance and Troubleshooting Maintenance and Troubleshooting Recommended Inverter and Battery Care The MMS Series inverter/charger is designed to provide you with years of trouble-free service. It is recommended that every 6 months you perform the following maintenance steps to ensure optimum performance and to extend the life of your batteries. -
Page 49: Troubleshooting
Maintenance and Troubleshooting Troubleshooting The MMS Series inverter/charger is a fairly simple device to troubleshoot. There are only two active circuits (AC and DC), as well as a charging circuit. Table 4-1 is designed to help you quickly pinpoint the most common inverter and charger faults. - Page 50 Maintenance and Troubleshooting Table 4-1, Troubleshooting Guide (Cont.) Symptom Possible Cause Recommended Solution Internal Fault This fault occurs when To clear this fault, an (the status an internal fault is inverter reset is required. indicator blinks detected. Remove DC power to the x5/4 secs) inverter or press and hold down the power switch on...
-
Page 51: Specifi Cations
Specifi cations Specifi cations Table 5-1, MMS Series Specifi cations MODEL MMS1012 MMS1012-G Inverter Specifi cations Input battery voltage 9 to 17 VDC Nominal AC output voltage 120 VAC +/- 5% Output frequency and accuracy 60 Hz +/- 0.1 Hz... -
Page 52: Optional Equipment And Accessories
Appendix A – Optional Equipment and Accessories Optional Equipment and Accessories The following Magnum Energy components are available for use with the MMS Series inverter/charger. Some of these items are required depending upon the intended use of the inverter. MM-RC Remote Control (LED Display) The MM-RC Remote Control is simple to use;... -
Page 53: Battery Information
Appendix B – Battery Information Battery Information Battery Bank Sizing The size of the battery bank determines how long the inverter can power the AC loads without recharging. The larger the battery bank, the longer the run time. Size your battery bank to the system’s AC load requirements and the length of time required to run the load from the batteries. -
Page 54: Figure B-2, Parallel Battery Wiring
Appendix B – Battery Information Parallel Wiring – Wiring the batteries in parallel increases the total run time the batteries can operate the AC loads. A parallel connection combines overall battery capacity by the number of batteries in the string. Even though there are multiple batteries, the voltage remains the same. -
Page 55: Figure B-4, Battery Bank Wiring Examples (12-Volt)
Appendix B – Battery Information Examples of wiring a 12-volt battery bank: overcurrent protection to 12 VDC String inverter 12 VDC (12 VDC @ 100 AH) (total capacity battery = 100 AH) (100 AH) 12-volt battery bank (one string of one 12-volt battery) overcurrent protection to 12 VDC... -
Page 56: Warranty/Service Information
Appendix C – Warranty/Service Information Warranty/Service Information C-1.1 Limited Warranty Sensata Technologies warrants this MMS Series inverter/charger to be free from defects in material and workmanship that result in product failure during normal usage, according to the following terms and conditions: 1. -
Page 57: C-1.2 How To Receive Repair Service
Appendix C – Warranty/Service Information C-1.2 How to Receive Repair Service If your product requires warranty service or repair, contact either: • An authorized service center, as listed on the our website at SensataPower.com, or • Sensata Technologies at: Telephone: 425-353-8833 Fax: 425-353-8390 Email: MagnumWarranty@Sensata.com... - Page 58 Magnum Energy Products Manufactured by: Sensata Technologies Web: www.SensataPower.com MMS Series Owner’s Manual (PN: 64-0036 Rev C)
Need help?
Do you have a question about the MMS Series and is the answer not in the manual?
Questions and answers