Table of Contents
Advertisement
Advertisement
Table of Contents
Troubleshooting

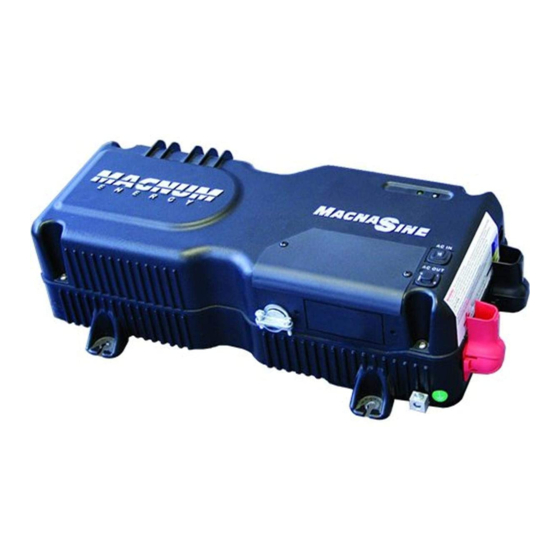
Related Manuals for Magnum Energy MMS1012


Summary of Contents for Magnum Energy MMS1012
- Page 1 MMS Series Inverters/Chargers Owner’s Manual...
-
Page 2: Contact Information
The use of this manual and the conditions or methods of installation, operation, use, and maintenance of the MMS Series Inverter/Charger are beyond the control of Magnum Energy, Inc. Therefore, this company assumes no responsibility and expressly disclaims any liability for... - Page 3 Internal capacitors remain charged after all power is disconnected. • No AC or DC disconnects are provided as an integral part of this inverter. Both AC and DC disconnects must be provided as part of the system installation. © 2010 Magnum Energy, Inc.
- Page 4 In the event of exposure to the eyes, fl ood them for at least 15 minutes with running water and seek immediate medical attention. • Recycle old batteries. SAVE ALL INSTRUCTIONS © 2010 Magnum Energy, Inc.
-
Page 5: Table Of Contents
Protection Circuitry Operation ..........32 Inverter Start-up ..............33 ON/OFF Switch ...............33 Status LED Indicator ............33 Factory Default Settings ............34 4.0 Maintenance and Troubleshooting .......36 Recommended Inverter and Battery Care .......36 RV/Marine Off-Season Storage ..........36 Resetting the Inverter ............37 © 2010 Magnum Energy, Inc. - Page 6 Figure 4, Front and Back Side Features ........5 Figure 5, Battery Temperature Sensor (BTS) ......6 Figure 6, MMS1012 Model Basic Installation Diagram ....8 Figure 7, MMS1012-G Model Basic Installation Diagram ....9 Figure 8, Approved Mounting Orientations ........12 Figure 9, MMS1012 Model Inverter/Charger Dimensions ....12...
-
Page 7: 1.0 Introduction
MMS Series Models MMS1012 - a 1000 watt inverter/charger with 20 amp AC transfer capability and a 50 amp, 4-stage Power Factor Correction (PFC) charger. The AC input and output are provided with pigtail wires to allow hardwiring to a main AC distribution panel and to an inverter sub-panel. -
Page 8: How An Inverter/Charger Works
Other factors such as the battery’s state of charge and temperature can also affect the length of time your appliances can run. © 2010 Magnum Energy, Inc. -
Page 9: Standard Features And Benefi Ts
– within the DC input voltage range and the continuous output power level. • Quick connection accessory and remote ports – easily accept several optional remote controls and the Battery Temperature Sensor. © 2010 Magnum Energy, Inc. -
Page 10: Figure 3, Top And Left Side Features
DC grounding system. This terminal accepts CU/AL conductors from #14 AWG to #6 AWG. 12. GFCI Outlet - Ground Fault Circuit Interrupter outlet (with test and reset capability). Only available on MMS1012-G model. © 2010 Magnum Energy, Inc. -
Page 11: Figure 4, Front And Back Side Features
18. Model/Serial Number Label - includes model/serial number and provides specifi cations and information on the inverter and charger. See the MMS Series Specifi cations on page 38 for more informa- tion and the different models available. © 2010 Magnum Energy, Inc. -
Page 12: Battery Temperature Sensor
F R O N T V IE W ~¾ ” 0 .3 7 5" d ia m e te r Ca b le S ID E V IE W ~½ ” Figure 5, Battery Temperature Sensor (BTS) © 2010 Magnum Energy, Inc. -
Page 13: 2.0 Installation
Record the unit’s model and serial number in the front of this manual in case you need to provide this information in the future. It is much easier to record this information now, instead of trying to gather it after the unit has been installed. © 2010 Magnum Energy, Inc. -
Page 14: Figure 6, Mms1012 Model Basic Installation Diagram
(o p tio n a l ) o ve rcu rre n t d e vice O utlet B attery B ank T ools VC R A C Loads Figure 6, MMS1012 Model Basic Installation Diagram © 2010 Magnum Energy, Inc. -
Page 15: Figure 7, Mms1012-G Model Basic Installation Diagram
A C Loads d e vice T ools VC R B attery B ank Figure 7, MMS1012-G Model Basic Installation Diagram © 2010 Magnum Energy, Inc. -
Page 16: Locating And Mounting The Inverter
68° F (20° C) rise in compartment tem- perature. Minimum clearances can be reduced if airfl ow is increased, but in no case should clearance around the inverter be less than 2” (5 cm) on all sides. © 2010 Magnum Energy, Inc. - Page 17 If this unit is used in a mobile application, you may want to place fl exible washers or bushings between the mounting surface and the inverter’s mounting fl anges to reduce vibration. After the inverter has been properly mounted, proceed to the DC Wiring section. © 2010 Magnum Energy, Inc.
-
Page 18: Figure 8, Approved Mounting Orientations
Shelf Mounted (right-side up) Shelf Mounted (up-side down) Wall Mounted (up-side down) Figure 8, Approved MMS1012 (-G) Mounting Orientations M ounting holes x 4 ~ 4 ⅝ " [¼ ” ( 0.25 ") diam eter ] ( 4.625 ") 10 .0"... -
Page 19: Wiring Guidelines
” (7.51 ") ½ (5.125 ") ” (8 .41 ") 7/16 Figure 10, MMS1012-G Model Inverter/Charger Dimensions Wiring Guidelines • Before connecting any wires, determine all wire routes to and from the inverter throughout the RV, vehicle, or boat. •... -
Page 20: Dc Wiring
(-), and GREEN for DC ground. The DC wires must have soldered and crimped lugs, crimped copper compression lugs, or aluminum mechanical lugs. Soldered connec- tions alone are not acceptable for this application. © 2010 Magnum Energy, Inc. -
Page 21: Dc Overcurrent Protection
Note 3 - Wire size is based on the requirements needed to increase effi ciency and reduce stress to the inverter. Note 4 - The next larger standard size overcurrent device may be used if the de-rated cable ampacity falls between the standard overcurrent devices found in the NEC. © 2010 Magnum Energy, Inc. -
Page 22: Dc Grounding
(-) cable to the vehicle’s safety ground. Only connect to the inverter’s negative battery terminal. If there are any non-factory installed appliances onboard the vehicle, DO NOT ground them at safety ground. Only ground them at the negative bus of the DC load center (as applicable). © 2010 Magnum Energy, Inc. -
Page 23: Dc Cable Connections
(snaps on) Inverter’s D C term inal ” (Kep 5 /16 nut w ith star-w asher) or F lange nut Figure 12, DC Cable to Inverter’s DC Terminals © 2010 Magnum Energy, Inc. -
Page 24: Battery Bank Wiring
Inverter to Battery Bank Wiring WARNING: Ensure all sources of DC power (i.e., bat- teries) and AC power (shore power or AC generator) are de-energized (i.e., breakers opened, fuses removed) before proceeding. © 2010 Magnum Energy, Inc. -
Page 25: Dc Ground Wire
This will occur in the Functional Test after the installation is complete. Route and connect an appropriately sized DC positive wire (RED) from the DC fuse block (or circuit breaker assembly) to the inverter’s posi- tive DC terminal. © 2010 Magnum Energy, Inc. -
Page 26: Ac Wiring
It also provides information on how to make the AC connections. Info: The MMS1012-G model has a power cord for AC input and dual outlets on top of the inverter for AC output, however, it has hardwiring capability as well. -
Page 27: Ac Wiring Connections
2.0 Installation AC Wiring Connections For the MMS1012 model, the AC input and output wiring is performed in the AC wiring compartment. This compartment is accessed via the top panel (see Figure 3, Item 8). If the panel cover is installed, remove the two Phillips screws on the cover to access the AC wiring compartment and locate the inverter’s AC wiring. -
Page 28: Ac Input Wiring
Wire Breaker Wire Breaker Breaker Breaker Size Size Size Size MMS1012 20 amps #12 AWG 20 amps 15 amps #14 AWG 15 amps MMS1012 20 amps #12 AWG 20 amps 15 amps #14 AWG 15 amps AC Input Wiring Your inverter has an AC transfer feature that passes the AC input power to the inverter’s output. -
Page 29: Figure 13, Ac Wiring Connections (Mms1012 Model)
AC O UT AC IN Figure 14, AC Hardwiring Connections (MMS1012-G model) Info: The MMS1012-G model has a power cord for AC input and a factory-installed dual outlet on top of the inverter for AC output. © 2010 Magnum Energy, Inc. -
Page 30: Ac Output Wiring
The AC output wiring in the inverter should be complete. Before reattaching the AC access cover, review all AC wiring to ensure all connections are correct and secure. © 2010 Magnum Energy, Inc. -
Page 31: Ground-Fault Circuit Interruption Breakers
Verify the voltage is 120 VAC +/- 5 VAC. If not using a true RMS meter the output AC voltage could indicate from 90 to 130 VAC, depending on the bat- tery voltage. © 2010 Magnum Energy, Inc. - Page 32 If the inverter passes all the steps, the inverter is ready for use. If the inverter fails any of the steps, refer to the Troubleshooting section. © 2010 Magnum Energy, Inc.
-
Page 33: 3.0 Operation
The amount of time the inverter can be inverting and providing power is directly related to the amount of AC loads that are connected and the capacity of the battery bank. © 2010 Magnum Energy, Inc. -
Page 34: Standby Mode
2. The AC input voltage falls < 85 VAC – the charger reduces the charge current to zero to help stabilize the incoming AC voltage; or 3. FET Temperature. © 2010 Magnum Energy, Inc. - Page 35 ** The MMS Series uses changeable settings (see Table 6, Inverter Default Settings) that are adequate for most installations. However, if you determine that some of your operating parameters need to be changed, the ME-RC50 remote control can be purchased to allow changes to those settings. © 2010 Magnum Energy, Inc.
-
Page 36: Figure 15, Automatic 4-Stage Charging Graph
VAC dropout setting – which in turn determines the VAC dropout threshold. Info: When switching from Inverter Mode to Standby Mode, the inverter waits approximately 15 seconds to ensure the AC source is stable before transferring. © 2010 Magnum Energy, Inc. -
Page 37: Figure 16, Bts Temperature To Charge Voltage Change
N o C hange -0. 15V -0.15 -0 .3V -0.3 -0. 45V -0.45 -0 .6V -0.6 -0. 75V -0.75 104F 113F 122F Tem perature reading from BTS Figure 16, BTS Temperature to Charge Voltage Change © 2010 Magnum Energy, Inc. -
Page 38: Protection Circuitry Operation
The inverter’s status LED turns OFF to indicate the over-temperature fault condition. The inverter will automatically restart after the units cools down. © 2010 Magnum Energy, Inc. -
Page 39: Inverter Startup
Blinks On (once every second) - The inverter is on and is using energy from the battery. The inverter is either providing full power to the loads connected to the inverter, or it’s in Search Mode and ready to supply AC power to the connected loads. © 2010 Magnum Energy, Inc. -
Page 40: Factory Default Settings
This protects the batteries from over-discharge and the AC loads from unregulated power (brown-outs). * Visit www.magnumenergy.com for more information. © 2010 Magnum Energy, Inc. -
Page 41: Table 6, Inverter/Charger Default Settings
Search Watts LowBatCutOut 10.0 VDC 400 AmpHrs Battery AmpHrs (Absorb Time = 120 minutes) Flooded - Liquid Lead Acid Battery Type (Bulk = 14.6 VDC, Float = 13.4 VDC) Charge Rate 100% VAC dropout 80VAC © 2010 Magnum Energy, Inc. -
Page 42: 4.0 Maintenance And Troubleshooting
Fully charge the batteries. • Connect shore power (if available) and verify that the breaker to the battery charger is switched ON. • Verify the inverter is switched OFF. • Switch OFF all unnecessary AC and DC loads. © 2010 Magnum Energy, Inc. -
Page 43: Resetting The Inverter
S ta tu s L E D In d ica to r P o w e r O N/O FF p u sh b u tto n Figure 17, Resetting the Inverter © 2010 Magnum Energy, Inc. -
Page 44: Table 7, Troubleshooting Guide
If the Battery Temperature Sensor is This is normal. DC charge voltage is installed, it will increase or decrease higher or lower than the DC voltage level depending on expected. temperature around the battery sensor. © 2010 Magnum Energy, Inc. -
Page 45: 5.0 Specifi Cations
16.6”x 8.4”x 4.7” (42cm x 21cm x 12cm) Mounting Shelf or wall (no vents facing downward) Weight 23 lbs. (10.4 kg) Shipping weight 25 lbs. (11.3 kg) Specifi cations @ 25° C - Subject to change without notice © 2010 Magnum Energy, Inc. -
Page 46: Appendix A - Optional Equipment And Accessories
DISABLE the inverter function when a 12 volt DC signal is removed. Ignition Switch Activate The MM-ISA (Ignition Switch Activate) is a pigtail adapter is designed to automatically ENABLE the inverter function when a 12 volt DC signal is supplied. © 2010 Magnum Energy, Inc. -
Page 47: Appendix B - Battery Information
– resulting in a 12 VDC/200 AHr bank. overcurrent protection 6 volts 6 volts 12 VDC (200 AHrs ) (200 AHrs ) Inverter 12 volt battery bank (total capacity = 200 AHrs) Figure 18, Series Battery Wiring © 2010 Magnum Energy, Inc. -
Page 48: Parallel Wiring
(200 AHrs ) (200 AHrs ) String 1 6 volts 6 volts 12 VDC String 2 (200 AHrs ) (200 AHrs ) Inverter 12 volt battery bank (total capacity = 400 AHrs) Figure 20, Series-Parallel Battery Wiring © 2010 Magnum Energy, Inc. -
Page 49: Figure 21, Battery Bank Wiring Examples (12-Volt)
(6 VDC + 6 VDC) battery battery (200 AH) (200 AH) 12 volt battery bank (two strings of two 6-volt batteries wired in series and connected in parallel) Figure 21, Battery Bank Wiring Examples (12 volt) © 2010 Magnum Energy, Inc. -
Page 50: Appendix C - Warranty/Service Information
Appendix C - Warranty/Service Information Appendix C - Warranty/Service Information Limited Warranty Magnum Energy, Inc., warrants this MMS Series Inverter/Charger to be free from defects in material and workmanship that result in product failure during normal usage, according to the following terms and conditions: 1. -
Page 51: How To Receive Repair Service
How to Receive Repair Service If your Product requires warranty service or repair, contact either: 1. An Authorized Service Center, as listed on the Magnum Energy web- site at http://www.magnumenergy.com/ServiceCenters.htm, or 2. Magnum Energy, Inc. at: Telephone: 425-353-8833 Fax: 425-353-8390 Email: warranty@magnumenergy.com... - Page 52 Magnum Energy, Inc. 2211 West Casino Rd. Everett, WA 98204 Phone: 425-353-8833 Fax: 425-353-8390 Web: www.magnumenergy.com © 2010 Magnum Energy, Inc. PN: 64-0036 Rev A...
Need help?
Do you have a question about the MMS1012 and is the answer not in the manual?
Questions and answers