Zodiac Heat Select ZS500 Series Instructions For Installation And Use Manual
Hide thumbs
Also See for Heat Select ZS500 Series:
- Instructions for installation and use manual (20 pages) ,
- Instruction manual (6 pages) ,
- Instruction manual (3 pages)

Related Manuals for Zodiac Heat Select ZS500 Series


Summary of Contents for Zodiac Heat Select ZS500 Series
- Page 1 Instructions for installation and use - English Heat pump Translation of the original instructions in French More documents on: www.zodiac.com H0430700_REVJ - 2019/04...
- Page 2 • Zodiac® heat pump, filtration pump and filter appliances are compatible with the most commonly used types of pool water treatment systems. • Do not touch the fan or moving parts and do not place any objects or your fingers in the vicinity of the moving parts during operation of the appliance.
-
Page 3: Table Of Contents
It is prohibited to distribute or modify this document in any way without authorisation from • Zodiac®. Zodiac® is constantly developing its products to improve their quality; therefore, the • information contained in this document may be modified without notice. -
Page 4: ❶ Installation
❶ Installation 1.1 I Selecting the location • When installed with and protected by an appropriate Residual Current Device (RCD) having a maximum trip current rating of 30mA, the appliance must be installed at 2 metres, minimum, from the surrounding edge of the pool. •... -
Page 5: I Hydraulic Connections
1.2 I Hydraulic connections • The device will be connected with a Ø50 PVC pipe, using the half union connectors supplied (see § “5.1 I Description”), to the pool's filtration circuit, after the filter and before the water treatment. • Respect the direction of hydraulic connection. •... -
Page 6: I Electricity Supply Connections
1.3 I Electricity supply connections • Before performing any work inside the device, you must disconnect the electrical power supply to the appliance as there is a risk of electric shock which may cause material damage, serious injury or even death. •... -
Page 7: I Option Connections
1.4 I Option connections Connecting the "Heating priority" and "On/off command" options: • Before any work inside the appliance, you must disconnect the electrical power supply to the appliance to the appliance as there is a risk of electric shock which may cause material damage, serious injury or even death. -
Page 8: ❷ Use
❷ Use 2.1 I Operating principle Your heat pump uses the calories (heat) in the air to heat up your pool’s water. The process to heat your pool’s water to the temperature you want may take a few days as it depends on the weather conditions, your heat pump’s power and the difference between the water temperature and the temperature you want. -
Page 9: I Operating
2.3 I Operating • Check that there are no tools or other foreign objects in the machine. • The panel that provides access to the technical section must be put in place. • Set the valves as follows: valve B wide open, valves A, C, D and E closed. : water entry valve : by-pass valve : water exit valve... -
Page 10: I User Functions
2.4 I User functions 2.4.1 Adjusting the temperature set point: • Press to increase the temperature by 0.5 °C, • Press to reduce the temperature by 0.5 °C. The heat pump stops automatically when the pool reaches the required temperature. 2.4.2 Using the different operating modes This heat pump has three operating modes: Operating mode... -
Page 11: I Presentation Of The Menu
2.5 I Presentation of the menu To access the menu, press To browse the menus and modify the values, press To validate a selection, press To go back in the menus, press Select the language for the interface Set the current day and time For faster heating For optimised operation For economic and silent operation... -
Page 12: ❸ Maintenance
❸ Maintenance 3.1 I Winterizing • Winterizing is vital to prevent the condenser from being damaged due to freezing. This is not covered by the warranty. • To avoid damaging the equipment with condensation, do not fully cover it; a winterizing cover is provided. -
Page 13: ❹ Troubleshooting
❹ Troubleshooting • Before you contact your reseller, please carry out these few simple checks using the following tables if a problem occurs. • If the problem continues contact your reseller. • : Actions reserved for a qualified technician 4.1 I Device behaviour •... -
Page 14: I Error Code Display
4.2 I Error code display Display Possible causes Solutions Resetting Error 01 Check the RJ11 and RJ45 Bad connection between the A1 Automatic (if fewer connectors on the link cable between and A2 boards than 4 faults per Communication the boards fault between the hour) or press regulation board... -
Page 15: I Additional Menus
Display Possible causes Solutions Resetting Error 12 Sensor is faulty or offline (J13 ST5 sensor error Reconnect or change the sensor Press connector) compressor discharge sensor Error 13 Sensor is faulty or offline (J16 ST4 sensor fault fluid line Reconnect or change the sensor Press connector) sensor Error 14... -
Page 16: I Wiring Diagrams
4.4 I Wiring diagrams 4.4.1 ZS500 MD4-MD5-MD8... - Page 17 4.4.2 ZS500 TD5-TD8...
-
Page 18: ❺ Specifications
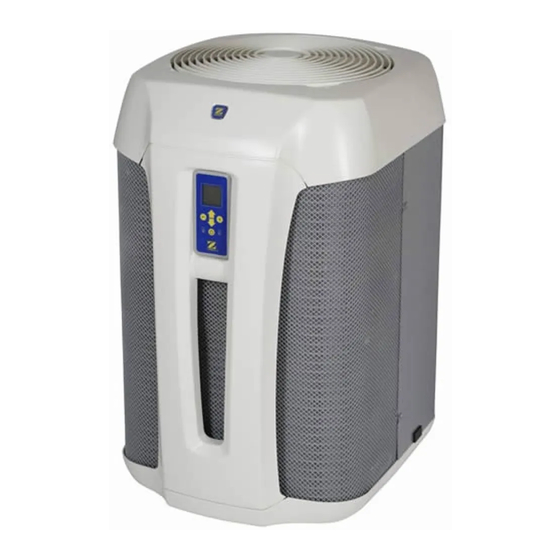
❺ Specifications 5.1 I Description ZS500 Ø50 connector to be glued (x2) Condensation evacuation kit (Ø18) Winterizing cap (x2) Winterizing cover Heating priority Kit for remote control Plant room kit Condensate pan PAC NET (cleaning product) : supplied : available as an accessory... -
Page 19: I Technical Specifications
5.2 I Technical specifications ZS500 -12 to 40 °C Operating temperature range water 12 to 32 °C Voltage 220-240V-50Hz 220-240V-50Hz 380-415V-50Hz 220-240V-50Hz 380-415V-50Hz Acceptable variation in voltage ± 6 % (during operation) Pollution class Pollution degree Overvoltage category Nominal absorbed intensity Maximum absorbed intensity 13.9 mm²... - Page 20 Your retailer Modèle appareil Appliance model Numéro de série Serial number Pour plus d’informations, enregistrement produit et support client : For more information, product registration and customer support: www.zodiac.com ZODIAC® is a registered trademark of Zodiac International, S.A.S.U., used under license.
Need help?
Do you have a question about the Heat Select ZS500 Series and is the answer not in the manual?
Questions and answers