Table of Contents
Advertisement
Advertisement
Table of Contents

Subscribe to Our Youtube Channel
Related Manuals for Huvitz Excelon EZ


Summary of Contents for Huvitz Excelon EZ
- Page 1 Excelon EZ Operator’s Manual Operator’s Manual Excelon EZ...
-
Page 2: Important Notice
HUVITZ reserves the right to make changes in its products or product specifications at any time without prior notice and is not required to update this documentation to reflect such changes. -
Page 3: Table Of Contents
Excelon EZ Operator’s Manual Contents IMPORTANT NOTICE ..................2 1. Introduction ....................6 1.1 System Configuration................6 1.2 Main Features ..................6 1.3 Classification ................... 7 2. Safety Information..................8 2.1 Introduction..................... 8 2.2 Safety Symbols ..................9 2.3 Environment factors ................10 2.4 Safety Precaution .................. - Page 4 Excelon EZ Operator’s Manual 5.4 Edging Process..................34 5.4.1 Main Screen..................34 5.4.2 Layout & Edging Options ............... 35 5.4.3 Starting a New Job & Loading a Job ..........37 5.4.4 Loading an Internal Data ..............39 5.4.5 Toggle Lens Side ................40 5.4.6 Layout Grid ..................
- Page 5 Excelon EZ Operator’s Manual 7.4 Wheel Dressing..................72 7.5 Wheel Usage Information ..............74 7.6 Maintenance Tips.................. 75 Standard Accessory ..................76 Specification..................... 77 Drawings of System ..................78...
-
Page 6: Introduction
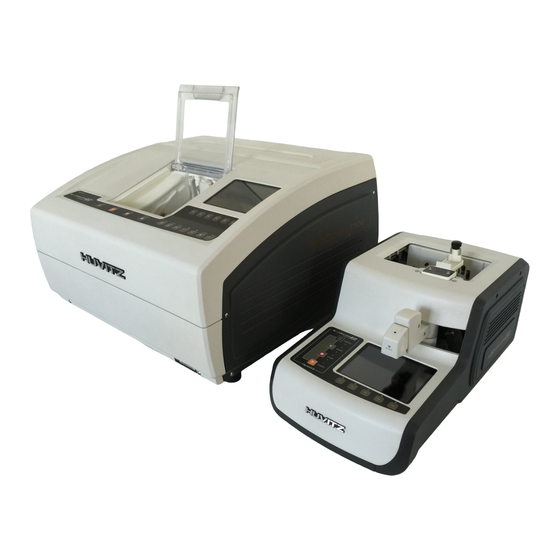
Excelon EZ Operator’s Manual 1. Introduction 1.1 System Configuration • Edger (CPE-3000) • Frame Reader & Blocker (CFR-3000) 1.2 Main Features • All the finishing processes, tracing to edging, are fully operated with the advanced 3D Digital Technology optimizing the productivity and efficiency. -
Page 7: Classification
Excelon EZ Operator’s Manual precisely scanned with 3D technology ensuring no margin of error. • The compete harmony between the robust hardware and the machining algorithm makes the whole machining processes much more stable and fast. 1.3 Classification • Protection against electric shock: Class I(earthed) •... -
Page 8: Safety Information
Excelon EZ Operator’s Manual 2. Safety Information 2.1 Introduction Safety is everyone’s responsibility. The safe use of this equipment is largely dependent upon the installer, user, operator, and maintainer. It is imperative that personnel study and become familiar with this entire manual before attempting to install, use, clean, service or adjust this equipment and any associated accessories. -
Page 9: Safety Symbols
Excelon EZ Operator’s Manual 2.2 Safety Symbols The International Electro technical Commission (IEC) has established a set of symbols for medical electronic equipment, which classify a connection or warn of any potential hazard. The classifications and symbol s are shown below. -
Page 10: Environment Factors
Excelon EZ Operator’s Manual 2.3 Environment factors Avoid the following environments for operation or storage: Where the equipment is exposed to water vapor. Don’t operate the equipment with a wet hand. Where the temperature changes extremely. - Operation Temperature: 10 ~ 40°C (Humidity : 50 ~ 80%) - Storage Temperature : -20 ~ 85°C (Humidity : 50 ~ 80%) -
Page 11: Safety Precaution
Excelon EZ Operator’s Manual Where the equipment is subject to excessive shocks or vibrations. Be careful not to be inserted dust, especially, metal Be careful not to close the fan located on the lateral or backside of the equipment. Pull out the power cord with holding the plug, not the cord. - Page 12 ③ The equipment must be operated only by, or under direct supervision of a properly trained and qualified person. ④ The service technician of Huvitz or the technician authorized by Huvitz may only carry out modifications of this equipment. ⑤ Customer maintenance of this equipment may only be performed as stated in the User’s Manual and Service Manual.
- Page 13 Excelon EZ Operator’s Manual ⑨ Only person who has undergone proper training and instructions are authorized to install, use, operate, and maintain this equipment. ⑩ Keep the User’s Manual and Service Manual in a place easily accessible at all times for persons operating and maintaining the equipment.
- Page 14 Excelon EZ Operator’s Manual WARNING • Be sure that any part of human body is not interfered with the edging wheel during the operation. Otherwise, the person may be seriously hurt. • Edging room cover should be fully closed during the lens finishing process. If the lens is broken during the process, the broken pieces of lens may cause the damage to the person.
- Page 15 Excelon EZ Operator’s Manual WARNING • Do not disassemble the product without the proper training. It may cause the electric shock, serious hurt during the operation or cause the malfunction of the product. • Be sure the material of lens is matched with the job options selected in the display before starting the edging mode.
- Page 16 Excelon EZ Operator’s Manual CAUTION • When moving the equipment, first fix the stage and check whether the power supply is off. Then, two persons should lift the bottom of the product with both hands. • In case of setting down the equipment, make sure not to be interfered with the obstacles.
-
Page 17: System Configurations
Excelon EZ Operator’s Manual 3. System Configurations 3.1 Edger Front View Main Switch Main display window Edger Control Panel Edging Room Cover Edging Room Lens Feeler Clamp Main Wheel Rear View Power Input for Pump I Main Power Input and Fuse... - Page 18 Excelon EZ Operator’s Manual For Edging Polycarbonate...
-
Page 19: Frame Reader & Blocker
Excelon EZ Operator’s Manual 3.2 Frame Reader & Blocker Front View Work Space for Stylus Lens Adaptor Setter & Switch Lever Control Panel Display Window Gripper Gripping Bar Stylus Rear View Power Input & Fuse Holder Main Switch Interface Terminal... -
Page 20: Standard Accessory (Tool Box)
Excelon EZ Operator’s Manual 3.3 Standard Accessory (Tool Box) Lens Adaptor Lens Adaptor Holder LEAP-Ⅲ Tape Clamp Adaptor Fuse(250V,10A) Lens Adaptor Remover Standard Frame Standard Pattern Pattern Holder Standard JIG for Edger Wrench Set Carriage-Fixing Bracket Feeler Assembly-Fixing Dressing Sticks... -
Page 21: Installation Procedure
Excelon EZ Operator’s Manual 4. Installation Procedure 4.1 Edger ① Remove the shock-absorbing material from the packing box and pull out the Edger carefully. ② Unfasten the screw at the Edger Front Cover and lift it open. ③ Remove the Edger Left Cover. -
Page 22: Frame Reader & Blocker
Excelon EZ Operator’s Manual [Connecting the Water Drain Hose] [ Connecting the Water Supply Hose ] Fixing Clip for Water Drain Hose NOTE • Fill up 2/3 of the tank with water and make sure that the water supply hose is not dragged below the pump, and is not folded or interfered with other objects. -
Page 23: Operation
Excelon EZ Operator’s Manual 5. Operation 5.1 Frame Reader Control Panel Control Button Function Button [MENU] Configuration [SEND] Transmit frame(pattern) data to the edger [STOP] Stop tracing [START] Start tracing [Function Button] Select function... - Page 24 Excelon EZ Operator’s Manual Frame Tracing ① Place the frame between the upper grippers and the lower grippers. ② Move the frame in order that the right frame is located at the central position in right side grippers. ③ Press the [START] button to...
- Page 25 • The frame data will be transmitted automatically after finishing the tracing. • Press the [SEND] button to retransmit data manually. • Excelon EZ tracer adapts monocular tracing method, so it can only read right side of the frame(Left side data duplicated symmetrically).
- Page 26 Excelon EZ Operator’s Manual Pattern Tracing ① Place pattern or demo lens to the Pattern Holder. ② Place Pattern Holder to the pattern holder hole of the tracer. ③ Press the [START] button to select the side of the pattern(RIGHT, LEFT).
-
Page 27: Blocker
Excelon EZ Operator’s Manual 5.2 Blocker Blocker Screen Lens adaptor position Blocking guideline Blocking ① Insert the Lens Adapter into the Lens Adapter Setter (Pay attention on the direction). ② Mark the lens at its optical center using Lensmeter. - Page 28 Excelon EZ Operator’s Manual ③ Place the marked Lens over the LCD screen. ④ Move the lens according to the guideline on the LCD screen. ⑤ Turn the Switch Lever to place the Lens Adapter Setter over the Lens and press it to complete...
- Page 29 Excelon EZ Operator’s Manual NOTE • Adjusting the lens position All marking points of the lens must located in horizontal guideline and the center of the marking point must meet the vertical guideline.
- Page 30 Excelon EZ Operator’s Manual Active Blocking vs Passive Blocking There are two methods for blocking. Active blocking is to locate the Lens Adapter to the optical center of the lens. On the other hand, Passive blocking is to locate the Lens Adapter to the center of the frame which is called ‘Boxing center’.
- Page 31 NOTE • Excelon EZ adopts Passive blocking as a default. • According to the blocking method, Excelon EZ calculates blocking position and display guideline on the LCD screen automatically. • User only place the lens to the guideline on the LCD screen regardless of the blocking method.
-
Page 32: Edger
Excelon EZ Operator’s Manual 5.3 Edger Main Display & Control Panel Main Display [F1] ~ [F6] Function Button [MENU] Menu Selection Option Control Button [LOAD] : Load data [BLOCK] : Transmit data to the Blocker [R/L] : Toggle lens side... - Page 33 Excelon EZ Operator’s Manual Edging Control Panel [CLAMP] [START] [STOP] [RETOUCH] Clamping Start Edging Process Stop Edging Process Start Retouching ! NOTE • [-]/[+] button used as Lens Position button while edging. • Be sure that Lens Position Button only works during Roughing process. It is useful to adjust the lens position if the lens exceeds the wheel range because of the thickness.
-
Page 34: Edging Process
Excelon EZ Operator’s Manual 5.4 Edging Process 5.4.1 Main Screen All the processes can be completed on one-page display. Center of the main screen shows frame shape in actual measurement. Frame information displayed on top of the screen. And right side of screen shows layout option values. -
Page 35: Layout & Edging Options
Excelon EZ Operator’s Manual 5.4.2 Layout & Edging Options Layout & Edging options displayed in the bottom button area. Most frequently used options are located in main option bar and remains are located in sub option bar. Option bar can be toggled by [MENU] button(Main <-> Sub). - Page 36 Excelon EZ Operator’s Manual Sub Options [F1] [F2] [F3] [F4] [F5] [F6] [F1] Boxing Center Optical Center [F2] Normal Edging Fragile Mode [F3] Clamp Pressure Normal High [F4] Edging Size Retouch Size [F5] Internal Data Square Ellipse Sample Frame Circle...
-
Page 37: Starting A New Job & Loading A Job
Excelon EZ Operator’s Manual 5.4.3 Starting a New Job & Loading a Job Starting a New Job When the edger receives data from the tracer, new job is started. Job number assigned in reqular sequence and displayed on top of the LCD screen(#001). Frame data displayed on the center of the screen in actual measurement. - Page 38 • In the middle of edging process, edger didn’t receive new data from the tracer for preventing a falling-off in edging quality. • Excelon EZ couldn’t handle more than one job. If new job started, the previous job deleted permanantly.
-
Page 39: Loading An Internal Data
Excelon EZ Operator’s Manual 5.4.4 Loading an Internal Data Internal data used for testing the edger. Total 5 data(Square, Ellipse, Sample frame, Circle, Pentagon) are saved in the memory Press the [MENU] button to change option bar. Press the [F5] button to select internal data. -
Page 40: Toggle Lens Side
Excelon EZ Operator’s Manual 5.4.5 Toggle Lens Side Press the [R/L] button to toggle lens side. Right Side Left Side The side icon will be changed if the edging process is finished. Before edging Edging completed Exchange R/L data When you trace pattern, if you select wrong lens side you can exchange it easily. -
Page 41: Layout Grid
Excelon EZ Operator’s Manual 5.4.6 Layout Grid Press the [MENU] button and the [DOWN] button together to display grids. Using this grid ruler, you can identify the dimension of each elements such as the size of frame, the distance from the far vision center to the near vision center and the size of near vision area and so on. -
Page 42: Digital Pattern
Excelon EZ Operator’s Manual 5.4.7 Digital Pattern Digital Pattern modifies the lens shape in left/right, top/bottom as well as circumference and optimizes the fitting challenge for rimless. Press the [MENU] button to change option bar. Press the [F6] button to select digital pattern. - Page 43 Excelon EZ Operator’s Manual ! NOTE • For the half-framed lens or the rimless lens, the digital pattern provides the convenient reformation. The redesign of the frame shape could be done easily using the digital pattern. • For the bi-focal lens or the progressive, the digital pattern makes the near vision area included within the frame.
-
Page 44: Safety Check
Excelon EZ Operator’s Manual 5.4.8 Safety Check The following two safety checking is executed before start edging process. Lens Adapter interference PD eccentricity (for optical center mode) If there is any problem while executing the safety check, warning messages will be displayed. -
Page 45: Start Edging Process
Excelon EZ Operator’s Manual 5.4.9 Start Edging Process After selecting all the options, press the [START] button to execute the lens edging process. Edging progress screen will be displayed on LCD for the convenience. On the edging progress screen, current edging step, detail of the edging step, edging position, bevel position and lens thickness displayed in real-time. -
Page 46: Retouching
Excelon EZ Operator’s Manual 5.4.10 Retouching If you need the size adjustment after finishing the lens edging, change the retouch size value. Be sure that retouch will be only executed after finishing the lens edging. After finshing the lens edging, retouch size icon selected automatically. -
Page 47: Data Sync
Excelon EZ Operator’s Manual 5.4.11 Data Sync To prevent discrepancy of frame information between the edger and the frame reader, frame information is synchronized in real-time. If the operator changes a option in the edger, the same option in the tracer changed automatically and vice versa. -
Page 48: Summary Of The Edging Process
Excelon EZ Operator’s Manual 5.4.12 Summary of the Edging Process Tracing (Frame Reader) ① Place the frame between the upper grippers and the lower grippers. ② Press the [START] button and then select the frame material. ③ After finishing the tracing, enter bridge size. - Page 49 Excelon EZ Operator’s Manual Layout (Edger) ⑤ Start new job with the data received from the tracer. ⑥ Change the PD and OH values if needed. ⑦ Press [F4] button select lens material(plastic, polycarbonate, hi-index, glass, trivex). ⑧ Press [F5]...
- Page 50 Excelon EZ Operator’s Manual Operation Tips • According to the Edging Options, Beveling position can be selected independently. ☞ Ratio (%) from the Front side of the lens ☞ Distance (mm) from the Front side of the lens ☞ Distance (mm) from the Rear side of the lens ☞...
- Page 51 Excelon EZ Operator’s Manual double of the designated value, the machine internally forces it to be machined by the 50% of the thickness at the thin position. ! NOTE Frame Material, Lens Material and Lens Thickness may affect the quality of Lens Fitting.
- Page 52 Excelon EZ Operator’s Manual Blocking (Blocker) ⑪ Mark the lens at its optical center using Lensmeter. ⑫ Place the marked lens over the LCD screen. And then adjust lens position according to the guideline on the LCD screen. ⑬ Turn the Switch Lever to place the Lens Adapter Setter over the lens and press it to complete the blocking job.
-
Page 53: Using Bi-Focal Lens
Excelon EZ Operator’s Manual 5.4.13 Using Bi-focal Lens Layout (Edger) ① Press the [F1] button to change Bi-focal mode. ② Adjust near vision area size. ③ Press the [F2] button until the PD type option icon changed to near PD and then change PD value. - Page 54 Excelon EZ Operator’s Manual Blocking (Blocker) ⑤ Bi-focal guidline displayed on the frame reader LCD screen, ⑥ Place the Bi-focal lens over the LCD screen. ⑦ Adjust near vision position according to the guidline. ⑧ Press Lens Setter to blocking.
- Page 55 Excelon EZ Operator’s Manual ! NOTE • In case of executing the options for Bi-Focal(Near Vision) and Bland Lens (Near Vision) , Near Vision Shape will be displayed on the LCD screen. If you input the diameter, you can see the frame shape similar to the actual lens shape and check the interference.
-
Page 56: User Defined Options
Excelon EZ Operator’s Manual 6. User Defined Options 6.1 Configuration of Frame Reader & Blocker Press the [MENU] button for 2 seconds to enter menu mode. Menu Icon + : sub menu item * : excutable item . : input item... - Page 57 Excelon EZ Operator’s Manual • Auto find frame groove : use automatic groove finding feature or not • reverse screen : black <-> white • minimum input step : setup step value • Bridge size : default value of bridge size (mm) •...
-
Page 58: Configuration Of Edger
Excelon EZ Operator’s Manual 6.2 Configuration of Edger Press the [MENU] button for 2 seconds to enter menu mode. Menu Icon + : sub menu item * : excutable item o : group item . : input item [F1] [F2]... -
Page 59: System Information & Basic Configuration
Excelon EZ Operator’s Manual 6.2.1 System information & Basic Configuration • Language : choose lanaguage • Edging room window watchdog : setup response type of edging room window open Off : no reaction. Warning Message : show warning message Stop : stop the edging process... -
Page 60: Frame Fitting
Excelon EZ Operator’s Manual 6.2.2 Frame Fitting You can adjust fitting size by frame type. Master Size is applied to a final output regardless of lens material. Frame fitting is applied to each of lens material. Setup procedure ① Trace the frame data with Frame Reader. -
Page 61: Layout Default
Excelon EZ Operator’s Manual 6.2.3 Layout Default • Vision Mode : Far vision (Single focus) Near vision (Bi-focal) Near vision (Bi-focal blending Lens) • Blocking Mode : Default blocking method Boxing Center (Passive Blocking) Optical Center (Active Blocking) • Bridge size : Default bridge size value •... -
Page 62: Edging Default
Excelon EZ Operator’s Manual 6.2.4 Edging Default • Default side : Default edging side (Right or Left) • Lens material : Default lens material Plastic Polycarbonate Hi-Index Glass Trivex • Edging type : Default edging type Beveling Flat Edging with Polishing Flat Edging •... -
Page 63: Configure Safety Check Parameters
Excelon EZ Operator’s Manual 6.2.5 Configure Safety Check Parameters Setup the parameter of the safety check feature. • Safety check : use safety check feature or not • Safety check interval : default value of test interval (seconds) • Safety check speed : setup test speed (leave as default value, default value is 1) •... -
Page 64: Gui Customize
Excelon EZ Operator’s Manual 6.2.6 GUI Customize Setup the interface of the GUI screen in detail. • Input step : setup step value (mm) • Increase/Decrease minimum value : use minimum step value or not • Separate R/L OH : apply OH value only to selected side or not •... - Page 65 Excelon EZ Operator’s Manual • Check input value : use value range check feature or not • Edger<->Tracer job sync : use job sync feature or not • Job sync interval(seconds) : default interval value of job sync feature (seconds) •...
-
Page 66: System Maintenance
Excelon EZ Operator’s Manual 7. System Maintenance 7.1 Frame Reader & Blocker Calibration Execute Automatic Calibration for Frame Reader & Blocker in the followings. • The traced data seems to show the error in the Size and Axis • The Frame Reader seems not to work properly •... - Page 67 Excelon EZ Operator’s Manual Pattern Calibration Procedures for pattern calibration Standard Pattern ① Place standard pattern to tracer. ② Enter menu mode by pressing the [MENU] button for 2 seconds. ③ Select “User Mode”. ⑦ Select “Calibration”. ④ Select “Patter Calibration”.
- Page 68 Excelon EZ Operator’s Manual Blocking Position Calibration Procedures for blocking position calibration ① Enter menu mode by pressing the [MENU] button for 2 seconds. ② Select “User Mode”. ③ Select “Calibration”. ④ Select “Blocking Position Calibration”. ⑤ Press the function([F1]~[F5]) button to move the cross line.
-
Page 69: Edger Calibration
Excelon EZ Operator’s Manual 7.2 Edger Calibration Two kinds of calibration can be done with standard edging JIG. Those are Size Calibration and Feeler Calibration. Follow the below instruction to go into Calibration display. ① Enter menu mode pressing the [MENU] button for 2 seconds. - Page 70 Excelon EZ Operator’s Manual Size Calibration Procedures for size calibration ① Replace Lens adaptor holder with Standard JIG. ② Press the [F1] button to start size calibration. ③ After calibration, press the [F1] button to save or [F2] button to discard.
-
Page 71: Edger Diagnosis
Excelon EZ Operator’s Manual 7.3 Edger Diagnosis ④ Enter menu mode by pressing [MENU] button seconds. ⑤ Select “Test Mode”. ⑥ Select “Edger Test”. ⑦ Press function button([F1]~[F6]) to test. Main screen displays all sensor status of the edger. Press the function button and... -
Page 72: Wheel Dressing
Excelon EZ Operator’s Manual 7.4 Wheel Dressing ⑧ Enter menu mode pressing the [MENU] button for 2 seconds. ⑨ Select “Test Mode”. ⑩ Select “Wheel Dressing”. Wheel Dressing is useful to maintain the wheel performance by way of removing the lens debris stick to the wheel. - Page 73 Excelon EZ Operator’s Manual NOTE • It is recommended to carry out Wheel Dressing after 1,500 ~ 2,000 Edging Jobs in order to maintain the Wheel performance. (It may vary depending on the Edging Condition) WARNING • Be sure that any part of human body or clothing is not interfered with the edging wheel during the Wheel Dressing.
-
Page 74: Wheel Usage Information
Excelon EZ Operator’s Manual 7.5 Wheel Usage Information ① Enter menu mode pressing [MENU] button for 2 seconds. ② Select “Statistics”. ③ Select “Wheel Statistics”. ④ Select item to clear. ⑤ Press the [STOP] button to clear wheel counter. NOTE •... -
Page 75: Maintenance Tips
It is recommended to keep the regular maintenance cycle in order to maintain the Edging Performance. Be sure to carry out the regular maintenance by the service technician of Huvitz or the technician authorized by Huvitz. • Regular Maintenance Cycle : 1,500 ~ 2,000 pieces of Lens edged ▪... -
Page 76: Standard Accessory
Excelon EZ Operator’s Manual Standard Accessory Operator’s Manual ············································································ 1 Lens Adapter (Large) ········································································ 3 Lens Adapter (Small) ···········································································5 Lens Adapter Holder (Large) ··································································1 Lens Adapter Holder (Small) ··································································1 LEAP-III Tape (500 Pads) ······································································1 Lens Adapter Remover ·········································································1 Standard Frame (for Frame Reader Calibration) ············································1 Standard Pattern (for Frame Reader Calibration) ·············································1... -
Page 77: Specification
Excelon EZ Operator’s Manual Specification Edger Edging System Auto Edging Mode Beveling Flat Edging Polishing Lens Material Plastic, Glass, Polycarbonate, Hi-lndex, Trivex® Edging Size Maximum 90mm Minimum 18mm Weight 50 kg Power Supply AC 100/220V, 50/60Hz Power Consumption 1200W(Maximum) Dimension... -
Page 78: Drawings Of System
Excelon EZ Operator’s Manual Drawings of System Edger... - Page 79 Excelon EZ Operator’s Manual Frame Reader & Blocker...
Need help?
Do you have a question about the Excelon EZ and is the answer not in the manual?
Questions and answers