Table of Contents
Advertisement
Advertisement
Table of Contents

Related Manuals for Huvitz HRK-8000A


Summary of Contents for Huvitz HRK-8000A
- Page 2 --------------------------------------------------------------- Auto Ref/Keratometer HRK-8000A 1 User’s Manual Auto Ref/Keratometer HRK-8000A...
- Page 3 2 Auto Ref/Keratometer HRK-8000A --------------------------------------------------------------- IMPORTANT NOTICE WARNING Potential electromagnetic or other interference between medical equipments and other devices being operated together in the same environmental may expert an adverse influence on functioning of the medical equipment. Non-medical equipments not in compliance with the requirements of EN 60601-1 and EN 60601-1-2 should not be used together in the same environmental as the medical equipments.
- Page 4 ©2010 - 2011 - Huvitz Co., Ltd. -689-3, Gumjeong-dong, Gunpoci, Gyeonggi-do, 435-862, Republic of Korea All rights are reserved. Under copyright laws, this manual may not be copied, in whole or in part, without the prior written consent of HUVITZ Co., Ltd.
- Page 5 4 Auto Ref/Keratometer HRK-8000A --------------------------------------------------------------- CAUTION Provision of information on the avoidance of light hazard from the optical device is required in ISO 15004-2:2007 “Ophthalmic instruments-Fundamental requirements and test methods” The light emitted from this instrument is potentially hazardous. The longer the duration of exposure, the greater the risk of ocular damage.
-
Page 6: Table Of Contents
--------------------------------------------------------------- Auto Ref/Keratometer HRK-8000A 5 Contents Introduction ......................9 1.1. Overview ....................... 9 1.2. Classificaiton ....................10 Safety Information ....................11 2.1. Overview ..................... 11 2.2. Safety Symbol .................... 12 2.3. Environmental Considerations ..............15 2.4. Safety Precaution ..................17 Characteristics ...................... - Page 7 6 Auto Ref/Keratometer HRK-8000A --------------------------------------------------------------- 8.2. Keratometry (KER Mode) ................43 8.2.1. Manual Measurement Mode ................ 43 8.2.2. Auto Measurement Mode ................46 8.3. Corneal Curvature / Refractive Power Measurement Mode (K&R Mode) . 47 8.3.1. Manual Measurement Mode ................ 47 8.3.2.
- Page 8 --------------------------------------------------------------- Auto Ref/Keratometer HRK-8000A 7 9.5.2. Blue LED ..................... 81 9.5.3. Yellow Filter ....................82 9.5.4. Capture Screen ................... 83 9.5.5. Selected Capture Screen ................83 9.5.6. Return to measure mode................87 9.6. DISPLAY Mode ................... 88 9.7. User SETUP Mode ..................90 9.8.
- Page 9 8 Auto Ref/Keratometer HRK-8000A --------------------------------------------------------------- Guidance and manufacturer’s declaration – electromagnetic immunity ..113 14.2 Guidance and manufacturer’s declaration – electromagnetic immunity ..115 14.3 14.4 Recommended separation distances between portable and mobile RF communications equipment and the EUT..............117 14.5...
-
Page 10: Introduction
--------------------------------------------------------------- Auto Ref/Keratometer HRK-8000A 9 1. Introduction 1.1. Overview Auto Ref/Keratometer HRK-8000A is the equipment to provide the information of Spherical, Cylindrical and Axis while measuring the refraction of examinee’s eyes. Auto Ref/Keratometer HRK-8000A is the equipment that can measure the corneal curvature of examinee. -
Page 11: Classificaiton
10 Auto Ref/Keratometer HRK-8000A --------------------------------------------------------------- 1.2. Classificaiton 1) Classification of product : -. EU - Class IIa according to Annex IX (Rule 10) of the Medical Device Directive 93/42/EEC as amended by 2007/47/EC -. KFDA – Class II 2) Resistance against electric shock : Class I (earthed) -
Page 12: Safety Information
--------------------------------------------------------------- Auto Ref/Keratometer HRK-8000A 11 2. Safety Information 2.1. Overview Safety is everyone’s responsibility. The safe use of this equipment is largely dependent upon the installer, user, operator, and maintainer. It is imperative that personnel study and become familiar with this entire manual before attempting to install use, clean, service or adjust this equipment and any associated accessories. -
Page 13: Safety Symbol
12 Auto Ref/Keratometer HRK-8000A --------------------------------------------------------------- 2.2. Safety Symbol The International Electrotechnical Commission (IEC) has established a set of symbols for medical electronic equipment which classify a connection or warn of any potential hazards. The classifications and symbols are shown below. - Page 14 --------------------------------------------------------------- Auto Ref/Keratometer HRK-8000A 13 Identifies the point where the system safety ground is fastened to the chassis. Protective earth connected to conductive parts of Class I equipment for safety purposes. Hot surface. Temperature Limitation Keep DRY MEDICAL EUIPMENT WITH RESPECT TO ELECTRIC SHOCK...
- Page 15 14 Auto Ref/Keratometer HRK-8000A --------------------------------------------------------------- Alternating Current...
-
Page 16: Environmental Considerations
--------------------------------------------------------------- Auto Ref/Keratometer HRK-8000A 15 2.3. Environmental Considerations Please avoid the environment below for the operation and storage of the equipment. Where the equipment is exposed to water vapor. Don’t operate the equipment with wet hands. Where the machine is exposed directly to the sunlight. - Page 17 16 Auto Ref/Keratometer HRK-8000A --------------------------------------------------------------- Where the machine can be exposed to the chemical or flammable substances. Please keep the equipment out of dust and do not let inserted any metal parts such as coins, clips, etc. Do not disassemble or open the machine. The manufacture shall have no responsibility for any problems caused by these.
-
Page 18: Safety Precaution
The equipment must be operated only by, or under direct supervision of properly trained and qualified person/s. Modifications of this equipment may only be carried out by Huvitz’s service technicians or other authorized persons. Customer maintenance of this equipment may only be performed as stated in the User’s Manual and Service Manual. - Page 19 The equipment may only be used together with accessories supplied by Huvitz’s. If the customer makes use of other accessories, use them only if there are usability under technical safety aspects has been proved and confirmed by Huvitz or the manufacturer of the accessory.
- Page 20 --------------------------------------------------------------- Auto Ref/Keratometer HRK-8000A 19 IEC60950 for IT equipment and IEC60601-1 series for medical electrical equipment). In addition, all such combination-system-shall comply with the standard IEC60601-1 and/or IEC60601-1-1 harmonized national standard or the combination. If, in doubt, contact qualified technician or your local representative the operator should not touch the patient and accessible male parts of the SIP/SOP connectors simultaneously.
-
Page 21: Characteristics
It is possible to select the display type of Refractometry and Keratometry. It is possible to measure the distance in between pupils (PD). Through the illumination, the HRK-8000A can observe the eyes’ condition of cataract patients or the scratches on the surface of contact lenses. It can store the two (2) images for each eye, and show the patients displaying them on the monitor screen. -
Page 22: Note For Use
So, please do not use them. In case of moving HRK-8000A, carry it holding the lower part of machine body with both hands as fixing the stage after switching the machine off all the time. -
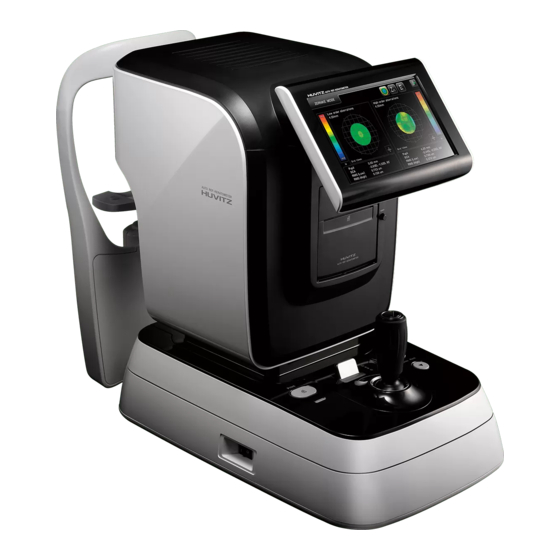
Page 23: Names And Functions Of Each Part
22 Auto Ref/Keratometer HRK-8000A --------------------------------------------------------------- 5. Names and functions of each part 5.1. Main parts ❶ ❻ ❷ ❼ ❸ ❽ ❹ ❾ ❺ [ Figure 5-1. Front ] 1. Height Adjustment Mark: Adjusts the eyes’ height of examinees 2. Display Monitor: Monitor for measurement 3. - Page 24 --------------------------------------------------------------- Auto Ref/Keratometer HRK-8000A 23 ❶ ❸ ❹ ❷ [ Figure 5-2. Back Section ] 1. Forehead Rest: Preventing the vibration by fixing the forehead 2. Measuring Object Lens: Measuring the image imaging on the retina of eyes. 3. Chin Rest: Preventing the vibration by fixing the chin...
- Page 25 24 Auto Ref/Keratometer HRK-8000A --------------------------------------------------------------- ❹ ❶ ❷ ❺ ❸ ❻ [ Figure 5-3. Bottom Section ] 1. Power Supply Socket: A socket connecting to exterior power plug 2. Fuse Holder : 250 V T3.15 AL 3. HDMI Connector: Connecting into the exterior monitor 4.
-
Page 26: Explanation On Switches In Front
--------------------------------------------------------------- Auto Ref/Keratometer HRK-8000A 25 5.2. Explanation on Switches in Front ❶ ❷ ❸ ❹ ❺ ❻ [Figure 5-4. Front Section Switches] (SETUP) Button: A switch to change the User setup mode (MODE) Button: A switch to change the mode (REF, KER, K&R, KER-P, CLBC) for measurement. -
Page 27: Installation Of Equipment & Preparation Of Measurement
26 Auto Ref/Keratometer HRK-8000A --------------------------------------------------------------- 6. Installation of Equipment & Preparation of Measurement 1. Release of Lock on Stage Section Unlock the clamping bolt at the button of the machine by rotating it counterclockwise, and change the stage fixing lever behind the joystick to the direction of UNLOCK. - Page 28 --------------------------------------------------------------- Auto Ref/Keratometer HRK-8000A 27 4. Installation of Printing Paper Please refer to section 8.2 regarding the sequence of installation of printing paper. 5. Input of Message Input the contents desirable to be printed such as name or address of hospital, etc in the memory of message editing monitor in advance at all times.
-
Page 29: Exercise Through Model Eye
28 Auto Ref/Keratometer HRK-8000A --------------------------------------------------------------- 7. Exercise through Model Eye 1. Power On of Main Body Connect the power plug appropriately as shown in the picture. Let the power switch on. Measuring screen appears as system check is completed. [Figure 7-1. Power Cable Connection] 2. - Page 30 --------------------------------------------------------------- Auto Ref/Keratometer HRK-8000A 29 5. Adjustment of Position for Measurement & Focus Tilt the operation lever over the model eye until the mire image appear around the external alignment ring. Adjust so that the mire image shall come coincide the external alignment ring while watching the monitor.
- Page 31 30 Auto Ref/Keratometer HRK-8000A --------------------------------------------------------------- Too close to the patient’s eye. Optimum condition. Too far from the patient’s eye <Focusing Indicator>...
- Page 32 --------------------------------------------------------------- Auto Ref/Keratometer HRK-8000A 31 External Alignment Ring Internal Alignment Ring [ Figure 7-4. Adjustment of Measuring Position & Focus ] 6. Measurement Manual Adjustment ① Adjust the focus and position of model eye as like in the procedure of adjusting measurement position & focus explained in the previous page.
- Page 33 32 Auto Ref/Keratometer HRK-8000A --------------------------------------------------------------- procedure of adjusting measurement position & focus explained in the previous page. ③ It the focus is well adjusted as the mire image coincide with the external alignment ring and the focus-adjustment focus symbol appears on the internal alignment ring, then, the measurement starts...
-
Page 34: Measurement
--------------------------------------------------------------- Auto Ref/Keratometer HRK-8000A 33 8. Measurement WARNING If the following situations happen, contact to the agents of Huvitz after immediately pushing the power switch off, and pulling the power cord out of AC Power connection part. ● In case that smoke comes, or strange smell or sound is heard from the equipment. -
Page 35: Refractometry (Ref Mode)
● If the measurement screen as shown in the above picture does not appear on the monitor screen, let the power switch “ON” again in 10 seconds after switching it off. If the measurement screen continues not to appear either, please contact to the agents of Huvitz. -
Page 36: Manual Measurement Mode
--------------------------------------------------------------- Auto Ref/Keratometer HRK-8000A 35 3. Check the user Setup mode. Check and select the diverse functions relating to measurement including VD value or printing condition. Input the message wanted to be printed together with measurement data (refer to section user setup mode). - Page 37 36 Auto Ref/Keratometer HRK-8000A --------------------------------------------------------------- ② Adjustment of Measurement Position and Focus CAUTION Do not insert your hands or fingers between stage and base. Also, make sure that the examinee should not put his or her hands or fingers there.
- Page 38 --------------------------------------------------------------- Auto Ref/Keratometer HRK-8000A 37 Manual/Auto Pupil Iris External Array Ring (Min. Radius of Iris Φ 2.0 mm) [ Figure 8-1-4. REF Manual Mode Screen ] NOTE ● As it is not enough to adjust it by tilting the operation lever, adjust it by pushing the stage to the directions of left/right.
- Page 39 38 Auto Ref/Keratometer HRK-8000A --------------------------------------------------------------- - In case of the consecutive measurement, the result of the previous measurement is indicated. ④ Repeated Measurement - Measure repeatedly if necessary. - The latest measured value is to be indicated every time new measurement is performed.
- Page 40 --------------------------------------------------------------- Auto Ref/Keratometer HRK-8000A 39 ⑥ Print - Print the measured result by pushing the PRINT button. - The contents selected in SETUP mode is to be printed.(Refer to section user setup mode) - Pull the printing paper. ( Auto Cutting ) - Put the name of examinee in the blank of NAME if necessary.
-
Page 41: Auto Measurement Mode
40 Auto Ref/Keratometer HRK-8000A --------------------------------------------------------------- 8.1.2. Auto Measurement Mode As touching MANUAL button in Manual Measurement mode, it automatically changes to the Auto measurement mode. As the condition of good array between the machine and the measured eye is reached, the measurement is to be performed automatically without pushing the Measurement button. - Page 42 --------------------------------------------------------------- Auto Ref/Keratometer HRK-8000A 41 ③ Measurement of Another Eye - Measure the left eye according to the same procedure by moving the stage to the right side. - As the measurement to both eyes is completed, the value of PD is to be indicated automatically on the screen of monitor.
- Page 43 42 Auto Ref/Keratometer HRK-8000A --------------------------------------------------------------- - As the message of TRY AGAIN happens, please refer to the explanation below. In case of TRY AGAIN Management Measure it after adjusting the exact position Poor position adjustment again. Let the examinee open the eye wide, or...
-
Page 44: Keratometry (Ker Mode)
--------------------------------------------------------------- Auto Ref/Keratometer HRK-8000A 43 8.2. Keratometry (KER Mode) It is the mode to measure the corneal curvature solely. Do not measure the base curve of hard contact lens in this mode. Please refer to CLBC mode in section 8.5 regarding the base curve of hard contact lens. - Page 45 44 Auto Ref/Keratometer HRK-8000A --------------------------------------------------------------- Iris Pupil External Alignment Ring (Min. radius of pupil Φ 2.0mm) [ Figure 8-2-1. Screen indicating KER mode ] ③ Perform the same 4, 5 procedure of section 8.1.1. ④ Print the measured result through the same 6 procedure of section 8.1.1.
- Page 46 --------------------------------------------------------------- Auto Ref/Keratometer HRK-8000A 45 [ Figure 8-2-2. Example of Print ]...
-
Page 47: Auto Measurement Mode
46 Auto Ref/Keratometer HRK-8000A --------------------------------------------------------------- 8.2.2. Auto Measurement Mode As touching MANUAL button in Manual measurement mode, it is to be changed to Auto measurement mode. As the condition of good array between the machine and measured eye is reached, the measurement is to be performed without pushing the measurement button. -
Page 48: Corneal Curvature / Refractive Power Measurement Mode (K&R Mode)
--------------------------------------------------------------- Auto Ref/Keratometer HRK-8000A 47 8.3. Corneal Curvature / Refractive Power Measurement Mode (K&R Mode) This is the mode to consecutively perform the measurement of corneal curvature and refractive power. Check whether or not the measurement screen appears on the screen of monitor. - Page 49 48 Auto Ref/Keratometer HRK-8000A --------------------------------------------------------------- Iris Pupil Alignment Ring Mire Image [ Figure 8-3-1. Screen indicating K&R Mode ] ③ Perform the same procedure as like in procedure 4, 5 of section 8.1.1. ④ Print the measured result through the same procedure as like in procedure 6...
- Page 50 --------------------------------------------------------------- Auto Ref/Keratometer HRK-8000A 49 [ Figure 8-3-2. Example of Print ]...
-
Page 51: Auto Measurement Mode
50 Auto Ref/Keratometer HRK-8000A --------------------------------------------------------------- ⑤ Selection of Screen Indication Type - In the measurement mode including the refractive power measurement, you can designate the sign of astigmatic refractive power in SETUP mode. - Also, you can indicate the measured data of refractive power on the screen according to VD value in the measurement mode including the refractive power measurement. -
Page 52: Diverse Indications
--------------------------------------------------------------- Auto Ref/Keratometer HRK-8000A 51 8.3.3. Diverse Indications Meaning of Measu Kind Name Signs Indicating Measured Measu value of low reliability reliability again Exceeding measurabl exceeds Measureme e range +25 D Impos nt of Exceeding sible Refraction measurabl exceeds e range –30 D... -
Page 53: Keratometry Peripheral Measurement (Ker-P Mode)
52 Auto Ref/Keratometer HRK-8000A --------------------------------------------------------------- 8.4. Keratometry Peripheral Measurement (KER-P Mode) It is the mode to measure the curvature of part around cornea. Based upon the center of cornea, measure the curvature of part around cornea from the positions of up/down and left/right direction. It is to indicate the relative eccentricity while comparing the curvature of part around cornea with the curvature of corneal center. - Page 54 --------------------------------------------------------------- Auto Ref/Keratometer HRK-8000A 53 [ Figure 8-4-1. Screen indicating KER-P mode ] In case of corneal center, R1 : Radius of curvature on maximum meridian R2 : Radius of curvature on minimum meridian AX : Axis on the radius of curvature on maximum meridian...
- Page 55 54 Auto Ref/Keratometer HRK-8000A --------------------------------------------------------------- is to be indicated as an empty box. The relevant box indicated at the part around cornea which is measured now is to flicker. Direction of part around cornea Superior (SUP) : Upside from corneal center...
- Page 56 --------------------------------------------------------------- Auto Ref/Keratometer HRK-8000A 55 In case of part around cornea (SUP, INF, TEM, NAS), R1 : Radius of curvature on maximum meridian in periphery R2 : Radius of curvature on minimum meridian in periphery AX : Axis on the radius of curvature on maximum meridian in...
-
Page 57: Measurement Of Contact Lens Base Curve(Clbc Mode)
56 Auto Ref/Keratometer HRK-8000A --------------------------------------------------------------- 8.5. Measurement of Contact Lens Base Curve(CLBC Mode) It is the mode to measure base curve of contact lens (concave surface). Check whether or not the measurement screen appears on the screen of monitor. Set CLBC mode, You can see CLBC mode on the upper left side of the screen. - Page 58 --------------------------------------------------------------- Auto Ref/Keratometer HRK-8000A 57 Measurement - Push the measurement button. - As you keep pushing the measurement button, the measurement is to be performed consecutively. - As the measurement is completed, the measured result is to be indicated on the screen of monitor.
- Page 59 58 Auto Ref/Keratometer HRK-8000A --------------------------------------------------------------- Information on the display is below. R1 : Radius of curvature on maximum meridian R2 : Radius of curvature on minimum meridian RM : Average curvature K1 : Rrefractive power on minimum meridian K2 : Rrefractive power on minimum meridian...
-
Page 60: Other Modes
--------------------------------------------------------------- Auto Ref/Keratometer HRK-8000A 59 9. Other Modes 9.1. ILLUMINATION Measurement Mode (ILLUM Mode) Illum measurement mode is the measuring function to use usefully in the following cases. It is to examine the crystalline lens of patient who has the severe symptom of cataract or undergoes it, or to measure its refractive power. - Page 61 60 Auto Ref/Keratometer HRK-8000A --------------------------------------------------------------- [Observe] - As Illumination mode is to be selected by pushing ILLUM measurement button, [Observe] window is to appear on the screen together with Illumination image spread out reflected from retina. - Diagnose the crystalline lens, opacity degree of cornea, and the degree of corneal scratches by observing the state of this Illumination image.
- Page 62 --------------------------------------------------------------- Auto Ref/Keratometer HRK-8000A 61 [ Figure 9-1-2. Illumination Measure Window ] <User Menu> : By using the joystick measurement button, you can store the observed Illumination image in memory while changing it as a static window. : It is the button to change the window between [Observe] and [Measure].
-
Page 63: Observation On Illumination
62 Auto Ref/Keratometer HRK-8000A --------------------------------------------------------------- 9.1.2. Observation on Illumination ① Adjustment of brightness of LED to measure refractive power - In order to take a close look at Illumination image, change the intensity of LED to measure refractive power by one (1) level using ↓ button and ↑... -
Page 64: Storage
--------------------------------------------------------------- Auto Ref/Keratometer HRK-8000A 63 NOTE The opacity of crystalline lens caused by cataract can lead in errors of measured value while causing the aberration by the decenteredness. 9.1.3. Storage If you want to store the stopped image in memory, push the measure button. You can store max of two (2) images for each eye. - Page 65 64 Auto Ref/Keratometer HRK-8000A --------------------------------------------------------------- [ Figure 9-1-3. Window indicating Stored Image ] ① In order to call the stored Ret-Illumination image for two eyes on the screen of monitor, enter Display mode by pushing button. ② For magnify image which is save in DISPLAY mode by touch it.
-
Page 66: Return To Measurement Mode
--------------------------------------------------------------- Auto Ref/Keratometer HRK-8000A 65 [ Figure 9-1-4. Window indicating stored image(enlarged) ] 9.1.6. Return to measurement mode As pushing button in [Observe] or [Measure] window, you can return to [REF], [KER], [K&R], [KER-P] or [CLBC] measurement mode. -
Page 67: Zernike Mode
66 Auto Ref/Keratometer HRK-8000A --------------------------------------------------------------- 9.2. ZERNIKE Mode Zernike Mode indicates the distribution of refractive power in pupil area. Based upon the wavefront of emmetropes, Z-Map is drawn as a kind of topographical map having the elevation according the degree of distortion(aberration) of wavefront come from myopia or hypermetropia. - Page 68 --------------------------------------------------------------- Auto Ref/Keratometer HRK-8000A 67 A=Cylinder Axis - RMS(Low) : aberration (low order aberration average) - RMS(High) : aberration (high order aberration average) [ Figure 9-2-2. Zernike mode Window (Map) ] [ Figure 9-2-3. Zernike mode Window (Map) ]...
- Page 69 68 Auto Ref/Keratometer HRK-8000A --------------------------------------------------------------- Map Level on the left side in window is the aberration value of wavefront, and it is the color table to draw map. The max and min value of the aberration of measured wavefront is indicated by the unit of micrometer(um). The wavefront aberration of emmetropes is 0, and the severer the myopia and hypermetropia is, it is to have higher wavefront aberration of (+) and (-) sign respectively.
- Page 70 --------------------------------------------------------------- Auto Ref/Keratometer HRK-8000A 69 : Graph [ Figure 9-2-4. Zernike mode Window (Graph) ] The graph shows coefficients of individual aberration compoments included in a group. (combination of aberration components). A side-by-side display of the preoperative and postoperative coefficient graphs tells differences in each...
- Page 71 70 Auto Ref/Keratometer HRK-8000A --------------------------------------------------------------- : PSF image [ Figure 9-2-5. Zernike mode Window (PSF image) ] PSF image information items indicated on bottom of window are as follows : E type chart : Grid type chart : Radiation type chart...
-
Page 72: Change Of Window
--------------------------------------------------------------- Auto Ref/Keratometer HRK-8000A 71 9.2.2. Change of Window As changing the measurement position of examinee to left or right side by moving the joystick, the map is to changed again as a result obtained in the measured direction. As the map is drawn for the first time, the guide message is to be indicated as “Calculating…”... -
Page 73: Measurement Of Corneal Radius(Size Mode)
72 Auto Ref/Keratometer HRK-8000A --------------------------------------------------------------- 9.3. Measurement of Corneal Radius(SIZE Mode) It is the mode to measure the corneal radius. Check the measurement window on the screen of monitor. Adjust the position and focus so that the image of eye to be measured can be seen apparently. - Page 74 --------------------------------------------------------------- Auto Ref/Keratometer HRK-8000A 73 Iris Perpendicular Pupil Corneal outline Left eye [ Figure 9-3-2. Window indicating Size Mode (2) ] Adjustment of measurement position and focus - Ask the examinee to look at the internal fixed target. - Adjust the position so that the pupil shall be in between two(2) perpendicular bars by moving the operation lever.
- Page 75 74 Auto Ref/Keratometer HRK-8000A --------------------------------------------------------------- - Move the relevant bar to left/right sides by pushing button or button. - The measured value shall be indicated on the screen of monitor. - Store the measured value by pushing the measurement button.
- Page 76 --------------------------------------------------------------- Auto Ref/Keratometer HRK-8000A 75 Repetition of Measurement - Repeat the measurement in the entry of measured value as many times as you need. Repeat the procedure of 2~4 as performing the measurement again. Measured value Average [ Figure 9-3-4. Window indicating repletion of Size Mode Measurement ] Measurement of the other eye - Move stage to opposite side, then change Pupil size “R”...
-
Page 77: Virtual Comparison Mode
76 Auto Ref/Keratometer HRK-8000A --------------------------------------------------------------- 9.4. VIRTUAL COMPARISON Mode A Virtual comparison Function allows the patient to compare the current uncorrected eye view with the corrected view By changing the distance to the chart, the patient can experience the virtual comparison. - Page 78 --------------------------------------------------------------- Auto Ref/Keratometer HRK-8000A 77 [ Figure 9-4-1. Display of VIRTUAL COMPARISON Mode ] The item of Data information which are indicated in screen. - REF/FAR or NEAR(40 mm) : HRK-8000A DATA - LENS : Lensmeter DATA - S (Spherical) : Spherical data.
-
Page 79: Color View Mode
78 Auto Ref/Keratometer HRK-8000A --------------------------------------------------------------- 9.5. COLOR VIEW MODE Measures the radius of curvature of the cormea and see the condition which wears contact lens in White LED / Blue LED / Yellow Filter mode. [ Figure 9-5-1. Display of Color View mode ] The item of Data information which are indicated in screen. - Page 80 --------------------------------------------------------------- Auto Ref/Keratometer HRK-8000A 79 < User Menu > : Select to Yellow Filter. : Select to White LED. : Select to Blue LED. : capture image displayed on the screen. (maximum LEFT 2, RIGHT 2 ) : Measurement data displayed on the screen.
-
Page 81: White Led
80 Auto Ref/Keratometer HRK-8000A --------------------------------------------------------------- 9.5.1. White LED It is the function to observe of the patient eye by using White LED lighting in the color image. 1. After when pressing buttons in measure mode, presses COLOR buttons then COLOR VIEW MODE screen appear. -
Page 82: Blue Led
--------------------------------------------------------------- Auto Ref/Keratometer HRK-8000A 81 9.5.2. Blue LED It is the function to observe the level of the fitness of contact lens with the patient eye using Blue LED and fluorescent solution. 1. Put in the fluorescent solution into the patient eye and wear the contact lens. -
Page 83: Yellow Filter
82 Auto Ref/Keratometer HRK-8000A --------------------------------------------------------------- 9.5.3. Yellow Filter The operator can see the level of the fitness of contact lens more clearly and definitely with this function. 1. Perform the same procedure as like in procedure 2, 3 of section 9.5.2 and press the button. -
Page 84: Capture Screen
--------------------------------------------------------------- Auto Ref/Keratometer HRK-8000A 83 9.5.4. Capture Screen 1. After when pressing buttons in measure mode, presses COLOR buttons then COLOR VIEW MODE screen appear. 2. Press measurement button (joystick) to capture the image of examinee. button is pressed, capture image is displayed on the screen. - Page 85 84 Auto Ref/Keratometer HRK-8000A --------------------------------------------------------------- [ Figure 9-5-6. Color View mode – selected capture image ] < User Menu > : Emphasizing the green contrast of the measurement image. (Check more easily with contrast emphasis of the measurement image.)
- Page 86 --------------------------------------------------------------- Auto Ref/Keratometer HRK-8000A 85 : Angle measurement. (The angle of three points on the touch screen is measured) : Length measurement. (The length of two points on the touch screen is measured.)
- Page 87 86 Auto Ref/Keratometer HRK-8000A --------------------------------------------------------------- : Guide Line(3 mm, 5 mm, 7 mm) display. : fitting state display. (The curvatures of the cormea and the contact lens displayed in screen. Automatically which are flat or normal or steep)
-
Page 88: Return To Measure Mode
--------------------------------------------------------------- Auto Ref/Keratometer HRK-8000A 87 [ Figure 9-5-7. Flat, Normal, Steep icon screen ] : Reverting to the previous screen. (Displayed on the LCD screen to remove all things revert to the initial screen.) ⇒ 9.5.6. Return to measure mode. -
Page 89: Display Mode
88 Auto Ref/Keratometer HRK-8000A --------------------------------------------------------------- 9.6. DISPLAY Mode You can see the measured results (Max ten(10) units of data) stored in memory in this mode. As pushing DISPLAY mode in the measurement mode, it changes to DISPLAY Mode. It returns to the measurement mode as pushing button again. - Page 90 --------------------------------------------------------------- Auto Ref/Keratometer HRK-8000A 89 Measured Result of Keratometry - It indicates the latest measured result of max amount of ten(10) times(refractive power of left/right eyes). As pushing button, the stored data is to be removed and returns to the measurement mode.
-
Page 91: User Setup Mode
90 Auto Ref/Keratometer HRK-8000A --------------------------------------------------------------- 9.7. User SETUP Mode It is to perform many setups relating to measurement, print-out, etc. As pushing (SETUP MODE) button, it enters USER SETUP mode. [How to change page] Select the wanted page while pushing button. - Page 92 --------------------------------------------------------------- Auto Ref/Keratometer HRK-8000A 91 [ Figure 9-7-1. Setup Mode Information (page 1) ] [Content of Item] : 1/7Page REF ( Refractometry measurement ) VD : Corneal Vertex Distance CYL : Astigmatism Indication Type INC-R : Indication Unit of SPH and CYL FOGG : The number of times fogging system in continuous measure mode.
- Page 93 92 Auto Ref/Keratometer HRK-8000A --------------------------------------------------------------- [ Figure 9-7-2. Setup Mode Information (page 2) ] [Content of Item] : 2/7 Page KER ( Keratometry measurement ) mm/D : Indication Type of Corneal Measurement R1 ····· Radius of curvature on maximum meridian R2 ·····...
- Page 94 --------------------------------------------------------------- Auto Ref/Keratometer HRK-8000A 93 PATIENT NUMBER ( Setup of Serial Number ) COUNT : Selection whether or not to use serial number NO. : Setup of Serial Number ( range : 0 ~ 9999 ) [ Figure 9-7-3. Setup Mode Information (page 3) ]...
- Page 95 94 Auto Ref/Keratometer HRK-8000A --------------------------------------------------------------- COMMUNICATION (Setup for communication to other machines ) BPS : Select the one among 9600, 57600, and 112500bps as its data transfer rate. RS232 : Setup of transmission method(method and version of other equipment) MODE : Data format setup of transmission method .
- Page 96 --------------------------------------------------------------- Auto Ref/Keratometer HRK-8000A 95 R-PRT : Refractometry -Output type of built-in printer for the measured result of Refractometry Off : It is not to be printed out. Std : The measured result & average value of max ten(10) times are to be printed out.
- Page 97 96 Auto Ref/Keratometer HRK-8000A --------------------------------------------------------------- [ Figure 9-7-5. Setup Mode Information (page 5) ] [Content of Item] : 5/7 Page PRINT MESSAGE ( Input the measured data and message to be outputted through printer by using the function of internal printer message input. It can print characters on two(2) lines.
- Page 98 --------------------------------------------------------------- Auto Ref/Keratometer HRK-8000A 97 DATE : Setting of date(year/menth/date) ( range : Y = 00 ~ 99 , M = 01 ~ 12, D = 01 ~ 31 ) TIME : Setting of time(hour/minute/second) ( range : H = 00 ~ 23 , M = 00 ~ 59, S = 00 ~ 59 ) [ Figure 9-7-6.
- Page 99 98 Auto Ref/Keratometer HRK-8000A --------------------------------------------------------------- ETC. ( Other Setup ) LANG : You can select the language characters indicated on the screen and the print output. BEEP : Setup of Beep sound. INIT-M : Select of initial mode. [ Figure 9-7-7. Setup Mode Information (page 7) ]...
- Page 100 --------------------------------------------------------------- Auto Ref/Keratometer HRK-8000A 99 [ Figure 9-7-8. Other (Character) Input ] - Character Input – (Clear) : Erase of line. (Back Space) : Erase of text. (Enter) : Change of line. : Save of information.
- Page 101 100 Auto Ref/Keratometer HRK-8000A --------------------------------------------------------------- [ Figure 9-7-9. Other (Number) Input ] - Number Input – range : Minimum ~ Maximum range which is possible of input. (If it will escape a range then will not save and displayed warning message “Out of Range!”...
-
Page 102: Power Saving Function
--------------------------------------------------------------- Auto Ref/Keratometer HRK-8000A 101 9.8. Power saving Function The power saving function begins to operate if you do not operate the machine at all for five(5) minutes or so. It is to return to the measurement mode as pushing... -
Page 103: Self Diagnosis & Maintenance
102 Auto Ref/Keratometer HRK-8000A --------------------------------------------------------------- 10. Self diagnosis & Maintenance 10.1. Before calling for serviceman In case that abnormality happens or the machine operates abnormally, a warning sign is to be indicated. In this case, perform the settlements below. If the machine does not return to the normal condition in spite of the measures below, contact to the agent where you bought the machine after switching the power off. - Page 104 --------------------------------------------------------------- Auto Ref/Keratometer HRK-8000A 103 ② Messages during measurement Message Cause Method of Settlement Refer to page 15 Refer to page 15 TRY AGAIN Objective glass in the measurement Clean the glass window is polluted Sphere of examinee’s eye exceeds...
- Page 105 104 Auto Ref/Keratometer HRK-8000A --------------------------------------------------------------- ③ Message as printing Message Cause Method of settlement -There is no printer paper or Install printer paper or close CHECK PAPER lever is not closed. the lever.
-
Page 106: Replacement
--------------------------------------------------------------- Auto Ref/Keratometer HRK-8000A 105 10.2. Replacement 10.2.1. Printer paper As red line appears on the paper, immediately change the print paper with new one. ① Presses the button in the printer side, open the cover. ② Cut the paper inserted in the printer, and take it away from paper roll. -
Page 107: Replacing Fuse
106 Auto Ref/Keratometer HRK-8000A --------------------------------------------------------------- Replacing Fuse 10.2.3. ① Turn off and raise the HRK-8000A with two arm carefully. ② Remove the Power cord ③ Pick the fuse holder out from the Power inlet ④ Exchange the fuses ⑤ Insert the fuse folder [ Figure 10-2. -
Page 108: Cleaning Equipment
--------------------------------------------------------------- Auto Ref/Keratometer HRK-8000A 107 10.3. Cleaning Equipment ① The equipment should be kept as clean basically. Do not use the solvents such as strongly volatile substance, thinner, benzene, etc. ② Put some soapy water to the soft cloth, and twist the water out of the cloth. -
Page 109: Service Information
108 Auto Ref/Keratometer HRK-8000A --------------------------------------------------------------- 11. Service Information Repair: If the problem is not solved in spite of the settlement according to the contents of chapter 10, please contact to Huvitz’s agent with the information on the following items. ①... -
Page 110: Main Specifications
--------------------------------------------------------------- Auto Ref/Keratometer HRK-8000A 109 12. Main Specifications Measurement Mode Continuous Keratometry & Refractometry (K/R Mode) Refractometry (REF Mode), Keratometry (KER Mode) Keratometry Peripheral (KER-P Mode) Base Curve of Contact Lens(CLBC Mode) Refractometry Vertex Distance(VD) 0.0, 12, 13.5, 15.0 - 30.00 ~ +25.00 D (In case of VD = 12 mm) 0.00 ~ ±... - Page 111 110 Auto Ref/Keratometer HRK-8000A --------------------------------------------------------------- Working range of auto-tracking Up & Down ± 15 mm Right & Left ± 5 ± 2 mm Back & Forth ± 5 ± 2 mm Working range of auto-shooting Up & Down ± 0.13 mm or less Right &...
-
Page 112: Accessories
--------------------------------------------------------------- Auto Ref/Keratometer HRK-8000A 111 13. Accessories [ Figure 13-1. Accessories ] 1. Power Cable(AC 220 V / 60 Hz Power plug or other)···························1 unit 2. Model Eye (Sph – 5.0 D ~ - 5.5 D)················································1 unit 3. Chin Rest Paper(100 sheets)··················································· 1 bundle 4. -
Page 113: Emc Information
112 Auto Ref/Keratometer HRK-8000A --------------------------------------------------------------- 14. EMC Information 14.1 Guidance and manufacturer’s declaration – electromagnetic emissions The EUT is intended for use in the electromagnetic environment specified below. The customer or the user of the EUT should assure that it is used in such an environment. -
Page 114: Guidance And Manufacturer's Declaration - Electromagnetic Immunity
--------------------------------------------------------------- Auto Ref/Keratometer HRK-8000A 113 14.2 Guidance and manufacturer’s declaration – electromagnetic immunity The EUT is intended for use in the electromagnetic environment specified below. The customer or the user of the EUT should assure that it is used in such an environment. - Page 115 114 Auto Ref/Keratometer HRK-8000A --------------------------------------------------------------- 61000-4- (30% (30% dip in Uт ) it is recommended that Uт ) for 25 cycle for 25 cycle <5% Uт EUT image intensifier <5% Uт (<95% Uт ) Powered from (<95% dip in for 5 s...
-
Page 116: Guidance And Manufacturer's Declaration - Electromagnetic Immunity
--------------------------------------------------------------- Auto Ref/Keratometer HRK-8000A 115 14.3 Guidance and manufacturer’s declaration – electromagnetic immunity The EUT is intended for use in the electromagnetic environment specified below. The customer or the user of the EUT should assure that it is used in such an environment. - Page 117 116 Auto Ref/Keratometer HRK-8000A --------------------------------------------------------------- Field strengths from fixed transmitters, deter-mined electromagnetic site survey, should be less than the compliance level in each frequency range. Interference may occur in the vicinity of equipment marked with the following symbol : NOTE 1) At 80MHz and 800MHz, the higher frequency range applies.
-
Page 118: Recommended Separation Distances Between Portable And Mobile Rf
--------------------------------------------------------------- Auto Ref/Keratometer HRK-8000A 117 14.4 Recommended separation distances between portable and mobile RF communications equipment and the EUT This is intended for use in an electromagnetic environment in which radiated RF disturbances are controlled. The customer or the user of the EUT can help... -
Page 119: Immunity And Compliance Level
118 Auto Ref/Keratometer HRK-8000A --------------------------------------------------------------- 14.5 Immunity and Compliance Level Immunity test IEC 60601 Test Actual Immunity Compliance Level Level Level Conducted RF 3Vrms 3Vrms 3Vrms IEC 61000-4-6 150kHz to 80MHz Radiated RF 3Vrms 3V/m 3V/m IEC 61000-4-3 80MHz to 2.5GHz... -
Page 120: Guidance And Manufacturer's Declaration - Electromagnetic Immunity
--------------------------------------------------------------- Auto Ref/Keratometer HRK-8000A 119 14.6 Guidance and manufacturer’s declaration – electromagnetic immunity The EUT is intended for use in the electromagnetic environment specified below. The customer or the user of the EUT should assure that it is used in such an electromagnetic environment. - Page 121 120 Auto Ref/Keratometer HRK-8000A --------------------------------------------------------------- NOTE 1) These guidelines may not apply in all situations. Electromagnetic propagation is affected by absorption and reflection from structures, objects and people. NOTE 2) It is essential that the actual shielding effectiveness and filter attenuation of the shielded location be verified to assure that they meet the minimum specification.
-
Page 122: Service Information
Dealer’s Name: Dealer Address: Dealer Phone No.: Model No.: Serial No.: ( Huvitz recommends customers to fill up the following form after purchase and retain this manual as a permanent record of purchase.) Write us at: Tel: +82-31-442-8868 HUVITZ Co., Ltd.
Need help?
Do you have a question about the HRK-8000A and is the answer not in the manual?
Questions and answers