Advertisement
Form# 179973
ASSEMBLY
INSTRUCTIONS
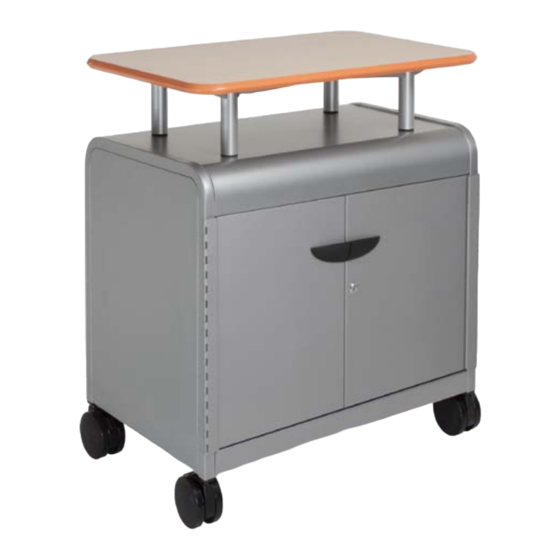
CASCADE™ RISER SHELF
CASCADE RISER SHELF
AVAILABLE OPTION FOR CASCADE™ CASES OR CABINETS.
(NOT APPLICABLE TO CASCADE™ TOWERS).
or to place an order, please contact Customer Service at 800-328-1061.
www.smithsystem.com
For assistance in assembling product, missing or damaged parts,
08.31.2015
Advertisement
Table of Contents

Related Manuals for SMITH SYSTEM CASCADE RISER SHELF


Summary of Contents for SMITH SYSTEM CASCADE RISER SHELF
- Page 1 08.31.2015 ASSEMBLY INSTRUCTIONS CASCADE™ RISER SHELF CASCADE RISER SHELF AVAILABLE OPTION FOR CASCADE™ CASES OR CABINETS. (NOT APPLICABLE TO CASCADE™ TOWERS). For assistance in assembling product, missing or damaged parts, or to place an order, please contact Customer Service at 800-328-1061.
- Page 2 Form# 179973 www.smithsystem.com 08.31.2015 Components and Hardware List HARDWARE AND COMPONENTS #10X5/8” Wood Screws Hex Head Bolt P/N – 70080 Steel Washer QTY. 4 QTY. 4 QTY. 16 Cascade Riser Handles QTY. 4 Riser Shelf Top Cascade Unit Qty. 1 QTY.
- Page 3 Form# 179973 www.smithsystem.com 08.31.2015 ASSEMBLY INSTRUCTIONS STEP 1: Flip the laminated top face down, so that the pre-drilled holes face up. Step 1: Flip the laminated top face down, so that the pre-drilled holes face up. STEP 2: Align the pole handles with the predrilled holes as shown and screw to the top using the Step 2: Align the Pole Handles with the predrilled holes as shown and screw to the top using (x16) wood screws provided.
- Page 4 Form# 179931 www.smithsystem.com 08.31.2015 ASSEMBLY INSTRUCTIONS p 3: Flip the top with pole handles attached into upright position, and align on cascade un STEP 4: Flip the top with pole handles attached (entire assembly) into the upright position and align on the Cascade™ unit. Step 3: Flip the top with pole handles attached into upright position, and align on cascade unit.
Need help?
Do you have a question about the CASCADE RISER SHELF and is the answer not in the manual?
Questions and answers