Advertisement
Table of Contents
- 1 Hardware and Components
- 2 Assembly Instructions
- 3 Step 1: Place the Top on a Clean, Dry Surface Laminate Side down
- 4 Step 2A: Loosely Attach the Legs to the Support Brace
- 5 Step 2B: if Your Table Requires a Bigger Assembly
- 6 Step 4: Tighten the Connector Bolts and Nuts
- 7 Step 5: Adjust the Leg Height as Needed
- 8 Step 6: Use the Help of at Least One Other Person
- Download this manual
Interchange Activity Table
Models
Rectangle Interchange
Square Interchange
Round Interchange
Contour Interchange
Flower Interchange
For Assistance in assembling product, missing or damaged parts,
or to place an order, please contact customer service at 800-328-1061
You may also place your order online at
www.smithsystem.com
Form# 179745
04/2015
Advertisement
Table of Contents

Related Manuals for SMITH SYSTEM Rectangle Interchange


Summary of Contents for SMITH SYSTEM Rectangle Interchange
- Page 1 Interchange Activity Table Assembly Instructions Models Rectangle Interchange Square Interchange Round Interchange Contour Interchange Flower Interchange For Assistance in assembling product, missing or damaged parts, or to place an order, please contact customer service at 800-328-1061 You may also place your order online at www.smithsystem.com...
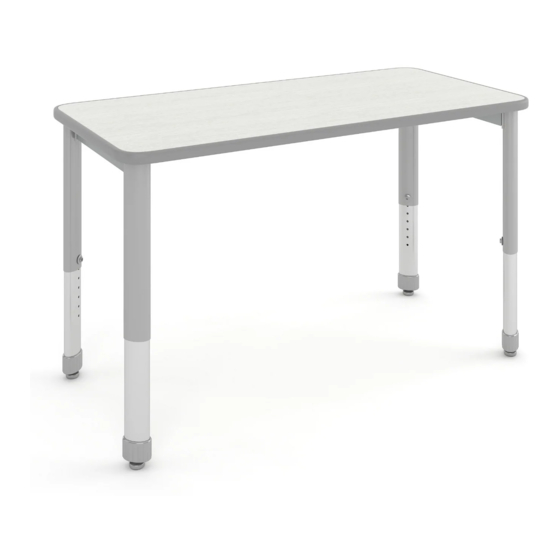
- Page 2 Hardware and Components Leg Set Support Channel/Brace Table Top (QTY: 1 Pair/Box) (P/N&QTY: See Table) (QTY: 1) 3/16” Allen Wrench P/N: 77813 P/N: 70867 – Connector Bolt ¼-20 x 23mm #10x3/4” Wood Screw (QTY: 2) P/N: 70869 – Connector Nut ¼-20 x 17mm P/N: 70054 (QTY: See Table) (QTY: See Table)
- Page 3 Assembly Instructions Step 1: Place the top on a clean, dry surface laminate side down, so that the predrill holes face up. Step 2a: Loosely attach the legs to the support brace using (4) connector bolts and (4) connector nuts. (See Picture #1A) Picture #1A Step 2b: If your table requires a bigger assembly, attach the legs to the braces using (8) Connector Bolts...
- Page 4 Step 3: Align the slots of the Leg Assembly to the pre-drilled holes of the top. Using the ¾” screws provided, attach the leg assembly to the top. (Tip: Stagger the screws in the beginning. For example, Fasten one screws on one of the legs, then another screw on the other leg. Continue to stagger the screws until the assembly is attached to the top using all of the screws.
Need help?
Do you have a question about the Rectangle Interchange and is the answer not in the manual?
Questions and answers