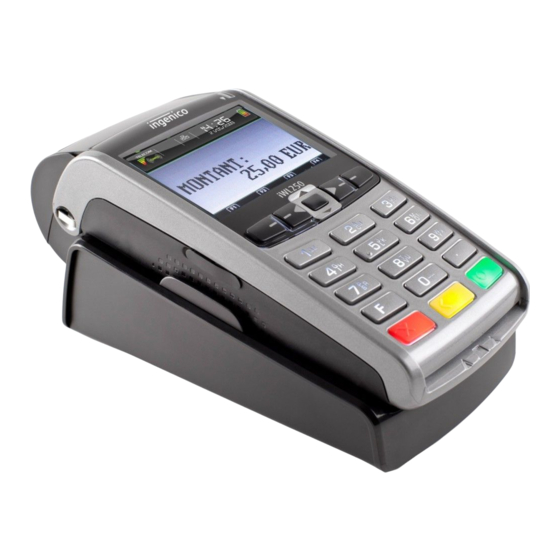
Ingenico iWL255 Quick Reference Manual
Global payments, wireless
Hide thumbs
Also See for iWL255:
- Quick reference manual (56 pages) ,
- Operating manual (132 pages) ,
- Configuration and troubleshooting manual (28 pages)
Table of Contents
Advertisement
Quick Links
Advertisement
Table of Contents

Related Manuals for Ingenico iWL255


Summary of Contents for Ingenico iWL255
- Page 1 Payments Global Payments Wireless – iWL255 Quick Reference Guide November 2019...
-
Page 3: Table Of Contents
Table of Contents 1 – Introduction ................6 2 – General Tips ................6 3 – Basic Terminal Operations ............ 7 Before You Begin ............7 How to Use This Guide ........... 7 Unpacking the Box ............7 Terminal ON/OFF ............7 Terminal Keyboard............ - Page 4 8 – Void (Credit or Debit) ............21 9 – Pre-Auth and Completion (Optional) ........22 10 – Return .................. 23 11 – Performing a Settlement (Closing the Terminal) ..... 24 12 – Reprint ................. 25 13 – Demo Mode ................. 26 14 –...
- Page 5 20 – Replacing The Paper Roll ..........36 21 – Troubleshooting ..............38 Receipt Paper is Jammed ..........38 Card Reader Does Not Work Properly (Cards are Not Read) ................38 Low Battery ..............39 Receipt is Blank ............39 22 –...
-
Page 6: Introduction
This guide is your primary source of information for operating, setting up and installing the iWL255 3G Long-Range Wireless point-of-sale (POS) terminal. For terminal-related questions or support, please contact Global Payments Customer Care. -
Page 7: Basic Terminal Operations
Global Payments. Do not try to use damaged equipment. Remove the items from the carton. You should have the following items, according to what was ordered: An iWL255 3G Long-Range Wireless terminal with paper roll installed Charging base ... -
Page 8: Terminal Keyboard
Press the green [Enter] key to power on the device; the terminal will initiate an application check and then enter the idle screen. To power off the device, press the yellow [Correction] key and the [Administrator] button simultaneously for one second. Terminal Keyboard The terminal keypad contains 10 numeric keys (0-9), an up/down scroll key, a green [Enter] key, a red [Cancel] key, a yellow [Correction] key... -
Page 9: Numeric Data Entry
Throughout the Quick Reference Guide, the [▼] NOTE: navigator key indicates scroll down and the [▲] navigator key indicates scroll up. Numeric Data Entry The terminal keypad will automatically default to a numeric-only keypad when entering data into numeric-only fields, such as card number and amount prompts. -
Page 10: Alphanumeric Data Entry
Alphanumeric Data Entry NOTE: When performing data entry on screens that accept both alpha and numeric characters, the method of using a shift key “F” to access the alpha characters and special characters is implemented. By pressing the numeric key first and then pressing the “F” key, you can scroll through all characters programmed on that key. - Page 11 FOOTERS Press [7] once. Enter Footer 1 Press [F] four times. [Op] FOOTERS Press [3] once. Enter Footer 1 Press [F] five times. [Ope] FOOTERS Press [6] once. Enter Footer 1 Press [F] five times. [Open] FOOTERS Press [0] once. Enter Footer 1 Press [F] two times.
-
Page 12: Administrator Menu
Press [Enter] to confirm data entry. The following are data entry keys: iWL255 3G Characters Accessed 1,Q, Z,q,z 2, A, B, C, a, b, c 3, D, E, F, d, e, f 4, G, H, I, g, h, i 5, J, K, L, j, k, l... -
Page 13: Password Management
Password Management The iWL255 3G Long-Range Wireless offers multi-level passwords that can be used for different purposes. You can set up a maximum of four levels of passwords. These passwords – from the highest level to the lowest level –... -
Page 14: Password Hierarchy
Manager, supervisor and clerk passwords cannot be locked out and do not expire. Password Hierarchy The password hierarchy is as follows: Administrator password Manager password Supervisor password Clerk password A higher level password is accepted in the place of a lower level password. -
Page 15: Changing The Terminal Language
If you forget your password, please call Global Payments’ Customer Care at 1-800-263-2970. For instructions on how to use each password level to protect sensitive information, please refer to Section 17. 4 – Changing the Terminal Language Press [Cancel] to return to the idle screen. At the idle screen, press [F4]. -
Page 16: To Conduct A Magnetic Stripe Transaction
To Conduct a Magnetic Stripe Transaction Press the [Enter] key to enter the main menu. Select a transaction type and follow the prompts accordingly. Position a magnetic card with the stripe in the card reader facing inward, toward the keypad. To ensure a proper read of the magnetic swipe card, the user should insert the magnetic card from the top of the unit, as shown below. -
Page 17: Sale (Credit And Debit)
6 – Sale (Credit and Debit) The sale transaction is the most common transaction for general retail applications. NOTE: If you are presented with a card with a chip on it, insert the card in the chip reader on the terminal with the chip facing up and in. - Page 18 inserts the card. Select language (if enabled). 10. The cardholder processes customer EMV prompts. 11. For debit transactions, enter the cashback amount (if enabled). 12. For debit transactions, enter the surcharge amount (if enabled). 13. The cardholder presses [F1] for Yes to confirm the total transaction amount.
- Page 19 options, or select Other to key in a specific tip percentage and press [Enter] to confirm. If tip amount is selected, cardholder can enter dollar amount for tip and press [Enter] to confirm. The cardholder presses [F1] for Yes to confirm the total amount Terminal displays “Swipe/Insert/Tap Card,”...
-
Page 20: Auth Only (Credit)
Key in the transaction amount and press [Enter]. Terminal displays “Pass Terminal to Customer,” the cardholder presses [F1] to confirm the transaction amount. If tip is enabled, customer can select either [1]-Tip percentage, [2]-Tip amount, or [3]-No Tip. If tip percentage is selected, cardholder then can select one of three pre-set tip percentage options, or select Other to key in a specific tip percentage and press [Enter] to confirm. -
Page 21: Void (Credit Or Debit)
8 – Void (Credit or Debit) If you have entered the wrong amount or need to cancel a transaction, use the Void transaction (instead of Refund) wherever possible. Transactions that are voided will not appear on cardholder statements. Customers must be present for a void transaction on a debit card. NOTE: Transactions can only be voided before they are settled. -
Page 22: Pre-Auth And Completion (Optional)
15. The cardholder hands the terminal back to the clerk. 16. Press [Enter] and the terminal starts to communicate with Global Payments. Once the transaction is complete, the merchant copy of the receipt is printed. 17. Press [Enter] to print the customer copy of the receipt. 9 –... -
Page 23: Return
NOTE: HCP is not supported in pre-auth transactions if the merchant is in restaurant profile. HCP is only enabled in pre-auth transactions for retail merchants. Completion – Complete the transaction for the final amount including tip: At the idle screen, press [Enter] to access the main menu. Uuse [▼] button to highlight r Pre Auth Completion. -
Page 24: Performing A Settlement (Closing The Terminal)
At the idle screen, press [Enter] to access the main menu. Press [2] or use [▼] button to highlight Return and press [Enter]. Enter manager password and press [Enter]. Enter total return amount (including tip and cashback) and press [Enter]. Press [Enter] and hand the terminal to cardholder. -
Page 25: Reprint
The terminal starts to communicate with Global Payments to close the batch. Once the transaction is complete, a Close Batch Settlement report is printed, giving the status of the close batch operation. Confirm the receipt displays “Batch ### Closed” to verify that the settlement is complete. -
Page 26: Demo Mode
Press the key that corresponds to the desired search option: [1]- All, [2]- Reference #, [3]-Clerk #, [4]-Invoice #, [5]-Account #, [6]-Cust PO# and [7]-Approval Code. When the transaction to reprint is found, press [F4] (Select). Press [▼] button to select the next transaction in the list. Select which copy to reprint: [1]-Merchant Copy, [2]-Customer Copy and [3]-Both. -
Page 27: Clerk Settings
14 – Clerk Settings The application allows you to track transactions by the clerk. From the clerk menu, the user has the option to Add, Delete or Print a Clerk ID list. Add Clerk ID This option allows you to add a clerk ID up to six (6) digits long. At idle menu press [.,#*] for the administrator menu. -
Page 28: Clerk Prompt
Key in the administrator name and administrator password, and then press [Enter]. Select [1] to highlight Clerk Menu. Select [3] to highlight Print ID List. Clerk Prompt This section is used to enable clerk prompting. If clerk prompting is enabled, you will be prompted for either the ID or ID plus Name. If there is at least one record in the open batch or pre auth batch, the error message “Must Settle Batch”... -
Page 29: View Batch History
Select [2] to highlight Batch Menu. Select [1] to highlight Batch Total. Press [Enter] to return to Batch Menu. View Batch History This feature will allow you to view the batch number and totals of up to thirty previous batches settled. NOTE: This feature will not be available when the application is in demo mode;... -
Page 30: Reports
CAUTION: DO NOT delete the batch before the current batch is settled. 16 – Reports To generate reports, follow the steps below: At the idle screen, press [Enter] to access the main menu Use [▼] to scroll down to highlight Report and press [Enter]. Select the report you want to generate: ... -
Page 31: Reports Menu Password Protection
and any qualified higher level passwords as shown in the password hierarchy. The table below shows a list of the administrator menu options that can be password protected and the associated parameters: Administrator Menu Associated Parameter Option Reports Menu PWReports Clerk Menu PWClerkMenu Batch Menu... -
Page 32: Transaction Password Protection
Report Menu Associated Parameter Option Clerk Report PWClerkRpt Detail Report PWDetail Summary Report PWSummary Open Pre-Auth PWPreAuthRpt Report The password protection screen will be presented to the user upon accessing one of the above reports menu options from the reports menu. -
Page 33: Terminal Security
Main Menu Option Associated Parameter Sale PWSale Return PWReturn Void PWVoid Force PWForce Settlement PWSettle Reprint PWReprint The password protection screen will be presented to the user upon initiating a transaction At idle menu press [.,#*] for the administrator menu. Key in the administrator name and administrator password, and then press [Enter]. -
Page 34: Key Beep And Backlight
If your terminal is missing, or if it does not belong to you, please call Global Payments Customer Care to deactivate the terminal immediately. As well, please call the police to report the stolen terminal. CAUTION: NEVER ask the cardholder to divulge his/her PIN code. -
Page 35: Connecting The Terminal On The Base
Storage temperature of -20° C to +55° C (-4° F to 131° F) Connecting the Terminal on the Base Place the iWL255 3G Long-Range Wireless between the flanges on its base so that the contacts on the iWL255 3G Long-Range Wireless engage with the contacts provided on the base. -
Page 36: Replacing The Paper Roll
Close the trapdoor. SIM Slot Please note that the 3G signal bar will display at the lefthand top corner on the terminal screen once the 3G network is connected. 20 – Replacing The Paper Roll When coloured stripes appear on a receipt, it is time to change the paper roll. - Page 37 To change the paper roll, follow the steps below: Pull up the flap at the top of iWL255 3G Long-Range Wireless. Pull the flap backwards to open the paper compartment. Place the paper roll into the paper compartment. Make sure the end of the paper is inserted as shown below.
-
Page 38: Troubleshooting
Card Reader Does Not Work Properly (Cards are Not Read) When sliding the card through the reader, make sure the magnetic stripe on the card is facing the iWL255 3G Long-Range Wireless display screen. Swipe the card at a faster or slower steady speed. -
Page 39: Low Battery
NOTE: Changes or modifications to this terminal not expressly approved by Global Payments could void the user’s authority to operate the equipment. Low Battery The terminal displays a warning indicating a low battery when the battery level is approximately less than seven per cent (7%) and the terminal is not powered by the base. -
Page 40: Terminal Specifications
If it does not, dry the terminal with a soft cloth 23 – Terminal Specifications This section discusses power requirements, dimensions and other specifications of the iWL255 3G Long-Range Wireless. Technical Specifications & Standard Features QVGA 320 x 240 pixel TFT-LCD ... -
Page 41: Service And Support
PCI PTS V3 Certified 24 – Service and Support For iWL255 3G Long-Range Wireless product service and repair information, contact Global Payments Customer Care at 1-800-263- 2970. Returning a Terminal for Service When you receive a replacement terminal, always return the defective devices back promptly;... - Page 42 © 2019 Global Payments Inc. All rights reserved. SM-191976-v1.0EN...
Need help?
Do you have a question about the iWL255 and is the answer not in the manual?
Questions and answers