Table of Contents
Advertisement
Quick Links
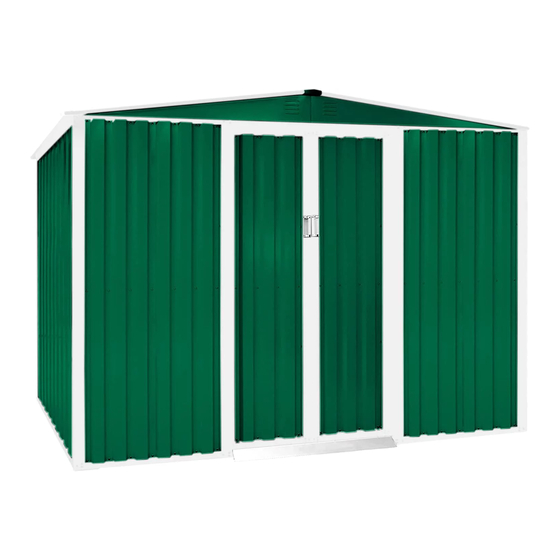
MODELS
EL64, EL65, EL66, EL67, EL69
EG64H-A, EG65H-A, EG66H-A, EG67H-A, EG69H-A
HE64, HE65, HE66, HE67, HE69
AL01
100% CANADIAN
CAUTION: Some parts have sharp edges. Care must be taken when handling
the various pieces to avoid a mishap. For safety sake, please read the safety
information provided in this manual before beginning construction. Wear
gloves when handling metal parts.
EASY TO INSTALL
Manufactured by Spacemaker Limited
15-5710507
English/French
05/07
Advertisement
Table of Contents

Related Manuals for SPACEMAKER EL64


Summary of Contents for SPACEMAKER EL64
- Page 1 ASSEMBLY INSTRUCTIONS FOR MODELS EL64, EL65, EL66, EL67, EL69 EG64H-A, EG65H-A, EG66H-A, EG67H-A, EG69H-A HE64, HE65, HE66, HE67, HE69 AL01 100% CANADIAN CAUTION: Some parts have sharp edges. Care must be taken when handling the various pieces to avoid a mishap. For safety sake, please read the safety information provided in this manual before beginning construction.
- Page 2 AH02 CONTENTS • Pre-construction instructions • Anchoring the frame • Assembling the building • Parts List and order information PROCEED WITH CONFIDENCE It might look complicated when you first unpack your building…but it really isn’t. Simply follow the illustrated instructions and your building will go up quickly and accurately. ASSEMBLY INSTRUCTIONS •...
- Page 3 IMPORTANT PERSONAL SAFETY DURING BUILDINGS CONSTRUCTION Some of the building components may contain sharp edges prior to assembly. Wear protective work gloves while handling these components. Wear eye protection when using any form of power tool. Do not use household voltage power tools in a wet or damp environment. Household voltage power tools must be monitored and controlled by a Ground Fault Interrupter or more commonly called a G.F.I.
- Page 4 Parts List AL04 IMPORTANT...When ordering parts please provide number stamped on the surface of galvalized parts. In the case of wall and roof panels please provide the model number of the building, color and size of panels. To order parts please use order form on the last page. Part Part Quantity...
- Page 5 Parts Not Identified with Part Number CORNER PANEL HALF CORNER PANEL WALL PANEL HALF WALL PANEL LEFT GABLE RIGHT GABLE ROOF PANEL HALF ROOF PANEL WEATHERSEAL TAPE DOOR HANDLE PLASTIC WASHER TREE DOOR PANEL ITEMS in the HARDWARE BAG ROOF CORNER DOOR SPACER DOOR GLIDE...
- Page 6 STEP 1 1 1 1 1 SIDE AND REAR BASE RAILS Assemble lengths of side base rails (2 pcs.) See Pages 4 and 5 for profile, together with a lap joint. Align large holes. correct part number and quantity Repeat for other side. required for your building.
- Page 7 STEP 3 3 3 3 3 BASE FRAME ASSEMBLY Assemble all 4 base rails into a base frame in proper position on your foundation. Use 10mm (3/8") self tapping screws on front and on back corners. Check base frame for squareness by measuring diagonal corners.
- Page 8 STEP 4 4 4 4 4 CORNER PANELS Position rear corner panels and fasten to rear See Pages 4 and 5 for profile, and side base rails...with narrow flange of correct part number and quantity panel along the side of the building. required for your building.
- Page 9 STEP SPLICED ASSEMBLY OF DOOR 6 6 6 6 6 TRACK AND DOOR FASCIA Assemble lengths of door track No. 66H See Pages 4 and 5 for profile, (2 pcs.) together with door fascia No. 635H. correct part number and quantity required for your building.
- Page 10 AL10 STEP 8 8 8 8 8 DOOR JAMBS AND FRONT MIDWALL BRACE Remove corner panel screws as necessary and install door jambs No. 69G on each side of entry ramp...sliding door jamb under the half corner panel and under door fascia. Fasten at base rail --- then fasten through the door fascia and door jamb into the side of door track.
- Page 11 STEP 9 9 9 9 9 SIDE AND REAR WALL PANELS Install wall panels on each side wall...fasten to base rails and top rails. NOTE - Size 6x4 and 6x6 uses a smaller half wall panel along the side walls only. At the midwall height on the overlap ridge joint of each wall panel...fasten with 10mm (3/8") long bolts and nuts.
- Page 12 STEP 1 1 1 1 1 1 1 1 1 1 GABLE INSTALLATION Place right rear gable in position and fasten to rear top rail with screws. See "A" Install left rear gable as above. USE A STEP LAD- Fasten right and left gables together...leaving 2 top holes vacant. Repeat above for front set of gables.
- Page 13 STEP INSTALLATION OF MAIN RIDGE BEAM Position the main ridge beam section on the MAIN RIDGE BEAM gables...with the extended lips of the gable section fitting between the 2 pieces...See "A". Fasten with "A" bolts and nuts. NOTE - THE SURFACE OF THE RIDGE BEAM NOTE - TO INSTALL USE ONLY 2 BOLTS CONTAINING THE MOST NUMBER OF FIXING AND NUTS AT EACH END.
- Page 14 STEP ROOF PANELS AND TAPE Install roof panels by overlapping the adjacent panel. Fasten See Pages 4 and 5 for to ridge beam and top rails with screws and washers. profile, correct part NOTE - Size 6x4 and 6x6 uses a small half roof panel on number and quantity each side at the center.
- Page 15 STEP RIDGE COVER AND END CAP INSTALLATION Carefully position ridge cover section and arrange for a See Pages 4 and 5 for helper outside on a ladder to adjust position and to apply profile, correct part pressure as necessary. number and quantity From the inside of building start from the gable ends and required for your building.
- Page 16 COMPLETE THE ANCHORING OF YOUR STEP NOTE: Anchor screws, washers and shields BUILDING NOW! are NOT supplied as part of the hardware YOUR BUILDING MUST BE ANCHORED! package and may be purchased at your local Check building position on concrete base and adjust store.
- Page 17 AL17 STEP DOOR AND HARDWARE ASSEMBLY Position a door strengthener No. DIS03 on the inside return lip of the door as shown in the illustration. Position a second door strengthener No. DIS03 on the opposite inside surface of the door. Attach top and bottom door braces No.
- Page 18 STEP DOOR INSTALLATION "A" 2 2 2 2 2 1 1 1 1 1 (FROM INSIDE) DOOR TRACK Inside and near the corner of build- ing, install bottom lip of left door into track formed in base rail. Position top of door so that holes in door line up with CENTER holes in door glide.
- Page 19 NOTES...
- Page 20 AH20 REPLACEMENT PARTS OR ANY QUESTIONS REGARDING YOUR BUILDING SHOULD BE REFERRED DIRECTLY TO CUSTOMER SERVICE. DO NOT CONTACT YOUR DEALER, THEY ARE NOT EQUIPPED TO SERVICE YOUR REQUESTS AS PROMPTLY AS CUSTOMER SERVICE DEPARTMENT (1-800-851-1085). PARTS REPLACEMENT ORDER FORM ** MODEL NO.______________ ** NAME: PART NO.
Need help?
Do you have a question about the EL64 and is the answer not in the manual?
Questions and answers