Table of Contents
Advertisement
Quick Links
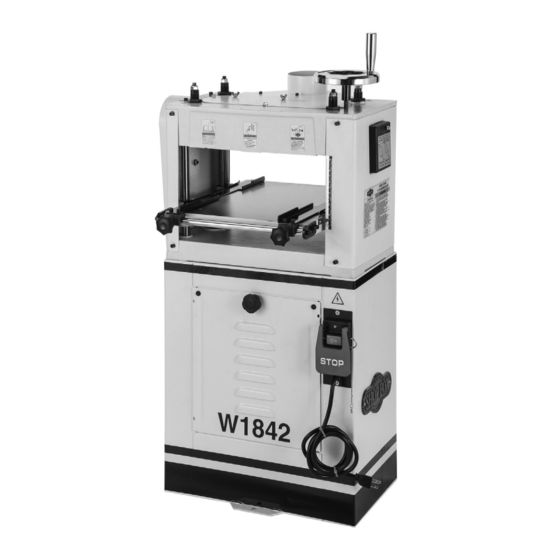
MODEL W1842
13" PLANER/MOULDER
OWNER'S MANUAL
(FOR MODELS MANUFACTURED SINCE 6/17)
Phone: (360) 734-3482 • Online Technical Support: techsupport@woodstockint.com
COPYRIGHT © SEPTEMBER, 2017 BY WOODSTOCK INTERNATIONAL, INC.
WARNING: NO PORTION OF THIS MANUAL MAY BE REPRODUCED IN ANY SHAPE OR FORM WITHOUT
THE WRITTEN APPROVAL OF WOODSTOCK INTERNATIONAL, INC.
#18953BL Printed in Taiwan
Advertisement
Table of Contents

Related Manuals for Shop fox W1842


Summary of Contents for Shop fox W1842
- Page 1 MODEL W1842 13" PLANER/MOULDER OWNER'S MANUAL (FOR MODELS MANUFACTURED SINCE 6/17) Phone: (360) 734-3482 • Online Technical Support: techsupport@woodstockint.com COPYRIGHT © SEPTEMBER, 2017 BY WOODSTOCK INTERNATIONAL, INC. WARNING: NO PORTION OF THIS MANUAL MAY BE REPRODUCED IN ANY SHAPE OR FORM WITHOUT THE WRITTEN APPROVAL OF WOODSTOCK INTERNATIONAL, INC. #18953BL Printed in Taiwan...
- Page 2 This manual provides critical safety instructions on the proper setup, operation, maintenance, and service of this machine/tool. Save this document, refer to it often, and use it to instruct other operators. Failure to read, understand and follow the instructions in this manual may result in fire or serious personal injury—including amputation, electrocution, or death.
-
Page 3: Table Of Contents
Contents INTRODUCTION........2 Adjusting/Replacing Planer Knives ..30 Moulding Fences ........ 32 Woodstock Technical Support ....2 Bedboard ........33 Machine Specifications ......3 Moulding Knives ........ 34 Identification ........6 Moulding Operation ......36 Controls & Components ......7 Edge Moulding ........37 SAFETY..........8 Moulding Do's &... -
Page 4: Introduction
Model W1842 (For Machines Mfd. Since 6/17) INTRODUCTION Woodstock.Technical.Support This machine has been specially designed to provide many years of trouble-free service. Close attention to detail, ruggedly built parts and a rigid quality control program assure safe and reliable operation. -
Page 5: Machine Specifications
Switch Type................ON/OFF Push Button Switch Motors Main Horsepower....................1.5 HP Phase....................Single‐Phase Amps....................15A/7.5A Speed....................3450 RPM Type................. TEFC Capacitor‐Start Induction Power Transfer ..................Belt Drive Bearings............... Shielded & Permanently Lubricated Model W1842 Machine Specifications, Page 1 of 3... - Page 6 Cutterhead Assembly..................Steel Infeed Roller.................... Rubber Outfeed Roller..................Rubber Paint Type/Finish................Powder Coated Other Measurement Scale................Inch & Metric Number of Dust Ports..................1 Dust Port Size....................4 in. Mobile Base..................... D2057A Model W1842 Machine Specifications, Page 2 of 3...
- Page 7 White Powder‐Coated Finish 2 Moulding Fences Easily Adjustable Guides Anti‐Kickback Pawls and Chip Breaker Device Convenient Knife Changes 4" Dust Port Rubberized‐Steel Feed Rollers 4‐Column Table Support Inch and Metric Measuring Scale Model W1842 Machine Specifications, Page 3 of 3...
-
Page 8: Identification
Model W1842 (For Machines Mfd. Since 6/17) Identification Become familiar with the names and locations of the controls and features shown below to better understand the instructions in this manual. 4" Dust Port Table Table Height Handwheel Moulding Gearbox Fences... -
Page 9: Controls & Components
Model W1842 (For Machines Mfd. Since 6/17) Controls.&.Components Refer to the Figures.1–2 and the following descriptions to become familiar with the basic controls and components of this machine. Understanding these items and how they work will help you understand the rest of the manual and stay safe when operating this machine. -
Page 10: Safety
Model W1842 (For Machines Mfd. Since 6/17) SAFETY SAFETY For.Your.Own.Safety, Read.Manual.Before.Operating.Machine The. purpose. of. safety. symbols. is. to. attract. your. attention. to. possible. hazardous. conditions.. This. manual.uses.a.series.of.symbols.and.signal.words.intended.to.convey.the.level.of.importance.of.the. safety.messages..The.progression.of.symbols.is.described.below..Remember.that.safety.messages.by. themselves. do. not. eliminate. danger. and. are. not. a. substitute. for. proper. accident. prevention. mea- sures—this.responsibility.is.ultimately.up.to.the.operator! - Page 11 Model W1842 (For Machines Mfd. Since 6/17) WEARING.PROPER.APPAREL..Do not wear FORCING.MACHINERY..Do not force machine. It clothing, apparel, or jewelry that can become will do the job safer and better at the rate for entangled in moving parts. Always tie back which it was designed.
-
Page 12: Additional Safety For Planers/Moulders
Model W1842 (For Machines Mfd. Since 6/17) Additional.Safety.for.Planers/Moulders Serious. cuts,. amputation,. entanglement,. or. death. can. occur. from. contact. with. rotating. cutterhead..or.other.moving.parts!.Flying.chips.can.cause.blindness.or.eye.injuries..Workpieces. or.knives.thrown.by.cutterhead.can.strike.nearby.operator.or.bystanders.with.deadly.force..To. reduce. the. risk. of. these. hazards,. operator. and. bystanders. MUST. completely. heed. hazards. and. warnings.below. KICKBACK. Know how to reduce the risk of kick- CUTTING.LIMITATIONS. -
Page 13: Electrical
Model W1842 (For Machines Mfd. Since 6/17) ELECTRICAL Circuit.Requirements This machine must be connected to the correct size and type of power supply circuit, or fire or electrical damage may occur. Read through this section to determine if an The. machine. must. be. properly. set. up. -
Page 14: Grounding Requirements
Model W1842 (For Machines Mfd. Since 6/17) Grounding.Requirements This machine MUST be grounded. In the event of certain types of malfunctions or breakdowns, grounding provides a path of least resistance for electric current to travel—in The. machine. must. be. properly. set. up. -
Page 15: Voltage Conversion To 220V
Model W1842 (For Machines Mfd. Since 6/17) Voltage.Conversion.to. 220V The voltage conversion MUST be performed by an Remove electrician or qualified service personnel. Ground Wire Capa Nuts and The voltage conversion procedure consists of rewiring the 125V Disconnect motor and installing the correct plug. A wiring diagram is Wires provided on Page.58 for your reference. -
Page 16: Setup
Model W1842 (For Machines Mfd. Since 6/17) SETUP Unpacking This machine has been carefully packaged for safe This machine presents transportation. If you notice the machine has been serious injury hazards damaged during shipping, please contact your authorized to untrained users. Read Shop Fox dealer immediately. -
Page 17: Inventory
Model W1842 (For Machines Mfd. Since 6/17) Inventory The following is a list of items shipped with your machine. Before beginning setup, lay these items out and inventory them. Note: If you cannot find an item on this list, carefully check around/inside the machine and packaging materials. -
Page 18: Cleaning Machine
Model W1842 (For Machines Mfd. Since 6/17) Cleaning.Machine To prevent corrosion during shipment and storage of your machine, the factory has coated the bare metal surfaces of your machine with a heavy-duty rust prevention compound. Gasoline.and.petroleum. products.have.low.flash. If you are unprepared or impatient, this compound can points.and.can.explode. -
Page 19: Machine Placement
Model W1842 (For Machines Mfd. Since 6/17) Machine.Placement Weight.Load Physical.Environment Refer to the Machine.Specifications for the The physical environment where your machine is weight of your machine. Make sure that the operated is important for safe operation and the surface upon which the machine is placed will longevity of its components. -
Page 20: Assembly
Model W1842 (For Machines Mfd. Since 6/17) Assembly Before beginning the assembly process, refer to Items. Needed.for.Setup and gather everything you need. Ensure all parts have been properly cleaned of any USE. helpers. or. power. heavy-duty rust-preventative applied at the factory (if lifting. - Page 21 Model W1842 (For Machines Mfd. Since 6/17) 4. Slide dust hood under chip guard bracket and secure top with (3) M5-.8 x 8 cap screws and (3) 5mm lock washers and secure bottom with (1) M6-1 x 12 cap screw and (1) 6mm lock washer, as shown in Figure.13.
-
Page 22: Dust Collection
Model W1842 (For Machines Mfd. Since 6/17) Dust.Collection Recommended.CFM.at.Dust.Port:....400.CFM Do not confuse this CFM recommendation with the rating This. machine. creates. substantial. of the dust collector. To determine the CFM at the dust amounts. of. dust. during. operation.. port, you must consider these variables: (1) CFM rating of Breathing. -
Page 23: Test Run
Model W1842 (For Machines Mfd. Since 6/17) Test.Run Once assembly is complete, test run the machine to ensure it is properly connected to power and safety components are functioning properly. Serious. injury. or. death. can. result. from. using. this. machine. BEFORE. -
Page 24: Operations
Model W1842 (For Machines Mfd. Since 6/17) OPERATIONS General This machine will perform many types of operations that are beyond the scope of this manual. Many of these operations can be dangerous or deadly if performed incorrectly. The instructions in this section are written with the understanding that the operator has the necessary knowledge and skills to operate this machine. -
Page 25: Workpiece Inspection
Model W1842 (For Machines Mfd. Since 6/17) Workpiece.Inspection Wood.Types Some workpieces are not safe to use or may The species of wood, as well as its condition, require modification before they are. Before. greatly affects the depth of cut the planer can cutting,.inspect.all.workpieces.for.the. -
Page 26: Planing Tips
Model W1842 (For Machines Mfd. Since 6/17) Planing.Tips Cutting.Problems • Inspect your lumber for twisting or cupping, Below is a list of wood characteristics you and surface one face on a jointer if may encounter when planing. The following necessary before planing workpiece. - Page 27 Model W1842 (For Machines Mfd. Since 6/17) Chip.Marks.or.Indentations Rippled.Cut. Problem: Chip indentation or chip bruising is Problem: Regularly spaced indentations across the result of wood chips not being thrown away face of workpiece are caused by excessive from the cutterhead and out of the machine.
-
Page 28: Depth Of Cut
Model W1842 (For Machines Mfd. Since 6/17) Depth.of.Cut Maximum.Depth.of.Cut.(Per.Pass) ....... ⁄ " Table Table.Movement.per.Handwheel.Revolution..⁄ " Height Material.Thickness.Range....... ⁄ "–6" Handwheel The depth of cut on a planer means the amount of material that is removed from the top of the workpiece as it passes underneath the cutterhead. -
Page 29: Setting Feed Rate
Model W1842 (For Machines Mfd. Since 6/17) Setting.Feed.Rate The power feed has a two-speed gearbox that uses a 31/46T gear combination (see Figure.20) to plane at 24 FPM and a 20/57T gear combination to feed the workpiece Only. change. the. feed. rate. when. the. -
Page 30: Planing Do's & Don'ts
Model W1842 (For Machines Mfd. Since 6/17) Planing.Do's.&.Don'ts There are common mistakes that must be avoided when planing. CORRECT Multiple.Boards Only plane one board at a time (see Figure 23). Whether you use guide rails or not, never attempt to plane more than one board at a time side-by-side. -
Page 31: Planing Operation
Model W1842 (For Machines Mfd. Since 6/17) Planing.Operation Thickness planing sizes material and creates a smooth surface parallel with the opposite side of the board. It does not remove twisting, warping, or cupping. If these conditions exist, joint the workpiece before using the AVOIDING KICKBACK! planer. -
Page 32: Adjusting/Replacing Planer Knives
Take. great. caution. whenever. working. with. or. The knife-setting jig that is included with the Model around.cutterhead.knives..Wear.heavy. W1842 is designed to set the knives 0.040" higher than the leather.gloves.to.reduce.risk.of.severe. cutterhead surface (see Figure.25). cuts. Note:.If you need to replace or sharpen a knife, you can remove the knife from the cutterhead during Step 4 of the following procedure. - Page 33 Model W1842 (For Machines Mfd. Since 6/17) 4. Use small piece of wood or drift to tap gibs down into cutterhead slot (see Figure.26). Figure.26. Loosening the gibs. 5. Place knife-setting jig over knife on cutterhead, as shown in Figure.27.
-
Page 34: Moulding Fences
Model W1842 (For Machines Mfd. Since 6/17) Moulding.Fences The moulding fences align the workpiece with the Guide Moulding moulding knives. Fence Components.and.Hardware.Needed:. Moulding Fences ..........2 Guide Moulding Fence Guide Rod ........1 Moulding Fence Guide Rod Brackets ......2 Bracket Knob Bolts (Male) M6-1 x 20 ........2 Cap Screws M6-1 x 20 ..........6... -
Page 35: Bedboard
Model W1842 (For Machines Mfd. Since 6/17) Bedboard A bedboard is essential to prevent the moulding knives from coming into contact with the work table and damaging the moulding knives, cutterhead, and work table. Components.and.Hardware.Needed:. ⁄ " to ⁄ " Plywood or MDF (Not included) ....1 ⁄... -
Page 36: Moulding Knives
Model W1842 (For Machines Mfd. Since 6/17) Moulding.Knives Moulding cutter knives are available in many sizes and profiles. Knives that are larger than 2" wide are generally ⁄ " thick and come with their own set of gibs. The knives To. - Page 37 Model W1842 (For Machines Mfd. Since 6/17) 7. For smaller knife sets only remove center spacers. For larger knife sets remove gibs, spacers, and Moulding Planing planer knives. Knife Knife Cutterhead Note: The planer knives remain in place when using Slot knives under 2".
-
Page 38: Moulding Operation
Model W1842 (For Machines Mfd. Since 6/17) Moulding.Operation Max..Profile.Depth.Moulding......⁄ " Max..Profile.Width.Moulding......4 ⁄ " Removing. more. than. ⁄ ". off. overall. The maximum depth of a moulding cut in soft wood is profile. of. moulding. can. break. knives,. ⁄... -
Page 39: Edge Moulding
Model W1842 (For Machines Mfd. Since 6/17) Edge.Moulding Certain moulding tasks require the workpiece to be oriented vertically, and thus extra-tall wood fence rails or Knife Workpiece guide boards are needed. " Components.and.Hardware.Needed:. Wood Fence Rail Material (Not included) ....2... -
Page 40: Moulding Do's & Don'ts
Model W1842 (For Machines Mfd. Since 6/17) Moulding.Do's.&.Don'ts The Model W1842 will accommodate most moulding knife profiles. However, you must still pay special attention to Sacrificial Table workpiece support and knife-to-table clearance. Refer to the following examples to avoid common workpiece setup CORRECT mistakes. - Page 41 Model W1842 (For Machines Mfd. Since 6/17) Crown.Moulding.Support When cutting crown moulding (see Figure 36), make a CORRECT wooden V-track that can be clamped to the table. The V-track must support at least 50% of the workpiece height on both sides.
- Page 42 Model W1842 (For Machines Mfd. Since 6/17) Always.Use.Guide.Rails.When.Moulding Always use the guide rails (see Figure 38), so the Guide Rail CORRECT moulding profile can be cut with maximum safety and without wander, twisting, or profile misalignment. DO NOT attempt to cut moulding without using the guide rails.
-
Page 43: Accessories
Model W1842 (For Machines Mfd. Since 6/17) ACCESSORIES Planer/Moulder.Accessories The following planer/moulder accessories may be available through your local Woodstock International Inc. Dealer. If you do not have a dealer in your area, these products are also available through online dealers. - Page 44 Select from this terrific assortment of casing, baseboard, crown moulding, and detail cutters. Knives are created through modern powdered metal technology. Designed for use with the Model W1842 Planer/Moulder. Knives come in sets of three (shown below at 40% real size). Easy installation with your cutterhead gibs.
-
Page 45: Maintenance
Model W1842 (For Machines Mfd. Since 6/17) MAINTENANCE Schedule Every.160.Hours.of.Operation:. • Lubricate leadscrews (Page.44). Check/tension/replace V-belts (Page 46). • • Clean/vacuum dust buildup from inside cabinet and off motor. MAKE. SURE. that. your. • Lubricate table height chain/sprockets machine. is. unplugged. -
Page 46: Lubrication
Model W1842 (For Machines Mfd. Since 6/17) Lubrication This machine features bearings that are lubricated and sealed at the factory. These bearings do not require any service unless they need to be replaced. If a bearing fails, Failure.to.follow.reasonable.lubrication. your machine will probably develop a noticeable rumble practices.as.instructed.in.this.manual.for. - Page 47 Model W1842 (For Machines Mfd. Since 6/17) Table.Height.Chain.&.Sprockets Lube Type ........NLGI#2 Equivalent Sprockets Amount ..........Thin Coat Frequency ..... Every 160 Hours of Operation The table leadscrews are synchronized by the table height chain and sprockets located underneath the planer base (see Figure.42).
-
Page 48: Service
Model W1842 (For Machines Mfd. Since 6/17) SERVICE General This section covers the most common service adjustments or procedures that may need to be made during the life of your machine. If you require additional machine service not included in this section, please contact Woodstock International Technical Support at (360) 734-3482 or send e-mail to: techsupport@woodstockint.com. - Page 49 Model W1842 (For Machines Mfd. Since 6/17) To.tension/replace.V-belts,.do.these.steps: Cutterhead 1. DISCONNECT MACHINE FROM POWER! Pulley 2. Remove V-belt cover from left side of machine to expose belts, as shown in Figure.44. V-Belts Note:.A collection of black belt dust at the bottom of the belt cover is normal during the life of the belts.
-
Page 50: Aligning Pulleys
Model W1842 (For Machines Mfd. Since 6/17) Aligning.Pulleys Pulley alignment is another important factor in power transmission and belt life. The pulleys should be parallel to each other and in the same plane (coplaner) for optimum performance. The pulleys can be adjusted by loosening the motor mount screws, aligning the pulleys, and retightening the screws. -
Page 51: Tensioning Table Height Chain
Model W1842 (For Machines Mfd. Since 6/17) Tensioning.Table.Height. Chain The table height chain transfers movement from the elevation handwheel to the columns that control table height. The chain drive can be adjusted to remove slack if the chain stretches over time or is loosened during table leveling procedures. -
Page 52: Feed Roller Height
Model W1842 (For Machines Mfd. Since 6/17) Feed.Roller.Height Tools.Needed: Gauge Block (Not included) ........1 " Feeler Gauge (Not included) ........1 " 45° The infeed and outfeed rollers move the lumber through the planer/moulder, and press the lumber flat against the 4"... - Page 53 Model W1842 (For Machines Mfd. Since 6/17) Adjusting.Roller.Height If the infeed and outfeed rollers are not 0.08" below the Threaded cutterhead knife edge at bottom dead center, or if the Adjuster rollers are not the same height on both sides, the roller and Lock height must be adjusted.
-
Page 54: Feed Roller Pressure
Model W1842 (For Machines Mfd. Since 6/17) Feed.Roller.Pressure To be effective, the infeed and outfeed rollers must put pressure on the workpiece as it feeds through the planer/ Spring moulder. Too little pressure and the boards will not feed Pressure... -
Page 55: Calibrating Table Height Scale
Model W1842 (For Machines Mfd. Since 6/17) Calibrating.Table.Height. Scale The table height scale, located below the handwheel, can be adjusted for accuracy. However, material must be run through the machine to adjust the scale. Make certain you have followed the directions in.Operations for test running before attempting to make these adjustments. -
Page 56: Positioning Chip Deflector
Model W1842 (For Machines Mfd. Since 6/17) Positioning.Chip.Deflector Chip Deflector Gap Setting ......⁄ "– ⁄ " Chip Guide Wing Nuts The chip deflector directs chips and dust into the dust hood and prevents chips from falling back into the planing area. -
Page 57: Troubleshooting
Model W1842 (For Machines Mfd. Since 6/17) Troubleshooting The following troubleshooting tables cover common problems that may occur with this machine. If you need replacement parts or additional troubleshooting help, contact our Technical Support. Note: Before contacting Tech Support, find the machine serial number and manufacture date, and if available, your original purchase receipt. - Page 58 Model W1842 (For Machines Mfd. Since 6/17) Machine Operation PROBLEM POSSIBLE.CAUSE CORRECTIVE.ACTION Excessive snipe 1. Workpiece is not supported properly as it 1. Hold workpiece up slightly as it leaves outfeed end (gouge in end leaves planer. of planer; use outfeed roller/table to properly sup- of board that is port workpiece as it leaves planer.
-
Page 59: Electrical Safety Instructions
Model W1842 (For Machines Mfd. Since 6/17) Electrical.Safety.Instructions These pages are current at the time of printing. However, in the spirit of improvement, we may make changes to the electrical systems of future machines. Compare the manufacture date of your machine to the one stated in this manual, and study this section carefully. -
Page 60: Wiring Diagram
Model W1842 (For Machines Mfd. Since 6/17) Wiring.Diagram Ground Read Page 57 STOP Before Wiring Rewired to 220V Figure.58. ON/OFF switch wiring. Start Ground Capacitor 300uF 125VAC MOTOR 110V Figure.59. Motor wiring. ON/OFF SWITCH (viewed from behind) 6-15 Plug 5-15 Plug... -
Page 61: Parts
Model W1842 (For Machines Mfd. Since 6/17) PARTS Main 15 16 30 31 9 10 21 10 46 47 64 65 80 81 83 84 113-3 113-4 113-2 113-7 113-12 113-8 113-1 113-11 113-6 113-9 113-10 160-3 160-1 160-5 113-13... - Page 62 Model W1842 (For Machines Mfd. Since 6/17) Main.Parts.List REF PART # DESCRIPTION REF PART # DESCRIPTION X1842001 HEX BOLT M6-1 X 12 X1842060 GEAR X1842002 LOCK WASHER 6MM X1842061 WORM GEAR X1842003 DUST CHUTE 4" X1842062 KEY 3 X 3 X 8...
- Page 63 Model W1842 (For Machines Mfd. Since 6/17) Main.Parts.List.(Ctd.) PART # DESCRIPTION PART # DESCRIPTION 110-5 X1842110-5 CONTACT POINTS X1842128 GEAR 46T 110-6 X1842110-6 CENTRIFUGAL SWITCH X1842129 GEAR 36T 110-7 X1842110-7 BALL BEARING 6203-2RS X1842130 KNIFE-SETTING JIG ASSY 110-8 X1842110-8 BALL BEARING 6205-2RS 130–1...
-
Page 64: Labels & Cosmetics
Model W1842 (For Machines Mfd. Since 6/17) Labels.&.Cosmetics REF PART # DESCRIPTION REF PART # DESCRIPTION X1842201 READ MANUAL LABEL X1842207 MODEL NUMBER LABEL X1842202 WARNING LABEL X1842208 SHOP FOX NAMEPLATE 3.25 X 8.125 X1842203 EYES-LUNG-HEARING LABEL X1842209 TOUCH-UP PAINT, SHOP FOX WHITE... - Page 65 Model W1842 (For Machines Mfd. Since 6/17)
- Page 66 Fold along dotted lIne place stamp Here Woodstock international inc. p.o. box 2309 bellingham, Wa 98227-2309 Fold along dotted lIne tape along edges--please do not staple...
-
Page 67: Warranty
Woodstock International, Inc. will repair, replace, or arrange for a dealer refund, at its expense and option, the Shop Fox machine or machine part proven to be defective for its designed and intended use, provided that the original owner returns the product prepaid to an authorized warranty or repair facility as designated by our Bellingham, Washington office with proof of their purchase of the product within two years, and provides Woodstock International, Inc.
Need help?
Do you have a question about the W1842 and is the answer not in the manual?
Questions and answers