Table of Contents
Advertisement
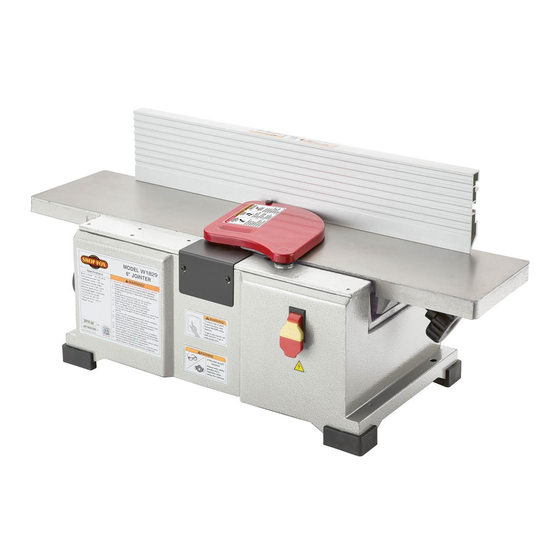
MODEL W1829
6" JOiNtER
OWNER'S MANUAL
(FOR MODELS MANUFACTURED SINCE 9/11)
Phone: (360) 734-3482 • Online technical Support: tech-support@shopfox.biz
COPYRiGHt © SEPtEMBER, 2011 BY WOODStOCK iNtERNAtiONAL, iNC. REViSED AUGUSt, 2012 (St)
WARNiNG: NO PORtiON OF tHiS MANUAL MAY BE REPRODUCED iN ANY SHAPE OR FORM WitHOUt
tHE WRittEN APPROVAL OF WOODStOCK iNtERNAtiONAL, iNC.
#14362KN Printed in China
Advertisement
Table of Contents

Related Manuals for Shop fox W1829


Summary of Contents for Shop fox W1829
- Page 1 MODEL W1829 6" JOiNtER OWNER'S MANUAL (FOR MODELS MANUFACTURED SINCE 9/11) Phone: (360) 734-3482 • Online technical Support: tech-support@shopfox.biz COPYRiGHt © SEPtEMBER, 2011 BY WOODStOCK iNtERNAtiONAL, iNC. REViSED AUGUSt, 2012 (St) WARNiNG: NO PORtiON OF tHiS MANUAL MAY BE REPRODUCED iN ANY SHAPE OR FORM WitHOUt tHE WRittEN APPROVAL OF WOODStOCK iNtERNAtiONAL, iNC. #14362KN Printed in China...
- Page 2 This manual provides critical safety instructions on the proper setup, operation, maintenance, and service of this machine/tool. Save this document, refer to it often, and use it to instruct other operators. Failure to read, understand and follow the instructions in this manual may result in fire or serious personal injury—including amputation, electrocution, or death.
-
Page 3: Table Of Contents
Contents INTRODUCTION........2 ACCESSORIES........25 Woodstock Technical Support ....2 MAINTENANCE........27 About Your Machine ......2 General .......... 27 Machine Specifications ......4 Cleaning ......... 27 Controls & Features ......5 Table & Base ........27 SAFETY..........6 V-Belts ........... 27 Standard Machinery Safety Instructions .. -
Page 4: Introduction
Email:.manuals@woodstockint.com About.Your.Machine The W1829 6" Jointer is a benchtop machine; its compact size makes for convenient placement in any shop. It mounts and dismounts quickly to a workbench making it portable when necessary. It is primarily used to produce straight, flat faces on a workpiece, in order to properly square the... - Page 5 Bevel Jointing................. 0 – 45 deg. L/R Maximum Width of Cut................... 6 in. Maximum Depth of Cut................1/8 in. Minimum Workpiece Length................8 in. Minimum Workpiece Thickness............... 1/2 in. Number of Cuts Per Minute................20,000 Model W1829 Machine Specifications, Page 1 of 2...
-
Page 6: Machine Specifications
ISO 9001 Factory ....................No CSA Certified ....................... No Features 45 Degree Inward, 90 and 45 Degree Outward Stops Jack Screw Knife Adjustment 2-1/2" Dust Port 2 Safety Push Blocks Dust Collection Fan, Chute and Bag Model W1829 Machine Specifications, Page 2 of 2... -
Page 7: Controls & Features
Model W1829 (Mfg. Since 9/11) Controls.&.Features Fence Cutterhead Guard Outfeed Table Infeed Table Dust Collection Depth of Cut Chute Adjusting Knob ON/OFF Switch Figure.1. W1829 identification—front view. Fence Tilting Handle Fence Bracket Assembly Fence Tilting Handle Figure 2. W1829 identification—rear view. -
Page 8: Safety
Model W1829 (Mfg. Since 9/11) SAFETY READ MANUAL BEFORE OPERATING MACHINE. FAILURE TO FOLLOW INSTRUCTIONS BELOW WILL RESULT IN PERSONAL INJURY. Indicates an imminently hazardous situation which, if not avoided, WILL result in death or serious injury. Indicates a potentially hazardous situation which, if not avoided, COULD result in death or serious injury. - Page 9 Model W1829 (Mfg. Since 9/11) 10. NEVER LEAVE WHEN MACHINE IS RUNNING. Turn power OFF and allow all moving parts to come to a complete stop before leaving machine unattended. 11. DO NOT USE IN DANGEROUS ENVIRONMENTS. DO NOT use machinery in damp, wet locations, or where any flammable or noxious fumes may exist.
-
Page 10: Additional Safety For Jointers
Model W1829 (Mfg. Since 9/11) Additional.Safety.for.Jointers READ.and.understand.this. USE.this.and.other.machinery.with.caution. entire.manual.before.using. and. respect.. Always. consider. safety. first,. this.machine..Serious.per- as. it. applies. to. your. individual. working. sonal. injury. may. occur. conditions..No.list.of.safety.guidelines.can. if. safety. and. operational. be. complete—every. shop. environment. is. information. is. not. under- different..Failure.to.follow.guidelines.could. -
Page 11: Electrical
Model W1829 (Mfg. Since 9/11) ELECTRICAL Circuit.Requirements This machine must be connected to the correct size and The machine must be properly set up type of power supply circuit, or fire or electrical damage before it is safe to operate. DO NOT may occur. -
Page 12: Grounding Requirements
Model W1829 (Mfg. Since 9/11) Grounding.Requirements GROUNDED 110V 5-15 RECEPTACLE This machine MUST be grounded. In the event of certain types of malfunctions or breakdowns, grounding provides Grounding Prong a path of least resistance for electric current to travel—in order to reduce the risk of electric shock. -
Page 13: Setup
Keep. machine. disconnected. from. The following is a description of the main components power.until.instructed.otherwise. shipped with the Model W1829. Lay the components out to inventory them. Note: If you can't find an item on this list, check the mounting location on the machine or examine the packaging materials carefully. -
Page 14: Machine Placement
Model W1829 (Mfg. Since 9/11) Machine.Placement Cleaning.Machine •. Workbench.Load: Refer to the Machine The tables and other unpainted parts of your Specifications, on Page 3, for the weight jointer are coated with a waxy grease that protects them from corrosion during shipment. -
Page 15: Bench Mounting
Model W1829 (Mfg. Since 9/11) Bench.Mounting The strongest bench mounting option is a "Through Mount" where holes are drilled all the way through the workbench, and hex bolts, washers, and hex nuts are Bolt used to secure the machine to the workbench. -
Page 16: Assembly
Model W1829 (Mfg. Since 9/11) Assembly Cap Screws To.assemble.the.jointer,.do.these.steps: 1. DISCONNECT JOINTER FROM POWER! 2. Use two of the included M8-1.25 x 20 cap screws and lock washers 8mm to attach the fence support to the jointer bed, as shown in Figure.9. - Page 17 Model W1829 (Mfg. Since 9/11) 6. Slide the fence bracket assembly over and onto the dovetail of the support and locking plate, as shown Fence in Figure.13. Bracket Assembly Fence Support Dovetail Figure.13. Sliding the fence bracket onto the fence support dovetails.
-
Page 18: Dust Collection
The W1829 has a built-in dust collection fan and chip exhaust. It also includes a 2.5" dust port, clamp, and dust collection bag. The W1829 can also be hooked up to a DO. NOT. operate. this. machine. with- pre-existing dust collection system. -
Page 19: Power Connection
Model W1829 (Mfg. Since 9/11) Power.Connection After you have completed all previous setup instructions 1. Turn the machine power switch OFF. and circuit requirements, the machine is ready to be connected to the power supply. 2. Insert the power cord plug into a mat power supply receptacle. The machin... -
Page 20: Test Run
Model W1829 (Mfg. Since 9/11) Test.Run Once the assembly is complete, test run your machine to make sure it runs properly and is ready for regular operation. The test run consists of verifying the following: 1) The motor powers up and runs correctly, and 2) the safety disabling mechanism on the switch works correctly. -
Page 21: Operations
This prevents unsupervised persons in your shop (especially children) from starting the jointer. Figure.21. W1829 basic controls in front. B.. Depth.of.Cut.Adjustment.Knob: Changes the height of the infeed table to control the depth of cut. -
Page 22: Stock Inspection & Requirements
Model W1829 (Mfg. Since 9/11) Stock.Inspection.. &.Requirements Here.are.some.rules.to.follow.when.choosing.and. jointing.stock: CORRECT FEED DIRECTION ROTATION DO.NOT.joint.or.surface.plane.stock.that.contains. • OUTFEED TABLE INFEED TABLE loose.knots. Injury to the operator or damage to the With Grain workpiece can occur if the knots become dislodged during the cutting operation. -
Page 23: Squaring Stock
Model W1829 (Mfg. Since 9/11) Squaring.Stock Squaring.stock.involves.four.steps.performed.in.the. order.below: 1. Surface.Plane.on.the.Jointer: The concave face of the workpiece is surface planed flat with the jointer (see Figure.26). 2. Surface.Plane.on.a.Thickness.Planer: The opposite Figure.26. Surface plane on the jointer. face of the workpiece is surface planed flat with a thickness planer (see Figure.27). -
Page 24: Surface Planing
Model W1829 (Mfg. Since 9/11) Surface.Planing The purpose of surface planing on the jointer is to make one flat face on a piece of stock (see Figures.30–31) to prepare it for surface planing on a thickness planer. NOTICE If. you. are. not. experienced. with. a. jointer,. set. -
Page 25: Edge Jointing
Model W1829 (Mfg. Since 9/11) Edge.Jointing The purpose of edge jointing is to produce a finished, flat-edged surface that is suitable for joinery or finishing (see Figure 32). It is also a necessary step when squaring If. you. are. not. experienced. with. a. -
Page 26: Bevel Cutting
Model W1829 (Mfg. Since 9/11) Bevel.Cutting The purpose of bevel cutting is to cut a specific angle into NOTICE the edge of a workpiece (see Figure.34). If. you. are. not. experienced. with. a. The Model W1829 has preset fence stops at 45˚ inward, jointer,.set.the.depth.of.cut.to.0",.and. 90˚, and 45˚ outward (135˚). If your situation requires practice. feeding. the. workpiece. across. -
Page 27: Accessories
W1829 Jointer. W1218A—Rotacator ® Adjust the W1829 to within ± .001". The magnetic base keeps the Rotacator firmly in position while the ® indicator indexes at 0°, 90°, 180°, and 270° for unmatched versatility. - Page 28 One size fits all. W1041—3".x.2. ⁄ ".Adapters W1044—4".x.2. ⁄ ".Adapters These adapters will allow you to connect the 2 ⁄ " dust W1041 W1044 chute of the W1829 to an existing dust collection system with standard 3" or 4" fittings. -26-...
-
Page 29: Maintenance
Model W1829 (Mfg. Since 9/11) MAINTENANCE General Regular periodic maintenance on your machine will ensure its optimum performance. Make a habit of inspecting your machine each time you use it. Check.for.the.following.conditions.and.repair.or. replace.when.necessary: • Loose mounting bolts. • Worn switch. •... -
Page 30: Service
Model W1829 (Mfg. Since 9/11) SERVICE General This section covers the most common service adjustments or procedures that may need to be made during the life of your machine. If you require additional machine service not included in this section, please contact Woodstock International Technical Support at (360) 734-3482 or send e-mail to: tech-support@shopfox.biz. - Page 31 Model W1829 (Mfg. Since 9/11) Motor.&.Electrical.(continued) PROBLEM POSSIBLE.CAUSE CORRECTIVE.ACTION Machine has vibration or 1. Motor or component is loose. 1. Inspect/replace stripped or damaged bolts/nuts, noisy operation and re-tighten with thread locking fluid. 2. Knife blades, clamp or jack screws 2.
-
Page 32: Checking/Adjusting Knife Height
Model W1829 (Mfg. Since 9/11) Checking/Adjusting.Knife. Height The knives MUST be level with the outfeed table when they are at top dead center (their highest point during rotation) or the workpiece cannot be safely fed across the jointer. Tools.Needed. Hex Wrench 4mm ..........1 MAKE. - Page 33 Model W1829 (Mfg. Since 9/11) 6.. Move the straightedge to position A, as shown in Figure 39. Turn the jack screw nearest the fence counterclockwise until the end of the knife touches Cutterhead. knives. are. sharp. and. the straightedge. laceration. injuries. may. occur.. Use.
-
Page 34: Replacing Knives
Model W1829 (Mfg. Since 9/11) Replacing.Knives Sharp cutterhead knives provide the best cutting results. Under normal operation these knives will become dull and need to be sharpened or replaced. Refer to Troubleshooting (see Page 28) to determine if the knives may be dull. -
Page 35: Setting Fence Angle Stops
Model W1829 (Mfg. Since 9/11) Setting.Fence.Angle.Stops This section provides instructions for setting the fence angle stops precisely at 90°, 45° inward, or 45° outward. Note:.To ensure accurate results when edge jointing, check the accuracy of these settings frequently (monthly at a minimum) and re-adjust them if necessary. - Page 36 Model W1829 (Mfg. Since 9/11) Setting.45°.Inward.Stop 1.. DISCONNECT JOINTER FROM POWER! 2. With the fence positioned over the bed and the sliding handle locked, loosen the fence tilting handle and release the limit tab. 3. Tilt the fence towards the table as far as it will go, then tighten the fence tilting handle.
- Page 37 Model W1829 (Mfg. Since 9/11) Setting.45°.Outward.Stop 1. DISCONNECT JOINTER FROM POWER! 2. Loosen the fence tilting handle, remove the limit block and set it aside. 3.. Tilt the fence backward (away from the table) until it stops. Note:.The fence will stop when the outward stop bolt hits the fence bracket.
-
Page 38: V-Belt Replacement
Model W1829 (Mfg. Since 9/11) V-Belt.Replacement The Model W1829 uses two belts to drive the cutterhead and the dust collection impeller. When these belts are not tensioned correctly, misaligned, or damaged, your jointer will not function properly. The part number for the replacement drive belt is X1829070;... -
Page 39: Motor Brush Replacement
Model W1829 (Mfg. Since 9/11) Motor.Brush.Replacement This jointer has a universal motor that uses carbon brushes, which are considered wear-items. Refer to the troubleshooting guide to determine if the motor brushes must be replaced. You can order a new brush kit (two brush assemblies) by calling customer service and ordering part X1829024-1. -
Page 40: Electrical Safety Instructions
Model W1829 (Mfg. Since 9/11) Electrical.Safety.Instructions These pages are current at the time of printing. However, in the spirit of improvement, we may make changes to the electrical systems of future machines. Study this diagram carefully. If you notice differences between your machine and these wiring diagrams, call Woodstock International Technical Support at (360) 734-3482. -
Page 41: Wiring Diagram
Model W1829 (Mfg. Since 9/11) Wiring.Diagram Neutral 110 VAC 5-15 Plug Ground (As Recommended) Ground Ground PADDLE SWITCH (viewed from behind) These. motor. wiring. diagrams. are. current. at. the. time. of. printing;. how- ever,.always.default.to.the.diagram.on. the. inside. of. the. junction. box. cover. -
Page 42: Parts
Model W1829 (Mfg. Since 9/11) PARTS Main 23-1 44-1 45 29-1 24-2 24-1 24-3 24-4 58 115 -40-... - Page 43 Model W1829 (Mfg. Since 9/11) Parts.List PART # DESCRIPTION PART # DESCRIPTION X1829001 TABLE X1829049 ALIGNMENT PIN X1829002 FENCE X1829050 PUSH BLOCKS X1829002A FENCE ASSEMBLY X1829051 PADDLE SWITCH X1829003 FENCE PLATE XP6000ZZ BALL BEARING 6000ZZ X1829004 FENCE TILTING HANDLE XPSS01M...
-
Page 44: Labels
Model W1829 (Mfg. Since 9/11) Parts.List.(continued) PART # DESCRIPTION PART # DESCRIPTION X1829106 RIGHT RUBBER FOOT XPCAP68M CAP SCREW M6-1 X 8 X1829107 LEFT RUBBER FOOT X1829112 FENDER WASHER 5MM X1829108 GUARD PLATE X1829113 INFEED TABLE SUPPORT ARM X1829109 CUTTERHEAD COVER... - Page 45 Model W1829 (Mfg. Since 9/11) -43-...
- Page 46 Model W1829 (Mfg. Since 9/11) Fold along dotted lIne place stamp Here Woodstock international inc. p.o. box 2309 bellingham, Wa 98227-2309 Fold along dotted lIne tape along edges--please do not staple -44-...
-
Page 47: Warranty
Woodstock International, Inc. will repair, replace, or arrange for a dealer refund at its expense and at its option, the Shop Fox machine or machine part, which in proper and intended use has proven to be defective, provided that the original owner returns the product prepaid to an authorized warranty or repair facility as designated by our Bellingham, Washington office with proof of their purchase of the product within two years, and provides Woodstock International, Inc. - Page 48 High Quality Machines and Tools Woodstock International, Inc. carries thousands of products designed to meet the needs of today's woodworkers and metalworkers. Ask your dealer about these fine products:...
Need help?
Do you have a question about the W1829 and is the answer not in the manual?
Questions and answers
I’ve adjusted the blades but after running meter Al through the measurements are not the same one end measures different
The blade measurements on the Shop Fox W1829 may appear different after adjustment due to changes in the infeed table height, which controls the depth of cut. Adjusting the infeed table alters how much material is removed, affecting the perceived blade position relative to the workpiece. Additionally, the fence position can influence the width of the cut.
This answer is automatically generated
@Mr. Anderson
Shop fox w1829 after adjusting the blades when running meterial through one end measures different.
The Shop Fox W1829 may show different measurements after adjusting the blades when running material through one end due to improper alignment of the infeed and outfeed tables or inconsistent blade height. If the infeed table is not correctly set relative to the cutterhead, or if the blades are not evenly adjusted, the depth of cut can vary across the workpiece. Additionally, if the fence is not securely locked or positioned correctly, it may cause uneven cuts. Proper calibration and alignment of these components are necessary to achieve consistent results.
This answer is automatically generated