Table of Contents
Advertisement
Quick Links
Advertisement
Table of Contents

Summary of Contents for Craftex CX500
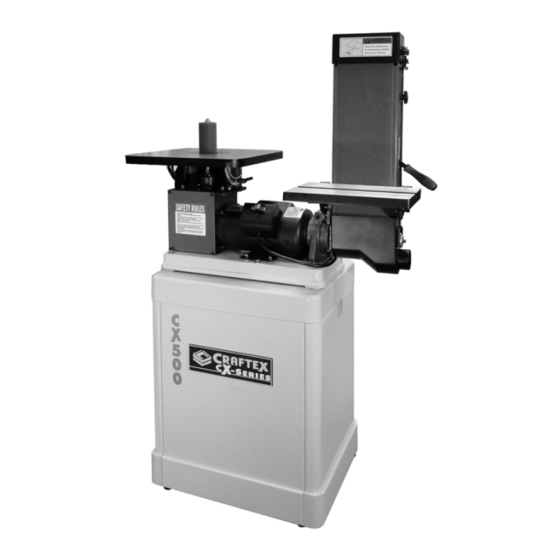
- Page 1 CX500 6” x 48” BELT & OSCILLATING VERTICAL SPINDLE SANDER User Manual...
-
Page 2: Table Of Contents
Table of Contents General Safety Instructions ................3 Specific Safety Instructions................4 Features .......................5 Physical Features ..................6 Un-Packing ....................7 Proper Grounding ..................7 On/Off Power Switch ..................8 Horizontal / Vertical Sanding ................8 Tilting the Belt Sanding Table...............9 Removing the Sanding Belt ................9 Installing New Belt ..................10 Belt Tracking Adjustment................10 Stop Fence ....................11 Dust Collection .....................11... -
Page 3: General Safety Instructions
GENERAL SAFETY INSTRUCTIONS Extreme caution should be used w hen operating all pow er tools. Know your pow er tool, be familiar w ith its opera tion, r ead through the o wner’s manual and practice safe usage procedures at all times. ALWAYS read and understand the router bits, shaper heads, blades, user manual before operating the... -
Page 4: Specific Safety Instructions
CX500 sander, before operating it. DO NOT force the sander. It will do the If you fail to do so, serious injury could job better and will be safer at the occur. -
Page 5: Features
MODEL CX500 – 6” x 48” BELT & OSCILATING VERTICAL SPINDLE SANDER As part of the growing line of Craftex woodworking equipment, we are proud to offer CX500 -6” x 48” Belt/Oscillating Vertical Spindle Sand er. The Craftex name guarantees Craft Excellence. -
Page 6: Physical Features
CX500–6”x48” Belt/Oscillating Vertical Spindle Sander PHYSICAL FEATURES Spindle Belt Tracking Adjustment Sand Knob 1-HP Paper Motor 6” x 48” Sanding On/Off Spindle Belt Switch Sander Table Quick Release Tension Lever Table Tilt Belt Graduated Sander Scale Table Table Tilting Table Tilt... -
Page 7: Unpacking
Open the crate and check that the machine is in good condition. WARNING CX500 is a heavy machine, do not over- exert yourself. For safe moving method, use fork truck or get the help of an assistant. -
Page 8: On/Off Power Switch
ON/OFF POWER SWITCH HORIZONTAL/VERTICAL SANDING CX500 is equipped with a rocker-type power switch which starts and stops the 1. Loosen the screw securing the sander motor and is loc ated on the junction box of frame to the motor bracket using a 6mm the motor. -
Page 9: Tilting The Belt Sanding Table
TILTING THE BELT SANDING TABLE The belt sander table can be tilted to front downward from 0° to 45°. To tilt the table: 1. Turn off the sander and disconnect the cord from the power source. 2. Loosen the two table fix lever s located under the right and left sides of the table. -
Page 10: Installing New Belt
INSTALLING NEW BELT After the old belt has been removed proceed as follows: 1. Make sure the arrowheads marked on the back of the sanding belt point to the direction indicator attached on the belt guard. 2. Place and center the new belt on both the rollers. -
Page 11: Stop Fence
STOP FENCE MOUNTING THE SPINLDE When the sanding platen is set for CX500 is furnished with five s pindle drums horizontal sanding, t he stop fence should sizes: be used to prevent the work piece flying out while sanding. 1/4", 1/2", 5/8", 1-1/2" and 2" diameter... -
Page 12: Replacing The Table Insert
REPLACING THE TABLE ALIGNING TABLE TO THE INSERT SPINDLE The CX500 is supplied with 4 table inserts; 1. Turn off the sander and disconn ect the cord from the power source. 1. Select a pr oper table insert according to the spindle drum installed. -
Page 13: Tilting The Spindle Sanding Table
5. Adjust the table so th at the square sits on the table and touches the drum IMPORTANT correctly along its entire length without any gap. Make sure you have done the tracking adjustment and the belt is centered on both the rollers before you start the TILTING THE SANDER sander for a test run. -
Page 14: Work-Piece Inspection
WORK-PIECE INSPECTION MAINTENANCE CX500 is designed t o sand wood only. Do 1. It is highly recommended to clean the not use this machine to sand m etals, glass machine daily after use. or stone etc. 2. When the machine is not in use, turn the Before sanding, make sure to inspect the switch off and remove the switch key. -
Page 15: Troubleshooting
TROUBLESHOOTING... -
Page 16: Parts Breakdown & Parts List
CX500 PARTS BREAKDOWN... - Page 19 CX500 PARTS LIST PART# DESC RIPTION 2" Rubber Drum Base 1-1/2" Rubber Drum Frame SANDING SLEEVE(2",1-1/2",5/8",1/4") Spindle Right Graduated Scale Helical Bevel Gear Left Graduated Scale PU Helical Bevel Gear Sanding Belt Pressure Plate Right Oil Box Sanding Platen Left Oil Box Upper Pressure Plate 2"...
- Page 20 Cap Screw M6 X 1 X 15 Hex Hd Screw 1/4" x 3/4" Micrometer Indicator Micrometer adjustment Screw Toothed Washer 1/4" Steel Ball Pan Head Screw M5 X 0.8 X15 Hex Soc Hd Screw 5/16" x 1" Flat washer 1/4 X 16 Base Graduated Scale Right &...
-
Page 21: Warranty
This warranty shall not apply to consumable products such as blades, bits, belts, cutters, chisels, punches etceteras. Craftex shall in no event be liable for injuries, accidental or otherwise, death to persons or damage to property or for incidental contingent, special or consequential damages arising from the use of our products.


Need help?
Do you have a question about the CX500 and is the answer not in the manual?
Questions and answers