
Related Manuals for Codec Tieline ViA


Summary of Contents for Codec Tieline ViA
- Page 1 Quick Start User Manual Visit www.tieline.com/Support/Documentation/User-Manuals to download the latest user manual. Software Version: 2.20.xx Manual Version: 3.0 March, 2020...
-
Page 2: Table Of Contents
ViA User Manual v3 Table of Contents Part I Warnings & Safety Information Part II Battery Use and Power Management Part III Inserting and Removing Modules Part IV Wireless IP Connection Options 1 Cellular Activation in the USA ........................... 17 Part V Connection Guide 1 Connecting over IP ........................... -
Page 3: Part I Warnings & Safety Information
DO NOT USE Tieline codecs during thunderstorms and lightning. You may suffer an injury using a phone, Tieline codec, or any device connected to a phone during a thunderstorm. This can lead to personal injury and in extreme cases may be fatal. Protective devices can be fitted to the line, how ever, due to the extremely high voltages and energy levels involved in lightning strikes, these devices may not offer protection to the users, or the Tieline codec and equipment connected to the codec. - Page 4 The battery should immediately be removed from the codec. Please contact Tieline if this situation persists. 5. The battery may continue to charge w hen external pow er is applied to the codec even w hen the codec is off.
- Page 5 ViA User Manual v3 · Sw itch OFF your w ireless device in hospitals and any other place w here medical equipment may be in use. Sécurité relative aux appareils à radiofréquence (RF) À cause du risque d'interférences de radiofréquence (RF), il est important de respecter toutes les réglementations spéciales relatives aux équipements radio.
- Page 6 ViA User Manual v3 · Do not attempt to disassemble the device. There are no user serviceable parts inside. · Do not expose your device to any extreme environment w here the temperature or humidity is high. · Do not expose the device to w ater, rain, or spilled beverages. It is not w aterproof. ·...
- Page 7 The product specifications and descriptions w ithin this manual w ill be subject to improvements and modifications over time w ithout notice, as changes to softw are and hardw are are implemented. This codec can provide high voltages on inputs and suitable broadcast equipment must be used at all times. Tieline takes no responsibility for any damage to equipment attached to the codec.
-
Page 8: Part Ii Battery Use And Power Management
When you start the charge cycle the BATTERY will be activated. Charge fully before first use. 3. If the codec is off the BATTERY continues to charge when external power is applied to the codec. Inserting the Battery 1. - Page 9 2. A warning dialog is displayed on the TOUCH SCREEN until acknowledged. 3. The ALARM LED flashes until acknowledged, and then turns solid red. Tap the TOUCH SCREEN or touch any codec controls to acknowledge the alarm and stop the alarm tones.
-
Page 10: Part Iii Inserting And Removing Modules
ViA User Manual v3 Inserting and Removing Modules A single module slot is available on the codec rear panel for inserting an optional cellular, ISDN or POTS module into the codec. ViA codec with an ISDN module installed Inserting or Removing a Module Ensure the codec is [OFF] when inserting or removing modules. - Page 11 ViA User Manual v3 2. Tap to select Transport Interfaces and then tap Wi-Fi 3. Ensure the Wi-Fi State is Enabled and tap Rescan Access Points if the required Wi-Fi network is not populated in the access point list. 4. Tap to select the Wi-Fi access point to which you are connecting, in this example AndroidAP.
- Page 12 5 GHz). For increased security Tieline has implemented the WPA2-PSK authentication protocol because standard WEP encryption is less secure. Wi-Fi Indications The following Wi-Fi indications are displayed in the Status Bar on the codec screen. Symbol Description of Status...
- Page 13 Connecting over Cellular Wireless via USB Modems 1. Attach a supported USB Modem to either USB PORT 1 or USB PORT 2 on the codec. When the modem is detected by the codec, the network symbol and signal strength is displayed in the Status Bar on the TOUCH SCREEN.
- Page 14 APNs used by each Telco. See Adding Access Points and a SIM PIN for more details. · It may be necessary to enter a SIM PIN if the codec cannot connect automatically to the network. · To safely remove a USB modem press the HOME...
- Page 15 Tethering a Smartphone Important Note: Only tethering to an Android phone is supported. It is possible to tether a phone to the codec with a USB cable and use cellular or Wi-Fi data from the connected device. 1. Enable USB tethering in the smartphone to allow sharing of the phone's internet connection.
- Page 16 ViA User Manual v3 3. The codec should detect the smartphone connection and acquire an IP address from the phone. When it connects successfully the USB tethering symbol changes from greyed out to illuminated in the Status Bar at the top of the TOUCH SCREEN.
-
Page 17: Cellular Activation In The Usa
LTE Activation Notice Before using a Tieline ViA LTE module in the USA it is necessary to set up a wireless account with your Telco. Follow the steps in the tech note at the following link to set up a wireless account: https://www.multitech.com/documents/publications/activation-guides/lte-device-activation-steps-... - Page 18 12 Program name The name of the loaded program. The codec is configured to connect in mono over IP by default when shipped, or when factory default settings are restored. 1. Ensure the codec is not powered up when inserting or removing modules.
-
Page 19: Connecting Over Ip
The following procedure will use a default 'program' to connect using the codec's TOUCH SCREEN. For IP connections, attach an RJ45 Ethernet cable to one of the LAN ports on the codec's left side panel, or use one of the codec's wireless IP connection options. - Page 20 Load Program to load preconfigured custom programs. Default programs cannot be locked in the codec. Save a program as a custom program if a program needs to be locked. 3. Tap to select the preferred program connection option, e.g. Default Mono or Default Stereo, and then tap Done in the top right-hand corner of the TOUCH SCREEN.
- Page 21 ViA User Manual v3 6. To connect very simply using default settings navigate to the Connections screen. 7. Tap Press to Edit Destination and then enter the IP address of the destination codec being dialed, or tap the Dial History symbol to select a previously dialed number.
- Page 22 SmartStream PLUS connection uses the same IP address as the last configured connection. 3. Tap the IP address field to edit the IP address of the destination codec being dialed, then tap Done. Note: Tap IP to display the Address Book symbol and then tap to select a TieLink Traversal Server contact list destination if this is available.
-
Page 23: Advanced Ip Connection Settings
ViA User Manual v3 Advanced IP Connection Settings To adjust other IP connection settings there are three options: · Connection settings: Algorithm, jitter, FEC, auto reconnect, auxiliary data, encoding/decoding settings and connection name. · Destination settings: Stream level settings like selection of IP interface (Via) and local/remote audio and session ports. - Page 24 8. Tap FEC to configure local and remote forward error correction settings. See Configuring Forward Error Correction for more details. 9. Tap Direction if you want to save data and configure the codec to either Encode Only or Decode Only. Note: this can be helpful if connection bandwidth is limited.
- Page 25 ViA User Manual v3 10. Tap to toggle the On/Off button for Auxiliary Data to activate CONTROL PORT I/O operation and RS232 data in the codec. 11. Tap Name to rename the connection. When all settings have been configured tap Save in the top right-hand corner of the TOUCH SCREEN.
- Page 26 · Tap Remote Session Port to enter the session port number of the remote codec (to which you are dialing). · Tap Remote Audio Port to enter the audio port number of the remote codec (to which you are dialing).
-
Page 27: Connecting Over Sip
4. Custom: The G3 codec will load a specified profile, e.g. profile 6, which is the first custom profile number. 7. Tap G3 Channel when connecting to a G3 codec in dual mono mode. This setting lets you configure which G3 channel (encoder) is used when the G3 codec receives a call from this codec. - Page 28 IP address of the codec being dialed and configure each codec with a compatible algorithm and sample rate etc. If the remote codec has a private IP address then it should be configured for port forwarding and should dial the public IP address at the studio. To dial using a SIP account it is necessary to add a SIP account and register it to the codec.
- Page 29 6. Tap Algorithm to select the preferred algorithm, sample rate and bit rate. G.711 is configured by default in mono. 7. Tap to toggle the On/Off button for Auto reconnect if the codec should automatically reconnect if the connection is temporarily lost.
- Page 30 11. Tap Press to Edit Destination and then enter the IP address, or alphanumeric characters in the SIP URI for the codec you want to dial, then tap Done in the top right-hand corner of the TOUCH SCREEN to confirm all settings.
- Page 31 14. When configuration is complete, tap Connect or press the CONNECT button to dial the destination codec. The Status Bar turns green when the codec is connected. 15. Tap Info to view audio stream connection details and statistics. 16. Tap Disconnect...
-
Page 32: Connecting With Isdn
The following procedure will create a custom peer-to-peer ISDN connection program using the codec's TOUCH SCREEN. Attach an ISDN cable to the ISDN module installed in your codec. The codec displays ISDN line sync status in the Status Bar at the top of the TOUCH SCREEN. Symbol... - Page 33 ViA User Manual v3 7. When dialing a Tieline codec tap to select the default Tieline Codecs Session Data setting, or tap Sessionless if dialing a non-Tieline codec. Important Note: By default, when Tieline codecs dial they send configuration settings to the remote codec using Tieline Session Data.
- Page 34 Helpful Hint: To save the program as a new custom program for later use tap Menu and then tap Save as, then name the program before connecting. 11. Tap Press to Edit Destination to enter the number for the codec being dialed, or tap the Dial History symbol to select a previously dialed number.
-
Page 35: Connecting Pots
2. Tap Menu and then tap Default Programs to view program connection options. Note: Default programs cannot be locked in the codec. Save a program as a custom program if a program needs to be locked. 3. Tap to select the preferred program connection option, e.g. Default Mono, and then tap Done. - Page 36 Important Note: When Analog Phone is configured, the codec displays a simplified Connection Settings menu with applicable settings. 7. When dialing a Tieline codec tap to select the default Tieline Codecs Session Data setting, or tap Sessionless if dialing a non-Tieline codec.
- Page 37 10. Tap Name to adjust the connection name and then tap Save to store all settings and return to the Connections screen. 11. Tap Press to Edit Destination to enter the number for the codec being dialed, or tap the Dial History symbol to select a previously dialed number.
-
Page 38: Part Vi Via Headphone Controls
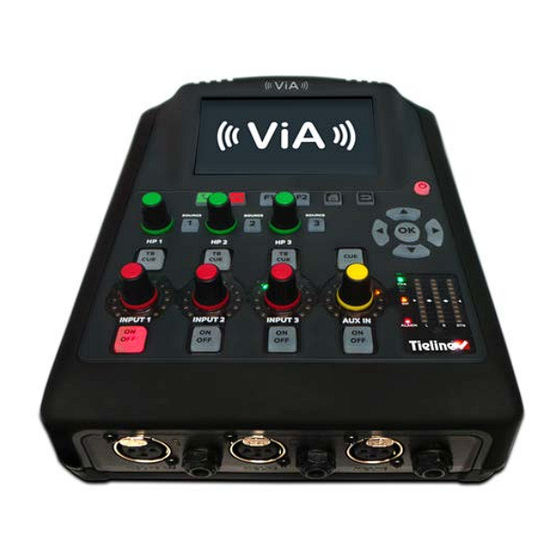
POTS line quality at either end of the link. This reading affects the maximum allowable bit rate when the codec is training and negotiating a connection. It also indicates the stability of the connection when a call has been connected for a long period of time. - Page 39 ViA User Manual v3 Adjust Headphone Levels The codec has three 6.35mm (1/4") RTS stereo headphone outputs (HP 1-3) for monitoring inputs and return program audio. Use the green headphone HP 1-3 rotary encoders to adjust the headphone level for each headphone output.
- Page 40 Save & Edit a Custom Headphone Mix The codec supports saving and recalling custom headphone mixes configured for specific users and events. A custom headphone mix includes matrix crosspoint routing and Send and Return balance settings.To save edits to current headphone settings, or a custom headphone mix:...
- Page 41 "attached" to a Matrix Editor matrix when it is saved. This is displayed in the codec as per the following image. In this example, "Basketball" is the name of the custom Matrix Editor matrix and "Glenn mix" is the name of the custom headphone mix attached to this matrix.
- Page 42 ViA User Manual v3 3. Tap Load and then tap to select a custom mix to load. Note: When you load a custom headphone mix the Matrix Editor will be adjusted based on the headphone mix loaded. Any edits to the Matrix Editor are displayed in orange. Reset Headphone Mix Settings There are two options for resetting headphone matrix settings.
Need help?
Do you have a question about the Tieline ViA and is the answer not in the manual?
Questions and answers