Table of Contents
Advertisement
OUTPUTS LV
OUT4
OUT5
AUX
2ndRX
OUTPUTS HV
OUTPUTS HV
INPUTS
Attenzione! Leggere attentamente le "Avvertenze" all'interno! Caution! Read "Warnings" inside carefully! Attention! Veuillez lire attentivement les Avertissements qui se trouvent à l'intérieur!
Achtung! Bitte lesen Sie aufmerksam die „Hinweise" im Inneren! ¡Atención¡ Leer atentamente las "Advertencias" en el interior! Let op! Lees de "Waarschuwingen" aan de binnenkant zorgvuldig!
Advertisement
Table of Contents

Related Manuals for BFT PERSEO-CBE


Summary of Contents for BFT PERSEO-CBE
- Page 1 OUTPUTS LV OUT4 OUT5 2ndRX OUTPUTS HV OUTPUTS HV INPUTS Attenzione! Leggere attentamente le “Avvertenze” all’interno! Caution! Read “Warnings” inside carefully! Attention! Veuillez lire attentivement les Avertissements qui se trouvent à l’intérieur! Achtung! Bitte lesen Sie aufmerksam die „Hinweise“ im Inneren! ¡Atención¡ Leer atentamente las “Advertencias” en el interior! Let op! Lees de “Waarschuwingen” aan de binnenkant zorgvuldig!
- Page 2 SHIELD AN. IN PRES 2 PRES 1 emergency ECD (not supplied) Without BATTERY UNIT STOP CLOSE emergency ECD (not supplied) With OPEN BATTERY UNIT START BRK - BRK + OUT BUZZER 24VAC2 OUT LED 24VAC2 LED1 LED2 24VAC1 OUT5 2ndRX OUT4 SEM GRN SEM RED...
- Page 3 SHIELD AN. IN PRES 2 PRES 1 FCC1 FCC2 FCC3 FCC4 FCA1 FCA2 FCA3 FCA4 STOP CLOSE OPEN START BRK - BRK + OUT BUZZER 24VAC2 OUT LED 24VAC2 LED1 LED2 LED3 LED4 24VAC1 OUT5 2ndRX NOTE / NOTES Dissuasori elettromeccanici/Electromechanical bollards: OUT4 STOPPY MBB / STOPPY B Dissuasori oleodinamici/Hydraulic bollards:...
-
Page 4: Table Of Contents
Contents 1. INTRODUCTION 2. MAIN CHARACTERISTICS 3. TECHNICAL SPECIFICATIONS 3.1 CONTROL PANEL DIMENSIONS 4. INSTALLATION SAFETY 5. PRELIMINARY OPERATIONS 6. INPUT AND OUTPUT FUNCTIONALITY AND CONNECTIONS 6.1 J2 POWER TERMINAL BLOCK 6.2 J3A/J3B POWER TERMINAL BLOCK 6.3 J4 OUTPUTS/ACCESSORIES TERMINAL BLOCK 6.4 J5A/J5B INPUTS TERMINAL BLOCK 6.5 J6 EXPANSION CONNECTOR 6.6 J8 PROGRAMMER CONNECTOR FOR RECEIVER... -
Page 5: Introduction
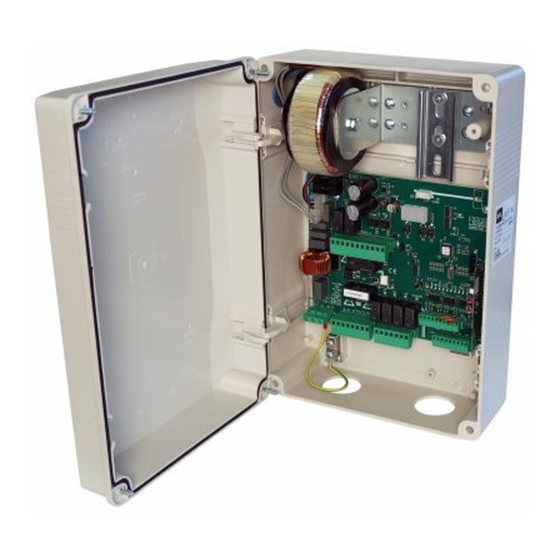
Control unit 1. INTRODUCTION The control unit has been developed to control automatic bollards. = Electrical connections coming from bollard. 2. MAIN CHARACTERISTICS - Microprocessor logic - LEDs displaying input and output status - Socket for integrated radio receiver 433Mhz; 2048 codes (optional) - 3-digit display - 2 con gurable outputs - PROGRAMMER connector for receiver... -
Page 6: Technical Specifications
Control unit 3. TECHNICAL SPECIFICATIONS - Power supply: 230Vac +-10%, 50/60Hz -Operating ambient humidity up to 95% - Motor output: 230Vac; 13A max non condensing -Protection degree IP55 - Flashing light/tra c light: 230Vac; 40W max - Accessory output: 24Vac; 1A max -Storage ambient temperature -25°... -
Page 7: J3A/J3B Power Terminal Block
Control unit J3A/J3B POWER TERMINAL BLOCK MOT A - COM - MOT B Motor connection, MOT A for open direction and MOT B for close direction Capacitor if not present on motor(s) side Electrovalve (230Vac RAC), for hydraulic bollards only Electrovalve (230Vac RAC), for ECD bollards equipped only TRAFFIC LIGHT - GREEN LAMP Tra c light outputs green lamp (230Vac) -
Page 8: J5A/J5B Inputs Terminal Block
Control unit J5A/J5B INPUTS TERMINAL BLOCK 2 wire N.O. closing limit switch imput (set parameter - level 3 and parameter - level 2). When activated the opening travel ends (XPASS B 800C). 3 wire N.O. closing limit switch imput (set parameter - level 3 and parameter - level 2). -
Page 9: J8 Programmer Connector For Receiver
Control unit EXPANSION CONNECTOR PROGRAMMER CONNECTOR FOR RECEIVER B EBA TCP/IP TCP/IP MODULE B EBA GATEWAY RS485 RS 485 LINK BBU 7. DISPLAY At power-on the display shows the board type “ ”, then the FW release X.Y.Z, then the type of bollard (see table on chapter cap. 5), and nally the status or error code. -
Page 10: Programming
Control unit 8. PROGRAMMING 8.1 BASIC FUNCTIONS To access programming, press button F for 2 seconds. Programming is divided into 4 levels. To go to the next level keep button F pressed and press the + key (Sequence 1-2-3-4-1..). After selecting the level wanted, press button F to display the functions available in consecutive order. Each time F is pressed the menu shifts to the next function ( ..) With the function selected, use the... -
Page 11: 1St Level Programming
Control unit PROGRAMMING 1st LEVEL The following table gives the 1st level functions and the adjustable parameters. = DEFAULT value set in factory. = parameter value set during installation: should be lled if DEFAULT value is modi ed. Function Settable data : Hold-to-run Selects the functioning logic. -
Page 12: 2Nd Level Programming
Control unit · : Close con guration Close-when-released input The bollard closes automatically only when the vehicle has completely passed by the photocell or magnetic detector (the recom- mended accessories for this purpose). Connect the N.O. contact of the detector or photocell to the close input terminals. If the vehicle is on the detector or in front of the photocell it does not cause immediate closing but the control board will wait for the signal to be released (i.e. -
Page 13: 3Rd Level Programming
Control unit Deceleration torque (not avail- able for hydraulic bollards) Exiting the menu/saving Pressing the “F” key exits the programming menu and changes are saved Description of level 2 parameters · : Request for maintenance : the request for maintenance is not active. : after the programmed cycles set by the counters , the programmed output is activated (see parameters : after the programmed cycles set by the counters... -
Page 14: 4Th Level Programming
Control unit : None : Opening Enable when active Programmable PDM input for spe- : Opening Enable and pause time reset (with ), when active cial functions : TERMON Enabled when active : Opening Enable and pause time reset (with ), when active : Receiver channel 1 not used Radio channel 1 command selec-... -
Page 15: Radio Receiver
Control unit Description of level 4 parameters · · Setting communication protocol. Setting Modbus/RTU ID. Set value always same to Master and Slave. · · Setting MODBUS RTU speed Setting U-LINK mode. · · Show the list of error codes and the number of time they occur, Setting U-LINK adress. - Page 16 - 35 -...
-
Page 17: Connections For Simultaneous Operation
Control unit 10. CONNECTIONS FOR SIMULTANEOUS OPERATION (FIG. PAG. 2 and 3) The control unit is used to operate up to a maximum of four bollards connected in parallel to thus obtain simultaneous operation with just one control panel. We recommend to use a junction box with adequate protection rating to complete the connections between two or more bollards. Fol- lowing the table with indicated how to connect, serial or parallel, the common cables. -
Page 18: Examples Of Controlling Entrances
Control unit 13. EXAMPLES OF CONTROLLED ENTRIES/EXITS INSTALLATION A 13.1 CONTROLLED ENTRY OR EXIT This solution is recommended when you want to enter a reserved area in just one direction, by activating a command (radio control, proximity key, magnetic keys, etc.). The vehicle approaches the reserved area. -
Page 19: Installation B Automatic Entry Or Exit
Control unit INSTALLATION B 13.2 AUTOMATIC ENTRY OR EXIT This solution is recommended when you want to allow entry to a reserved area, without using any commands, allowing transit of vehicles in just one direction. The vehicle approaches the reserved area. When over the loop S1, the bollard goes down. -
Page 20: Installation C Controlled Entry And Exit
Control unit INSTALLATION C 13.3 CONTROLLED ENTRY AND EXIT This solution is recommended when you want to enter a reserved area in both directions by activating a command (radio control, proximity key, magnetic keys, etc.). ENTRY The vehicle approaches the reserved area. -
Page 21: Installation D Controlled Entry And Automatic Exit
Control unit INSTALLATION D 13.4 CONTROLLED ENTRY AND AUTOMATIC EXIT This solution is recommended when you want to enter a reserved area in both directions. Entry is by means of a command while exiting is automatic. ENTRY The vehicle approaches the reserved area. -
Page 22: Error Handling
Control unit 14. ERROR HANDLING The control board can store up to 10 di erent errors, with no. of occurrences limited to 10, for each event. In case of blocking (severe) error, it is possible to restart the board by pressing both keys “+” and “-“ for 5 seconds or by switching o and on the power supply. - Page 23 REGISTRO DI MANUTENZIONE MAINTENANCE LOG Dati impianto • Plant data Installatore Installer Cliente Customer Matricola Serial number Data installazione Installation date Data attivazione Activation date Data • Date Descrizione intervento • Intervention description Firme • Signatures Tecnico • Technician Cliente • Customer Tecnico •...
- Page 24 CZECH REPUBLIC BFT USA 69800 Saint Priest BFT CZ S.R.O. Boca Raton POLAND www.bft-france.com Praha www.bft-usa.com BFT POLSKA SP. Z O.O. www.bft.it GERMANY 05-091 ZĄBKI CHINA BFT TORANTRIEBSSYSTEME Gmb H www.bft.pl TURKEY BFT CHINA 90522 Oberasbach BFT OTOMATIK KAPI SISTEMELERI...
Need help?
Do you have a question about the PERSEO-CBE and is the answer not in the manual?
Questions and answers