Table of Contents
Advertisement
Quick Links
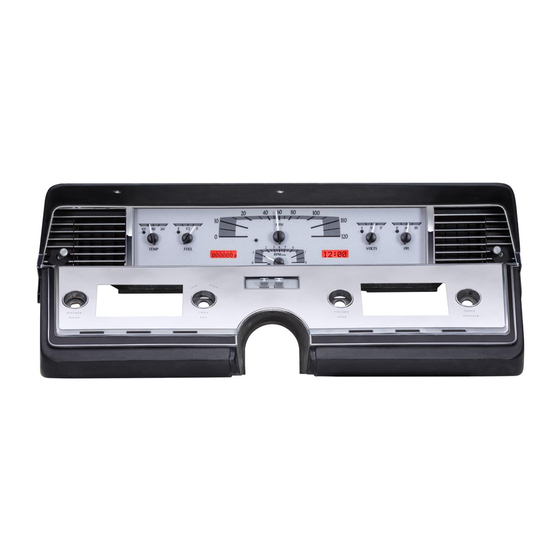
Your new VHX-66L kit includes:
Switch Assembly
Universal Sender
Pack
Installation
1. Remove the stock gauge cluster from the dash. Retain all hardware for reassembly.
VHX-66L
Dakota Digital VHX Instrument Installation
For 1966-'69 Lincoln Continental
VHX Display
Installation Manuals
CAT5 Cable
(2) 6-32 X 1/4" Screws
Ford Speed Adapter
(3) 8-32 X 7/8" Screws
(2) 6-32 X 5/8" Screws
Control Box
(5) 6-20 X 5/8" Screws
Manual #650620A
Advertisement
Table of Contents

Related Manuals for Dakota Digital VHX-66L


Summary of Contents for Dakota Digital VHX-66L
- Page 1 VHX-66L Dakota Digital VHX Instrument Installation For 1966-‘69 Lincoln Continental Your new VHX-66L kit includes: VHX Display Switch Assembly Universal Sender Pack Installation Manuals Ford Speed Adapter (3) 8-32 X 7/8” Screws (2) 6-32 X 5/8” Screws CAT5 Cable Control Box (2) 6-32 X 1/4”...
- Page 2 2. Remove the lower panel on the gauge bezel. Retain all hardware for reassembly. 3. Remove the odometer assembly. 4. Remove the speedometer gauge face. Manual #650620A...
- Page 3 5. Remove the speedometer assembly so you are left with a bare gauge housing. The blue bulb shields can be left in place or removed if desired. 6. Separate the speedometer face from the gauge trim. 7. Mount the VHX gauge to the gauge trim using the provided three (3) 8-32 X 7/8” screws. Manual #650620A...
- Page 4 8. Attach the assembled gauge trim to gauge housing using five (5) 6-20 X 5/8” screws. 9. Mount the VHX switch assembly to the gauge housing using the provided two (2) 6-32 X ¼” screws. 10. Connect the provided switch harness to the back of the VHX switch assembly and refer to the wiring diagram.
- Page 5 11. Connect the provided CAT5 cable to the back of the VHX gauge. 12. Reinstall the lower panel and the dash is now ready to re-install into the vehicle using stock hardware. Take care when routing the CAT5 cable and switch harness to the control box mounting location.
Need help?
Do you have a question about the VHX-66L and is the answer not in the manual?
Questions and answers