Table of Contents
Advertisement
Quick Links
Instructions for installation and use
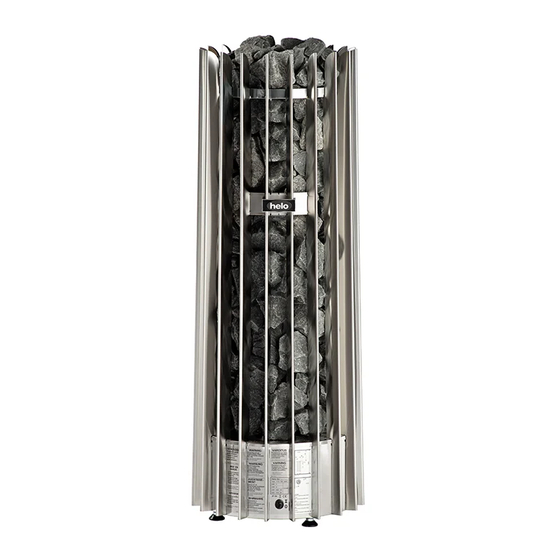
ROCHER
Electric sauna heater:
1118-700-04
1118-900-04
1118-1050-04
Contactor box:
WE – 3
400V – 415V 3N~ max 9 kW
WE – 4
400V – 415V 3N~ max 15 kW
WE – 4 – 1 230V – 240V 1N~ / 2~ max 8 kW
WE – 4 – 3 230V 3~ max 9 kW
WE – 5 – 3 230V 3~ max 15 kW
Connectable to the following control panels:
1601-12 (Control panel RA 12 Digi II)
1601-13 (Control panel RA 13 Digi I)
1601-16 (Control panel RA 16 Easy)
1601-18 (Control panel RA 18 Midi)
GENUINE SAUNA & STEAM
314 SKLT 47-2 A
1
Advertisement
Table of Contents

Related Manuals for Helo ROCHER


Summary of Contents for Helo ROCHER
- Page 1 GENUINE SAUNA & STEAM Instructions for installation and use ROCHER Electric sauna heater: 1118-700-04 1118-900-04 1118-1050-04 Contactor box: WE – 3 400V – 415V 3N~ max 9 kW WE – 4 400V – 415V 3N~ max 15 kW WE – 4 – 1 230V – 240V 1N~ / 2~ max 8 kW WE –...
-
Page 2: Table Of Contents
3.5 Locating the connecting box for connection cable in the sauna room 3.6 Sauna heater safety clearances 3.7 Switch diagram 3.8 Installing the support for heating elements 3.9 Spare parts for the Rocher electric sauna heater ROHS Images and tables: Image 1 Recommended sauna room ventilation... -
Page 3: Quick Start Guide For The Sauna Heater
1. Quick start guide for the sauna heater 1.1 Check the following before taking a sauna bath: The sauna room is suitable for taking a sauna bath. The door and the window are closed. The sauna heater is topped with stones that comply with the manufacturer's recommendations, the heating elements are covered with stones, and the stones are piled sparsely. -
Page 4: Preparing For Piling The Stones
Unscrew the bars' mounting screws (2 pcs). Lift the support bar's locking plate up from its normal position. Lift off the support bars. Pile stones up to the Helo marker. Reinstall the support bars. Install the support bars as above in the reversed order. -
Page 5: Sauna Heater Stones
Structural clay tiles are not allowed. They may cause damage to the sauna heater Damages caused by using structural clay tiles will not be covered by the warranty. 2.5 Accessories for Rocher sauna heater Integration flange, soapstone EAN 6416976384299... -
Page 6: If The Sauna Heater Will Not Heat Up
2.7 If the sauna heater will not heat up If the sauna heater will not heat up, please check the following: - The power is on; - The fuses for the sauna heater are intact; - Any error messages on the control panel; In case of an error message, please refer to the control panel operating instructions. -
Page 7: Main Connection
Main connection The sauna heater must be connected to the mains by a qualified electrician and in compliance with current regulations. Sauna heater is connected with a semi-permanent connection. Use H07RN-F (60245 IEC 66) cables or a corresponding type. (See Table 1 on page 8) Other output cables (signal lamp, electric heating toggle) must also adhere to these recommendations. -
Page 8: Locating The Connecting Box For Connection Cable In The Sauna Room
Table 1 Input Sauna heater's Fuse Sauna heater's Fuse Sauna heater's Fuse connection cable connection cable connection cable H07RN-F H07RN-F/ H07RN-F/ 60245 IEC 66 60245 IEC 66 60245 IEC 66 400 - 415V 3N~ 230 V 3~ 230 - 240V 1N~ / 2~ 5 x 1,5 3 x 10 4 x 2,5... -
Page 9: Image 3 Clearances In Wall And Corner Installations
Image. 3 and 4 Corner and wall installation OLET 19 40 *) OLET 19 425 mm 1900 Absolute measurement! (must not be exceeded 1130 or undershot) Safety clearances between the bottom of the sauna heater and a wall. Fixing the sauna heater on the floor. -
Page 10: Switch Diagram
Switch diagram Teho, Effekt Lämpövastukset, Värmeelement, Input, Leistung Heating elements, Heizeelement 230 V SEPC 199 SEPC 201 SEPC 200 2267W 3000W 3500W 1,2,3 1,2,3 10,5 1,2,3 1 2 3 4 5 6 L1 L2 L3 400V - 415V 3N~ 1. Syöttö / Nätet / Stromnetz / Power input. 354 SKLT Image. -
Page 11: Image 6 Basic Installation Of A Sauna Heater
Image of principle with control panel Digi II. Connector strip Limiter Control unit Sensor cable OLET 19 1 Sin 1 Sin 2 Valk. 2 Valk. 3 Pun 3 Pun 4 Kelt 4 Kelt Central 1601-12 Sauna heater Valk White Weiss Rosa Ljusröd Pink... -
Page 12: Installing The Support For Heating Elements
3.8 Installing the support for heating elements: Pile in stones up to halfway of the provided space. Position the support so that the heating elements stay between the openings. Tilt the support and press the pivots at each end of the support to the grooves in the inside of the heater's vertical beams, one end at a time. -
Page 13: Spare Parts For The Rocher Electric Sauna Heater
3.9 Spare parts to ROCHER sauna heater: Table 3 Product number Product title Rocher 700 Rocher 900 Rocher 1050 Mains connector NLWD 7812550 Heating element SEPC 5207770 199 2267W / 230V Heating element SEPC 5207772 201 3000W / 230V Heating element SEPC... -
Page 14: Rohs
ROHS Instrucciones de protección medioambiental Instructions for environmental protection Este producto no debe ser tratado como un residuo This product must not be disposed with doméstico normal al final de su vida útil, sino que debe normal household waste at the end of depositarse en el punto de recogida adecuado para el its life cycle.
Need help?
Do you have a question about the ROCHER and is the answer not in the manual?
Questions and answers