Table of Contents
Advertisement
Quick Links
Advertisement
Table of Contents

Subscribe to Our Youtube Channel
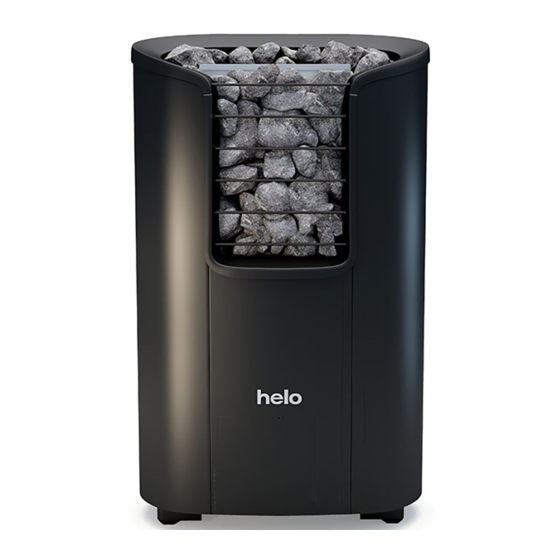
Summary of Contents for Helo Roxx Premium
- Page 1 REWARD YOURSELF Installation and User Manual HELO Roxx Premium ELECTRIC SAUNA HEATER: 1107 – 60 – 040517 1107 – 90 – 040517 230V – 240V 1N~ / 2~ 230V 3~ 400V – 415V 3N~ CONTROL PANEL: 1601 – 31 (RA – 31) Trend) 1601 –...
-
Page 2: Table Of Contents
Installation and User Manual HELO Roxx Premium Contents Check before taking a sauna bath Sauna room Operation of the sauna heater controls Operation of the sauna heater controls 2. Preparing for sauna heater installation Installation 2.2. Various stages of the installation... -
Page 3: Check Before Taking A Sauna Bath
Installation and User Manual HELO Roxx Premium 1.1 Check before taking a sauna bath 1. The sauna room is suitable for taking a sauna bath. 2. The door and the window are closed. 3. The sauna heater is topped with stones that comply with the manufacturer's... -
Page 4: Preparing For Sauna Heater Installation
Installation and User Manual HELO Roxx Premium 2. Preparing for sauna heater installation Check the following before installing the sauna heater. • The ratio of the heater's input (kW) and the sauna room's volume (m ). Volume recommendations are pre- sented in the table 1 on page 6. -
Page 5: Various Stages Of The Installation
Installation and User Manual HELO Roxx Premium 2.2. Various stages of the installation Borr diam. o 3,5 mm Min. 240 mm With the adjustment legs driven in, the mounting height of the sauna heater wall mount is 750mm from the floor. -
Page 6: Installing The Sensor Near A Supply Air Vent
Installation and User Manual HELO Roxx Premium 2.2 Installing the sensor near a supply air vent The sauna room air should be exchanged six times in an hour. The diameter of the supply air pipe should be 1000 mm Sensor between 50 and 100 mm. - Page 7 Installation and User Manual HELO Roxx Premium MIN. mm MIN. mm Sensor Sensor OLET 31 OLET 31 MIN. mm MIN. mm Sensor Sensor OLET 31 OLET 31 Figure 2 Safety distances and sensor positions. - For wall installation, install the OLET 31 sensor 40 mm from the ceiling on the centre line of the heater.
-
Page 8: Connection Of The Sauna Heater To The Mains
Installation and User Manual HELO Roxx premium Connection of the sauna heater to the mains The sauna heater must be connected to the mains by a qualified electrician and in compliance with current regulations. The sauna heater is connected with a semi-permanent connection. Use H07RN-F (60245 IEC 66) cables or a corresponding type. -
Page 9: Locating The Connecting Box For The Connection Cable In The Sauna Room
Installation and User Manual HELO Roxx Premium 2.8 Locating the connecting box for the connection cable in the sauna room A = Specified minimum safety clearance 1. Recommended location for the connecting box 2. Silumin box recommended in this area. -
Page 10: Wiring Diagram
Installation and User Manual HELO Roxx Premium DIP switch positions for sauna heater use Control panel RJ 10-connectors Figure 4 . Order of RJ 10 connectors. Sensor, Door switch, Remote control, Additional NTC 2.10 Wiring diagram kW 230 V 1N~ / 2~... -
Page 11: Recommended Sauna Room Ventilation
Installation and User Manual HELO Roxx Premium 2.11 Recommended sauna room ventilation 1000 mm 500 mm Figure. 6 Rekommended sauna room ventilation 1. Sauna room 3. Electric sauna heater 5. Exhaust flue or channel 2. Washroom 4. Exhaust valve 6. Door to the sauna room 7. -
Page 12: Sauna Heater Stones
Installation and User Manual HELO Roxx Premium 2.13 Sauna heater stones Quality stones meet the following requirements: Sauna stones should withstand heat and heat variation caused by vaporisation of the water thrown on the stones. Stones should be rinsed before use in order to avoid odour and dust. -
Page 13: Door Switch
The switch part is installed on the door frame and the magnet is installed on the door. The distance between the switch and the magnet is 18 mm. When the door switch is installed on the top part of the door, TylöHelo recommends using the TylöHelo model with product number 0043233, SSTL 8260371. -
Page 14: Principle Image When Ra 33 Premium Is Used As Control Panel
Installation and User Manual HELO Roxx Premium 2.16 Principle image when RA 33 Premium is used as control panel Heater Sensor OLET 31 End stop return acknowledgement Adapter circuit board 1 = Blue OLEA 103 2 = White 3 = Red... -
Page 15: Bwt Technology In A Roxx Premium Heater
Installation and User Manual HELO Roxx Premium 2.17 BWT technology in a Roxx Premium heater Bio Water Technology (BWT) uses the heater's thermal energy to heat water and raise the moisture level without a separate heat source. Moisturised air improves the sauna climate, and various fragrances and salts can be evaporated to make the sauna experience more enjoyable.


Need help?
Do you have a question about the Roxx Premium and is the answer not in the manual?
Questions and answers