Table of Contents
Advertisement
Quick Links
Advertisement
Table of Contents

Related Manuals for Helo HELO CAVA DET


Summary of Contents for Helo HELO CAVA DET
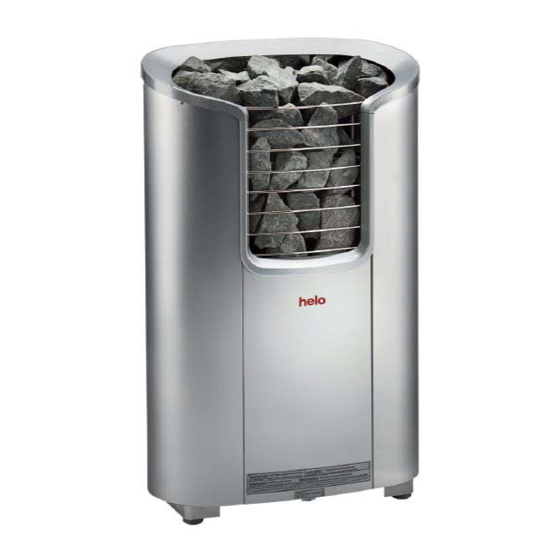
- Page 1 Installation and User Manual HELO CAVA / HELO ROXX DET ELECTRIC SAUNA HEATER: 1118 – 60 – 040518 (Helo Cava DET) 1118 – 90 – 040518 (Helo Cava DET) 1118 – 600 – 040518 (Helo Roxx DET) 1118 – 900 – 040518 (Helo Roxx DET)
-
Page 2: Table Of Contents
Installation and User Manual HELO CAVA / HELO ROXX DET Contents 1. Quick instructions for use of the sauna heater 1.1. Check before taking a sauna bath 1.2. Operation of the sauna heater controls 2. Information for users 2.1. Sauna room 2.2. -
Page 3: Quick Instructions For Use Of The Sauna Heater
Installation and User Manual HELO CAVA / HELO ROXX DET 1. Quick instructions for use of the sauna heater 1.1. Check before taking a sauna bath The sauna room is suitable for taking a sauna bath. The door and the window are closed. -
Page 4: Sauna Heater Stones
Installation and User Manual HELO CAVA / HELO ROXX DET 2.4. Sauna heater stones Quality stones meet the following requirements: Sauna stones should withstand heat and heat variation caused by vaporisation of the water thrown on the stones. Stones should be rinsed before use in order to avoid odour and dust. -
Page 5: If The Sauna Heater Will Not Heat Up
Installation and User Manual HELO CAVA / HELO ROXX DET 2.5. If the sauna heater will not heat up If the sauna heater will not heat up, please check that: - the power is on; - the main fuses of the sauna heater are intact;... -
Page 6: Various Stages Of The Installation
Installation and User Manual HELO CAVA / HELO ROXX DET Drill diam. o 3,5 mm Min. 3.3. Various stages of the installation 240 mm 3.3.1. Mounting the sauna heater to the wall With the adjustment legs driven in, the mounting height of the sauna heater wall mount is 750mm from the floor. -
Page 7: Helo Cava - Assembly Instructions For The Heater Soapstones
Installation and User Manual HELO CAVA / HELO ROXX DET 3.3.2. HELO CAVA – Assembly instructions for the heater soapstones Before the installation of the soapstones the heater has to be fixed to the wall. See the instructions on page 6. -
Page 8: Image 2.1 Installation Of The Soapstones
Installation and User Manual HELO CAVA / HELO ROXX DET After installing the sauna rocks, install the metallic supports above them. The illustration shows the order. The heater body has both vertical and end limiters which prevent the movement of the soapstone both vertically and horizontally once they are installed. -
Page 9: Image 2.2 Installation Of The Soapstones
Installation and User Manual HELO CAVA / HELO ROXX DET Install the round-edged stone next. Push the other end under the edge and then push the stone along the support plate against the end limiter. In the illustration the round edge stone and the soapstone furthest at the back remain where they are. -
Page 10: Recommended Sauna Room Ventilation
Installation and User Manual HELO CAVA / HELO ROXX DET 3.4. Recommended sauna room ventilation 1000 mm 500 mm Image 3 Recommended sauna room ventilation 1. Sauna room 3. Electric sauna heater 5. Exhaust flue or channel 2. Washroom 4. Exhaust valve 6. -
Page 11: Electric Heating Toggle
Installation and User Manual HELO CAVA / HELO ROXX DET Sauna heater insulation resistance: The sauna heater heating elements may absorb moisture from air, e.g. during storage. This may cause leakage currents. The moisture will be gone after a few heating sessions. Do not connect the heater power supply through a ground fault interrupter. -
Page 12: Locating The Connecting Box For The Connection Cable In The Sauna Room
Installation and User Manual HELO CAVA / HELO ROXX DET Power Heater connection Fuse Heater connection Fuse Heater connection Fuse cable H07RN-F/ cable H07RN-F/ cable H07RN-F/ 60245 IEC 66 60245 IEC 66 60245 IEC 66 400 - 415V 3N~ 230 V 3~... -
Page 13: Image 6 Principle Image
Installation and User Manual HELO CAVA / HELO ROXX DET Principle image when T1 is used as control panel Connector strip Limiter Heater Sensor cable OLET 28 1 Blue 1 Blue 2 White 2 White 3 Red 3 Red 4 Yellow... -
Page 14: Switch Diagram
Installation and User Manual HELO CAVA / HELO ROXX DET 3.9. Switch diagram Teho, Effekt Lämpövastukset, Värmeelement, Tennid, Input, Potencia Heating elements, Heizeelement, Resistores Térmicos Leistung, 230 V Vöimsus, SEPC 64 SEPC 65B 2000 W 3000 W 1,2,3 1,2,3 230V - 240V 1N~ / 2~ Max. -
Page 15: Helo Cava / Helo Roxx Det Spare Part List
Installation and User Manual HELO CAVA / HELO ROXX DET Helo CAVA / Helo ROXX DET spare part list Cava / Roxx Cava / Roxx Part Part number Part name 6 kw 9 kw 4071002 Rock grate 6215793 Circuit board OLEA 98... -
Page 16: Rohs
Installation and User Manual HELO CAVA / HELO ROXX DET ROHS Ympäristönsuojeluun liittyviä ohjeita Anvisningar för miljöskydd Tämän tuotteen käyttöiän päätyttyä sitä ei Denna produkt får inte kastas med saa hävittää normaalin talousjätteen vanliga hushållssopor när den mukana, vaan se on toimitettava inte längre används.
Need help?
Do you have a question about the HELO CAVA DET and is the answer not in the manual?
Questions and answers