Table of Contents
Advertisement
Quick Links
Advertisement
Table of Contents

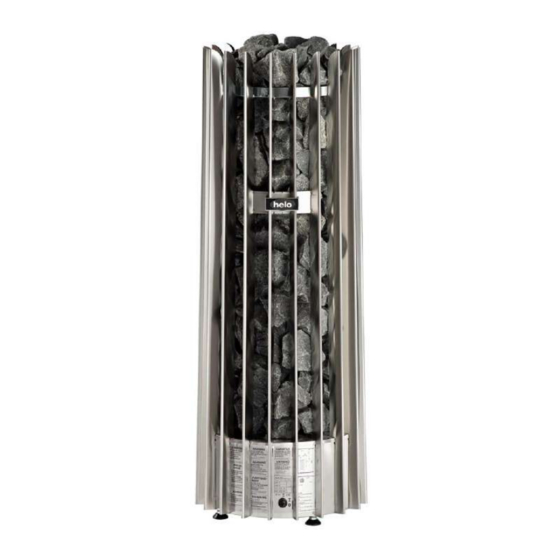
Summary of Contents for Helo Rocher DES
- Page 1 REWARD YOURSELF Installation and User Manual Rocher DES ELECTRIC SAUNA HEATER: 1102 – 70 – 040517 1102 – 105 – 040517 230V – 240V 1N~ / 2~ 230V 3~ 400V – 415V 3N~ CONTROL PANEL: 1601 – 31 (RA – 31) Trend) 1601 –...
-
Page 2: Table Of Contents
Installation and User Manual Rocher DES Contents Page 1.Quick instructions for use of the sauna heater 1.1. Check before taking a sauna bath 1.2. Operation of the sauna heater controls 2.Information for users 2.1. Sauna room 2.2. Heating the sauna 2.3. -
Page 3: Quick Instructions For Use Of The Sauna Heater
Installation and User Manual Rocher DES 1. Quick instructions for use of the sauna heater 1.1. Check before taking a sauna bath The sauna room is suitable for taking a sauna bath. The door and the window are closed. The sauna heater is topped with stones that comply with the manufacturer's recommendations, the heating elements are covered with stones, and the stones are piled sparsely. -
Page 4: Recommended Sauna Room Ventilation
Installation and User Manual Rocher DES 2.3. Recommended sauna room ventilation 1000 mm 500 mm Figure 1 Rekommended sauna room ventilation 1. Sauna room 3. Electric sauna heater 5. Exhaust flue or channel 2. Washroom 4. Exhaust valve 6. Door to the sauna room 7. -
Page 5: Sauna Heater Stones
Installation and User Manual Rocher DES 2.6. Sauna heater stones Quality stones meet the following requirements: Sauna stones should withstand heat and heat variation caused by vaporisation of the water thrown on the stones. Stones should be rinsed before use in order to avoid odour and dust. -
Page 6: If The Sauna Heater Will Not Heat Up
Installation and User Manual Rocher DES 2.7. If the sauna heater will not heat up If the sauna heater will not heat up, please check that: the power is on; the main fuses of the sauna heater are intact; is there any error messages on the control panel. In case of an error message on the control panel, please refer to the control panel instructions. -
Page 7: Sauna Heater Safety Clearances
Installation and User Manual Rocher DES 2.11. Sauna heater safety clearances Corner and wall installations: The OLET 28 sensor is installed 40 mm from the ceiling on the centre line of the heater on a wall. Alternatively, the sensor can be installed on the ceiling above the centre of the heater – see 'middle installation' for instruc- tions. -
Page 8: Preparing For Piling The Stones
Installation and User Manual Rocher DES 2.12. Preparing for piling the stones Removing of the supporting bars to pile the stones Unscrew the bars' mounting screws (2 pcs). Lift the support bar's locking plate up from its normal position. Lift off the support bars. -
Page 9: Installing The Support For Heating Elements
Installation and User Manual Rocher DES 2.13. Installing the support for heating elements Note that heating element support should always be used in order to prevent the heating elements from being bent into each other or out sideways. Installation of the heating element support: Pile in stones up to halfway of the provided space. -
Page 10: Connection Of The Sauna Heater To The Mains
Installation and User Manual Rocher DES 2.14. Connection of the sauna heater to the mains The sauna heater must be connected to the mains by a qualified electrician and in compliance with current regulations. The sauna heater is connected with a semi-permanent connection. Use H07RN-F (60245 IEC 66) cables or a corresponding type. -
Page 11: Locating The Connecting Box For The Connection Cable In The Sauna Room
Installation and User Manual Rocher DES 2.16. Locating the connecting box for the connection cable in the sauna room A = Specified minimum safety clearance 1. Recommended location for the connecting box 2. Silumin box recommended in this area. 3. This area should be avoided. Always use a silumin box. -
Page 12: Door Switch
The door switch wiring is connected to the adapter circuit board OLEA 102. LiYY 4 x 0.25 mm² can be used as the cable. Helo model number 0043233, SSTL 8260371 is recommended to be used as the door switch. Door switch Min. -
Page 13: Wiring Diagram
Installation and User Manual Rocher DES 2.19. Wiring diagram 6,8 kW 230 V 1N~ / 2~ L1 / N 6,8 - 10,5 kW 230 V 3~ OLEA 10 3 L2 L3 6,8 - 10,5 kW 400 V 3N~ L1 L2 L3... -
Page 14: Principle Image When 1601 - 31 (Ra - 31 Trend) Is Used As Control Panel
Installation and User Manual Rocher DES 2.20. Principle image when 1601 - 31 (RA - 31 Trend) is used as control panel Terminal block Limiter Heater Sensor cable 1= Blue Adapter circuit Sensor OLET 28 2= White board OLEA 102... -
Page 15: Rocher Des Spare Part List
Fuse 3,15 AT 7817536 Fuse holder 6101741 Rocker switch OAAA 2 7306008 Rubber cover for rocker switch Heatin element SEPC 199 5207770 2267W/230V Heating element SEPC 200 5207771 3500W/230V Adapter circuit board 5916323 OLEA 102 Table 3 Rocher DES spare parts list... -
Page 16: Rohs
Installation and User Manual Rocher DES 4. ROHS Ympäristönsuojeluun liittyviä ohjeita Anvisningar för miljöskydd Tämän tuotteen käyttöiän päätyttyä sitä ei Denna produkt får inte kastas med saa hävittää normaalin talousjätteen vanliga hushållssopor när den mukana, vaan se on toimitettava inte längre används. Istället ska den sähkö- ja elektroniikkalaitteiden kierrätykseen...


Need help?
Do you have a question about the Rocher DES and is the answer not in the manual?
Questions and answers