
Related Manuals for Helo Fusion 60


Summary of Contents for Helo Fusion 60
- Page 1 INSTRUCTIONS FOR INSTALLATION AND USE FUSION ELECTRIC SAUNA HEATER: 1117 - 60 - 0405 1117 - 80 - 0405 1117 - 90 - 0405 CONTROL PANEL: 1601 - 20 7014251 314 SKLS 2 C...
-
Page 2: Table Of Contents
Contents 1. Quick instructions for use of the sauna heater ............... 3. 1.1 Check before taking a sauna bath ......................... 3. 1.2 Quick start of the sauna heater ........................3. 2. Information for users ......................4. 2.1. Sauna heater and its components ......................... 4. 2.2. -
Page 3: Quick Instructions For Use Of The Sauna Heater
Quick instructions for use of the sauna heater Check before taking a sauna bath The sauna room is suitable for taking a sauna bath. The door and the window are closed. The sauna heater is topped with stones that comply with the manufacturer's recommendations, the heating elements are covered with stones, and the stones are piled sparsely. -
Page 4: Information For Users
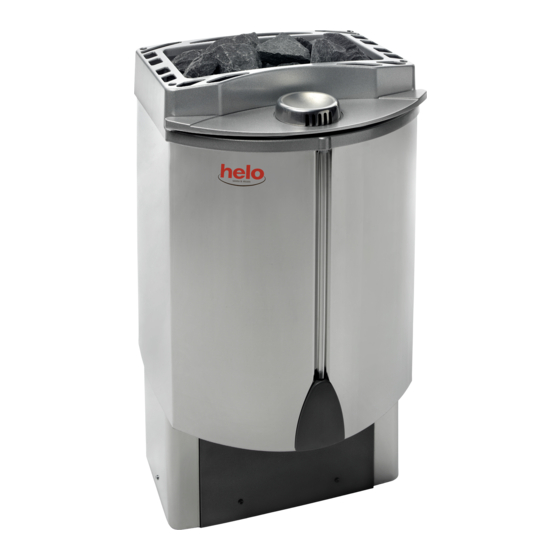
Information for users 2.1. Sauna heater and its components Sauna heater The Fusion's design and technical properties make it a unique sauna heater. It combines traditional dry and hot, and a lower temperature and moist way of sauna bathing. The integrated steamer in the sauna heater makes this possible. -
Page 5: Sauna Room
Digital control centre With the control centre the user can set the steamer function, temperature, starting time, bathing time, etc. An electrician installs the control centre outside the sauna room either as surface mounting or as flush mounting. The user can set the time easily, or it may be left for the installer to set. For additional information on the control centre, see page 7 2.6 –... - Page 6 Sauna stones should be piled sparsely in order to enhance ventilation between the stones. Do not bend the heating elements together or against the frame. Rearrange the stones regularly (at least once a year)and replace small and broken stones with new, larger stones.
-
Page 7: Operation Of The Sauna Heater Controls
2.6. Operation of the sauna heater controls Control centre buttons Start / Stop helo Light Remote control Selection / Acknowledgement Arrow up / down Memory slots Indicator lights of the control centre Humidity Temperature 10. Operating time 11. Pre-selection time 12. -
Page 8: Time Setting
Pre-selection mode: If there is a pre-selection time set in the use / programming mode, the control centre goes into this mode as soon as the settings are saved. The following settings may be modified in this mode • Pre-selection time Heating mode: The control centre goes into heating mode after the pre-selection time has expired or when a quick selection is used. -
Page 9: Checking The Bathing Program
When the OK button is pressed again, the hour separator stops flashing to indicate the clock is stopped and may now be set to desired time. The setting is done by pressing either arrow up (+) or arrow down (-) buttons. A short press will step a minute at a time and a long press will scroll the number with acceleratingspeed. -
Page 10: Setting The Bathing Program
2.6.4. Setting the bathing program If you do not want to use any programmes bathing programs or you want to modify one of the existing programs, some settings must be programmed in the control centre. These settings include bating mode, time, temperature, humidity (only for steam sauna) and the possible pre-selection time. - Page 11 Setting the bathing temperature The next setting is the bathing temperature. The temperature set value display depends on the selected bathing mode. Normal sauna: The lower display shows the set bathing temperature. The value can be freely changed between 5 – 110 °C with the arrow buttons. When the setting is confirmed, the control centre goes directly to Setting the bathing time.
- Page 12 Saving the bathing program After setting the bathing mode, temperature, (humidity) and bathing time, the user can save the current setting to the control centre memory slots (1-4). The control centre indicates this by showing "SAVE PROG" on the display. The bathing program is saved by pressing the memory slot button, where you want to save the program (for example, in the image, the program is saved in memory slot 1).
-
Page 13: Setting The Remote Control Mode
2.6.5. Setting the remote control mode If the sauna heater is equipped with a remote control device, and the remote control function is activated (see 3.x - Sauna heater remote control), the control centre can be set in remote control mode. Setting the remote control mode is only possible when the control centre is in standby mode and there is no starting request from the remote control device. -
Page 14: Special Functions In Steam Sauna Mode
2.7. Special functions in steam sauna mode Few of the control centre functions are availably only when the selected bathing mode is steam sauna. These include drying mode and alarm for the need of filling the water tank. 2.7.1. Drying mode This mode is in use only when the bathing mode is steam sauna. -
Page 15: Light And Fan
2.8. Light and fan The Fusion sauna heater is equipped with a possibility to control both a separate exhaust air fan and lighting (e.g. fibre optic lighting of the sauna room). Connector for these functions are in the sauna heater control panel box. When a function is activated, the connector goes live and it may be loaded as follows: - Fan function max. -
Page 16: Maintenance
2.9. Maintenance Sauna heater There may be chalky remains from the water on the sauna heater surface. Clean it with a cleaning and care solution for rst fixtures. Water tank The tank should be drained after every use. This reduces the amount of chalky remains accumulating on the inner surface of the tank. -
Page 17: Instructions For The Installer
Instructions for the installer THE PERSON INSTALLING THE SAUNA HEATER SHOULD LEAVE THESE INSTRUCTIONS TO THE PREMISES FOR THE FUTURE USER. 3.1. Preparing for sauna heater installation Check the following before installing the sauna heater: 1. The ratio of the heater's input (kW) and the sauna room's volume (m3). Volume/input recommendations are presented in the table 1 on page 19. - Page 18 MOUNTING THE SAUNA HEATER ON A WALL With the adjustment legs driven in, the mounting height of the sauna heater wall mount height is 635mm. The adjustment legs can be adjusted 15mm is the floor is not even. The maximum mounting height of the wall mount is 650 mm.
- Page 19 Table 1. Sauna heater safety clearances: Sauna room Safety clearances minimum 1900 1150 1900 1150 1900 1150 (mm) (mm) OLET 19 min 30 min 30 Picture 1. Sauna heater safety clearances:...
-
Page 20: Recommended Sauna Room Ventilation
3.3. Recommended sauna room ventilation Sauna room ventilation 1000 mm 500 mm 1. Sauna room 3. Electric sauna heater 5. Exhaust flue or channel 2. Washroom 4. Exhaust valve 6. Door to the sauna room 7. A ventilation valve can be installed here to be kept closed while the sauna is heated and during bathing. -
Page 21: Block Diagram Of The Electric And Hpac Connections
Sauna heater insulation resistance: The sauna heater heating elements may absorb moisture from air, e.g. during storage. This may cause bleeder currents. The moisture will be gone after a few heating sessions. Do not connect the heater power supply through a ground fault interrupter. However, adhere to the effective electrical safety regulation when installing the sauna heater. -
Page 22: Electric Heating Toggle
3.6. Electric heating toggle Electric heating toggle applies to homes with an electric heating system. Sauna heater has a connection (marked 55) for controlling the electric heating toggle. Connector 55 and the heating elements are simultaneously live (230V). 3.7. Maximum setting for bathing time The bathing time set in the control centre may be limited, depending on the intended use of the heater. -
Page 23: Sauna Heater Remote Control
3.8. Sauna heater remote control Before the sauna heater remote use is possible, the remote control feature must be activated from the control centre circuit board. The activation is done by setting the switch 4 to "ON" position (same switch group than in the maximum setting for bathing time). After that it is possible to use the "R" button to set remote control. -
Page 24: Locating The Connection Box For Connection Cable In The Sauna Room
3.9. Locating the connection box for connection cable in the sauna room KIUAS Image 3. Location for the connection box A = Specified minimum safety clearance 1. Recommended location for the connection box 2. Silumin box recommended in this area. 3. -
Page 25: Control Centre Error Messages
3.10. Control centre error messages The control centre monitors continuously the sensors connected to it and the sauna heater. If any of those breaks down for some reason, the control centre aborts the heating of the sauna room and shows an error message on its display. -
Page 26: Wiring Diagram
Wiring diagram Teho, Effekt Lämpövastukset, Värmeelement, Input, Leistung Heating elements, Heizeelement SEPC 64 SEPC 65 SEPC 65B SEPC 142 2000W 2670W 3000W 2250W 1,2,3 1,2,3 1,2,3 230V- 240V 1N~ / 2~ Max. 8 kW Water tank High Limit 230 V 3~ L2 L3 Control 400V - 415V 3N~... -
Page 27: Spare Parts For The Fusion Electric Sauna Heater
Spare parts for the FUSION electric sauna heater Product Product title FUSION FUSION FUSION number 4071002 Basic grate 5916316 Circuit board OLEA 001013 Control panel 1601- 20 (RA-20) 6214032 Thermostat OLET 19 6214035 Thermostat OLET 21 (humidity) 7812550 Mains connector NLWD 1-1 7712000 Cable clamp... -
Page 28: Rohs
ROHS Ympäristönsuojeluun liittyviä ohjeita Anvisningar för miljöskydd Tämän tuotteen käyttöiän päätyttyä sitä ei Denna produkt får inte kastas med saa hävittää normaalin talousjätteen vanliga hushållssopor när den mukana, vaan se on toimitettava inte längre används. Istället ska den sähkö- ja elektroniikkalaitteiden kierrätykseen levereras till en återvinningsplats tarkoitettuun keräyspisteeseen.
Need help?
Do you have a question about the Fusion 60 and is the answer not in the manual?
Questions and answers