Table of Contents
Advertisement
Quick Links
User Guide
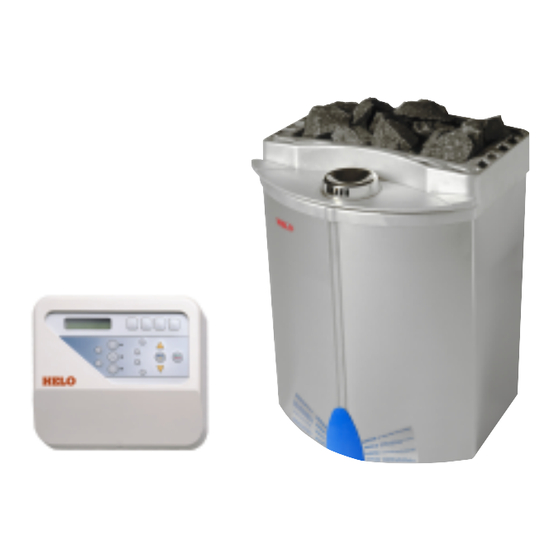
Sauna heater and
digital control panel
User Guide for the following models
Automatically filled water tank:
1712-60-010420 (6,0 kW)
1712-80-010420 (8,0 kW)
1712-90-010420 (9,0 kW)
Manually filled water tank:
1712-60-120420 (6,0 kW)
1712-80-120420 (8,0 kW)
1712-90-120420 (9,0 kW)
Digital Control Panel:
1418-2-150504
Advertisement
Chapters
Table of Contents

Related Manuals for Helo Saunatec 1712-60-010420


Summary of Contents for Helo Saunatec 1712-60-010420
- Page 1 User Guide Sauna heater and digital control panel User Guide for the following models Automatically filled water tank: 1712-60-010420 (6,0 kW) 1712-80-010420 (8,0 kW) 1712-90-010420 (9,0 kW) Manually filled water tank: 1712-60-120420 (6,0 kW) 1712-80-120420 (8,0 kW) 1712-90-120420 (9,0 kW) Digital Control Panel: 1418-2-150504...
-
Page 2: Thank You For Choosing Saunatec
Thank you for choosing quality products from Saunatec We think that our products will live up to your expectations and give you many hours of enjoyment in your sauna. We want you, your family and your friends to have many comfortable sauna baths and at the same time find new ways to enjoy sauna bathing. -
Page 3: Quick Reference Guide
Quick Reference Guide In the following quick reference guide we provide important information for you as a user. You will find more information about each function in the contents list on page 5. Set the language in 11. Save the setting with PROG/OK the control panel 12. - Page 4 Program a memory ALARM button OFFSET T1 ALARM Example: Normal Sauna OFFSET T2 1. Push ON/OFF button STEAM SAUNA 2. Push NORMAL SAUNA button FILL WATER TANK 3. Push DURATION button 4. Set DURATION with arrow ALARM OFFSET STEAM buttons 5.
-
Page 5: Table Of Contents
Information for the user Table of contents for the user This user guide helps you to understand and use your new sauna products. Please read this Thank you for choosing Saunatec ..... 2 user guide carefully and take Quick Reference Guide ....... 3 special note of warnings. -
Page 6: This Is How Sauna Works
This is how sauna works Sauna functions in the same way as any room in your house. Radiators in a room make sure that the room temperature is maintained at the desired temperature. Ventilation lets fresh air in and spent air is lead out. -
Page 7: The Sauna Heater
The sauna heater Sauna heater Cup for sauna fragrances The sauna heater, with its design and technology, offers unique qualities. The sauna heater can be used in two different modes; normal sauna and sauna with varying humidity. The settings are made from the digital control panel. -
Page 8: The Control Panel
When the temperature has fallen, the sensor can be reset by pushing the reset button with a screwdriver. Before you reset the sensor the cause of the fault must be corrected. The temperature sensor is mounted by an installer directly over the heater, 40 mm from the ceiling. -
Page 9: Functions Of The Control Panel
Tips and advice Observe If light and fan have been The control panel gives you the connected to the control panel, opportunity to set four you can use them with the individual sauna baths. We appropriate buttons. If they are recommend that you use the not connected, contact your memory buttons. -
Page 10: Menu
Menu Use the menu 1. Push ON/OFF button In the menu you make all the basic 2. Push PROG OK for settings. Basic settings are, for example, three sec. to set the time, choose language, calibrate temperature and humidity. Set the basic The display shows: settings before you have your first sauna MENU 1... -
Page 11: Set The Time And Choose Language
Set the time and choose the language The basic settings must be completed in the control panel. It means setting the clock and choosing the correct language. Activate the setting menu by pushing the button PROG OK for about three seconds. If no button is pushed within five seconds the control panel will automatically return to the basic setting. -
Page 12: Turn On The Sauna
Turn on the sauna Observe The control panel gives you several options how to turn on the sauna. The options are: Before you turn on the sauna - With a timer heater you must check that the - With a memory button sauna is ready to be used. -
Page 13: With Memory Button
Turn off the sauna If you wish to turn off the sauna before or during the sauna bath, you can push the button START STOP. With a memory button Memory buttons The digital control panel has four memory buttons. You have the opportunity to set four individual sauna bath programs. -
Page 14: With Last Used Sauna Program
With the last used program To turn on the sauna with the last used program means that you will use the same settings in the control panel as you had in your previous sauna bath. To turn on the sauna with the last used program: Menu 4 - SmartSauna - is set on OFF. -
Page 15: Program And Activate The Memory Buttons
Change the temperature 1. Push TEMPERATURE button 2. Change the temperature with arrow buttons 3. Save the new setting by pushing PROG OK Change the duration 1. Push DURATION button 2. Change the duration with arrow buttons 3. Save the new setting by pushing PROG OK Change the humidity 1. -
Page 16: Calibrate The Temperature
3. Push button DURATION 4. Change the duration to 00:50 with arrow buttons 5. Save the setting with PROG OK 6. Push button TEMPERATURE 7. Change the temperature to 75 C with arrow buttons 8. Save the setting with PROG OK 16:00 The display shows: 00:50... -
Page 17: Calibrate The Humidity
Example Your thermometer inside the sauna shows 84°C and your control panel is set on 80°C. The difference is thus + 4°C. By setting OFFSET: T2 on – 4°C, the control panel will show the right temperature. 1. Push ON/OFF 2. -
Page 18: Activate Smartsauna
Activate SmartSauna Smartsauna is a function that measures the temperature in the sauna and calculates the length of time the heater will take to heat the sauna to the set temperature. The function only works when it is activated, together with a time setting. Example: You have had a hard day at work and wish to relax with a sauna bath directly after you come home. -
Page 19: Turn On The Light And Fan
Set the drying time: Push ON/OFF Push PROG OK for three seconds 3. Page to Menu 7 with PROG OK MENU 7 The display shows: DRYING: 30 min 4. Set the drying time (30 or 60 min) with arrow buttons 5. -
Page 20: Lock The Control Panel
Activate and adjust the ventilation The fan can be activated when the control panel is in either on-mode or off-mode. 1. Push button FAN FAN SPEED: The display shows: 2. Adjust the rotation speed with arrow buttons The upper arrow increases the speed while the lower arrow decreases the speed. - Page 21 Lock the light Make sure that the control panel is in off-mode before you lock the light. 1. Push button LIGHT Wait for the adjustment-mode to disappear before you continue the instruction 1. Push upper arrow button 2. Push lower arrow button 12:15 The display shows: LOCKED...
-
Page 22: Alarm
Alarm In an alarm situation, the control panel stops the heater, and the cause for the alarm is shown on the display of the control panel. Check the alarm and restart the sauna heater. An alarm can be triggered by the following reasons: Alarm Display Action... -
Page 23: Maintenance
Maintenance The water tank The water tank should be drained after every Warning sauna bath. After a while you will probably find inpurities on the inside of the water tank. The Be careful when emptying the tank should therefore be cleaned 1-2 times water tank. -
Page 24: General Information About Sauna Bathing
General information about sauna bathing Allow yourself plenty of time when you take a sauna bath. You should not feel hurried. To take a sauna bath should be a pleasure. Take a shower before entering the sauna. If the situation requires that you wear a towel, it should not be too tight. -
Page 25: Recommended Ventilation
Moist sauna A moist sauna means higher humidity and lower temperature. This is achieved by ladling water on the stones. After a humid sauna bath you feel clean and refreshed. To achieve this: 1. Set the temperature at about 60°C 2. - Page 26 Mechanical ventilation 2 Fan draws away Extra outlet of the spent air vent Fresh air Mechanical ventilation 2 Fresh air is let in through a vent, which is placed in the ceiling or in the wall at least 50 centimeters above the heater (A). Spent air is let out through an outlet channel with the Sauna bench vent placed at floor level.
-
Page 27: Information For The Installer
Information for the installer This user guide gives you answers on how to install electrical cables and the control panel in the sauna. We want you to read the ENTIRE user guide, both sections: Information for the user and Information for the installer. We feel that even an installer benefits from the information directed to the user. -
Page 28: Important Information For The Installer
Important information for the installer Observe! This user guide is an important tool for you Follow the installation who will mount and install the sauna heater. dimensions given in this There are several installation dimensions that user guide. must be followed exactly due to safety Make sure that the wall requirements. -
Page 29: Parts Included In The Delivery
Parts included in the delivery Sauna heater 1 pc Sensors with cables Temperature sensor OLET 19 and humidity sensor OLET 18 2 pc Digital control panel 1 pc Observe! User Guide 1 pc If any of the parts are missing in delivery, contact your retailer. -
Page 30: Summary Of The Electrical And Water Connections
Summary of the electrical and water connections The picture below shows a plan of the electrical and water connections for the sauna heater and control panel. Temperature sensor OLET 19 (T1) Digital Control Panel Humidity sensor OLET 18 (T2) Voltage to the control panel: 400V 3N~ Sauna heater Water tank... -
Page 31: Install The Heater And Temperature Sensor
Install the heater and tempera- ture sensor Install the heater: There are precise requirements for installation of the heater. The different models of sauna Study the installation heaters have their own specific installation dimensions in the pictures dimensions, and these must be followed and the table. -
Page 32: Wall Mounting
Wall mounting All measures are in millimetres (mm). Temperature sensor Humidity sensor OLET 19 (T1) OLET 18 (T2) Upper sauna bench Lower sauna bench Drill O 3,5 mm Metal screw 6 x 40 Metal screw 6 x 16... - Page 33 Install the temperature and humidity sensor 1. Mark the spot on the sauna wall where the sensor should be placed. Study the illustrations on page 32. 2. Remove the cover of the sensor with a screwdriver. See pictures 1 and 2. 3.
-
Page 34: Connect The Electricity
Connect the electricity Connecting the electricity is the most important part of the installation of a sauna heater. Only certified electricians may install the sauna heater. The heater should be connected half-fasten to the electricity supply. You must use a standard cable HO7RN-F, 245 IEC66 or similar (example RHH or VSN) when you connect the heater to the electricity... -
Page 35: Connection To The Electricity Supply
Connection to the electricity supply Output Fuse Heater connection Steam unit (kW) HO7RN-F, 245 IEC66 HO7RN-F, 245 IEC66 (example RHH el. VSB) (example RHH el. VSB) 3 x 10 5 x 1,5 2 x 1,5 3 x 16 5 x 2,5 2 x 2,5 3 x 16 5 x 2,5... -
Page 36: Install And Program The Control Panel
Install and program the control panel The control panel has several holes in the back. These holes are used to mount the control panel outside the sauna. When the control panel is installed you have to set a number of basic settings on the display. The basic settings include among other things setting the time and choosing the language. -
Page 37: Test The Sauna And Make Safety Measurements
Cable packing in the control panel Voltage Humidity sensor cable OLET 18 (T2) Temperature sensor OLET 19 (T1) Test the sauna and make safety measurements When the installation is done and you have run through all the steps in the checklist, the only thing that remains is to test the sauna and make the safety measurements. - Page 38 P.O. Box 72 02201 ESPOO, Finland / P.O. Box 15 10901 HANKO, Finland 314 SKSM 150 B Homepage: www.saunatec.fi - E-mail: info@saunatec.fi...
Need help?
Do you have a question about the Saunatec 1712-60-010420 and is the answer not in the manual?
Questions and answers