
Related Manuals for Kargo Master 408SC


Summary of Contents for Kargo Master 408SC
-
Page 1: Installation Guide
Installation Guide 408SC Kargo Master Rancho Cordova, CA 95742 800-343-7486 CustomerService@KargoMaster.com DATE: ______________... -
Page 2: Table Of Contents
Installation Instructions – 408SC *PLEASE READ ALL INSTRUCTIONS AND WARNINGS PRIOR TO ASSEMBLING, INSTALLING, AND USING THIS PRODUCT* Warning Always check for wires, fuel tanks and lines, brake lines and other important vehicle functionality items prior to drilling and installing all products. -
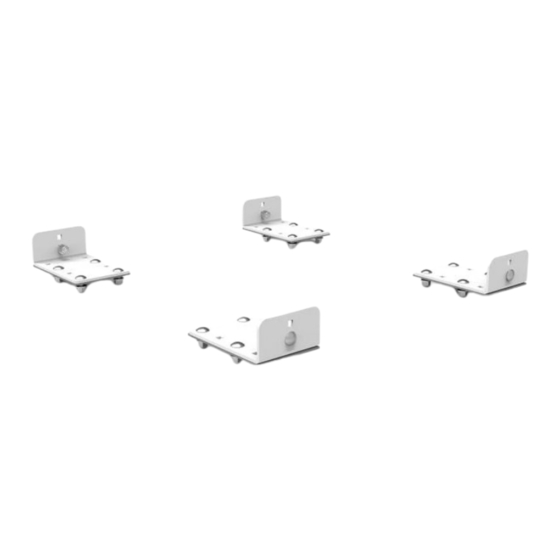
Page 3: Parts List
Installation Instructions – 408SC Parts/Hardware For Technical Support Call: 800-343-7486 Monday-Friday 7AM - 4 PM (PST) Page 2... -
Page 4: Step 1 - Foot Attachment
Installation Instructions – 408SC Step 1 – Foot Attachment • Measure the approximate width of the flat section of the roof on the top of the shell. • Determine best mount locations on top of the shell and measure distance between the desired mounting locations. -
Page 5: Step 2 - Attach Mounts To Feet
Installation Instructions – 408SC Step 2 – Attach Mounts to Feet • Attach feet on ladder rack to the mounting brackets from the 408SC kit using 5/16” x 1” carriage bolts, 5/16” flat washers and 5/16” nyloc nuts. • Repeat at all four mount feet. -
Page 6: Step 3 - Place Rack On Shell
Installation Instructions – 408SC Step 3 – Place Rack on Shell • Place rack on top of shell. Positon rack to you liking. Be sure the rack is off-set far enough to the rear that one will not hit the shell when loading and unloading a ladder. -
Page 7: Step 4 - Remove Rack And Drill
Installation Instructions – 408SC Step 4 – Remove Rack and Drill • Remove rack with feet and mounts from the top of the shell. • Drill in previously marked holes using a .340” bit. • Ensure safety when drilling. • Remove rack and feet from the feet mounts. -
Page 8: Step 6 - Mount Rack
Step 6 – Mount Rack • Place rack on top of previously installed feet mounts. • Attach feet on ladder rack to the mounting brackets from the 408SC kit using 5/16” x 1” carriage bolts, 5/16” flat washers and 5/16” nyloc nuts. - Page 9 Installation Instructions – 408SC GO BACK AND ENSURE ALL HARDWARE IS TIGHT Your installation is now complete. For Technical Support Call: 800-343-7486 Monday-Friday 7AM - 4 PM (PST) Page 8...
Need help?
Do you have a question about the 408SC and is the answer not in the manual?
Questions and answers