Bradley Express SS Series Installation Manual
Infrared (standard and wall-hung)
Hide thumbs
Also See for Express SS Series:
- Installation manual (27 pages) ,
- Installation instructions manual (17 pages) ,
- Installation manual (15 pages)
Table of Contents
Advertisement
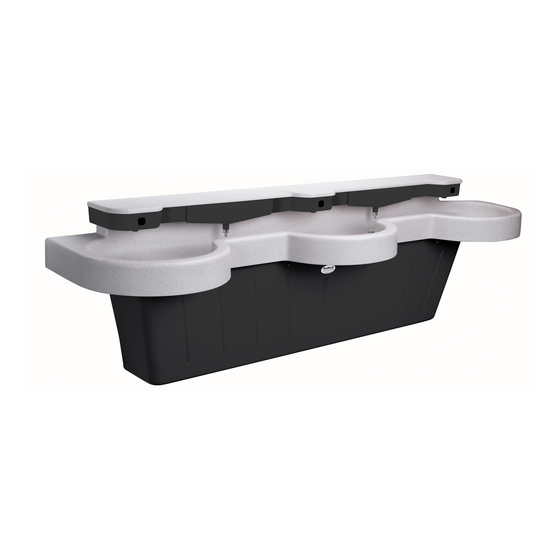
SS-3N with infrared activation, standard
frame and liquid soap dispenser
SS-3N with infrared activation, wall-hung
frame and liquid soap dispenser
215-1493 Rev. K; ECN 17-08-010
© 2017 Bradley
Page 1 of 14
5/18/2017
Installation
SS-3N Infrared
(Standard and Wall-Hung)
Express
Lavatory System SS-Series
®
Express Lavatory Systems are ADA and TAS compliant
U.S. Pat. Nos. 5,611,093, 5,369,818, D398,969
Other Patents Pending
Table of Contents
Pre-Installation Information ................................................2
Components ......................................................................3
Supplies Required .............................................................4
Dimensions ....................................................................4-5
Rough-Ins ..........................................................................6
Mount Frame to Wall .........................................................7
Install Bowl ........................................................................7
Connect the Supply ...........................................................8
Install Drains ......................................................................9
Connect Electrical and Sprayhead Supplies .....................9
Adjust Temperature ..........................................................10
Sensor Assembly and Solenoid Valve Access ................10
Solenoid Valve Troubleshooting .......................................11
Navigator® Mixing Valve Troubleshooting .......................12
Stop Valve Troubleshooting .............................................13
Cleaning and Maintenance for Terreon® .........................13
Soap Dispenser Maintenance .........................................14
Menomonee Falls, WI 53052 USA
800 BRADLEY (800 272 3539)
+1 262 251 6000
P.O. Box 309
bradleycorp.com
Advertisement
Table of Contents
Troubleshooting

Related Manuals for Bradley Express SS Series


Summary of Contents for Bradley Express SS Series
-
Page 1: Table Of Contents
Cleaning and Maintenance for Terreon® ......13 Soap Dispenser Maintenance .........14 P.O. Box 309 215-1493 Rev. K; ECN 17-08-010 Menomonee Falls, WI 53052 USA © 2017 Bradley 800 BRADLEY (800 272 3539) +1 262 251 6000 Page 1 of 14 5/18/2017 bradleycorp.com... -
Page 2: Pre-Installation Information
If any parts are missing, do not begin installation until you obtain the missing parts. Special Note for Sprayhead/Bowl retrofit to retrofit new SS-3N sprayhead onto existing SS-3 bowl 2¼" (57mm) Drill hole Ø 1" (25mm) to 1½" (38mm). Existing Hole 1½" (38mm) Bradley • 215-1493 Rev. K; ECN 17-08-010 5/18/2017... -
Page 3: Components
Installation SS-3N Components Sprayhead Cover (SS-3N-COVR-ONLY) Contact your local Bradley Rep for part number. Bolt, 5/16-18 (160-371) Sprayhead Body Screw, 10-24 (SS-3N-SPYD-ASSY) (160-386) Contact your local Bradley Rep for part number. Bowl (SS-3N-BOWL) Contact your local Bradley Rep for part number. -
Page 4: Supplies Required
• STD. HEIGHT ONLY: (2) 3/8" wall anchors, bolts and 1" min. O.D. washers to mount scuff base to wall • 1/2" nominal copper tubing for hot and cold supplies and 1-1/2" NPT drain piping • 120V/220V 50/60 Hz power source using Bradley supplied 120VAC/12V DC plug in adapter Dimensions - Front and Top Views... - Page 5 Grades: Pre-K 11-1/2" (292) through (292) through 5 or 6 8 or 9 36-1/2" 34-1/2" (927) (876) 32" 30" (813) (762) 8-5/8" 8-5/8" 28" (219) 26" (219) (711) (660) 11-1/4" 9-1/4" (286) (235) Bradley • 215-1493 Rev. K; ECN 17-08-010 5/18/2017...
-
Page 6: Rough-Ins
34" None Standard Height 34" None Wall-Hung 32" Subtract 2" TAS, Grades 6 through 8 or 9 31" Subtract 3" Juvenile Height 30" Subtract 4" TAS, Pre-K through Grades 5 or 6 Bradley • 215-1493 Rev. K; ECN 17-08-010 5/18/2017... -
Page 7: Mount Frame To Wall
Do not tighten. Secure the bowl to the wall anchors with 3/8" bolts and 1" min. O.D. washers, two places. Do not overtighten. Tighten the pan-head screws. DO NOT OVERTIGHTEN. Bradley • 215-1493 Rev. K; ECN 17-08-010 5/18/2017... -
Page 8: Connect The Supply
Loosen but do not remove the two mounting screws holding the valve bracket to the frame. Slide the valve bracket up and lift it from the frame. Attach the stop to the tempered wall stub-out. Bradley • 215-1493 Rev. K; ECN 17-08-010 5/18/2017... -
Page 9: Install Drains
(110-231) Supply Inlet Navigator Thermostatic Mixing Valve Loosen the compression nuts. Push the sprayhead supply tubes firmly into the tube connectors until they are fully seated. Tighten the compression nuts by hand. Bradley • 215-1493 Rev. K; ECN 17-08-010 5/18/2017... -
Page 10: Adjust Temperature
1. Position the cover/shelf on the sprayhead body. 2. Secure it to the sprayhead body using the screws provided. Sprayhead Infrared Sensor Components 269-1608HP-DC Nut, ½"-14 NSPM (110-115) Window (269-1241) Aerator Assembly (S05-180) O-Ring (125-157) Bradley • 215-1493 Rev. K; ECN 17-08-010 5/18/2017... -
Page 11: Solenoid Valve Troubleshooting
• reconnect to the adjacent valve and turn on the water supplies to the unit; • pass your hand in front of the sensor. If the station still fails to turn on, replace the sensor. Bradley • 215-1493 Rev. K; ECN 17-08-010 5/18/2017... -
Page 12: Navigator® Mixing Valve Troubleshooting
198-014 Check Valve* 132-051 Retaining Ring* 118-319 Valve Body 146-079 U-Clip * Included with Prepack S65-326 Tempered Line Adapter Option Part no. S39-804 (replaces S59-4000 if tempered line is used) Strainer (173-028) Bradley • 215-1493 Rev. K; ECN 17-08-010 5/18/2017... -
Page 13: Stop Valve Troubleshooting
For complete instructions on this additional maintenance, visit bradleycorp.com. Repair Kits: Terreon repair kits are available. Contact your Bradley representative or distributor for part numbers and pricing. Repair kits are made to order and have a shelf life of 30 days. -
Page 14: Soap Dispenser Maintenance
To change soap, pour out all of the soap from the dispenser and rinse with hot water several times until all residue is removed. Pump the valve until clean water appears. Rinse the dispenser with ethyl alcohol; air dry before refilling. Bradley • 215-1493 Rev. K; ECN 17-08-010 5/18/2017...
Need help?
Do you have a question about the Express SS Series and is the answer not in the manual?
Questions and answers