Table of Contents
Advertisement
Quick Links
Advertisement
Table of Contents

Related Manuals for Tate SmartAire MZ Basic

Summary of Contents for Tate SmartAire MZ Basic
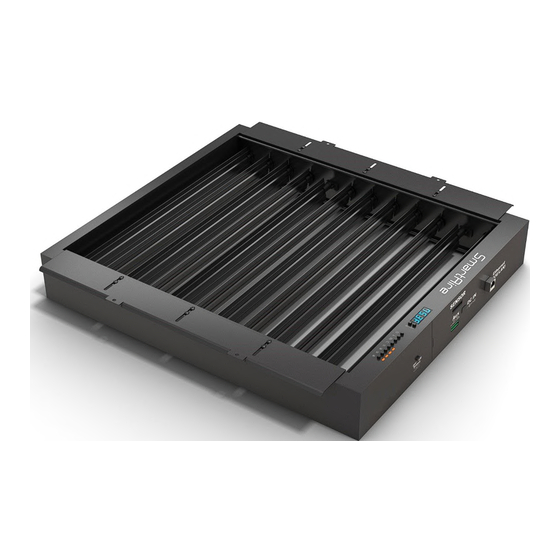
- Page 1 User Installation Manual ® SmartAire MZ Basic ® SmartAire MZ Basic User Installation Guide Please Read and Save These Instructions 7510 Montevideo Road r1.0-12/11/15 © 2015 Tate Access Floors, Inc. Jessup, MD 20794 SmartAire_mzb_Installation.docx Tel (410)799-4200 1 of 27...
-
Page 2: Table Of Contents
Adjusting the setpoint ............................... 18 Programmable RGB LED Control ............................18 TCP/IP Advanced Programming & monitoring ........................18 SNMP Monitoring and Control.............................. 23 SmartAire MZ Basic Upgrade ..............................25 Factory Default Settings ................................ 26 Troubleshooting & Alarms ..............................27 7510 Montevideo Road r1.0-12/11/15... -
Page 3: Introduction
MZ Basic INTRODUCTION Thank you for choosing a Tate Airflow product. Tate Airflow products are engineered to maximize the efficiency of your data center air handling system. We would be interested in hearing any comments you may have on this installation manual, product, or overall experience. Please call or e-mail our Technical Service... -
Page 4: Sécurité
Pour tous les travaux sur les unités ne peut être réalisée par un professionnel qualifié. Modification des équipements autres que de façon proposés et approuvés par Tate sont ni recommandé ni supporté et peut endommager l'équipement ou causer un préjudice. -
Page 5: Included Components
Battery Backup system (x1) Black Zip ties (x10) ADDITIONAL REQUIRED COMPONENTS Tate DirectAire® Al or Tate DirectAire® (x1) 5x5mm DirectAire® Al Screws (x4) or DirectAire® Steel Hangers (x2) Power and Networking Cable (Plenum Rated Ethernet CAT5) (x1) ... -
Page 6: Quick Installation - Aluminum Directaire
User Installation Manual ® SmartAire MZ Basic QUICK INSTALLATION – ALUMINUM DIRECTAIRE® QUICK INSTALLATION – STEEL DIRECTAIRE® 7510 Montevideo Road r1.0-12/11/15 © 2015 Tate Access Floors, Inc. Jessup, MD 20794 SmartAire_mzb_Installation.docx Tel (410)799-4200 6 of 27... -
Page 7: Initial Setup
MANIPULER L’UNITÉ AVEC SOIN, NE PAS AJUSTER LES LAMES DU REGISTRE MAUNELLEMENT, NE PAS SOUTENIR OU LEVER L’UNITÉ PAR LES LAMES. 7510 Montevideo Road r1.0-12/11/15 © 2015 Tate Access Floors, Inc. Jessup, MD 20794 SmartAire_mzb_Installation.docx Tel (410)799-4200 7 of 27... -
Page 8: Step 2: Route The Temperature Sensor
The LED indicator should be installed in a location that is visible to facility staff relative to the locations of the rack/SmartAire which it is indicating the temperature of. 7510 Montevideo Road r1.0-12/11/15 © 2015 Tate Access Floors, Inc. Jessup, MD 20794 SmartAire_mzb_Installation.docx Tel (410)799-4200... -
Page 9: Step 4: Connect The Sensor To The Tree
Note that SmartAire Basic will only be provided with Sensor 1 and does not require sensors 2-4 to operate. STEP 5: CONNECT THE LED INDICATOR 7510 Montevideo Road r1.0-12/11/15 © 2015 Tate Access Floors, Inc. Jessup, MD 20794 SmartAire_mzb_Installation.docx Tel (410)799-4200... -
Page 10: Step 6: Connect The Tree To The Smartaire® Mz
NOTE: POUR DÉBRANCHER LA FISHE, IL Y A UN PETIE BOUTON POUSSOIR SUR LE BAS DU CONNECTEUR QUI LUI PERMETTERA DE SE DÉCONNECTER. UNE FORCE EXCESSIVE PEUT ENDOMMAGER LE CÂBLE OU CONNECTEUR 7510 Montevideo Road r1.0-12/11/15 © 2015 Tate Access Floors, Inc. Jessup, MD 20794 SmartAire_mzb_Installation.docx Tel (410)799-4200 10 of 27... -
Page 11: Step 7: Turn The Battery On
IT IS NECESSARY TO HAVE THE BATTERY IN THE “ON” POSITION DURING NORMAL OPERATION IL EST NÉCESSAIRE D’AVOIR LA BATTERIE DANS LA POSITION ”ON” PENDANT LE FONCTIONNEMENT NORMAL 7510 Montevideo Road r1.0-12/11/15 © 2015 Tate Access Floors, Inc. Jessup, MD 20794 SmartAire_mzb_Installation.docx Tel (410)799-4200 11 of 27... -
Page 12: Step 8: Connect The Power To The Smartaire® Mz
PRÉFÉRABLE POUR L’ALIMENTATION NOTE: CAT5 CABLING SHOULD BE UTILIZED FOR POE INSTALLATION NOTE: CÂBLAGE CAT5 DOIT ÊTRE UTILISÉ POUR INSTALLATION D’ALIMENTATION PAR ETHERNET 7510 Montevideo Road r1.0-12/11/15 © 2015 Tate Access Floors, Inc. Jessup, MD 20794 SmartAire_mzb_Installation.docx Tel (410)799-4200 12 of 27... -
Page 13: Step 9: Deploy The Air Blockers
DE COUPLE EST PRÉFÉRABLE POUR CETTE PARTIE DE L’INSTALLATION POUR ÉVITE UN SERRAGE EXCESSIF. PLUS QUE 15 IN.LB DE COUPLE PEUT ENDOMMAGER LA VISE 7510 Montevideo Road r1.0-12/11/15 © 2015 Tate Access Floors, Inc. Jessup, MD 20794 SmartAire_mzb_Installation.docx Tel (410)799-4200 13 of 27... -
Page 14: Step 10: Assemble The Smartaire® With The Directaire® Al
L’APPAREIL DOIT ÊTRE INSTALLÉ DANS L’ORIENTTATION AVEC L’AFFICHAGE MONTÉ “TOWARDS BACK”, AVEC TOUTES AUTRE ORIENTATION PEUVENT ENDOMMAGER L’ÉQUIPMENT OU PROVOVQUER UNE PANNE 7510 Montevideo Road r1.0-12/11/15 © 2015 Tate Access Floors, Inc. Jessup, MD 20794 SmartAire_mzb_Installation.docx Tel (410)799-4200 14 of 27... -
Page 15: Step 10B: Installation With Directaire
Lastly, Install the DirectAire Panel gently into the floor. The DirectAire should rest just above the SmartAire and not apply any force to the SmartAire. If this is not the case please contact Tate for assistance, you may have non-standard understructure. -
Page 16: Step 11: Place The Assembly Into The Floor
The DirectAire should rest just above the SmartAire and not apply any force to the SmartAire. If this is not the case please contact Tate for assistance, you may have non-standard understructure. IF UNIT IS BEING REMOVED FOR SERVICE OR RELOCATION, TAKE CAUTION TO NOT CATCH CABLES OR HARDWARE ON ACCESS FLOOR UNDERSTRUCTURE AS IT MAY DAMAGE CABLES OR HARDWARE. -
Page 17: Interface
This function is ideal in partially loaded racks, where the top airflow zones can be disabled to increase energy efficiency in the system. 7510 Montevideo Road r1.0-12/11/15 © 2015 Tate Access Floors, Inc. Jessup, MD 20794 SmartAire_mzb_Installation.docx Tel (410)799-4200... -
Page 18: Adjusting The Setpoint
1. The SmartAire MZ includes a fully programmable temperature indicating RGB LED which is connected to the sensor harness in any SmartAire MZ or SmartAire MZ Basic Units. The LED is designed to indicate whether the current measured temperature is above, below or within an acceptable temperature range. - Page 19 7. This will prompt a username and password field, the default values are: a. Username: “admin” b. Password: “admin” 8. Enter these values and press log in to connect to the unit. 7510 Montevideo Road r1.0-12/11/15 © 2015 Tate Access Floors, Inc. Jessup, MD 20794 SmartAire_mzb_Installation.docx Tel (410)799-4200 19 of 27...
- Page 20 Overview: A list of variables which can be configured as listed in the following table. b. TCP/IP Upgrade: To upgrade the system firmware; this is only necessary to utilize if directed by Tate. Uploading custom files may cause damage or harm to the SmartAire.
- Page 21 Manual Set Point override on zone maintain a different set T3SetPointOverride Deg F 32.0 122.0 3; Ignored with value of 0 point than the master value. 7510 Montevideo Road r1.0-12/11/15 © 2015 Tate Access Floors, Inc. Jessup, MD 20794 SmartAire_mzb_Installation.docx Tel (410)799-4200 21 of 27...
- Page 22 Temperature) Color changing all three Custom Blue (Low Temperature) #0000 #00000 #FFFF variables to single value Custom_BLU Color 7510 Montevideo Road r1.0-12/11/15 © 2015 Tate Access Floors, Inc. Jessup, MD 20794 SmartAire_mzb_Installation.docx Tel (410)799-4200 22 of 27...
-
Page 23: Snmp Monitoring And Control
The following table of available OID addresses is available for BMS control for the SmartAire MZ: Note: .mib file used should match the current software revision date listed in the TCP/IP interface. (ie. October 11, 2015 should use “smartaire_October2015.mib”) (Greyed Values are Read-only or non- functional for SmartAire MZ Basic) Address Label OID Address... - Page 24 RW_T2Damper_Min.0 .1.3.6.1.4.1.43431.1.3.33.0 Integer RW_T3Damper_Min.0 .1.3.6.1.4.1.43431.1.3.34.0 Integer RW_T4Damper_Min.0 .1.3.6.1.4.1.43431.1.3.35.0 Integer RW_T1Damper_Max.0 .1.3.6.1.4.1.43431.1.3.36.0 Integer RW_T2Damper_Max.0 .1.3.6.1.4.1.43431.1.3.37.0 Integer RW_T3Damper_Max.0 .1.3.6.1.4.1.43431.1.3.38.0 Integer RW_T4Damper_Max.0 .1.3.6.1.4.1.43431.1.3.39.0 Integer 7510 Montevideo Road r1.0-12/11/15 © 2015 Tate Access Floors, Inc. Jessup, MD 20794 SmartAire_mzb_Installation.docx Tel (410)799-4200 24 of 27...
-
Page 25: Smartaire Mz Basic Upgrade
SMARTAIRE MZ BASIC UPGRADE To upgrade the SmartAire MZ Basic to the full version, an upgrade kit must be purchased through Tate. The upgrade kit consists of Sensors Labeled 2, 3, and 4. To complete the upgrade process, connect these sensors to the existing 4 port sensor tree and complete a factory default reset. -
Page 26: Factory Default Settings
AVERTISSEMENT: LE RÉGLAGES D’USINE PAR DÉFAUT REINITIALISE LES POINT SET AU VALEUR DÉFAUT DE 76°F, SE FERME ET REDÉMMARRE APRÈS UN DÉLAI DE 5 SECONDES 7510 Montevideo Road r1.0-12/11/15 © 2015 Tate Access Floors, Inc. Jessup, MD 20794 SmartAire_mzb_Installation.docx Tel (410)799-4200 26 of 27... -
Page 27: Troubleshooting & Alarms
If “Er04” disconnected. alarm persists, Perform a factory default reset. If any alarm is persistent and the above steps has no effect, please contact Tate Technical support for further assistance 7510 Montevideo Road r1.0-12/11/15 © 2015 Tate Access Floors, Inc.
Need help?
Do you have a question about the SmartAire MZ Basic and is the answer not in the manual?
Questions and answers