Table of Contents
Advertisement
Quick Links
Advertisement
Table of Contents

Subscribe to Our Youtube Channel
Related Manuals for Insportline 20215


Summary of Contents for Insportline 20215
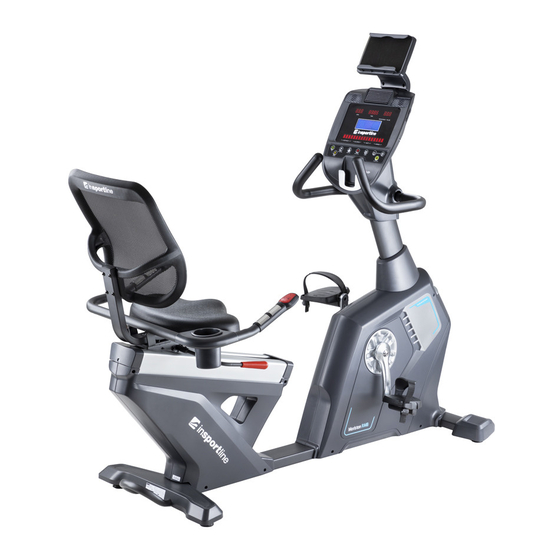
- Page 1 USER MANUAL – EN IN 20215 Recumbent inSPORTline Moriston RMB...
-
Page 2: Table Of Contents
CONTENTS SAFETY INSTRUCTIONS ........................3 IMPORTANT NOTES ..........................4 PRODUCT DECSRIPTION ........................4 TECHNICAL SPECIFICATIONS ......................5 ASSEMBLY ............................. 5 CONSOLE ............................. 12 DIAGRAM .............................. 15 PARTS LIST ............................16 ADVANTAGES OF RECUMBTION ....................... 17 MAINTENANCE ............................ 17 STORAGE ............................. 18 IMPORTANT NOTICE ........................... -
Page 3: Safety Instructions
SAFETY INSTRUCTIONS • Read the manual carefully and keep it for future references. • To ensure the best safety of the exerciser, regularly check it on damages and worn parts. • If you pass on this exerciser to another person or if you allow another person to use it, make sure that that person is familiar with the content and instructions in these instructions. -
Page 4: Important Notes
IMPORTANT NOTES • Assemble the exerciser as per assembly instructions and be sure to only use the structural parts provided with the exerciser and designed for it. Prior to the assembly, make sure the contents of the delivery is complete by referring to the parts list of the assembly and operating instructions. -
Page 5: Technical Specifications
TECHNICAL SPECIFICATIONS Type OMA-R11 Unfolded dimension 1615 x 710 x 1390 Maximal load capacity 150 kg Speed ratio 308:30 Φ245/15 kg Load Wheel Resistance 0-20 ASSEMBLY PREPARATION Name Specification M10×20 Allen screw Allen screw M12x70 (12.9 degree) M8×15 Allen screw M8×35 Allen screw M6×10... - Page 7 STEP 1 Attach the front stabilizer (3) to the main frame (1) using a flat washer (44), spring washer (42) and screw (23). STEP 2 Attach the rear stabilizer (4) to the main frame (1) using a flat washer (44), spring washer (42), and screw (19).
- Page 8 STEP 4 Connect the communication cables (95, 104) to the handle pulse cables (101, 105). Attach the console (62) to the middle post (2) with the screws (36). STEP 5 Attach the handlebars (9) to the middle post (2) using a flat washer (41), spring washer (43) and screw (20).
- Page 9 STEP 7 Attach the brake assembly (11) to the seat bracket (5) with the screws (25). STEP 8 Attach the handlebars (10) to the handle holder (5) with the screws (24). STEP 9 Attach the backrest support (6) to the seat bracket (5) using the screws (27). STEP 10 Attach the seat (84) to the seat support (5) with the screws (25).
- Page 10 STEP 11 Attach the backrest (85) to the backrest support (6) with screws (28). STEP 12 Attach the L (82) and R (83) pedal to the main frame.
- Page 11 STEP 13 Attach the tablet holder (109) to the console (62) using the screws (38). STEP 14 Attach the pulley before use.
-
Page 12: Console
CONSOLE BUTTONS START / STOP Starts or stops the program RESET Press to return to the main menu while the program is paused Hold down for 5 seconds to reset the system Press to return to the previous value in the setting MODE Press to set or adjust the value Press to change the displayed data during the program... - Page 13 DISPLAY Display: 0:00–99:99, set: 0:00 – 99:00 min TIME Display: 0.0–99.99, set: 0,0 – 99,99 km DISTANCE CALORIES Display: 0–999 Cal, set: 0-999 Cal SPEED Display: 0,0–99,9 Km/h, mil/h RESISTANCE LEVEL Set 1–20 PULSE Display: 40–220 WEIGHT Set 30–150 kg, default value 70 kg for the metric system Set 40–400 liber, default value 155 liber for imperial system HEIGHT Set 90–210 cm...
- Page 14 BODY FAT MODE Press the BODY FAT button in the main menu (MW window displays FOD FAT). Use the MODE and RESISTANCE +/- buttons to set AGE, WEIGHT, HEIGHT. Then start the program with the START / STOP button. Hold the pulse plates during the test. The console starts receiving a pulse signal for 10 seconds. Then the test starts for 25 seconds.
-
Page 15: Diagram
DIAGRAM... -
Page 16: Parts List
PARTS LIST Name Qty. Name Qty. Main frame Screw 5/16-18UNC-1" Screw ST4×16 Middle post Screw ST4×10 Front stabilizer Flat washer Φ6 Rear stabilizer Flat washer Φ8 Seat and backrest frame Flat washer Φ10 Backrest support Spring washer Φ8 Load wheel flange Spring washer Φ10 Console Allen screw M6×20... -
Page 17: Advantages Of Recumbtion
Rear stabilizer cover Stop Front stabilizer cover L Column Communication Cable Front stabilizer cover R Frame communication cable Handrail front cover Magnetic sensor Rear Handle Cover Brake cable Outside rear cover Magnet cable Cover R Battery Cover L Column cable Seat adjustment lever Pulse Sensor Cable - 2 Pedal L... -
Page 18: Storage
STORAGE Keep the recumbent in a clean and dry environment. Make sure the power switch is turned off and the exercise bike is not plugged into the power socket. IMPORTANT NOTICE • This exercise bike comes with standard safety regulations and is suitable for professional and commercial use. - Page 19 Warranty Conditions Warranty Period The Seller provides the Buyer a 24 months Warranty for Goods Quality, unless otherwise specified in the Certificate of Warranty, Invoice, Bill of Delivery or other documents related to the Goods. The legal warranty period provided to the Consumer is not affected. By the Warranty for Goods Quality, the Seller guarantees that the delivered Goods shall be, for a certain period of time, suitable for regular or contracted use, and that the Goods shall maintain its regular or contracted features.
Need help?
Do you have a question about the 20215 and is the answer not in the manual?
Questions and answers