Table of Contents
Advertisement
Quick Links
Advertisement
Table of Contents

Related Manuals for Insportline SevenSport SPORTOP U80


Summary of Contents for Insportline SevenSport SPORTOP U80
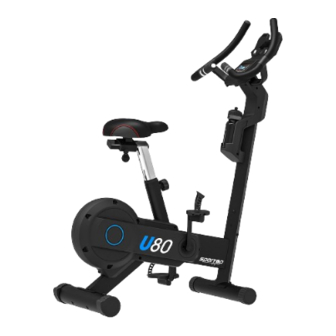
- Page 1 USER MANUAL – EN IN 26512 Exercise bike SPORTOP U80...
-
Page 2: Table Of Contents
CONTENTS SAFETY INSTRUCTIONS ........................3 PARTS LIST ............................4 ASSEMBLY ............................. 5 CONSOLE ............................. 10 BUTTONS ............................11 DISPLAY ............................11 PROGRAMS ............................12 iCARDIO APPLICATION ........................20 USE ............................... 26 CORRECT BODY POSTURE ....................... 26 MAINTENANCE ............................ 26 STORAGE ............................. 27 IMPORTANT NOTICE ........................... -
Page 3: Safety Instructions
SevenSport s.r.o. reserves the right to make any changes and improvements to its product without prior notice. Visit our website www.insportline.eu where you will find the latest version of the manual. SAFETY INSTRUCTIONS • Read all instruction in this manual before using this equipment and keep it for future references. -
Page 4: Parts List
• WARNING: Before beginning any exercise program, consult your physician. This is especially important for persons with pre-existing health problems. The seller assumes no responsibility for personal injury or property damage sustained by or through the use of this product. PARTS LIST... -
Page 5: Assembly
ASSEMBLY Assembly is recommended to be done by two people. Unscrew the nuts (J1), spring washers (J2), and washers (J3) from the rear stabilizer (C). Attach the rear stabilizer (C) to the main frame (A) using the nut (J1), spring washer (J2), and washer (J3). - Page 6 Ask a second person to help you with this step. First, unscrew the bolts (J4), spring washers (J12) and washers (J5) from the main frame (A). Connect the sensor cables (M1 and M2), being careful not to pinch the cables between the frames. Then connect the middle frame (B) and the main frame (A) with bolts (J4), spring washers (J12) and washers (J5).
- Page 7 Unscrew the nuts (J8) and washers (J9) from the middle frame (B). Attach handles (E) to middle frame (B) and secure with washers (J9) and nuts (J8). Tighten with a 13mm wrench, being careful not to pinch the cables. Unscrew the 4x bolts (G1) from the back of the console (G). Connect the cables (M2, M4, M5) and pulse sensor cable (M3) to the console (G).
- Page 8 You can slide the water bottle (L) into the holder on the post. Unscrew the nuts (H1) and washers (H2) from the back of the saddle (H). Attach the saddle (H) to the saddle holder (F2) using the nut (H1) and washer (H2). Loosen the hand knob (F4) on the seat bracket and the hand knob (A46) on the main frame.
- Page 9 You can adjust the saddle position by loosening the hand knobs (A46, saddle height) and (F4, horizontal saddle position). The left and right pedals are labeled (L and R). Tighten the left pedal (K1) counterclockwise on the left crank, the right pedal (K2) tighten clockwise on the right crank. Tighten the pedals with a 15 mm wrench.
-
Page 10: Console
You can move the exercise bike by tilting it on the wheels on the front stabilizers. Always ask another person for help. CONSOLE... -
Page 11: Buttons
BUTTONS Button Function Increasing the value of e.g. load, performance, time UP (+) Navigation button Reduction of the value of e.g. load, power, time DOWN (-) Navigation button MODE Selecting a function or setting Hold for 2 seconds to restart the console RESET Press the button to return to the main menu if the program is paused START/STOP... -
Page 12: Programs
RESISTANCE Range: 1~16 BLUETOOTH PROGRAMS TURN ON • Plug in the power (or hold RESET for 2 seconds), the console will start, and the display will show all segments for 2 seconds (Fig. 1). • The LCD display will display the wheel diameter, the unit (Km or mile) for 1 second (Fig. 2), the resistance will be set to 1 level. - Page 13 • The LCD display will show MANUAL (Fig. 8), the user can use the navigation buttons to select programs WATT (Fig. 9) – H.R.C (Fig. 10) – USER (Fig. 11) – PROGRAM (Fig. 12) – MANUAL. Confirm program selection by pressing MODE. Fig.
- Page 14 Manual program • Press START/STOP to start the program immediately. • Use the navigation buttons to select MANUAL, confirm the program by pressing MODE/ENTER. • Press the navigation buttons to set the load (fig. 13), confirm the load by pressing MODE. •...
- Page 15 WATT program • Use the navigation buttons to select the WATT program, confirm by pressing MODE (fig. 9). • The WATT value will flash, set the value (the original value is 120, Fig. 19). Adjust the value using the navigation buttons. Press MODE to confirm the value. You will pass the time setting. •...
- Page 16 HRC program • Use the navigation buttons to select the HRC program (Fig. 10). Confirm by pressing MODE. • Use the navigation buttons to select the values 55%, 75%, 90% and TARGET (Fig. 20 ~ 23). The original value is calculated from the entered age in the profile and will be displayed on the PULSE display.
- Page 17 USER program • Use the navigation buttons to select USER (fig. 11), confirm by pressing MODE (fig. 24). • Use the navigation buttons to set the load (Fig. 25). Each value must be confirmed by pressing MODE. 10 segments need to be set. After setting all 10 segments, it is necessary to set the training time.
- Page 18 RECOVERY program • After your workout, wear the chest strap or grab the heart rate sensors and press RECOVERY. A countdown starts from 00:60 to 00:00 (Fig. 28). After the calculation is completed, the result F1 ~ F6 will be displayed (Fig. 29). F1 is the best result, F6 the worst. •...
- Page 19 Bluetooth Not connected (Fig. 31) Connected (Fig. 32) Preset programs...
-
Page 20: Icardio Application
iCARDIO APPLICATION • Download the iCARDIO app to your smart device. • *The application is compatible with Android 9 / iOS 13 and above systems Android... - Page 21 Start Bluetooth on your smart device. Start the application and enter the iCardio password, the password must be entered only the first time the application is launched. Pairing the iCardio app and the console Press the gear icon in the lower left corner. Tablet Smartphone Select Bluetooth...
- Page 22 Tablet Smartphone Check if the numbers on the back of the machine are identical to the number in the application, if so, confirm by pressing confirm. If the device does not appear in the application, try the following steps: 1. Press the arrow icon in the lower right corner.
- Page 23 2. Unplug and plug in the machine adapter. 3. Restart your smart device. *Make sure Bluetooth is turned on on your smart device. *If none of the three options above work, contact the service center. Changing the language Press the icon in the left-hand corner. Tablet Smartphone Press...
- Page 24 Tablet Smartphone Manual for the iCardio application Press the icon in the left-hand corner. Tablet Smartphone Press...
- Page 25 Tablet Smartphone *The language of the manual changes according to the set language of the application. Apart from the iCardio application, it is possible to pair the machine via Bluetooth with the KINOMAP and Zwift applications. You can find apps in Google or Apple store. The applications are operated by a third party and the seller responsible operation...
-
Page 26: Use
Exercise on the exercise bike is based on very simple movements, but you will surely fall in love with them. Thanks to simplicity of the exercise on the exercise bike in can be done by elderly people. Prior to exercise, it is necessary to adjust the height of the saddle. It is important that you sit comfortably. The bicycle saddle must be set so that you can hold the ergonomically shaped handles when sitting. -
Page 27: Storage
• Wipe the sweat after the exercise. Clean the device with a cloth and gentle cleanser. Do not use solvents or aggressive cleaners on the plastic parts. • When noise is increased, it is necessary to check that all joints are tightened properly. •... - Page 28 “The Buyer who is not the End Customer” is a Businessman that buys Goods or uses services for the purpose of using the Goods or services for his own business activities. The Buyer conforms to the General Purchase Agreement and business conditions. These Conditions of Warranty and Warranty Claims are an integral part of every Purchase Agreement made between the Seller and the Buyer.
- Page 29 VAT ID: CZ26847264 About shipping Phone: +420 556 300 970 E-mail: eshop@insportline.cz reklamace@insportline.cz servis@insportline.cz Web: www.inSPORTline.cz inSPORTline s.r.o. Headquaters, warranty & service center: Električná 6471, Trenčín 911 01, SK CRN: 36311723 VAT ID: SK2020177082 Phone: +421(0)326 526 701 E-mail: objednavky@insportline.sk reklamacie@insportline.sk...
Need help?
Do you have a question about the SevenSport SPORTOP U80 and is the answer not in the manual?
Questions and answers