Table of Contents
Advertisement
Quick Links
Operating and
installation instructions
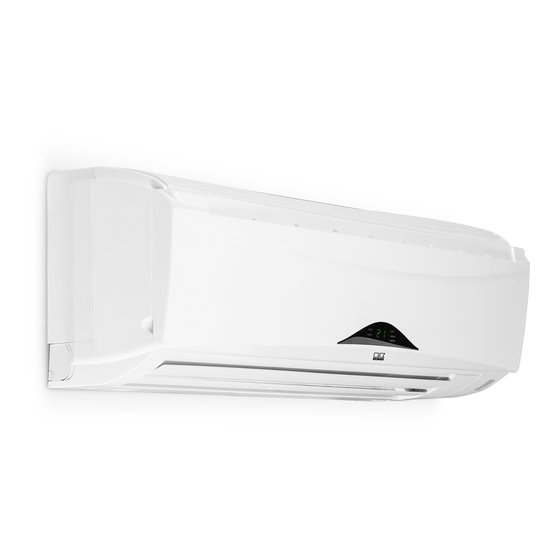
REMKO WLT EC series
Wall units in 2-conductor version
with multifunctional control technology
WLT 30-2 EC, WLT 40-2 EC, WLT 50-2 EC, WLT 60-2 EC, WLT 80-2 EC, WLT 90-2 EC
WLT 30-3 EC, WLT 40-3 EC, WLT 50-3 EC, WLT 60-3 EC, WLT 80-3 EC, WLT 90-3 EC
0226-2019-06 Edition 1, en_GB
Read the instructions prior to performing any task!
Advertisement
Table of Contents

Related Manuals for REMKO WLT EC Series


Summary of Contents for REMKO WLT EC Series
- Page 1 Operating and installation instructions REMKO WLT EC series Wall units in 2-conductor version with multifunctional control technology WLT 30-2 EC, WLT 40-2 EC, WLT 50-2 EC, WLT 60-2 EC, WLT 80-2 EC, WLT 90-2 EC WLT 30-3 EC, WLT 40-3 EC, WLT 50-3 EC, WLT 60-3 EC, WLT 80-3 EC, WLT 90-3 EC...
- Page 2 Read these operating instructions carefully before commis- sioning / using this device! These instructions are an integral part of the system and must always be kept near or on the device. Subject to modifications; No liability accepted for errors or mis- prints! Translation of the original...
-
Page 3: Table Of Contents
Table of contents Safety and usage instructions......................4 1.1 General safety notes........................4 1.2 Identification of notes........................4 1.3 Personnel qualifications........................4 1.4 Dangers of failure to observe the safety notes................4 1.5 Safety-conscious working....................... 4 1.6 Safety notes for the operator......................5 1.7 Safety notes for installation, maintenance and inspection.............. -
Page 4: Safety And Usage Instructions
REMKO WLT EC series Safety and usage instructions CAUTION! This combination of symbol and signal word 1.1 General safety notes warns of a potentially hazardous situation, which if not avoided may cause injury or mate- Carefully read the operating manual before com- rial and environmental damage. -
Page 5: Safety Notes For The Operator
"certificate of warranty" to conditions stipulated in this manual and comply REMKO GmbH & Co. KG at the time when the with all applicable regional regulations. units are purchased and commissioned. -
Page 6: Transport And Packaging
REMKO WLT EC series 1.11 Transport and packaging The devices are supplied in a sturdy shipping con- tainer. Please check the equipment immediately upon delivery and note any damage or missing parts on the delivery and inform the shipper and your contractual partner. -
Page 7: Technical Data
Technical data 2.1 Unit data Series WLT 30 EC WLT 40 EC WLT 50 EC Chilled water wall units with 2 or Operating mode 3-way valve in 2-conductor version 2.81 3.73 4.85 Nominal cooling output (min-max) (0.82-2.81) (0.82-3.73) (0.84-4.85) 4.17 4.85 6.42 Nominal heating capacity... - Page 8 REMKO WLT EC series Series WLT 30 EC WLT 40 EC WLT 50 EC Dimensions Height Width 1147 Depth Weight Operating weight, approx. Serial number with 2-way valve 1866... 1867... 1868... EDP no. with 2-way valve 1614831 1614841 1614851 Serial number with 3-way valve 1860...
- Page 9 Series WLT 60 EC WLT 80 EC WLT 90 EC Chilled water wall units with 2 or Operating mode 3-way valve in 2-conductor version 6.10 7.44 (1.90-7.44) 9.31 (2.00-9.31) Nominal cooling output (min-max) (0.91-6.10) 7.81 11.27 Nominal heating capacity (min-max) 9.44 (2.27-9.44) (1.25-7.81) (2.36-11.27)
- Page 10 REMKO WLT EC series Series WLT 60 EC WLT 80 EC WLT 90 EC Dimensions Height Width 1147 1557 Depth Weight Operating weight, approx. Serial number with 2-way valve 1869... 1870... 1871... EDP no. with 2-way valve 1614861 1614880 1614891 Serial number with 3-way valve 1863...
-
Page 11: Unit Dimensions
2.2 Unit dimensions 245 mm 824 mm 245 mm 1147 mm 300 mm 1557 mm Fig. 1: Unit dimensions A: WLT 30 EC - WLT 40 EC B: WLT 50 EC - WLT 60 EC C: WLT 80 EC - WLT 90 EC We reserve the right to modify the dimensions and design as part of the ongoing technical development process. -
Page 12: Cooling And Heating Capacity
REMKO WLT EC series 2.3 Cooling and heating capacity Cooling capacity WLT 30 EC - WLT 50 EC Medium inlet 5 °C 7 °C 9 °C 11 °C 13 °C Medium nominal Cooling capacity Medi Pres- flow sure rate loss... - Page 13 Cooling capacity WLT 60 EC - WLT 90 EC Medium inlet 5 °C 7 °C 9 °C 11 °C 13 °C Medium nominal Cooling capacity Medi Pres- flow sure rate loss [kPa] [kW] [kW] [kW] [kW] [kW] [kW] [kW] [kW] [kW] [kW] 0.250...
- Page 14 REMKO WLT EC series Heating capacity WLT 30 EC - WLT 50 EC Medium inlet 35 °C 40 °C 45 °C 50 °C 55 °C 60 °C 65 °C Medium nominal Heating capacity Mediu Pres- m flow sure rate loss...
- Page 15 Heating capacity WLT 60 EC - WLT 90 EC Medium inlet 35 °C 40 °C 45 °C 50 °C 55 °C 60 °C 65 °C Medium nominal Heating capacity Mediu Pres- m flow sure rate loss [kPa] [kW] [kW] [kW] [kW] [kW] [kW]...
-
Page 16: Design And Function
(accessory) with five-stage fan operation Network control for up to 32 units, all units within a group via a REMKO bus provided by Fig. 2: Scope of delivery the factory with five-stage fan operation Network control for up to 32 units, certain... -
Page 17: System Layout
3.2 System layout The cooled operating medium is then fed in once again to the unit medium circuit. With 2-conductor The unit is designed for a 2-conductor system. The systems, which are used for cooling or heating, the system has 2 medium pipes (conductors: Supply heating capacity can be generated through a and return flow) for cooling using a cold medium or chiller with heat pump function or through a boiler... -
Page 18: Operation
Example controls ulation Single control with three-stage fan operation via external regulation 1: Regulation provided by the customer Control in REMKO network with five-stage fan control and group operation on all slave units Master Slave Slave 1: Regulation provided by the customer... - Page 19 Control in REMKO networks with five-stage fan Operation with IR remote control that is fitted control and single control on specific slave as standard units The unit is easily operated using the standard infrared remote control. The indoor unit beeps to acknowledge the correct transmission of data.
- Page 20 REMKO WLT EC series Keys on the remote control "MODE" key Press this key to select the operating mode. The indoor unit has 5 modes: 1. Automatic mode (COOL/HEAT): In automatic mode, the temperature is maintained at the constant setpoint.
- Page 21 "TURBO" key Key functions Press this key to set a particularly high fan speed. A symbol is shown on the display to indicate that the settings are being transferred. "POWER" key "TIME-SET" key Press the "POWER" key to activate/deactivate the Press this key to set the time.
- Page 22 REMKO WLT EC series "TIME" key "RESET" key Use a small pen or similar to press recessed key Use a small pen or similar to press the recessed "C", the time will flash on the display. Press and "R" key. All the symbols will appear on the display.
- Page 23 "MODE" key "AUTO" mode Press the "MODE" key to change to another mode. Press the "MODE" key once or repeatedly to A total of 5 modes are available: switch to automatic mode. In this mode, the con- troller automatically selects "COOL" or "HEAT" 1.
- Page 24 REMKO WLT EC series "COOL" mode "DRY" mode Press the "MODE" key once or repeatedly to Press the "MODE" key once or repeatedly to switch to cooling mode. Use this mode to cool the switch to dehumidification mode. Use this mode to room air to the desired target temperature.
- Page 25 "FAN" mode Cooling mode: Press the "MODE" key once or repeatedly to switch to recirculation mode. In this mode, the unit We recommend setting the target temperature is used as an air circulation unit. The room is nei- to max. 6 °C below the outside temperature. ther heated nor cooled.
- Page 26 REMKO WLT EC series "SILENT" key "SWING" key Pressing the "SILENT" key sets the fan to a partic- The "SWING" key is used to provide continual and ularly low speed and the fan symbol starts to flash. automatic vertical adjustment of the fins. When...
- Page 27 “FAN” key "TIME" keys After pressing the "FAN" key, "AUTO" is shown on The "TIME-ON/-OFF" keys are used to program the fan speed display. Each press of the key cycles the switch-on/off time, the "TIME-SET" key to set through a high (H), medium (M) and low (L) speed the time.
- Page 28 REMKO WLT EC series "SLEEP" key After the "SLEEP" key is pressed, the symbol is shown on the display and the room temperature is raised or lowered by 0.5 °C in cooling and heating mode respectively 30 minutes after the function starts up.
- Page 29 "NETWORK" key Two different network variants are available: The "NETWORK" key enables the settings on the 1. Operating a group: master unit (leading unit) to be transferred to all Leading unit (master) function: slave units (following units) on the network. All units confirm that they have received the settings Standard IR or alternative cabled remote control of correctly by beeping.
- Page 30 REMKO WLT EC series Please enter the configuration of the installed networks in the table. Identify the master or slave units in the corresponding rows. Infrared Infrared Cabled Cabled Room remote control remote control remote control remote control Address designation...
-
Page 31: Installation Instructions For Qualified Personnel
Installation Instructions Selecting the installation location for qualified personnel The indoor unit is designed for horizontal wall installation above doors. However, it can also be Important notes prior to installation used in the upper wall area (min. 1.75 m above the floor). - Page 32 REMKO WLT EC series Bending of the medium piping Bend pipes downwards Medium piping must only be bent as shown below. Then bend pipes into the desired position CAUTION! Pipes must never be twisted!
- Page 33 Mounting plates The following figures show the mounting plates when installed, as well as the route of the medium piping installed on the unit (shaded in blue). The centre point marked on the mounting plate is also the centre point of the unit.
-
Page 34: Installation
REMKO WLT EC series Installation Connection of the medium piping The medium piping of the unit is designed 6.1 Unit installation without any transition. The respective transition (press fitting, soldering sleeve, etc.) can be Unit installation selected on an individual basis. - Page 35 Anti-freeze protection (accessories) A water glycol mix is generally used as medium for a cold water system. Depending on the glycol type and quantity used, the viscosity changes, the pres- sure loss increases and the unit's cooling or heating output reduces. A All system components must be approved for use with glycol.
-
Page 36: Condensate Drainage Connection
REMKO WLT EC series 6.2 Condensate drainage 6.3 Leak testing connection The leak test is carried out after the connection has been made. If the temperature falls below the dew point, con- densate will form on the cooling fins during cooling Flush the system twice with tap water. -
Page 37: Electrical Wiring
Electrical wiring 7.1 General connection If one of the unit switch contacts is to be used, remove the unit housing. To do so, and safety instructions undo the screws beneath the air outlet fins. It is then possible to remove the housing by first pulling the underside forwards. -
Page 38: Electrical Drawings
REMKO WLT EC series 7.2 Electrical drawings FAN 2 FAN 1 AUTO AUX2 AUX1 AUX 2 AUX 1 Auto ON/OFF 0-10V ALARM ALARM ON/OFF 0-10V Fig. 34: Electrical drawings A: Unit circuit board open --> 0-5 V DC control 1: Fan closed -->... -
Page 39: Connection Options
7.3 Connection options Enable/block via external start/stop contact Using a potential-free start/stop contact, the unit 3-speed fan control can be enabled or blocked from an external loca- With 3-speed control of the fan, it is possible to tion. If this contact is closed, the unit is blocked control 3 fan stages (Low, Medium, High) plus and is placed in standby operation. - Page 40 REMKO WLT EC series Alarm contact for general alarm signal Group control/MODBUS control The unit is equipped with a general alarm signal If, for example, multiple units are to be controlled contact that can be used to signal a malfunction to via a single cabled remote control, connect the an external location.
-
Page 41: Configuration
Configuration Network The units can also be adjusted to requirements ret- roactively by adjusting DIP switch blocks SW1 to Master OFF OFF OFF OFF OFF SW3 accordingly. Slave 1 OFF OFF OFF OFF OFF OFF The DIP switch block SW1 configures the network addresses within a bus. - Page 42 REMKO WLT EC series Function logic (SW2) Unit configuration (SW3) The units can be used for numerous applications Adjusting this DIP switch provides the regulation and requirements. The settings in the table below with specific key variables that are required for are possible using switch block SW2.
-
Page 43: Internal Network
Internal network The infrared remote control or the cabled remote control (accessory) can be used for Up to 32 units can be operated at the same time user-specific operation of an individual slave thanks to the parallel connection via a bus line unit. -
Page 44: Before Commissioning
REMKO WLT EC series Before commissioning Commissioning Anti-freeze protection for the medium NOTICE! If a water-glycol mixture is used, it is to be pre- mixed before being put in the system. The desired Commissioning should only be performed by concentration is then to be checked. -
Page 45: Shutdown
Ensure that units and components are disposed of in accordance with local regulations, e.g. through authorised disposal and recycling specialists or at collection points. REMKO GmbH & Co. KG or your contractual partner will be pleased to provide a list of certified firms in your area. -
Page 46: Troubleshooting And Customer Service
REMKO WLT EC series Troubleshooting and customer service The unit and components are manufactured using state-of-the-art production methods and tested several times to verify that they function correctly. However, if malfunctions should occur, please check the functions as detailed in the list below. For systems with an indoor unit and outdoor unit, refer to the chapter "Trouble- shooting and customer service"... - Page 47 Malfunction Possible causes Checks Remedial measures Valve assembly jammed, Is electrical power present Have the valve head not working, not yet fully at the valve head or has the replaced or wait for time activated time period of 3 minutes period to pass after activation passed? Filter is dirty/air inlet/outlet...
- Page 48 REMKO WLT EC series Malfunction indicated by flashing code H (red) Cause Required action (yellow) (green) Fan at max. speed Normal operating condition Fan at medium speed Normal operating condition Fan at low speed Normal operating condition Heating mode: Warm-up phase, fan not...
-
Page 49: Care And Maintenance
Care and maintenance Clean the fins on the unit prior to long shut- down periods. Regular care and observation of some basic points Maintenance will ensure trouble-free operation and a long service life. It is recommended that you take out a mainte- nance contract with an annual service from an appropriate specialist firm. - Page 50 REMKO WLT EC series Dirt can also be removed by carefully Cleaning the condensate pump (accessories) cleaning with lukewarm water and mild An optional integrated or separate condensate cleaning agents (Fig. 39). The dirty side pump may be in the indoor unit, which pumps out should be face down.
-
Page 51: Exploded View And Spare Parts Lists
Exploded view and spare parts lists 15.1 Exploded view of the unit WLT 30 EC - WLT 60 EC Fig. 40: Exploded view of the unit We reserve the right to modify the dimensions and design as part of the ongoing technical development process. -
Page 52: Spare Parts List Wlt 30 Ec - Wlt 60 Ec
REMKO WLT EC series 15.2 Spare parts list WLT 30 EC - WLT 60 EC IMPORTANT! To ensure the correct delivery of spare parts, please always the device type with the corresponding serial number (see type plate) No. Designation Unit trim... - Page 53 No. Designation Terminal block, 5-pole Terminal block, 7-pole Receiver board 3-way valve 1/2" 2-way valve 1/2" Elbow union Actuator Spare parts not illustrated Probe, ambient air Probe, heat exchanger Sealing ring for blanking plug Blanking plug 1/2" Accessories Cabled remote control...
-
Page 54: Exploded View Of The Unit Wlt 80 Ec - Wlt 90 Ec
REMKO WLT EC series 15.3 Exploded view of the unit WLT 80 EC - WLT 90 EC Fig. 41: Exploded view of the unit We reserve the right to modify the dimensions and design as part of the ongoing technical development... -
Page 55: Spare Parts List Wlt 80 Ec - Wlt 90 Ec
15.4 Spare parts list WLT 80 EC - WLT 90 EC IMPORTANT! To ensure the correct delivery of spare parts, please always the device type with the corresponding serial number (see type plate) No. Designation Unit trim Air filter, left or right Air filter, centre Housing front, complete Air inlet grill... - Page 56 REMKO WLT EC series No. Designation Control board Terminal block, 5-pole Terminal block, 7-pole Receiver board Fan cover, top Fan cover, bottom Cover 3-way valve 3/4" 2-way valve 3/4" Elbow union 3/4" Actuator Spare parts not illustrated Probe, ambient air...
-
Page 57: Index
Index Remedial measures ....46 Manual mode ......19 Care and maintenance . - Page 58 REMKO WLT EC series...
- Page 60 REMKO QUALITY WITH SYSTEMS Air-Conditioning | Heating | New Energies Telephone +49 (0) 5232 606-0 REMKO GmbH & Co. KG Hotline within Germany +49 (0) 5232 606-0 Klima- und Wärmetechnik Telefax +49 (0) 5232 606-260 Im Seelenkamp 12 E-mail info@remko.de...
Need help?
Do you have a question about the WLT EC Series and is the answer not in the manual?
Questions and answers